LG WSEP4727 Owner's Manual
Hide thumbs
Also See for WSEP4727:
- Owner's manual (124 pages) ,
- Installation manual (36 pages) ,
- Owner's manual (109 pages)
Table of Contents
Advertisement
Quick Links
Advertisement
Table of Contents

Related Manuals for LG WSEP4727


Summary of Contents for LG WSEP4727
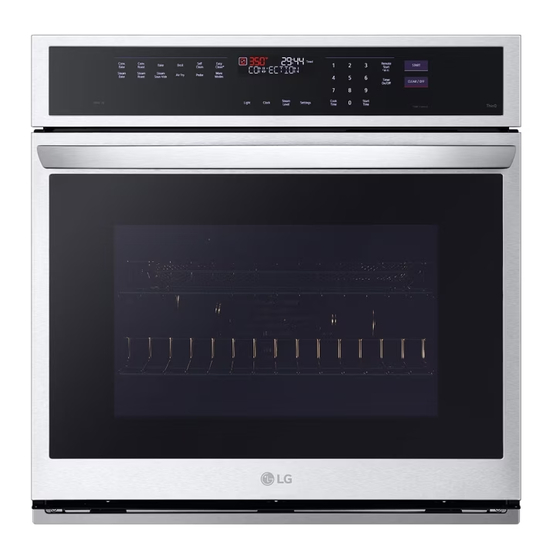
- Page 1 Scan to see the online manual. OWNER'S MANUAL WALL OVEN Read this owner's manual thoroughly before operating the appliance and keep it handy for reference at all times. ENGLISH WSEP4727* www.lg.com MFL51224549 Copyright © 2023 LG Electronics Inc. All Rights Reserved. Rev.01_021323...
-
Page 2: Table Of Contents
36 Open Source Software Notice Information Operating Control Panel 10 Control Panel Features Smart Diagnosis Feature 10 Energy Saving Tips 37 Using LG ThinQ to Diagnose Issues Changing Settings 37 Using Audible Diagnosis to Diagnose Issues 11 Clock 11 Timer On/Off... - Page 3 48 Cooking 50 Parts & Features 51 Noises 51 Wi-Fi 52 LIMITED WARRANTY 52 TERMS AND CONDITIONS 52 THIS LIMITED WARRANTY DOES NOT COVER 53 PROCEDURE FOR RESOLVING DISPUTES...
-
Page 4: Important Safety Instructions
IMPORTANT SAFETY INSTRUCTIONS IMPORTANT SAFETY INSTRUCTIONS READ ALL INSTRUCTIONS BEFORE USE Safety Messages Your safety and the safety of others are very important. We have provided many important safety messages in this manual and on your appliance. Always read and follow all safety messages. -
Page 5: Operation
IMPORTANT SAFETY INSTRUCTIONS Operation • DO NOT TOUCH HEATING ELEMENTS OR INTERIOR SURFACES OF OVEN. Heating elements may be hot even though they are dark in color. Interior surfaces of an oven become hot enough to cause burns. During and after use, do not touch or let clothing or other flammable materials contact heating elements or interior surfaces of oven until they have had sufficient time to cool. -
Page 6: Risk Of Fire And Flammable Materials
IMPORTANT SAFETY INSTRUCTIONS • Before replacing the oven light, switch off the electrical power to the oven at the main fuse or circuit breaker panel. • Never pour cold water over a hot oven for cleaning purposes. • Oversized food or oversized metal utensils should not be inserted in a microwave/toaster oven as they may create a fire or risk of electric shock. -
Page 7: Maintenance
IMPORTANT SAFETY INSTRUCTIONS • Accessible parts may become hot when the grill is in use. • Do not place food or cookware on the bottom of the oven cavity. Doing so will cause permanent damage to the oven bottom finish. •... -
Page 8: Product Overview
PRODUCT OVERVIEW PRODUCT OVERVIEW Product Features The appearance and specifications listed in this manual may vary due to constant product improvements. Exterior / Interior Oven Controller Rating Label, Model and Serial Number Plate Spacer (2ea) Air Fry Tray Oven Door Standard Rack (2ea) Steam Feeder Tank Gasket... - Page 9 Optional Accessories (sold separately) Grid Broiler Pan Gliding Rack NOTE • Contact LG Customer Service at 1-800-243-0000 (1-888-542-2623 in Canada) if any accessories are missing. • For your safety and for extended product life, only use authorized components. • The manufacturer is not responsible for product...
-
Page 10: Operation
10 OPERATION OPERATION Operating Control Panel Control Panel Features Oven Functions Number Pad Select various functions of the oven. See Use to set any function requiring numbers such Operating the Oven. as the time of day on the clock, the timer, the oven temperature, the start time, and the Display length of operation for timed baking, etc. -
Page 11: Changing Settings
OPERATION • For optimal performance and energy savings, Press 5. follow the guides for proper rack and pan 0:05 appears in the display. placement. • Reduce energy use by cleaning light oven soil with the EasyClean feature instead of self-clean. Press Timer On/Off to start the Timer. - Page 12 12 OPERATION Setting the Hour Mode Use the number buttons to enter the number The control is set to use a 24-hour clock. To reset of degrees you want to adjust the oven the clock to 12-hour mode, follow the steps below. temperature.
-
Page 13: Start Time (Delayed Timed Cook)
OPERATION complete. Eating spoiled food can result in Press START to accept the change. sickness from food poisoning. Adjusting the Beeper Volume Setting a Delayed Timed Cook Press Settings repeatedly until appears 8EEP For example, to bake at 300 ℉ and delay the start in the display. -
Page 14: Cook Time (Timed Cook)
14 OPERATION The oven will continue to cook for the set amount • The time of day shows in the display. of time and then turn off automatically. When the • The cook end indicator tone sounds every 60 cooking time has elapsed: seconds until CLEAR/OFF is pressed. -
Page 15: Minimum & Maximum Default Settings
OPERATION without chiming. The oven remains in Sabbath mode, but is turned off. • If no cook time is set, the oven will not automatically turn off. To stop the Sabbath mode, press and hold • After a power failure, the display will turn back Settings for 3 seconds. -
Page 16: Using Standard Oven Racks
16 OPERATION Replacing Racks NOTE • The heat turns off if the door is left open during Place the end of the rack on the support. baking. If the door is left open for longer than 30 seconds during baking, the heat turns off. The heat turns back on automatically once the door Tilt the front end up and push the rack in. -
Page 17: Instaview
OPERATION • The InstaView function is disabled during Self Clean, Control Lock, Sabbath Mode and initial power input. • Tapping the edges of the glass panel may not activate the InstaView function. • The taps on the glass panel must be hard enough to be audible. -
Page 18: Bake Mode
18 OPERATION The Convection Roast feature is designed to give A chime sounds once preheating is complete. optimum roasting performance. Convection Roast combines cooking with the convection fan to roast meats and poultry. The heated air circulates A chime sounds at the end of the set cook around the food from all sides, sealing in juices time and a notification appears in the display. -
Page 19: Recommended Baking Guide
OPERATION • Baking time and temperature will vary Press the numbers to enter the desired depending on the characteristics, size, and temperature. shape of the baking pan used. • Check for food doneness at the minimum recipe time. If desired, press Cook Time to set the cook time or Start Time to set the delayed start •... -
Page 20: Broil Mode
20 OPERATION • Always use a broiler pan and grid for excess fat Standard Rack (Position and grease drainage. This will help to reduce Standard Rack (Position splatter, smoke, and flare-ups. • Should an oven fire occur, leave the oven door Single Rack closed and turn the oven off. -
Page 21: Recommended Broiling Guide
OPERATION process. This smoke is a natural byproduct of If the cook time is set, the remaining time searing and should not cause you to worry. If you appears in the display. are experiencing more smoke than you are comfortable with, use the following tips to reduce the amount of smoke in your oven. - Page 22 22 OPERATION First Second Quantity and/or Rack Side Side Food Comments Thickness Position Time Time (min.) (min.) Space evenly. Up to 9 1 lb (9 patties) Ground Beef patties may be broiled 1/2 to 3/4" thick at once. Rare 1" thick Medium Steaks less than 1"...
-
Page 23: Frozen Meal
OPERATION First Second Quantity and/or Rack Side Side Food Comments Thickness Position Time Time (min.) (min.) 2 (1" thick) Medium about 10 to 12 Well done Lamb Chops Slash fat. Medium 2 (1 " thick) about 1lb Well done 9-11 Grease pan. -
Page 24: Warm Mode
24 OPERATION This system is designed to give the optimum Press 1 for High, 2 for Medium, or 3 for Low cooking performance by automatically selecting a temperature setting. combination of the broil and bake heating • High: 200 ℉ (93.3 ℃) systems. -
Page 25: Favorite Mode
OPERATION temperature is not hot enough to keep foods at Press the numbers to enter the desired safe temperatures. Use the Warm feature to temperature. keep food warm. Proofing does not operate • Only the selected temperature is stored, not when the oven is above 125 ℉. - Page 26 26 OPERATION • If you don't have the air fry tray, place food on a Press the numbers to enter the desired wire rack inside a foil-lined broiler pan. temperature. If desired, press Cook Time to set the cook time. Press the numbers to set the time settings.
-
Page 27: Recommended Air Frying Guide
OPERATION trap heat, causing a fire hazard or poor oven • Run oven cleaning cycles (Easy Clean or performance. SelfClean) regularly, depending on how often and what types of food you Air Fry. • Turn on your exhaust hood at a high fan setting •... -
Page 28: Probe Mode
28 OPERATION Quantity Rack Recommended Items Temp. (°F) Time Guide (oz) Position Frozen Hot Wings, Bone- 25-35 CHICKEN-Fresh, Skin on 25-35 Brush or lightly spray with † Fresh Chicken Wings 1 tbsp. of oil. Add salt and Fresh Chicken 30-40 pepper to taste. -
Page 29: Recommended Probe Guide
OPERATION element. Failure to follow this warning can result NOTE in severe personal injury. • Calculating a total cooking time by weight is no • To avoid damage to the meat probe, do not use longer necessary using this feature. See the tongs to pull on the probe when removing it. -
Page 30: Steam Function
30 OPERATION Category Examples of Food Probe Placement Fresh Pork Insert in the thickest part, away Pork & Ham Fresh Ham (Raw) from bone, fat and gristle Precooked Ham (Reheat & Serve) Leftovers Insert in the thickest part of the Leftovers &... -
Page 31: Steam Bake And Roast Mode
OPERATION Fill lid CAUTION • Take care when opening the oven door during or CAUTION after steam cooking. Hot steam can cause • Make sure the steam feeder tank cover and fill scalding. lid are closed before putting the tank in the •... -
Page 32: Steam Sous Vide
32 OPERATION Refer to the cooking guide for recommended sous If desired, press Cook Time to set the cook vide settings. time or Start Time to set the delayed start time. Press the numbers to set the time Benefits of Sous Vide settings. -
Page 33: Sous Vide Cooking Guide
If the appliance is connected to a home Wi-Fi use. network, the preheating function of the oven can be started or stopped using the LG ThinQ smartphone app. Follow the instructions in the LG ThinQ smartphone app for using the Remote Start Preparing the Oven for a Remote Start function. - Page 34 34 OPERATION NOTE • The Wi-Fi icon on the display shows the status of the appliance's network connection. If the Wi-Fi icon is not lit, use the smartphone app to select the Wi-Fi network or connect the product again. • A faulty Wi-Fi connection could delay the Remote Start function.
-
Page 35: Smart Functions
LG ThinQ Application Features Installing LG ThinQ Application and • Product Upgrades Connecting an LG Appliance - On models with the LG UP Home Appliance feature, experience new features by Models with QR Code upgrading the product through the LG ThinQ app. -
Page 36: Rf Module Specifications
Any changes or modifications in construction of press and hold the Wi-Fi button for 3 seconds. this device which are not expressly approved by Run the LG ThinQ application and follow the the party responsible for compliance could void instructions in the application to connect the the user’s authority to operate the equipment. -
Page 37: Smart Diagnosis Tm Feature
If you experience a problem with your Wi-Fi equipped appliance, it can transmit troubleshooting data to a smartphone using the LG ThinQ application. • Launch the LG ThinQ application and select the Smart Diagnosis feature in the menu. Follow the instructions provided in the LG ThinQ application. -
Page 38: Maintenance
38 MAINTENANCE MAINTENANCE Cleaning Repeat as necessary. Interior NOTE • To clean the stainless steel surface, use warm Do not use oven cleaners to clean the oven cavity. sudsy water or a stainless steel cleaner or polish. Use the product's EasyClean function regularly to clean light soil. -
Page 39: Easyclean
Compared to the more intense Self Clean process, your LG oven • Do not store a soiled broiler pan or grid gives you the option of cleaning with LESS HEAT, anywhere in the appliance. - Page 40 40 MAINTENANCE When to Use EasyClean • Example of oven soiling • Suggested plastic scrapers: - Hard plastic spatula - Plastic pan scraper - Plastic paint scraper - Old credit card Case 1 - Soil pattern: Small drops or spots - Types of soils: Cheese or other ingredients Fill a spray bottle (10 oz or 300 ml) with water and use the spray bottle to thoroughly spray...
-
Page 41: Self Clean
MAINTENANCE • During the EasyClean cycle, the oven becomes for further details. If a Self Clean option is hot enough to cause burns. Wait until the cycle is not available, scrape off and remove over before wiping the inside surface of the stubborn soil using a scraper. - Page 42 42 MAINTENANCE window or turn on a ventilation fan or hood • Do not force the door open. This can damage the before self-cleaning. automatic door locking system. Use care when opening the oven door after the Self Clean cycle. •...
- Page 43 MAINTENANCE When to Use Self Clean Press Self Clean. The oven defaults to the recommended four- • Example of oven soiling hour self clean for a moderately soiled oven. Press Self Clean repeatedly to set the time settings. If desired, press Start Time to set the delayed start time.
-
Page 44: Cleaning The Steam Feeder Tank
44 MAINTENANCE after the oven cools. If the oven is not clean after The Descaling function runs for 1 hour 43 minutes. one self-clean cycle, repeat the cycle. Water will come out of the steam generator while it is being cleaned. •... -
Page 45: Periodic Maintenance
MAINTENANCE Setting Drying Support the glass light cover with two fingers to prevent the cover from falling to the Make sure that the steam feeder tank is bottom of the oven. empty. Gently twist the screwdriver blade to loosen Press More Modes and press 6. the glass light cover Press START to begin Drying. -
Page 46: Troubleshooting
46 TROUBLESHOOTING TROUBLESHOOTING FAQs Frequently Asked Questions My new oven doesn’t cook like my old one. Is there something wrong with the temperature settings? No. Your oven has been factory tested and calibrated. For the first few uses, follow your recipe times and temperatures carefully. - Page 47 TROUBLESHOOTING My appliance is still dirty after running the EasyClean cycle. What else should I do? The EasyClean cycle only helps to loosen light soils in your appliance to assist in hand-cleaning of your oven. It does not automatically remove all soils after the cycle. Some scrubbing of your appliance is required after running the EasyClean cycle.
-
Page 48: Before Calling For Service
48 TROUBLESHOOTING Before Calling for Service Review this section before calling for service; doing so will save you both time and money. Cooking Problem Possible Cause & Solution Oven will not work Plug on appliance is not completely inserted in the electrical outlet. •... - Page 49 TROUBLESHOOTING Problem Possible Cause & Solution Food does not broil Oven controls improperly set. properly • Make sure you select the Broil mode properly. Improper rack position being used. • See the Broiling Guide. Cookware not suited for broiling. • Use broiling pan and grid. Aluminum foil used on the broiling pan and grid has not been fitted properly and slit as recommended.
-
Page 50: Parts & Features
50 TROUBLESHOOTING Parts & Features Problem Possible Cause & Solution Oven control beeps Electronic control has detected a fault condition. and displays any • Turn off the oven function you are using to clear the display and stop beeping. Reprogram code error. -
Page 51: Noises
During Wi-Fi setup, the app is requesting a password to connect to the product (on certain phones). • Locate the network name which starts with "LG" under Settings > Networks. Note the last part of the network name. - If the network name looks like LGE_Appliance_XX-XX-XX, enter lge12345. -
Page 52: Limited Warranty
Should your LG Electric Oven ("Product") fail due to a defect in materials or workmanship under normal and proper use, during the warranty period set forth below, LG will, at its option, repair or replace the Product. This limited warranty is valid only to the original retail purchaser of the Product (“You”) and applies only when purchased lawfully and used within the United States including U.S. -
Page 53: Procedure For Resolving Disputes
Notice of Dispute. In the event you intend to commence an arbitration proceeding, you must first notify LG in writing at least 30 days in advance of initiating the arbitration by sending a letter to LG at LG Electronics, USA, Inc. Attn: Legal Department- Arbitration 111 Sylvan Avenue, Englewood Cliffs, NJ 07632 USA. - Page 54 54 LIMITED WARRANTY subject of the claim; and describe the nature of the claim and the relief being sought. If you and LG are unable to resolve the dispute within 30 days, either party may proceed to file a claim for arbitration.
- Page 55 LIMITED WARRANTY You may only opt out of the dispute resolution procedure in the manner described above (that is, by e-mail or telephone); no other form of notice will be effective to opt out of this dispute resolution procedure. Opting out of this dispute resolution procedure will not affect the coverage of the Limited Warranty in any way, and you will continue to enjoy the full benefits of the Limited Warranty.
- Page 56 LG Customer Information Center For inquiries or comments, visit www.lg.com or call: U.S.A. 1-800-243-0000 1-888-542-2623 CANADA Register your product Online! www.lg.com...
Need help?
Do you have a question about the WSEP4727 and is the answer not in the manual?
Questions and answers