Table of Contents
Advertisement
Quick Links
5457-E02
The warranty period extension method 1 year 2 years
The warranty period will be extended from 1 year to 2 years when you register customer information.
ATAGO Logger NFC can also be downloaded at the same time.
https://www.atago.net/ur/index.php?l=en
Trouble scanning the code? Access this link
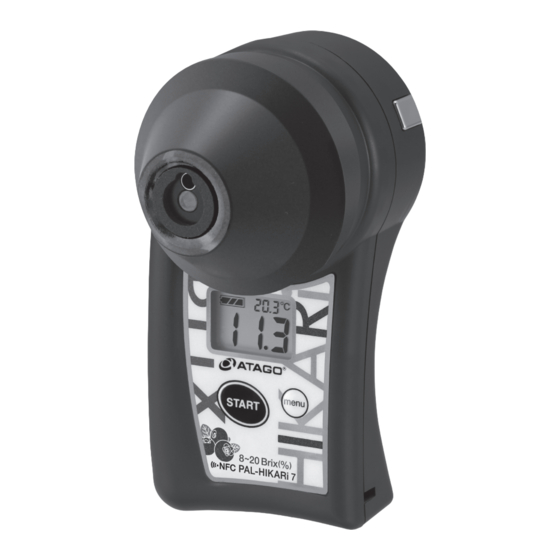
Digital Hand-held "Pocket" IR Brix Meter
PAL- HIKARi 7
Instruction Manual
Cat.No.5457
Contents
・Main unit (with Silicon Cover) ・・・・・・ 1
・Small Sample Stage S ・・・・・・・・・・・・ 1
・Instruction Manual(this book) ・・・・・・ 1
・Inspection Report・・・・・・・・・・・・・・・・ 1
・Silicon cushion S (for replacement)・ 2
・Condensing C ・・・・・・・・・・・・・・・・・・・ 1
・AAA alkaline batteries ・・・・・・・・・・・・ 2
※AAA alkaline batteries are included.
Parts
When the Small Sample Stage S is attached
Side button
Small Sample
Stage S
LCD
Silicon cushion S
menu button
START button
Lanyard hole
Battery
compartment
Introduction
Thank you for purchasing the instrument.
Read and follow all safety instructions before operating the instrument.
Fairure to comply with the following instructions may result in personal injury or property damages.
This instrument measures amount of light absorbed by shining the near infared light to the fruit then
converts to Brix (sugar level) to display.
Brix (sugar level) can be measured with no need to cut and squeeze the fruits.
Measurment variance may be seen depending on the variety and harvest timing. This instrument is equipped
with offset function to match the value in such cases.
Safety Precautions
WARNING
・Do not aim it at a face when measuring.
・Do not attempt to repair, modify, or disassemble the instrument.
CAUTION
・Before use, carefully read this instruction manual and fully understand the function and operation for
each part of the instrument.
・ATAGO is not liable for any or all damages as a result of use of the instrument for those other than its
intended purposes (measurement of Brix, of fruits).
・Do not hit or protrude the light emitting or receiving section with a sharp object.
・ATAGO is not liable for any loss and damage caused by the measurement and use of this instrument.
・Do not expose the instrument to a rapid change in ambient temperature.
・Do not use the instrument where there is much dust.
・Do not subject the instrument to strong vibration.
・Do not place the instrument under anything heavy.
・If the instrument is dropped or subjected to a strong impact, contact your supplier for inspection.
・Loosen the battery compartment cover for air transportation.
●Installation method
QR code
Align the hole for the radiation temperature sensor with
the radiation temperature sensor and push the Small
Sample Stage S straight.
Make sure to carry out the measurement with the Small Sample Stage S installed. With
Note
Small Sample Stage S removed, correct measurement can not be performed.
Note
Do not turn the Small Sample Stage S after mounting. Measurement can not be performed
correctly if the hole for radiation temperature sensor and the radiation temperature sensor
are misaligned.
Sample stage with
Small Sample Stage S removed
Radiation
Place the fruit.
temperature
sensor
Cover with a paper cup.
Press the START button.
Light emitting
part
Receiver
* Condensing C (10 sets) may be used with commercially available white paper cup (about 100 mL).
Place the tip of the blueberry
Note
Note
(calyx) face up and cover with
a paper cup.
Not keeping the fruit still
Note
while measuring will result in
inaccurate measurements.
Beep
The instrument will turn itself off after 30 seconds of inactivity.
To manually turn it off, hold down the START button for more than 3 seconds.
Depending on the variety, there may be a difference between the refractometer (sugar meter) and the
measured value. Please confirm the difference from the value measured with your refractometer (PAL
- 0 of the set when purchasing IR Brix Meter x Brix Meter) and use the offset function as necessary.
(Refer to "Offset Function" )
Installing Small Sample Stage S / Removing
Hole for radiation
●Removal method
temperature sensor
Small Sample Stage S
Radiation
temperature sensor
Same serial number
Pull the Small Sample Stage S
straight up.
Measurement
Press the
START button
Beep
Tip (calyx)
The measurements are displayed.
<LCD Auto Shut-off>
This function modifies the measurement value by a constant. Use this function to match the
measurement value to the refractometer (Brix meter).
How to set addition/subtraction number [Range:-9.9~9.9]
1. Hold down menu while
it is turned on.
(While the measurement is
displayed.)
Current
addition/subtraction
number is displayed
and "-" will flash.
(Example)
4. Enter the addition/subtraction
number.
The first digit:
Press menu to
changethe number.
Press START to
confirm and move
to the next digit.
The first digit :
The second digit:
0 to 9
Press menu to
The second digit :
change the number.
0 to 9
For default
Press the side button while setting up the Off-Set feature.
Measurement Tips And Precautions
Acclimate the fruit and this instrument to
●
ambient temperature.
The temperature difference between the
surface and the inside of the fruit, and
temperature difference between this
instrument and the fruit may affect the
measurement values.
Especially when measuring refrigerated fruits,
be sure to let the fruits acclimate to the
ambient temperature.
Clean the surface of the fruits.
●
Do not measure the spoiled spots.
The instrument may not measure correctly
when there is water droplets, dust or scar,
and bruising soft spots.
Place the sample stage to the fruit.
●
Recommended sample size is 15 mm
or more in diameter.
P o s i t i o n t h e
Measure the part where there is no dent with
fruit so that it
diameter that is 15 mm or more.
c o v e r s t h e
radiation
Be sure to avoid any spacing between the
temperature
sensor hole.
fruit and the silicon cushion to avoid the
external light interference. If the silicon
cushion is deteriorated, please replace it with
a brand new silicon cushion. (Refer to"How
to change the silicon cushion")
Sugar level varies depending on the
●
measured area.
Example for measurement value:
Measure a few berries and use the average
value as the result.
When taking measurements, avoid
●
changing external light intensity.
If the intensity of external light changes, it
will result in inaccurate measurements.
Offset Function
2. Press menu to select
3. Press START
either addition or
to confirm.
subtraction.
No plus sign will be displayed.
5.
Press START to confirm the
Press START or side
addition/subtraction number.
button to begin
measuring
・Screen image during
measurement when
offset is on.
The entered
addition/subtraction
number will flash
first then remains
lit once confirmed.
(Example)
13.8
(Example)
13.8
12.4
11.6
Advertisement
Table of Contents

Related Manuals for ATAGO PAL-HIKARi 7


Summary of Contents for ATAGO PAL-HIKARi 7
- Page 1 13.8 ・ATAGO is not liable for any or all damages as a result of use of the instrument for those other than its The measurements are displayed. Example for measurement value: intended purposes (measurement of Brix, of fruits).
- Page 2 4℃or to “Measurement tips and precautions” lower. ATAGO instruments are rigorously inspected to ensure each unit meets the highest standards of quality assurance. There is a temperature difference between the fruit and the main unit. Measured when the fruit’s temperature is exceeding 45℃.
Need help?
Do you have a question about the PAL-HIKARi 7 and is the answer not in the manual?
Questions and answers