Table of Contents
Advertisement
Advertisement
Table of Contents

Related Manuals for Olympus Stylus


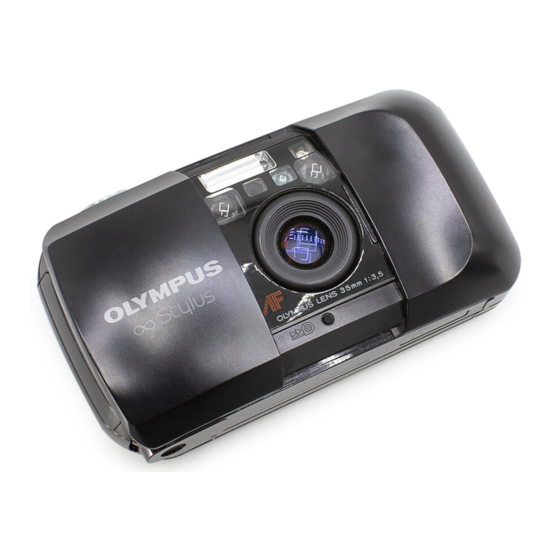
Summary of Contents for Olympus Stylus
- Page 1 INSTRUCTIONS...
-
Page 2: Description Of Controls
LCD panel Shutter release button Flash reflector Autofocus windows Lens barrier Rewind button Description of controls Light sensor Self-timer button Flash mode button Self-timer signal... - Page 3 Viewfinder indicators Close-up Viewfinder Autofocus indicator correction marks Autofocus frame Flash indicator Strap Eyelet LCD panel Fill-in flash Battery remaining indicator Tripod socket Film window AUTO/AUTO-S flash Back cover release Flash OFF Battery compartment cover Exposure counter...
-
Page 4: Table Of Contents
Table of contents Description of controls... 1 Before you begin ......... . . 5 Loading the battery... - Page 5 Thank you for purchasing the Olympus Please read this instruction manual carefully before using the camera. This camera will not operate unless the lens barrier is opened. We also recommend that you shoot at least one roll of film to familiarize yourself with the camera's features.
-
Page 6: Before You Begin
Before you *Remove the battery if you do not plan to begin use the camera for an extended period of time. Loading the battery Open the battery compartment cover. Insert the new battery correctly as indicated below and close the bat- tery compartment cover tightly. - Page 7 *Open the battery compartment cover and remove the battery, as illustrated below, when replacing the battery. *Be sure to close the lens barrier when replacing the battery. Open the lens barrier as shown below until you hear a "Click" and check the battery power remaining.
-
Page 8: Simple Point & Shoot Photography
Simple point and shoot photography Loading the film This camera is designed to use DX coded 35 mm film to automatically set film speed. If DX-coded film is unavailable, use ISO 100 film. Open the back cover by sliding the back cover release toward the top of the camera. - Page 9 Prepare a "DX" film cartridge. The camera will set itself auto- matically for DX-coded film speeds from ISO 50 to 3200. *When using non-DX film, the film speed is automatically set to ISO 100. Insert the film cartridge into the camera.
- Page 10 Align the film leader with the red film loading indicator. Adjust the length of the film leader before loading so that it matches with the red loading indicator. Make sure the film leader tip is not bent and the film perforations are properly aligned and engaged as shown.
- Page 11 Open the lens barrier until you hear a "Click". Be sure the exposure counter on the LCD panel will display a number "1" indicating the first picture on the roll. If the film is improperly loaded, the LCD panel will display a blinking "E" as shown in the illustration (B).
-
Page 12: Unloading The Film
The camera automatically rewinds the film when you reach the end of the roll. You will hear the motor operating and the exposure counter will count down as the film is rewinding. The final reading on the exposure counter before rewinding may be Unloading more than the number of exposures specified for the film. - Page 13 If you want to rewind the film before the end of a roll, press the rewind but- ton with the tip of a ballpoint pen. Do not use any device with a sharp tip and do not press the rewind button too hard.
-
Page 14: How To Take Pictures
How to take pictures Slide the lens barrier as far as it will go until you hear a click. (The shutter will not release unless the lens barrier is fully open.) When the camera is not in use, always close this barrier so that the shutter will not release accidentally. - Page 15 Hold the camera correctly. Keep your fingers and the strap away from the lens, viewfinder and flash reflector.
- Page 16 Position your subject within the autofocus frame. Press the shutter release button lightly and confirm that the auto- focus lamp (green) to the right of the viewfinder is lighted. The subject should be within the picture frame.
- Page 17 *If the distance between the subject and the camera is set at 0.35 m (1.1 ft.), the picture area will be inside the close-up correction marks as shown in the illustration. Shooting range: From 0.35 m (1.1 ft.) to— (infinity) *If the distance between the subject and the camera is less than 0.35 m (1.1 ft.), the autofocus lamp (green) to the right...
- Page 18 Press the shutter release button (Gently to minimize camera shake.) As soon as the shutter is released, the film will automati- cally advance to the next frame. You will hear the motor operat- ing. The exposure counter will advance to the next frame when film winding is completed.
-
Page 19: Auto Flash Photography
Auto flash photography (1) Taking pictures in low light In low light situations, the flash will activate automatically when the flash mode is AUTO or AUTO-S. If you are taking pictures in low light, the flash lamp (orange) to the right of the viewfinder and the red lamp on the front of the camera will light when the shutter release button is pressed halfway. - Page 20 The flash will activate automatically when the shutter release button is fully pressed. Flash shooting range: (ISO 100) 0.35 m (1.1 ft.)—3.5 m (11.5 ft.) (ISO 400) 0.35 m (1.1 ft.)—7m (23 ft.) *The flash range as shown below is optimal for color negative film.
-
Page 21: Auto Flash Photography
Auto flash photography (2) Taking backlighted subjects In backlighted situations, the flash will activate automatically when the flash mode is AUTO or AUTO-S. If you are taking backlighted subjects, the flash lamp (orange) and red lamp on the front of the camera will light when the shutter release button is pressed halfway. -
Page 22: Camera Functions And Controls
Camera functions and controls Close-up photography Be careful of the flash's light when shooting people's faces in close- up photography. *When the distance between the subject and the camera is 0.35 m (1.1 ft.), com- pose your shot within the close-up correction marks as shown in the illustration. -
Page 23: Focus Lock
Focus lock Use the locus lock when you want to position your subject outside the autofocus frame in the center of the viewfinder. Position your subject in the autofocus frame and press the shutter release button halfway. The autofocus indicator (green) will light in the viewfinder. - Page 24 While keeping the shutter release button pressed halfway, change the position of your subject in the viewfinder to achieve the desired composition. Press the shutter release button fully to take the picture. *If you remove your finger from the shutter release button while the autofocus indicator (green) lights, the focus lock will be canceled.
-
Page 25: Self-Timer Photography
While pressing the self-timer button press the shutter release button fully to activate the self-timer. The shutter will be released 12 seconds later *Be sure the subject is in the autofocus frame. *The red lamp on the front of the camera will light up for the first 10 seconds, then blink rapidly for 2 seconds until the shutter is released. -
Page 26: Auto-S Flash Photography
Auto-S flash photography Auto-S flash significantly reduces "Red-eye" phenomenon (when a subject's eyes appear red) in flash portraits and group photos. Press the flash mode button until " AUTO-S" appears on the LCD panel. Compose your shot and press the shutter release button — the flash will emit a rapid series of pre flashes, followed directly by the main flash. -
Page 27: Flash Off Mode
Flash AUTO-S mode shooting range: (ISO 100) 0.35 m (1.1 ft.) —3.5 m (11.5 ft.) (ISO 400) 0.35 m —7 m (23 ft.) *To cancel Auto-S mode, press the flash mode button again. * Auto-S mode will not be canceled, when the lens barrier is closed. - Page 28 Press the shutter release button fully to take the picture. *To cancel flash OFF mode press the flash mode button again or close the lens barrier. FILL-IN flash mode The flash always activates in this mode. It can be engaged for daylight synchro photography or when shooting backlighted...
-
Page 29: Fill-In Flash Mode
*By using the flash FILL-IN mode, the subject will be properly lit by the flash. Press the flash mode button until " FILL-IN" appears on the LCD panel. Press the shutter release button fully to take the picture. *To cancel Fill-in flash mode, press the flash mode button again or close the lens barrier. -
Page 30: Attaching The Strap /How To Use The Soft Case
Attaching the strap Use of the optional Olympus case Attach the strap to the camera according to the directions illustrated below. - Page 31 Be sure the lens barrier is closed before the camera is inserted into the case.
-
Page 32: Troubleshooting
Q: Will the camera operate without film? A: Even if there is no film in the camera, if the lens barrier is open, the shutter will release. Under low light the flash will activate. If the lens barrier is closed, the camera will not operate;... - Page 33 Subjects in high - light situations, such as summer sea shores or snowy mountains. Q: Where can I buy lithium batteries? A: At your local camera dealer or nearest Olympus service center. When purchasing batteries, order Duracell DL123A or Panasonic CR123A, or equivalent.
-
Page 34: Care And Storage
*Do not expose the camera to rain shower and water. *Never disassemble the camera; it contains a high- voltage circuit. *Do not disassemble or expose batteries to excessive heat. *In case of malfunctions, consult your nearest Olympus dealer, or nearest Olympus service center. -
Page 35: Specifications
Type: Fully automatic 35 mm autofocus lens-shutter camera Film format: 35 mm standard DX coded film (24 x 36 mm) Lens: Olympus lens 35 mm F3.5, 3 elements in 3 groups Shutter: Programmed electronic shutter Viewfinder: Active type viewfinder type 0.4X (with auto- focus frame, close-up correction marks, flash indicator, AF indicator). - Page 36 Flash modes: AUTO (automatic flash activation in low light and backlight), AUTO-S (automatic flash activation in low light and backlight), OFF (no flash), and FILL-IN (forced activation). Battery check: Display on LCD Lens barrier: Sliding type (with release lock) Power source: 3V lithium battery (DL123A, CR123A or equivalent) Dimensions: 117 (W) x 63 (H) x 37 (D) (4.6"...
- Page 37 (Premises/Goods delivery) Wendenstrasse 14-16, 20097 Hamburg, Germany. Tel. 040-237730 (Letters) Postfach 10 49 08, 20034 Hamburg, Germany. OLYMPUS OPTICAL CO (UK.) LTD. 2-8 Honduras Street, London EC1Y 0TX, United Kingdom. Tel. 0171-253-2772 Copyright © OLYMPUS OPTICAL CO., LTD. (Tokyo) PRINTED IN HONGKONG 0592 50MM...
Need help?
Do you have a question about the Stylus and is the answer not in the manual?
Questions and answers
Need instruction sheets for Olympus Stylus 10X
how to download my digital pictures to a MacBook Air?