Table of Contents
Advertisement
Advertisement
Table of Contents

Related Manuals for Olympus PC


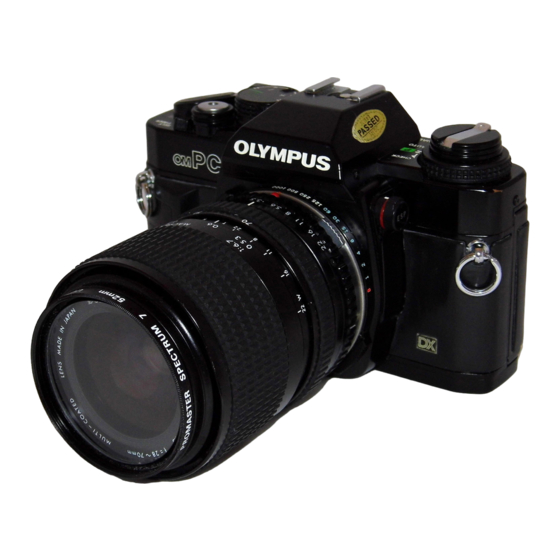
Summary of Contents for Olympus PC
- Page 2 SLR. Note: All the components of the Olympus OM-PC are carefully designed and their production and assembly is strictly controlled to enhance the unmatched performance of the system. If any interchangeable lenses, flashes, or accessories other than Olympus products are used, Olympus cannot be responsible for poor results or damage of the OM-PC.
-
Page 3: Table Of Contents
• Using Electronic Flashes Other Than Olympus T-Series Units ... . . 60 • Shooting with Motor Drive ... . 61 •... -
Page 5: Preparations Before Taking Pictures
< Preparations before Taking Pictures > The Olympus OM-PC is basically designed for automatic film speed setting with DX coded film. -
Page 6: Mounting The Lens
Mounting the Lens Remove the rear lens cap. Remove the body cap. -
Page 7: Removing The Lens
Align the red dots and rotate the lens clockwise until it locks. Remove the front lens cap. (Press in the mount tabs on the edges of the lens cap parallel with "OLYMPUS"). Removing the Lens: Press the lens release button and turn the lens counter-clockwise. -
Page 8: Loading The Batteries
Loading the Batteries Remove the battery cover. Wipe battery surfaces clean. Make sure that + signs are facing upwards. Replace the battery cover. -
Page 9: Checking The Batteries
Checking the Batteries After inserting the batteries, always check as follows: Rotate the mode selector dial to the "BAT- TERY CHECK" position. The audible and visual signals will tell you that the battery voltage is sufficient. If these signals are emitted intermittently, it means that the batteries are almost worn out. -
Page 10: Setting The Camera For Automatic Film Speed Setting
Setting the Camera for Automatic Film Speed Setting With DX coded film, the OM-PC sets the film speed automatically. Make sure the film you are using is marked "DX". If the film you are using is not marked "DX" refer to page 25. -
Page 11: Loading The Film
Loading the Film Pull up on the rewind knob to open the camera back. Place the film cartridge in the film chamber. Always load film in the shade. - Page 12 Insert the film leader into the take-up spool. Wind the film and make sure the sprocket teeth catch both the upper and lower film perforations. Take up the slack by turning the rewind crank clockwise.
- Page 13 Close the camera back until it clicks into place. Take two blank shots to bring the film to the first frame. Checking the type of film: The film check window in the camera back will allow you to check the type of film loaded in the camera.
-
Page 14: Taking Photographs (I)
< Taking Photographs (I) > This chapter explains how to take programmed automatic exposure pic- tures with ESP metering. In this mode, anyone can enjoy taking pictures with ease, even in difficult lighting conditions such as backlight. -
Page 15: How To Take Programmed Automatic Exposure Pictures With Esp Metering
How to Take Programmed Automatic Exposure Pictures with ESP Metering Make sure the camera is set for the ESP meter- ing. Set the mode selector dial to the "PROGRAM" position. - Page 16 Set the lens to its minimum aperture, which is the largest number on the aperture ring. Press the shutter release lightly to activate the viewfinder display. Focus on your subject.
- Page 17 mark will appear in the finder when ESP metering is adjusting the exposure. Press the shutter release to take the picture. (A built-in battery conserver turns off the viewfinder display after 60 sec.)
-
Page 18: Rewinding The Film
Rewinding the Film When the exposure counter indicates the end of your roll of film. Push the "R" button. - Page 19 Fold out the rewind crank and wind it until the film tension is released. Open the camera back by pulling up on the rewind knob and remove the film.
-
Page 20: Taking Photographs (Ii)
< Taking Photographs (ll)> This mode allows you to respond creatively to the photo situation by free selection of the lens aperture, shutter speed and exposure compensation settings. -
Page 21: How To Take Aperture-Preferred Automatic Exposure Pictures
How to Take Aperture-Preferred Automatic Exposure Pictures Set the mode selector dial to the "AUTO" position. Select the light metering mode. ESP Metering. "OTF" Light Metering (Center- Weighted Average Metering) - Page 22 Set the aperture. Basic aperture settings. Press the shutter release lightly to activate the viewfinder display. Focus on your subject.
- Page 23 Press the shutter release to take the photograph. If you see an overexposure warning signal (the number "1000" blinks), set the aperture to a larger number. If the shutter speed is too slow, set the apeture to a smaller number to prevent camera shake.
-
Page 24: Manual Exposure
Manual Exposure Set the mode selector dial to the "MANUAL" position. Set the aperture. - Page 25 Select the shutter speed. Focus, then press the shutter release. To obtain the proper exposure, set the shutter speed ring to the setting indicated in the viewfinder. ESP Metering. Center Weighted Averaged Metering.
-
Page 26: Manual Film Speed Setting
Manual Film Speed Setting Release the DX ISO AUTO SET mode. Lift up the outer collar and rotate until the desired ISO speed appears in the window. ISO/ASA25~3200... - Page 27 Readjust the Index line. If the film speed dial (exposure compensation dial) cannot be turned to the ISO number of the film used, set it once at an intermediate value then repeat steps 2 to 3 until the desired ISO number is set.
-
Page 28: Exposure Compensation
Exposure Compensation For exposure compensation, set the dial anywhere except at "DX ISO AUTO SET". When an exposure compensation is set, the indicator lights in the viewfinder. After use, be sure to return the dial to the" normal setting. -
Page 29: Other Operations
< Other Operations >... -
Page 30: Using The Self-Timer
Using the Self-Timer Wind the film once. Set the self-timer lever. - Page 31 Press the shutter release to start the self-timer. The shutter will fire in 12 seconds. Wind the film for the next shot. The self-timer lever will automatically return to its original position. If you continue to use the self-timer, wind the film in several short strokes, and it will remain activated.
-
Page 32: Bulb Exposure
Bulb Exposure Set the exposure mode selector dial to the "MANUAL" position. Set the shutter speed dial to "B" (bulb). ("B" is not displayed in the viewfinder.) -
Page 33: Advanced Techniques
If you want to improve your pictures or refine your shooting techniques, it is important to understand the operation of your camera thoroughly. The following pages will provide detailed technical information on the OM-PC to help you create more sophisticated photographs. -
Page 34: Selecting The Metering Mode (A Choice Of Two Metering Modes)
SELECTING THE METERING MODE (A Choice of Two Metering Modes) Selector Mode switch ESP Metering TTL Direct "OTF" Light Measuring (Center- weighted average metering) Viewfinder Display This mode can be selected for general use at all times. Depending on the light distribution in the composition, metering is carried out as follows: When the central part of the composition is darker than areas on the periphery, the camera computer increases the... - Page 35 The Olympus OM-4, OM-3 and OM-2S PROGRAM have adopted spot metering systems which allow the photographer to isolate the subject for specific metering and therefore to obtain more accurate exposures.
-
Page 36: Selecting The Metering Mode (How To Use Esp Metering)
SELECTING THE METERING MODE (How to Use ESP Metering) ESP Metering is the mode to set for general use. In this mode, you don't have to worry about how the picture will turn out. All you need do is press the shutter release. - Page 37 When part of the subject area is extremely bright If a part of the picture frame is extremely bright, the subject is underexposed under the influence of a strong light on the table in the case of center- weighted, averaged metering. In the same picture taken with the ESP metering, even the expression of her face is clearly seen.
- Page 38 When the background is extremely bright in sunlight In center-weighted, averaged light metering, the subject appears completely dark; in ESP metering mode, you will see even her face clearly. If there is an extremely bright object in the viewfinder frame, ESP metering mode disregards this object when determining exposure, as shown in this example.
- Page 39 Notes on ESP metering The ESP metering mode works properly for the majority of subjects, but it may not be as effective in the following cases: When the subject is too small In this case, the metering method is practically the same as the center-weighted averaged metering.
- Page 40 ESP Metering Chart (ESP Algorithm) Compositions with the sun in the scene Bright outdoor scenes Normally lit outdoor scenes Evening shots and interiors Night shots Main subject bright Subject Contrast Concentration on low light areas Center weighted metering for high contrast subjects Center weighted metering Averaged metering Mode...
-
Page 41: Guide To Selection Of Exposure Mode
GUIDE TO SELECTION OF EXPOSURE MODE Viewfinder Indication 1. This is the ideal normal mode for snapshots and general photography. 2. When this mode is set the camera automatically decides both the shutter speed and the aperture. Fully automatic exposures are possible over a wide range of subject brightnesses. -
Page 42: Selecting The Exposure Mode - Program
SELECTING THE EXPOSURE MODE - PROGRAM - Program Exposures In this mode the camera automatically selects the ideal lens aperture and shutter speed for the sub- ject brightness, making you highly responsive even to unexpected shots. In Program Mode, the photo- grapher can forget about exposures and shutter speeds completely, and give full concentration to the subject in the viewfinder. -
Page 43: Program Diagrams
Program Diagram with Use of T Series Flash Unit The OM-PC assures you "OTF" Program Auto flash perform- ance when System T Series flash unit. The... - Page 44 Viewfinder Display in the Program Mode Set the exposure mode dial to shutter release button lightly while looking through the viewfinder. mark will be lighted and the shutter speed will be displayed in the left side of the viewfinder. and "1000" blink alternately, it means you have not set the aperture ring to its minimum aperture.
-
Page 45: Selecting The Exposure Mode - Auto (Aperture Preferred)
SELECTING THE EXPOSURE MODE - AUTO (Aperture Preferred) - Auto Exposures This is an aperture preferred auto mode in which the shutter speed is set automatically by the camera to give the correct exposure for the aperture which the photographer has set after considering the kind of picture desired. -
Page 46: Depth Of Field
DEPTH OF FIELD Depth of field is the area of acceptable sharpness in front of and behind the subject in focus. As you get closer to your subject or as you open your lens (e.g. from F16 to F2.8) the depth of field becomes shallower. -
Page 47: Preview Button
PREVIEW BUTTON When you wish to see which objects fall within the acceptable zone of sharpness (depth of field), press the preview button on your lens. The dia- phragm of the lens will stop down to the preset F stop enabling you to see the depth of field in the viewfinder. -
Page 48: Shutter Speeds
SHUTTER SPEEDS This camera offers various possibilities for visual expression by changing the shutter speed. High shutter speeds can be used to "freeze" a moving subject to give sharp definition of the im- age. Shutter speeds of 1/1000 sec. can "stop" the movement of a considerably fast moving subject. -
Page 49: Viewfinder Display For Automatic Exposure
VIEWFINDER DISPLAY FOR AUTOMATIC EXPOSURE If you press the shutter release button lightly while looking through the viewfinder, you will see the automatic shutter speed in the left side of the frame. However, if the "1000" blinks, it means overexposure and you will have to close down the aperture. -
Page 50: Selecting The Exposure Mode - Manual
SELECTING THE EXPOSURE MODE The OM-PC also provides manual exposure con- trol. With the exposure mode dial set to MANUAL, you can choose your desired aperture and shutter speed combination. You will see the following display in the viewfinder. As you adjust the aperture ring, the appropriate shutter speed for the aperture you have set will be displayed in the viewfinder. -
Page 51: Combinations Of Metering Mode And Exposure Mode
COMBINATIONS OF METERING MODE AND EXPOSURE MODE Exposure Modes P R O G R A M Metering Modes The ideal mode for snap- shots and general photogra- phy, that lets you take pro- perly exposed shots easily, even difficult conditions. It is still simpler and more Metering convenient when combined... -
Page 52: Selecting The Film Speed Setting Mode
SELECTING THE FILM SPEED SETTING MODE Mode Mode Selector Dial DX ISO AUTO MANUAL Finder Indication 1. If you use film that has the DX code and set the selector dial to this mode, the film speed is set automatically on the camera. - Page 53 On reading this information, the film speed is automatically set on the camera. In other words, when you turn the OM-PC film speed dial to the DX ISO AUTO SET position, whatever the film speed it is automatically set on the camera.
-
Page 54: Bulb Exposure
BULB EXPOSURE If you require long exposure, set the shutter speed dial at "B" (bulb). This is useful for night exposures or other spe- cial effects. * When taking pictures with the shutter speed dial set at "B", it is recommended that you use a tripod and cable release to prevent camera shake. -
Page 55: Multiple Exposure/Infrared Photography
MULTIPLE EXPOSURE By tripping the shutter several times on the same frame, multiple images are produced on the same frame. This is how to do: After the first exposure is ended, erect the re- wind crank and turn it clockwise as far as it will go to take up film slack. -
Page 57: Flash Photography
Flash Photography The OM-PC is designed to provide "OTF" Auto- matic Exposure with Olympus T-Series electronic flashes. There is nothing to set since exposure is determined by the sensors in the camera body itself. You can even adjust exposures using the compensation dial on the camera. -
Page 58: T-Series Flashes/Mounting The Flash
T-Series Flashes Electronic flash T20 (small-size flash with a guide number of 20) Electronic flash T32 (high-capacity flash with a guide number of 32) * The electronic flash T45 and other flashes that have no direct hot shoe contact cannot be used. Mounting the Flash Slide the flash into the camera's accessory shoe and lock it by turning knob until the flash is tight. -
Page 59: How To Use T-Series Flashes
To take pictures in the programmed mode, switch the mode selector dial of the OM-PC to PROGRAM, set the lens' aperture ring to its minimum aperture and turn on the flash. The camera will determine the appropriate aperture depending on the brightness of the subject. -
Page 60: Bounce Flash/Close-Up Flash
Bounce Flash The T32 has an adjustable flash head that tilts as much as 90° upward. As it operates on "OTF" auto, it allows you to use bounce flash automati- cally by simply activating the flash switch. * Set the tilting angle so that the subject is ilumi- nated by reflected light. -
Page 61: Using Electronic Flashes Other Than Olympus T-Series Units
Using Electronic Flashes Other Than Olympus T-Series Units (1) Mount the flash on the accessory shoe. The OM-PC does not accept flash units with- out direct hot shoe contacts. (2) Setting the aperture If you are using an automatic flash, check the specifications on the flash and set the aperture accordingly. -
Page 62: Shooting With Motor Drive
The display will remain on for 60 seconds. Then shoot by pressing the Motor Drive's shutter release. * Up to 3.5 frames a second with OM-PC, OM- 2S PROGRAM and up to 5 frames a second with OM-1, OM-2, OM-3, OM-4, OM-G and OM-F. -
Page 63: Motor Drive Group Units
5 frames a second (up to 3.5 frames a second with OM-PC.) This quick shooting capability will often allow you to catch a dramatic instant that would be missed with a slower drive. -
Page 64: Macrophotography
Equipped with an "OTF" Light Metering system, the OM-PC has solved this difficult problem and will always provide correct exposure. The OM Macro System includes a wide choice of macro lenses that offer excellent life-size and larger than life size photographs. -
Page 65: Macrophoto Group Units
Macrophoto Group Units • Simplified Macro System These units allow you to take close-ups up to life size with ease. For example, Close-up lenses 49mm and 55mm (f=40cm) — the 49mm can be used on normal 50mm F 1.8, F 1.4 and F 1.2 standard lenses. You can take up to 0.63X life size close-ups by simply screwing them into the front of the standard lens. -
Page 66: Other System Units
+2 to –5 diopters. Varimagni Finder: Allows easy, unstrained viewing for low angle shots, copying work, etc. Can be switched between 1.2 and 2.5 magnifications. Semi-Hard Case: Protects the camera from dust and scratches. Be sure to get the OM-PC version. -
Page 67: For Longer Service Of Your Camera
For Longer Service of Your Camera... -
Page 68: Handling Care
Handling Care Take care in handling the camera. Do not apply excessive force. -
Page 69: Battery Precaution
Storage Care Battery Precaution Guard against high temperature and magnetic fields. In case of malfunction, take the camera to your nearest Olympus service station. -
Page 70: Rewind The Film
A: If the shutter is fired in auto mode with no film in the camera, the shutter speed will be slower than that displayed in the viewfinder. This is because the OM-PC Light Metering that measures the light reflected off the film plane. To test the shutter, load an... - Page 71 A: (1) When new batteries are inserted into the camera, (2) when you are using the camera after it hasn't been used for a long time, (3) when you think the batteries may be worn out, and (4) when the temperature is extremely low. (If the battery voltage is low, the shutter may not fire when using the self-timer;...
- Page 72 A: When using a 50mm F1.2, 50mm F1.4, 75 ~ 150mm ZOOM or 35 ~ 105mm ZOOM lens, the shutter speed displayed in the viewfinder can differ from the actual one; but by approxi- mately less than one stop. However, correct exposure is always insured.
- Page 73 ESP metering need not be operated. Other cautions • When the OM-PC is used with other brand lenses, Olympus can not assume any responsi- bility for poor image quality or other problems. This Is particularly true when other brand lenses are used in PROGRAM mode.
-
Page 74: Description Of Controls
Description of Controls Self-Timer/Battery Light Metering Mode Selector Lever Check Signal Shoulder Strap Eyelet Lens Lens Release Button Depth of Field Scale Aperture Ring Focusing Ring Preview Button... - Page 75 Manual Shutter Speed Dial Exposure Mode Selector Dial Rewind Crank Rewind Knob/Camera Back Release Accessory Shoe Film Speed Dial/Exposure Compensation Dial ISO/ASA Film Speed Window Shutter Release Button Grip Self-Timer Lever Exposure Counter Film Advance Lever Rewind Release Button Flash Control Contact X Contact...
- Page 76 Shutter Curtain Film Rewind Shaft Film Chamber Film Guide Pins Lens Mount Ring Motor Guide Pin Hole Viewfinder Eyepiece Frame Sprocket Film Take-up Spool Camera Back Pressure Plate Film Cartridge Pressure Film Window Tripod Socket Motor Coupling Terminals Motor Coupling Socket Battery Chamber Plate...
-
Page 77: Specifications
SPECIFICATIONS Type: TTL auto-exposure 35mm SLR camera. Film Format: 24mm × 36mm. Lens Mount: Olympus OM Mount. Shutter: Horizontal running electronic control type focal plane shutter with automatic exposure con- trols from 2 sec. to 1/1000 sec. Synchronization: X contact. Hot shoe with direct contact for OM T-Series electronic flash units. - Page 78 Crossways Park, Woodbury, New York 11797, U.S.A. Tel. 5 1 6 - 3 6 4 - 3 0 0 0 OLYMPUS OPTICAL CO.(EUROPA) GMBH Postfach 104908, Wendenstrasse 14-16, 2 Hamburg 1, West Germany. Tel: 040-23773-0 OLYMPUS OPTICAL CO. (U.K.) LTD. 2-8 Honduras Street, London EC1Y OTX, England. Tel. 01-253-2772 ®...
Need help?
Do you have a question about the PC and is the answer not in the manual?
Questions and answers