Table of Contents
Advertisement
Quick Links
Advertisement
Table of Contents

Summary of Contents for Everyday Essentials GPT1813
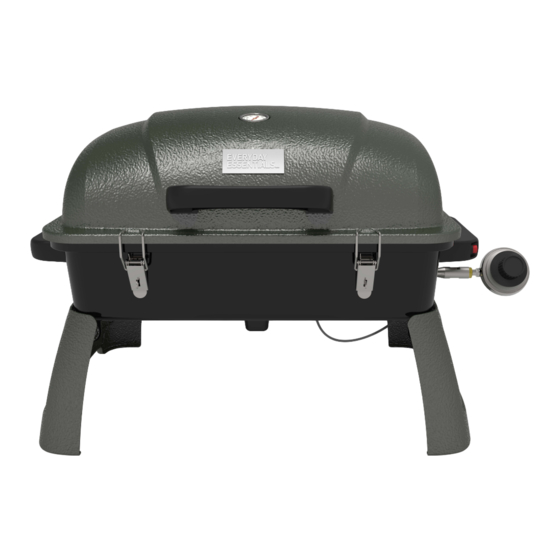
- Page 1 297141( GPT1813 ) Model Number: EE PORTABLE GAS GRILL SAVE THESE INSTRUCTIONS FOR FUTURE USE. IF YOU ARE ASSEMBLING THIS UNIT FOR SOMEONE ELSE, GIVE THEM THIS MANUAL FOR FUTURE USE. FOR CUSTOMER SERVICE: CALL 1-877-630-5396 (TOLL-FREE) 10:00 A.M. – 7:00 P.M. (EST),...
- Page 2 Grill Opera on 1-2-3 Before Grilling Step 1 Keep barbecue a safe distance away from building(s).* Step 2 Always perform a Leak Test on all connec ons and hoses. * Step 3 Keep children away from the barbecue. During Grilling (To avoid tripping safety valves, please follow these instruc ons carefully!) Step 1 Open barbecue lid and slowly turn on gas supply valve at the tank.
-
Page 3: Table Of Contents
Table of Contents For Your Safety.........................4 Illustrated Parts List .........................6 Hardware List...........................7 Assembly Instruc ons…..………………..................8 Opera ng Your Barbecue .......................10 Ligh ng Grill Burners ......................10 Care and Maintenance......................12 Troubleshoo ng........................13 Warranty Program........................15 - 3 -... -
Page 4: For Your Safety
For Your Safety IMPORTANT NOTICE: READ ALL INSTRUCTIONS PRIOR TO ASSEMBLY AND USE Safety First! Read and understand all warnings and precau ons prior to opera ng your barbecue. WARNING This barbecue is for outside use only. It should not be used in a building, garage or any other enclosed area. The use of alcohol or prescription or non-prescrip on drugs may impair an individual’s ability to properly assemble or safely operate this appliance. - Page 5 1.27 m (50 in) Always confirm that this grill is posi oned more than 1.27 m (50 in) away from any building or combus ble materials or surface before ligh ng it, and that no gasoline or other vola le substances are stored in the vicinity of this grill.
-
Page 6: Illustrated Parts List
Illustrated Parts List Part Description Part Description Part Description Lid handle 1 PC Heat plate 1 PC Right handle 1 PC 1 PC Burner 1 PC Body assembly 1 PC Upper hinge 2 PCS Regulator 1 PC Left leg 1 PC Lower hinge 2 PCS Heat plate support... -
Page 7: Hardware List
Hardware List AA: 1 PC BB: 14 PCS CC: 14 PCS M5 × 10 Bolt M5 Spring washer Wrench DD: 14 PCS EE: 14 PCS FF: 1 PCS Flat washer M5 Nut M6 x 7 Bolt GG: 7 PCS HH: 7 PCS II: 6 PCS M6 Spring washer Flat washer... -
Page 8: Assembly Instruc Ons
Assembly Instruc ons Remove all contents from the carton. Make sure all parts are present before starting assembly. Once the barbecue is fully assembled, go back and check to make certain all the bolts are secure. Tighten again using the screwdriver provided if necessary. - Page 9 Step 6 Insert the grease cup (O) into the two guides underneath the grill and push forward un l it is in place. Step 7 a) Insert the pre-a ached bolts on the lid handle (A) into the holes on the front of the lid and seal with one flat washer (HH), one spring washer (GG), and one nut (II).
-
Page 10: Opera Ng Your Barbecue
Opera ng Your Barbecue The propane gas supply cylinder to be used must be constructed and marked in accordance with the specifica ons for LP-gas c ylinders of the National Standard of the Transportation of Dangerous Goods Commission of Canada for Cylinders, Spheres and Tubes (CAN/CSA-B139). - Page 11 Ligh ng Main Burner WARNING: A emp ng to light the burner with the lid closed may cause an explosion. Make sure there are no obstruc ons of airflow to the gas unit. Spiders and insects can nest and clog the burner/venturi tube at the orifice. A clogged burner tube can lead to a fire beneath the appliance.
-
Page 12: Care And Maintenance
WARNING Always monitor the grill closely when cooking and turn the flame level down to LOW or OFF if flare-ups intensify. Shu ng Off Burners 1. Always turn the valve knob(s) clockwise to the ‘’HIGH’’ posi on, and then press and turn it to ‘’OFF’’. Never force the knob without pressing it. -
Page 13: Troubleshoo Ng
TROUBLESHOOTING Problem Possible cause Preven on/Cure Burner doesn't light using knobs or Wires or electrode is covered by Clean wire or electrode using a igniter cooking residue cloth and rubbing alcohol Electrode and burners are wet Wipe with dry cloth Igni on electrode cracked or Replace electrode broken;... - Page 14 Excessive cooking temperature Adjust (lower) temperature Turn knobs to OFF. Turn gas OFF at Persistent grease fire Grease trapped between burner and food on the grate propane tank. Leave lid in closed posi on and let fire burn out. A er grill cools, remove and clean all parts.
-
Page 15: Warranty Program
Warranty Program Proof of purchase is required to access this warranty program, which is in effect from the date of purchase. If unable to provide proof of purchase or a er the warranty has expired, customers will be subject to parts, shipping and handling fees. Full 30-Day Warranty Any missing parts can be replaced at no charge within 30 days from the date of purchase with a valid proof of purchase.

Need help?
Do you have a question about the GPT1813 and is the answer not in the manual?
Questions and answers