
Subscribe to Our Youtube Channel
Summary of Contents for Dr. J HI-04
- Page 1 Dr. J HI-04 Mini Home Projector Quick Start & Troubleshooting Guide Anastasiya Dvuzhylov...
- Page 2 Important Information Caution: Hot air is exhausted from the ventilation openings, do not put anything flammable near the projector. To prevent fire, do not cover ventilation openings, make sure that the projector is in a well ventilated area. Avoid confined spaces. Caution: To prevent shock, do not open the projector unit body.
-
Page 3: Table Of Contents
Table of Contents 1. Introduction 1.1 Product Overview 1.2 Feature Overview 1.3 Projection Settings 2. Installation 2.1 Mounting 2.2 Non-Mounted Set up 2.3 Connecting to Power 3. Connecting to Devices 3.1 Connecting to Computers 3.2 Connecting to Phones/Tablets 3.3 Connecting to Gaming Consoles 3.4 Connecting to USBs 3.5 Connecting to Other 4. -
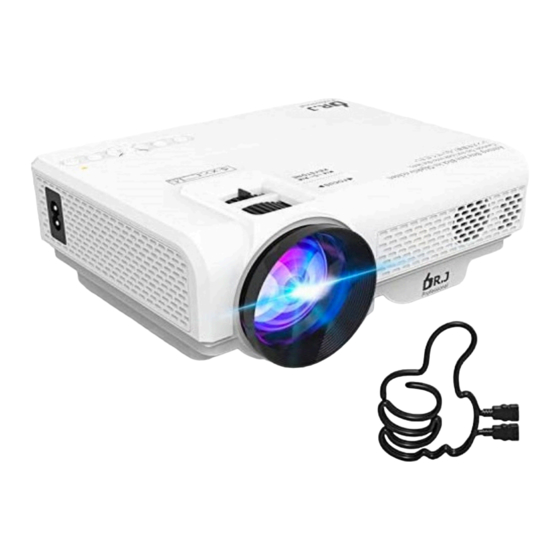
Page 4: Introduction
1. Introduction The Dr. J HI-04 Mini Home Projector is a portable projec- tor intended for home use. It can be connected to phones, computers, gaming systems, and other devices, to project an image. This projector is a budget model, it is not inten- ded to be used in a professional setting. -
Page 5: Product Overview
1.1 Product Overview 1. Input 2. Menu 3. Navigation/OK 4. Return 5. Power 6. Focus 7. Keystone 8. Power adaptor 9. 3.5 mm jack 10. AV jack 11. SD port 12. HDMI port 13. USB port 14. VGA port Q u i c k S ta r t & t r o u b l e S h o ot i n g g u i d e / 5... -
Page 6: Feature Overview
1.2 Feature Overview The Dr. J HI-04 Mini Home Projector is a portable projector intended for home use. It can be used for streaming sports games indoors or having movie nights outside. The projec- tor features a 1280x720 resolution for crisp images. -
Page 7: Projection Settings
1.3 Projection Settings The Dr. J HI-04 Mini Home Projector has 4 projection set- tings, based on how the projector is positioned. The 4 set- tings are: • Front • Front ceiling • Rear • Rear ceiling 1.2.1 Front Projection Front projection is the factor y default setting. - Page 8 1.3 Projection Settings 1.2.3 Front Ceiling Projection Front ceiling projection is intended for users who mount their projectors to the ceiling, in front of a screen. Because the projector is intended to be mounted upside-down, the image output will also appear upside-down. To correct the upside-down image, select Menu >...
-
Page 9: Installation
2. Installation 2.1 Mounting Mounting the projector to the ceiling or a tripod is optional and requires a mount that is not included. If Front Ceiling Mounting or Rear Ceiling Mounting, please see sections 1.2.3 and 1.2.4 to optimize image projection for moun- ting. -
Page 10: Connecting To Devices
3.5mm audio cable to connect device audio with the projector. 3.1 Connecting to Computers There are two ways to connect the Dr. J HI-04 Mini Home Projector to a laptop or desktop computer (both Windows or Mac). -
Page 11: Connecting To Phones/Tablets
3. Connecting to Devices 3.2 Connecting to phone/tablet To connect a phone or a tablet, use an HDMI to lightning cable/USB C adaptor (not included). Connect the HDMI cable to the adaptor port. Connect the other side of the HDMI to the HDMI port loca- ted on the left side of the projector. -
Page 12: Connecting To Usbs
3. Connecting to Devices 3.4 Connecting to USB/Memory Card Connect the USB/Memor y to the projector’s USB port or if using a memor y card, connect an adaptor to the USB port. Select the desired folder/content for viewing. Select the Input Source Button > DMP 3.5 Connecting to Other Devices Find the appropriate connection method based on what ports the device has:... -
Page 13: Image Output Adjustment
The Keystone adjustment fixes skewed image output, ma- king it rectangular. NOTE: The Dr. J HI-04 Mini Home Projector only has a keystone adjustment of +/- 15 degrees, it can only fix sli- ghtly skewed image outputs. -
Page 14: Menu
5. Menu 5.1 Image adjustments The projection output settings can be accessed by selecting Menu>Picture>Picture Mode There are 3 pre-set picture modes: Vivid – image output has rich, high contrast colours • Medium – image output has regular toned colours •... -
Page 15: Sound Adjustment
5. Menu 5.2 Sound Adjustments The sound settings can be accessed by selecting Menu> Sound>Sound Mode There are 4 pre-set sound modes, based on the best use case scenario: Medium – default setting • Movie – optimized for movies and T V shows •... -
Page 16: Troubleshooting
6. Troubleshooting 6.1 Colour looks off If the image output colour looks off, i.e. the reds look pink, select Settings > Picture > Picture mode – User Adjust brightness, contrast, colour, and saturation as nee- 6.2 Blurry/Bad Picture Quality If the picture looks blurr y or fuzzy, adjust the focus to in- crease sharpness. -
Page 17: No/Low Sound
6. Troubleshooting 6.4 No or low sound If connecting with a VGA cable, use a 3.5mm headphone line to connect device audio with the projector. If using HDMI, USB, or other means of connection, please drjprofessional@163.com contact for support. We will send you an update to upload to the projector to restore sound for both internal and external speakers. - Page 18 1 8 / Q u i c k S ta r t & t r o u b l e S h o ot i n g g u i d e...
Need help?
Do you have a question about the HI-04 and is the answer not in the manual?
Questions and answers
Can I use an app if there is no remote?
Yes, you can use the DR.J HI-04 without a remote control. The remote control allows for remote operation, but the projector should still have onboard buttons or controls for basic functions.
This answer is automatically generated
How do I make it stay on a picture for a longer
To make the DR. J HI-04 projector stay on a picture for a longer time, ensure that a stable video or image source is connected through HDMI or AV. If the projector displays "No Signal," it will not stay on a picture. Also, check that the source device (like an iPad) is active and not going to sleep or turning off the display.
This answer is automatically generated
I just bought a projector and would like to connect it to my phone so i can project images or video from my phone. It will play the sound but the images will not project. Is there a setting? I can't figure out. Also I've tried to connect to my lap top but it is still doing the same thing. Actually the lap top will project the screen saver but nothing else. Can you please help me?
To connect the Dr. J HI-04 projector to your phone and laptop:
1. For a Laptop (Windows or Mac):
- Using HDMI Cable:
- Plug one end of an HDMI cable into your laptop's HDMI port.
- Connect the other end to the HDMI port on the left side of the projector.
- If your laptop lacks an HDMI port, use an appropriate adapter.
- Select the "Input Source" on the projector and choose "HDMI."
2. For a Phone or Tablet:
- Use an HDMI to Lightning cable (for iPhones) or an HDMI to USB-C adapter (for Android devices).
- Connect the HDMI cable to the adapter, and then to the HDMI port on the projector.
- Ensure the adapter is compatible with your phone or tablet.
If using a VGA cable for the laptop, you will also need a 3.5mm audio cable to connect audio, as VGA does not support audio.
This answer is automatically generated
Why is it projecting a white screen only? No color, no menu, just white box.
I have power the red light is on.. but the projector itself will not power on
There was an erratic power supply at my house and my dr Q mini projector was plugged so it was affected and now not even the power indicator is coming on…what may be the problem because I tried to take it apart to check for any burnt parts but I didn’t spot anything. What can be the problem ?
Does the Dr J Professional projector have an option to hook up to external speakers?