Miele professional G 7881 Operating And Installation Instructions
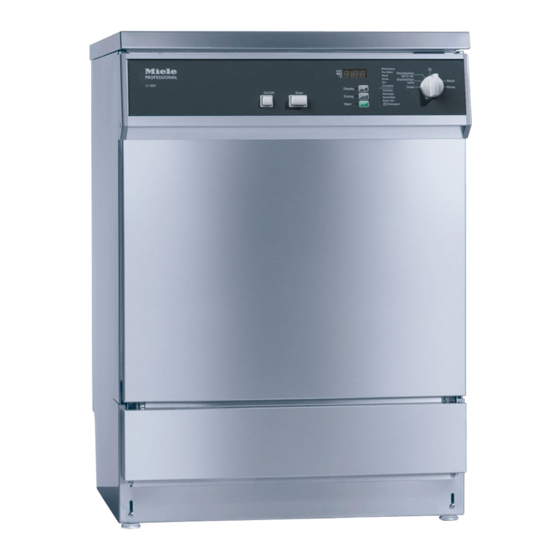
Dental thermal disinfector
Hide thumbs
Also See for G 7881:
- Installation and in-service manual (13 pages) ,
- Installation and in-service manual (12 pages) ,
- Operating instructions manual (56 pages)

Related Manuals for Miele professional G 7881


Summary of Contents for Miele professional G 7881
- Page 1 Operating and Installation Instructions Dental Thermal Disinfector G 7881 en - US, CA To prevent accidents and machine damage read these instructions before installation or use. M.-Nr. 07 778 191...
-
Page 2: Table Of Contents
Contents IMPORTANT SAFETY INSTRUCTIONS....... . . 4 Function of the Dental Thermal Disinfector ......8 Guide to the Dental Thermal Disinfector . - Page 3 Contents Programming functions ......... . . 36 For all programming functions: .
-
Page 4: Important Safety Instructions
IMPORTANT SAFETY INSTRUCTIONS Please pay attention to the following This machine conforms to current notes to maintain safe procedures. safety requirements. However, The machine should be installed, inappropriate use can lead to commissioned and maintained only by personal injury and property a certified Miele Service Technician. - Page 5 IMPORTANT SAFETY INSTRUCTIONS Take care when handling When using this machine regard the processing chemicals (detergents, high temperatures and be especially softeners, neutralizers, etc.). These may careful not to scald or burn yourself. contain irritant or corrosive ingredients. When opening the door bypassing the Wear protective gloves and goggles.
- Page 6 IMPORTANT SAFETY INSTRUCTIONS The following points should be In order to prevent damage to the observed to assist in maintaining machine and any accessories through processing chemicals or dirt as well as quality standards and to avoid any interaction between them, see damage to the loads being cleaned.
- Page 7 IMPORTANT SAFETY INSTRUCTIONS When using cleaning agents and Using accessories specialized products, it is essential that Only specific additional equipment the manufacturer’s instructions are made by Miele should be connected to followed. Chemicals must only be used this machine. Consult a Miele for the purpose they are designed and Application Specialist on the type and in the situation specified, to the...
-
Page 8: Function Of The Dental Thermal Disinfector
200°F/93°C, instruments and All critical instruments must be accessories. sterilized after treatment in the G 7881 Dental Thermal Disinfector. Critical Areas of effectiveness are physical instruments are used to penetrate soft removal or thermal inactivation of tissue or bone, e.g. - Page 9 Carbon steel and chrome-plated instruments may corrode during the cleaning process. Processing these types of instruments in the G 7881 is If you notice any of the above not recommended. symptoms in your instruments, please...
-
Page 10: Guide To The Dental Thermal Disinfector
Guide to the Dental Thermal Disinfector a "On/Off" button h Check / Refill indicators b "Door" button i Program selector c Display d "Display" button with indicator (toggles between the elapsed time, active wash blocks and actual temperature displays) e "Drying" button with indicator f "Start"... - Page 11 Guide to the Dental Thermal Disinfector a Connection for DOS module G 60 at f Rinse aid reservoir with dispensing the rear of the machine selector (Optional dispenser pump for liquid g Level indicator for rinse aid detergent). At the rear of the machine: b Service panel –...
-
Page 12: Before Using For The First Time
Before using for the first time Load the machine carefully Before using for the first time please Arrange the load so that water will pay special attention to the following come into contact with all surfaces. points: Concealed surfaces will not be cleaned. -
Page 13: Opening And Closing The Door
Opening and closing the door Electric door lock Opening the door during a power failure The machine is equipped with an electric door lock. The emergency release should only The door can only be opened if: be used when the door cannot be opened normally, e.g. -
Page 14: Water Softener
Water softener Programming the water To obtain good cleaning results, the disinfector needs soft water. Hard tap softener water results in calcium deposits on the ^ Turn the machine off with "On/Off". instruments and machine. If your tap water hardness is above 4°d, ^ Turn the program selector to f. - Page 15 Water softener Settings °d Value °d Value displayed displayed 1010 1030 19 *) 1040 1060 1080 *) Factory setting...
-
Page 16: Filling The Salt Reservoir
Water softener ^ Remove the lower basket. Filling the salt reservoir ^ Unscrew the salt reservoir cap. Only special, coarse-grained reactivation salt should be used in this Before filling the salt reservoir with machine, available from Miele's reactivation salt for the first time, fill it Professional Department. -
Page 17: Salt Indicator
Water softener Salt indicator ^ Clean any excess salt from the threads and seal of the container The reactivation of the water softener opening. takes places automatically during a ^ Screw the cap on securely. program cycle. During this process the, a, ^ Immediately run the "Rinse"... -
Page 18: Rinse Aid
Rinse aid Use only special processing chemicals for dental thermal disinfectors and observe the manufacturer's recommendations for use. In particular, always observe the manufacturer's instructions regarding residual amounts that do not pose any toxicological risk. Adding rinse aid Rinse aid is necessary to allow for easy water run-off from items. -
Page 19: Rinse Aid Indicator
Rinse aid Rinse aid indicator Setting the rinse aid dosage ^ Refill rinse aid when the rinse aid The dosage adjuster in the opening has settings adjustable from 1 to 6 (1-6 ml). indicator lights. It is set to 3 by default. ^ Use a higher setting if spots appear on dry items. -
Page 20: Neutralizing Agent
Neutralizing agent ^ Place the neutralizer container (red) Adding neutralizer on the floor next to the machine or in Neutralizer causes remains of alkaline an adjacent cabinet. detergents on the items surface to be neutralized. The neutralizer is automatically dispensed in the program after the main wash. -
Page 21: Neutralizer Indicator
Neutralizing agent Neutralizer indicator ^ Refill the container for neutralizer or replace it with a new one when the "Neutralizer" indicator lights. Remember to refill the container in time to avoid being completely emptied. ^ The indicator light should go out. ^ If the container has been allowed to run dry, the light will not go out until the priming process is performed. -
Page 22: Detergent
Detergent Liquid Option Refilling the liquid detergent ^ Replace the current detergent As a separate option, this machine can also be fitted with a dispenser pump for container with a full one. automatic liquid detergent dispensing ^ The indicator light should go out. (DOS-Module G 60). - Page 23 Detergent Powder detergent The flap is always open at the end of a program. Avoid inhaling cleaning agents in powder form. If processing chemicals are ingested, they can cause chemical burns in the mouth and throat or suffocation. ^ Place powder detergent in the detergent compartment (except for the programs "Rinse"...
-
Page 24: Loading The Machine
Loading the machine The disinfector can be equipped with a – Is the filter combination free of lower and upper basket which can be coarse debris (remove any coarse fitted with different inserts, depending material and clean the coarse, fine, on the type and form of items to be flat, and micro-fine filters as disinfected. - Page 25 Loading the machine Loading the machine – Mobile units and baskets with an adapter must engage correctly. – Load the items to be washed so that water can access all surfaces. – The spray arms must not be blocked by tall items or items which hang in –...
-
Page 26: Water Connection Spring Adapter
Loading the machine Water connection spring Height adjustable top basket adapter The upper basket can be adjusted above and below the middle position The spring adapter for water by 13/16" (2 cm). connection must engage correctly when a basket or injector unit is Depending on the position of the upper inserted in the machine. -
Page 27: Effects Of Processing Chemicals
Effects of Processing Chemicals General information Effects Action Damage to elastomer (seals and hoses) – Find and correct the causes of the or plastic components of the machine damage. may cause the materials to swell, See "Connected processing shrink, harden or become brittle, chemicals", "Soiling"... - Page 28 Effects of Processing Chemicals Connected processing chemicals Effects Action The ingredients of the processing – Use only those processing chemicals chemicals have a considerable effect recommended by Miele. on the durability and functionality (feed – Perform regular visual inspections of performance) of the metering systems.
- Page 29 Effects of Processing Chemicals Connected processing chemicals Effects Action The following processing chemicals – The process parameters of the wash can result in excessive foaming: program, e.g. metering temperature, metering concentration, etc. must be – cleaning and rinsing agents that set so that the overall process contain tensides, creates little or no foam.
- Page 30 Effects of Processing Chemicals Soiling Effects Action The following substances can cause – First rinse the load with a sufficient excessive foaming during washing and quantity of water. rinsing: – Select a wash program with one or – agents such as disinfection agents, more short pre-rinses with cold or dish detergents, etc.
-
Page 31: Use
Selecting the optional drying Turning on function ^ Close the door. The additional function "Drying" can be ^ Press the "On/Off" button. selected immediately after a program If the program selector is in the f was selected (except "Rinse" and "Drain"). -
Page 32: Program Sequence Display
During a program, the "Display" ß Program sequence display button can be used to toggle between The indicator for the active program the: sequence lights during the program. – actual temperature Recharging – elapsed program time and Pre-Wash 1 + 2 –... -
Page 33: Canceling A Program
^ Start the "Drain" program. Canceling a program The water will be drained away. If a program is canceled it must ^ Select and start the program. be run again to be complete. Canceling a program because of an End of a program interruption If the "Complete"... -
Page 34: Program Guide
Program guide Choose your program according to the types of instruments or utensils being cleaned and the degree of soiling. Programs Program Description (fixed) Wash Wash program without disinfection. Rinse (cold) Rinse only. To rinse items before a wash program, to avoid excessive foam. - Page 35 Program guide Program Sequence 1. Pre-wash 2. Cleaning 3. Interim 4. Interim 5. Final 6. Drying and/or rinse II rinse (extra rinse I thermal and/or program) with disinfection disinfection Neutralization and/or cleaning Cleaning Rinse 60°C/3’ 65°C/1’ (DI) DOS 2 Cleaning DOS 3 Rinse and 55°C/5’...
-
Page 36: Programming Functions
Programming functions Note any adjustments of the factory settings in the provided field in case a service call is necessary. General notes – Non occupied program selector positions are displayed with a bar (-) in the middle of the display. –... -
Page 37: Dispensing Liquid Detergent With The Dos Module
Programming functions Dispensing liquid detergent with the DOS module Setting the dosage The dispensing concentration for liquid detergent must be set. It must be set according to the manufacturer's specifications or the requirements. When dispensing powder detergent via the door dispensing system, the value must not be changed. -
Page 38: Priming The Liquid Detergent Dispensing System
Programming functions Priming the liquid detergent dispensing system The dispensing system needs to be primed: - when the dispensing concentration is set for the first time, - if the liquid detergent container runs out and is not filled in time. Step Display / Result ^ Press "Drying"... -
Page 39: Dispensing Neutralizer With The Dos Module
Programming functions Dispensing neutralizer with the DOS module Setting the dosage The dispensing concentration for neutralizer must be set according to the manufacturer's specifications or the requirements. Step Display / Result ^ Press "Drying" 0 until E02 appears in the display. ^ Turn the program selector to the The dispensing concentration 1-o'clock-position. -
Page 40: Priming The Neutralizer Dispensing System
Programming functions Priming the neutralizer dispensing system The dispensing system needs to be primed: - when the dispensing concentration is set for the first time, - if the neutralizer container runs out and is not filled in time. Step Display / Result ^ Press "Drying"... -
Page 41: Buzzer
Programming functions Buzzer A buzzer can be programmed for the following functions: – End of program, constant tone, – Fault, tone in 1 second rhythm, – Signal to take a sample, 3 x short with 2 seconds break The sample extraction must be programmed by the Miele Technical Service Dept. The displayed numbers conform with the following settings. -
Page 42: Process Documentation (Optional)
Process documentation (optional) This machine offers the ability to During the program sequence the document the cleaning process follow data is logged: (process documentation) – Date and machine number The documentation process can be – Program start and program name completed either by an external software or an external printer. -
Page 43: Maintenance
Maintenance Periodic maintenance for this appliance When using powder detergent the is recommended every 1,000 hours or temperature at the time of dosing must annually. be checked every 2 weeks. The dosing temperature is found under Validation in the Validation Protocol. Routine checks The temperature review must be The routine checks must be done daily... -
Page 44: Cleaning And Care
Cleaning and Care Cleaning the coarse filter Wear protective gloves and goggles when cleaning this machine. Filter combination The machine must not be used without all the filters in place. The filters protect the circulation pump from damage caused by foreign objects. - Page 45 Cleaning and Care Cleaning the fine, flat and micro-fine filters ^ Remove the coarse filter. ^ Remove the fine filter from between the flat and micro-fine filters. ^ Then remove together with the flat filter. ^ Clean the filters. ^ Replace the filter combination in reverse order.
- Page 46 Cleaning and Care Cleaning the spray arms The spray arms can get clogged. Check daily and clean if necessary. Remove the spray arms as follows: ^ Remove the baskets. Spray arm at the upper basket or mobile unit (if available): ^ Loosen the knurled nut and remove the spray arm.
- Page 47 Cleaning and Care Cleaning the drain pump and The drain pump is located beneath the non-return valve (see arrow). non-return valve If water has not been pumped away at the end of a program the drain pump or the non-return valve may be blocked. ^ Turn off the washer.
- Page 48 Cleaning and Care Cleaning the water inlet filters Cleaning the filters ^ Disconnect the machine from the To protect the water inlet valve, filters are incorporated in the intake hose main electrical supply. attached to the water faucet. If the ^ Close the water supply and unscrew filters are soiled they must be cleaned the water inlet valve.
- Page 49 Cleaning and Care Cleaning the control panel Never clean the machine near or ^ The control panel should only be with a water or high pressure hose. cleaned with a damp cloth or a suitable cleaner for use on plastic Cleaning the wash cabinet materials.
-
Page 50: Frequently Asked Questions
Frequently asked questions The following guide can be used to help address minor problems without a service call. Repairs should only be performed by Miele Technical Service. Work performed by unqualified persons can place the user at considerable risk of harm. To help avoid unnecessary service calls, please be sure to check first whether an error message is due to operator error. - Page 51 Frequently asked questions What if ... Possible fault Solution Before starting a Before fixing the fault: program, the indicator – Turn the program 8 Detergent flashes. selector to f, the fault A program cannot be code goes out. started. – Turn the machine off with the On/Off button.
- Page 52 Frequently asked questions What if ... Possible fault Solution Before starting a Before fixing the fault: program, the – Turn the program selector to f, the fault "Neutralizer" indicator flashes. A program code goes out. cannot be started. – Turn the machine off with I-0.
- Page 53 Frequently asked questions What if ... Possible fault Solution The "Recharge" The water softener has run Refill the salt reservoir. indicator flashes. out of salt. The indicator p/6 Before fixing the fault: flashes a few minutes – Turn the program after the program start, selector to f, the fault the program was...
- Page 54 Frequently asked questions What if ... Possible fault Solution The program was Before fixing the fault: canceled, the indicator – Turn the program selector to f, the fault p/6 flashes. code goes out. – Turn the machine off with the On/Off button. Fault code F..A: –...
- Page 55 Frequently asked questions What if ... Possible fault Solution Detergent is left in the – Remove any detergent dispenser at the end of residue. a program. – Prepare dishes again. The dispenser was damp Dry the dispenser before when detergent was adding detergent.
- Page 56 Frequently asked questions What if ... Possible fault Solution Instruments show There is too much chloride Have the water analyzed. corrosion. in the water. Probable need for external water treatment and usage of DI (deionized) water for the final rinse. The items show white The water softener is Check the water hardness...
- Page 57 Frequently asked questions What if ... Possible fault Solution The items have stains. The rinse aid dosage is set Increase the dispense too low. amount for rinse aid. The container for rinse aid Refill rinse aid. is empty. Poor cleaning results Baskets and Inserts were Rearrange items.
-
Page 58: Thermo Switch
Frequently asked questions Thermo switch This machine has a resettable heater limiter which will shut off the elements in the event of over-heating. This could be caused for example, if large articles cover the heating elements or if the filters in the wash cabinet are blocked. If the following fault shows: F01 - F03, F18, F19 (Water in the wash cabinet is not heated, the program cycle takes too... -
Page 59: After Sales Service
After sales service This machine must be installed, maintained and repaired by an authorized Miele service technician. Maintenance and repair work performed by unqualified persons can place the user at risk. In the event of a fault which you cannot correct yourself please contact the Miele Technical Service Department 1-800-991-9380... - Page 61 INSTALLATION INSTRUCTIONS...
-
Page 62: Installation
Installation Undercounter installation Please refer to the installation diagram included with the machine. To install the machine under a continuous countertop, the machine lid Furniture and fittings installed must be removed, as follows: near the machine must be of a ^ Open the door. - Page 63 Installation Protecting the countertop Positioning and securing the machine Important for machines with steam condenser (depending on model): To ensure stability the machine must first be aligned and then secured to the To prevent steam damage to the countertop. countertop, adhere the protective foil ^ Open the door.
-
Page 64: Electrical Connection
Electrical connection All electrical work must be See also the supplied installation carried out by a suitably qualified diagram. electrician in accordance with local and national safety regulations. A damaged power cord must only – Connection should be made via a be replaced with a genuine Miele suitable isolator, with an on-off switch cord by a Miele service technician. -
Page 65: Plumbing
Plumbing ^ Connections with a Connection to the water inlet " GHT male thread are to be provided on site. Water in the machine is not They should be easily accessible so suitable for drinking. that the water supply can be turned off when the machine is not in use. - Page 66 Plumbing DI water connection If required the machine can be connected as standard to a DI water supply of: Acceptable water pressure (flow rate): 10 - 147 psi Recommended water pressure (flow rate): 25 - 60 psi ^ The DI pressure-tested hose (marked "H O pur") with a "...
- Page 67 Plumbing Drainage ^ The drainage system is fitted with a non-return valve which prevents dirty water from flowing back into the machine via the drain hose. ^ The machine should preferably be connected to a separate drainage system onsite. If separate drainage is not available contact your Miele application specialist for advice.
-
Page 68: Technical Data
Technical Data Height: with lid 33 7/16" (85 cm) without lid 32 5/16" (82 cm) Width: 23 5/8 " (60 cm) Depth: 23 5/8 " (60 cm) Depth with the door open 47 1/4" (120 cm) Net weight: 154 lbs (70 kg) Voltage/Fuse: see data plate Power cord... -
Page 69: Help To Protect The Environment
Help to protect the environment Disposal of the packing Disposal of the appliance material Appliances contain materials which can be recycled. Please contact your local The protective packing materials are authorities about recycling in your area. environmentally safe and can be recycled. - Page 72 Alteration rights reserved / 2011 M.-Nr. 07 778 191 / 01...
Need help?
Do you have a question about the G 7881 and is the answer not in the manual?
Questions and answers