Table of Contents
Advertisement
Available languages
Available languages
Quick Links
Model • Modèle • Modell • Modello • Modelo • Malli:
GE959_ML_A5_v1_20230104.indb 1
GE959_ML_A5_v1_20230104.indb 1
Portable air
conditioning unit
Instruction manual
Portable air
EN
conditioning unit
Instruction manual
Draagbare
NL
airconditioning
Gebruikshandleiding
Climatiseur portable
FR
Mode d'emploi
Mobile Klimaanlage
DE
Bedienungsanleitung
Climatizzatore
IT
portatile
Manuale di istruzioni
Unidad de aire
ES
acondicionado
portátil
Manual de instrucciones
GE959
2
12
22
32
42
52
2023/1/4 17:37:18
2023/1/4 17:37:18
Advertisement
Table of Contents

Subscribe to Our Youtube Channel
Related Manuals for Polar Electro GE959


Summary of Contents for Polar Electro GE959
- Page 1 Climatiseur portable Mode d’emploi Mobile Klimaanlage Bedienungsanleitung Climatizzatore portatile Manuale di istruzioni Unidad de aire acondicionado portátil Manual de instrucciones Model • Modèle • Modell • Modello • Modelo • Malli: GE959 GE959_ML_A5_v1_20230104.indb 1 GE959_ML_A5_v1_20230104.indb 1 2023/1/4 17:37:18 2023/1/4 17:37:18...
-
Page 2: Safety Instructions
Safety Instructions Appliance is filled with flammable gas R290. Caution: risk of fire! The refrigerant loop is sealed. Only a qualified technician should attempt to service! Read the manual before use. Before installation, read the installation section of the manual. In case of any repairs, contact the nearest authorized service centre and strictly follow manufacturer’s instructions. - Page 3 • This appliance can be used by children aged from 8 years and above and persons with reduced physical, sensory or mental capabilities or lack of experience and knowledge if they have been given supervision or instruction concerning the use of the appliance in a safe way and understand the hazards involved.
-
Page 4: Pack Contents
• Always switch off and • Auto shut off when water tank full • Automatic restart in the event of power outage disconnect the power supply • Auto defrosting function at low ambient temperatures to the appliance when not • Castors for easy mobility in use, before cleaning or Pack Contents... -
Page 5: Control Panel
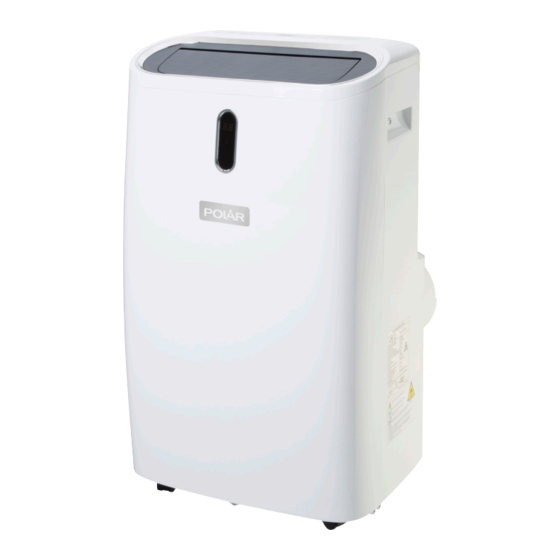
Knowing the appliance Control panel Recessed handle Air outlet with adjustable louver Removable air filter Front panel Upper display: drain Show Air Exhaust outlet working mode and temperature Castor Lower drain outlet Control panel 1. Power button: 6. Display: Press to turn the unit on or off Show temperature and timer setting 2. -
Page 6: Remote Control
Remote Control Display Show temperature and timer setting Power switch Press to turn the unit on or off Heat Press to enter the desired mode directly Cool Up/Down Increase/Decrease temperature (16°C-32°C) or timer setting (1-24h) Timer Set timer for auto start-up and shut-down °C/°F Press to toggle between Centigrade and Fahrenheit... -
Page 7: Operation
3. Extend the adjustable window kit as necessary, 6. Adjust the length of the flexible exhaust hose, then connect the exhaust hose to the window and avoid bends in the hose. kit. 4. Close the window to secure the kit in place. If 7. - Page 8 Heat mode Sleep function Select the heat mode to increase the temperature The sleep function can be activated when in cool in your room. mode and heat mode. In cool mode In heat mode 1. Press Mode button until the HEAT mode indicator lights up.
-
Page 9: Cleaning, Care And Maintenance
Automatic defrost Continuous drainage At low room temperatures, frost may build up The self-evaporating system uses the collected on the evaporator during operation. The unit will water to cool the condenser coils for better automatically start to defrost while the POWER performance, so there is no need to empty the indicator light keeps blinking. -
Page 10: Troubleshooting
Cleaning the air filter (every two weeks) Dust collecting on the filter will restrict the airflow. The restricted airflow will reduce the efficiency of the system. If blocked, it may cause damage to the unit. Clean the air filter regularly. 1. -
Page 11: Technical Specifications
Capacity Dimensions current Model Voltage H x W x D Weight Cooling Heating Cooling Heating Cooling Heating GE959 220-240V~ 1337 W 1118 W 5.9 A 5.0 A 12000 9500 762 x 470 x 29.5 kg 50Hz Btu/h Btu/h 353 mm Electrical Wiring POLAR appliances are supplied with a 3 pin BS1363 plug and lead. - Page 12 Veiligheidsinstructies Dit apparaat is gevuld met ontvlambaar gas R290. Opgelet: brandgevaar! De koelmiddelkring is verzegeld. Onderhoud mag uitsluitend worden uitgevoerd door een bevoegde technicus! Lees de handleiding voorafgaand aan gebruik. Lees de installatiesectie van de handleiding voorafgaand aan installatie. Neem in het geval van reparatie contact op met het dichtstbijzijnde erkende servicecentrum en volg nauwgezet de instructies van de fabrikant.
- Page 13 • Dit apparaat mag worden gebruikt door kinderen van 8 jaar en ouder en personen met verminderde lichamelijke, zintuiglijke of mentale capaciteiten, of met een tekort aan kennis en ervaring, vooropgesteld dat zij onder toezicht staan of instructies hebben gekregen inzake het veilige gebruik van het apparaat en de betrokken gevaren begrijpen.
- Page 14 • Bescherm het apparaat tegen • Automatische uitschakeling wanneer de watertank vol is hitte, direct zonlicht, vocht, • Automatische herstart in het geval van stroomuitval waterdruppels en -spetters. • Automatische ontdooifunctie bij lage • Dompel het apparaat NIET omgevingstemperaturen • Zwenkwielen voor handige mobiliteit onder in water.
-
Page 15: Beschrijving Van Het Apparaat
Beschrijving van het apparaat Bedieningspaneel Verzonken handgreep Luchtuitlaat verstelbare lamellen Uitneembare luchtfilter Voorpaneeldisplay: Bovenste Toont de afvoergat gebruiksmodus en Luchtafvoer temperatuur Zwenkwiel Onderste afvoergat Bedieningspaneel 1. Aan-/uittoets: 6. Display: Indrukken om het apparaat in of uit te Toont de temperatuur- en timerinstelling schakelen 2. - Page 16 Afstandsbediening Display Toont de temperatuur- en timerinstelling Stroomschakelaar Indrukken om het apparaat in of uit te schakelen Heat (Verwarmen) Indrukken om de gewenste modus direct te selecteren Cool (Koelen) Dry (Ontvochtigen) Fan (Ventilator) Omhoog/omlaag De temperatuurinstelling (16-32°C) of timerinstelling (1-24 uur) verhogen of verlagen Timer Stel met deze toets een timer in om...
- Page 17 3. Verleng de raamset indien nodig en sluit de 6. Pas de lengte van de flexibele afvoerslang aan en uitlaatslang vervolgens aan op de raamset. zorg er hierbij voor de slang niet te verbuigen. 4. Sluit het raam om de set op zijn plek vast te zetten.
- Page 18 Verwarmingsmodus Slaapfunctie Selecteer de verwarmingsmodus om de De slaapfunctie kan worden geactiveerd in zowel temperatuur in uw kamer te verhogen. de koelmodus als verwarmingsmodus. In koelmodus In verwarmingsmodus 1. Druk op de toets Modus totdat de modusindicator Verwarmen oplicht. 1. De vooraf 1.
-
Page 19: Automatisch Ontdooien
Automatisch ontdooien Onafgebroken afvoer Bij lage kamertemperaturen kan zich tijdens Het zelfverdampingssysteem gebruikt het verzamelde water om de condensatorspoelen gebruik ijs op de verdamper vormen. Het apparaat te koelen voor een betere prestatie. Het is dus zal automatisch beginnen met ontdooien terwijl het niet nodig om de afvoertank te legen wanneer Aan/uit-indicatielampje blijft knipperen. - Page 20 De luchtfilter reinigen (elke twee weken) Het stof dat zich op de filter ophoopt, zal de luchtstroom belemmeren. Een belemmerde luchtstroom zal het systeem minder efficiënt laten werken. Wanneer geblokkeerd, kan dit schade aan het apparaat veroorzaken. Maak de luchtfilter dus regelmatig schoon. 1.
-
Page 21: Technische Specificaties
Nominale Capaciteit Afmetingen Netto ingangsvermogen ingangsstroom Model Spanning H x B x D gewicht Koeling Verwarming Koeling Verwarming Koeling Verwarming GE959 220-240V~ 1337 W 1118 W 5,9 A 5,0 A 12000 9500 762 x 470 x 29,5 kg 50Hz Btu/u... -
Page 22: Consignes De Sécurité
Consignes de sécurité L'appareil est rempli de gaz inflammable R290. Attention : risque d'incendie ! La boucle de réfrigérant est scellée. Seul un technicien qualifié doit effectuer l'entretien ! Lisez le manuel avant l'utilisation. Avant de procéder à l'installation, lisez la section installation du manuel. - Page 23 • Cet appareil peut être utilisé par des enfants à partir de 8 ans et des personnes ayant des capacités physiques, sensorielles ou mentales réduites ou un manque d’expérience et de connaissances s’ils sont supervisés ou ont reçu des instructions concernant l’utilisation de l’appareil en toute sécurité...
-
Page 24: Contenu De L'emballage
• NE plongez PAS l’appareil • Arrêt automatique lorsque le réservoir d'eau est plein dans l’eau. • Redémarrage automatique en cas de coupure de courant • Éteignez et débranchez • Fonction de dégivrage automatique à basse toujours l'alimentation température ambiante •... -
Page 25: Présentation De L'appareil
Présentation de l'appareil Panneau de contrôle Poignée encastrée Sortie d'air avec persienne réglable Filtre à air amovible Affichage sur Sortie de le panneau vidange avant : Sortie d'air supérieure Affiche le mode de travail et la température Roulette Sortie de vidange inférieure Panneau de contrôle 1. -
Page 26: Installation
Télécommande Écran Affiche la température et le réglage de la minuterie Interrupteur Appuyez pour allumer ou éteindre l'appareil d’alimentation Heat (Chaud) Appuyez sur cette touche pour accéder directement au mode souhaité Cool (Froid) Dry (Sec) (Ventilateur) Haut/Bas Permettent d'augmenter/diminuer la température (16°C-32°C) ou de régler la minuterie (1 à... - Page 27 3. Déployez le kit de fenêtre réglable selon les 6. Ajustez la longueur du tuyau d'évacuation besoins, puis raccordez le tuyau d'échappement flexible et évitez les courbures dans le tuyau. au kit de fenêtre. 4. Fermez la fenêtre pour fixer le kit en place. 7.
- Page 28 Mode chaud Fonction de veille Sélectionnez le mode de chauffage pour augmenter La fonction de veille peut être activée en mode la température de votre pièce. froid et en mode chaud. 1. Appuyez sur le bouton Mode jusqu'à ce que En mode froid En mode chaud l'indicateur du mode CHAUD s'allume.
-
Page 29: Dégivrage Automatique
Dégivrage automatique Drainage continu Lorsque la température ambiante est basse, du Le système d'auto-évaporation utilise l'eau collectée givre peut se former sur l'évaporateur pendant pour refroidir les serpentins du condenseur afin le fonctionnement. L'appareil commence d'obtenir de meilleures performances. Il n'est donc automatiquement à... -
Page 30: Dépannage
Nettoyage du filtre à air (toutes les deux semaines) La poussière qui s'accumule sur le filtre restreint le débit d'air. La restriction du débit d'air réduit l'efficacité du système. S'il est bloqué, il peut endommager l'appareil. Nettoyez régulièrement le filtre à air. 1. -
Page 31: Spécifications Techniques
Tension H x L x P Refroidi- Refroidi- Refroidi- Chauffage Chauffage Chauffage ssement ssement ssement GE959 220 à 240V~ 1337 W 1118 W 5,9 A 5,0 A 12000 9500 762 x 470 x 353 mm 29,5 kg 50Hz Btu/h Btu/h Raccordement électrique... - Page 32 Sicherheitshinweise Das Gerät ist mit brennbarem Gas R290 gefüllt. Vorsicht: Brandgefahr! Der Kältemittelkreislauf ist versiegelt. Die Wartung sollte nur von einem qualifizierten Techniker durchgeführt werden! Lesen Sie vor dem Gebrauch die Bedienungsanleitung. Lesen Sie vor der Installation den Abschnitt über die Installation im Handbuch.
- Page 33 • Dieses Gerät kann von Kindern ab 8 Jahren und Personen mit eingeschränkten physischen, sensorischen oder geistigen Fähigkeiten bzw. mangelnden Erfahrungen und Kenntnissen benutzt werden, wenn sie beaufsichtigt werden oder in die sichere Benutzung des Gerätes eingewiesen worden sind und sich der mit der Benutzung verbundenen Gefahren bewusst sind.
- Page 34 • Schalten Sie das Gerät • Automatische Abschaltung bei vollem Wassertank immer aus und trennen Sie • Automatischer Neustart im Falle eines Stromausfalls es von der Stromversorgung, • Automatische Abtaufunktion bei niedrigen wenn Sie es nicht benutzen, Umgebungstemperaturen • Rollen für leichte Mobilität bevor Sie es reinigen oder Wartungsarbeiten Lieferumfang...
- Page 35 Das Gerät kennen Bedienfeld Zurückgesetzter Griff Luftauslass verstellbarer Abdeckung Abnehmbarer Luftfilter Frontpanel- Oberer Display: Ablaufauslass Arbeitsmodus Luftauslass Temperatur anzeigen Rolle Unterer Ablaufauslass Bedienfeld 1. Einschalttaste: 6. Anzeige: Drücken, um das Gerät ein- oder auszuschalten Temperatur und Timer-Einstellung anzeigen 2. Modus-Taste: 7.
-
Page 36: Montage
Fernbedienung Anzeige Temperatur und Timer-Einstellung anzeigen Netzschalter Drücken, um das Gerät ein- oder auszuschalten Heat (Hitze) Drücken Sie, um den gewünschten Modus direkt aufzurufen Cool (Kühl) Dry (Trocken) Auf/Ab Erhöhen/Verringern der Temperatur (16°C-32°C) oder Timereinstellung (1-24h) Timer Timer für automatisches Ein- und Ausschalten einstellen °C/°F Drücken, um zwischen Celsius und... -
Page 37: Bedienung
3. Verlängern Sie das verstellbare Fenster- 6. Passen Sie die Länge des flexiblen Abluftschlauch Kit nach Bedarf und schließen Sie dann den an, und vermeiden Sie Knicke im Schlauch. Abluftschlauch an das Fenster-Kit an. 4. Schließen Sie Ihr Fenster, um das Kit zu 7. - Page 38 Heizmodus Schlaffunktion Wählen Sie den Heizen-Modus, um die Temperatur Die Schlaf-funktion kann im Kühl- und Heizmodus in Ihrem Raum zu erhöhen. aktiviert werden. 1. Drücken Sie die Modustaste, bis die Anzeige In Kühlmodus In Heizmodus für den HEAT-Modus aufleuchtet. 1. Nach einer 1.
-
Page 39: Reinigung, Pflege Und Wartung
Automatische Abtauung Kontinuierliche Entwässerung Bei niedrigen Raumtemperaturen kann sich Das selbstverdampfende System verwendet während des Betriebs Frost am Verdampfer bilden. das aufgefangene Wasser zur Kühlung der Das Gerät beginnt automatisch mit dem Abtauen, Kondensatorspulen, um eine bessere Leistung während die POWER-Kontrollleuchte weiter blinkt. zu erzielen, so dass der Entwässerungstank im Kühlbetrieb nicht geleert werden muss, außer bei A. -
Page 40: Störungssuche
Reinigung des Luftfilters (alle zwei Wochen) Staub, der sich auf dem Filter ansammelt, schränkt den Luftstrom ein. Der eingeschränkte Luftstrom verringert die Effizienz des Systems. Wenn es blockiert wird, kann es zu Schäden am Gerät kommen. Reinigen Sie den Luftfilter regelmäßig. 1. -
Page 41: Technische Spezifikationen
Spezifikationen ohne vorherige Ankündigung ändern. Nenneingangsleistung Nenneingangsstrom Fassungsvermögen Abmessungen Modell Spannung Nettogewicht H x B x T Kühlung Heizung Kühlung Heizung Kühlung Heizung GE959 220-240V~ 1337 W 1118 W 5,9 A 5,0 A 12000 9500 762 x 470 x... -
Page 42: Suggerimenti Per La Sicurezza
Suggerimenti per la sicurezza L'apparecchio contiene gas infiammabile R290. Attenzione: pericolo di incendio! Il circuito del gas refrigerante è sigillato. Solo tecnici qualificati possono eseguire la manutenzione! Leggere il manuale prima dell'uso. Prima dell'installazione, leggere la relativa sezione del manuale. Se è... - Page 43 • L'apparecchio può essere utilizzato da bambini di età superiore a 8 anni e da persone con capacità fisiche, sensoriali o mentali ridotte o con scarse esperienza e conoscenza purché sotto adeguata supervisione o vengano fornite loro istruzioni sull'utilizzo sicuro dell'apparecchio e abbiano compreso i pericoli correlati.
- Page 44 • Quando l'apparecchio non • Spegnimento automatico quando il serbatoio dell'acqua è pieno vene utilizzato e prima di • Riavvio automatico in caso di interruzione della corrente pulirlo o eseguire interventi • Funzione di sbrinamento automatico a basse di manutenzione, spegnerlo temperature ambiente •...
-
Page 45: Panoramica Dell'apparecchio
Panoramica dell'apparecchio Pannello di controllo Maniglia incassata Uscita dell'aria con deflettore regolabile Filtro aria rimovibile Display Uscita di pannello Scarico scarico anteriore: dell'aria superiore mostra la modalità di lavoro e la temperatura Rotelle Uscita di scarico inferiore Pannello di controllo 1. -
Page 46: Installazione
Telecomando 1. Display mostra le impostazioni della temperatura e del timer 2. Interruttore di premere per accendere o spegnere alimentazione l’apparecchio 3. Heat Premere per accedere direttamente alla (Riscaldamento) modalità desiderata 4. Cool (Condizionatore) 5. Dry (Deumidificatore) 6. Fan (Ventilatore) 7. -
Page 47: Funzionamento
3. Estendere il kit finestra, se necessario, quindi 6. Regolare la lunghezza del tubo flessibile di collegare il tubo flessibile di scarico al kit scarico evitando piegature nel tubo. finestra. 4. Chiudere la finestra per fissare il kit in 7. Regolare il deflettore all'uscita dell'aria. posizione. - Page 48 Modalità Riscaldamento Funzione Notte Selezionare questa modalità per aumentare la La funzione Notte può essere attivata nelle temperatura della stanza. modalità condizionatore e riscaldamento. 1. Premere il pulsante Modalità fino a quando In modalità in modalità la spia della modalità Riscaldamento non si condizionatore riscaldamento illumina.
-
Page 49: Sbrinamento Automatico
Sbrinamento automatico Drenaggio continuo Se la temperatura ambiente è bassa, durante il Il sistema di evaporazione automatica utilizza funzionamento è possibile che si formi della brina l'acqua raccolta per raffreddare le bobine del sull'evaporatore. L'unità inizia automaticamente lo condensatore e migliorare le prestazioni, per cui sbrinamento e la spia POWER lampeggia. -
Page 50: Risoluzione Dei Problemi
Pulizia del filtro dell'aria (ogni due settimane) L'accumulo di polvere sul filtro limita il flusso dell'aria, riducendo l'efficienza del sistema. In caso di blocco, l'unità potrebbe danneggiarsi. Pulire regolarmente il filtro dell'aria. 1. Spegnere l'apparecchio e scollegarlo dalla rete elettrica. 2. -
Page 51: Specifiche Tecniche
Riscal- Condizi- Riscal- Condizi- Riscal- onatore damento onatore damento onatore damento GE959 220-240 V~ 1337 W 1118 W 5,9 A 5,0 A 12000 Btu/h 9500 Btu/h 762 x 470 x 29,5 kg 50 Hz 353 mm Cablaggi elettrici La spina deve venire collegata a una presa di rete appropriata. -
Page 52: Consejos De Seguridad
Consejos de Seguridad El aparato contiene gas inflamable R290. Precaución: ¡Riesgo de incendio! El circuito del refrigerante está sellado. ¡Únicamente el personal cualificado puede realizar las tareas de servicio! Lea este manual antes del uso. Antes de comenzar con las tareas de instalación, lea la sección de instalación del manual. - Page 53 • Este electrodoméstico puede ser utilizado por niños de 8 años o más y personas con las capacidades físicas, sensoriales o mentales reducidas o falta de experiencia y conocimientos si reciben supervisión o instrucciones sobre el uso seguro del electrodoméstico y entienden los peligros asociados. •...
-
Page 54: Contenido Del Conjunto
• Apague y desconecte • Autodesconexión cuando el depósito de agua se llena siempre el suministro de • Reinicio automático en caso de apagones • Función de descongelación automática a alimentación del aparato temperaturas ambientales bajas cuando no esté en uso, antes •... -
Page 55: Familiarizarse Con El Aparato
Familiarizarse con el aparato Panel de Control Asa empotrada Salida de aire con lamas ajustables Filtro de aire extraíble Pantalla Salida de del panel drenaje delantero: Escape de aire superior Muestra el modo de trabajo y la temperatura Ruedas Salida de drenaje inferior Panel de Control 1. -
Page 56: Control Remoto
Control remoto Pantalla Muestra la temperatura y el ajuste del temporizador Interruptor de Pulse para encender o apagar Alimentación Heat (Calor) Pulse para acceder directamente al modo deseado Cool (Frío) Dry (Seco) (Ventilador) Arriba/Abajo Aumente/disminuya la temperatura (16°C-32°C) o el ajuste del temporizador (1-24 h) Timer Ajuste el temporizador para el inicio y la (Temporizador) - Page 57 3. Alargue el kit para ventana ajustable tanto 6. Ajuste la longitud de la manguera de escape como sea necesario y, a continuación, conecte flexible y evite doblarla. la manguera de escape al kit de ventana. 4. Cierre la ventana para asegurar el kit en 7.
-
Page 58: Función Temporizador
Modo Calor Función Reposo Seleccione el modo de calor para aumentar la La función de reposo puede activarse en el modo temperatura de su habitación. frío y en el modo calor. En el modo frío En el modo calor 1. Pulse el botón Modo hasta que el indicador CALOR se encienda. -
Page 59: Descongelación Automática
Descongelación automática Drenaje continuo A temperaturas ambiente bajas, podría El sistema de autoevaporación usa el agua acumularse escarcha en el evaporador durante el acumulada para enfriar las bobinas del condensador funcionamiento. La unidad se pondrá en marcha para mejorar el rendimiento, por lo que no es automáticamente para decongelarse mientras el necesario vaciar el depósito de drenaje en la indicador ENCENDIDO continúa parpadeando. -
Page 60: Resolución De Problemas
Limpieza del filtro de aire (cada dos semanas) La acumulación de polvo en el filtro limitará el flujo de aire. Un flujo de aire restringido reducirá la eficacia del sistema. En caso de bloqueo, puede causar daños en la unidad. Limpie el filtro de aire habitualmente. 1. -
Page 61: Especificaciones Técnicas
Al. x An. x Pr. neto Enfria- Calefa- Enfria- Calefa- Enfria- Calefa- miento cción miento cción miento cción GE959 220-240 V~ 1337 W 1118 W 5,9 A 5,0 A 12000 9500 762 x 470 x 29,5 kg 50 Hz Btu/h Btu/h 353 mm Cableado Eléctrico... -
Page 62: Declaration Of Conformity
Model • Modèle • Modell • Modello • Tipo di apparecchiatura • Tipo de equipo • Modelo Portable Air conditioning Unit GE959 (& -E) Application of Territory Legislation & Low Voltage Directive (LVD) - 2014/35/EU Council Directives(s) Electrical Equipment (Safety) Regulations 2016... - Page 63 +44 (0)845 146 2887 Eire 040 – 2628080 01 60 34 28 80 BE-NL 0800-29129 BE-FR 0800-29229 0800 – 1860806 901-100 133 GE959_ML_A5_v1_20230104.indb 63 GE959_ML_A5_v1_20230104.indb 63 2023/1/4 17:37:34 2023/1/4 17:37:34...
- Page 64 http://www.polar-refrigerator.com/ GE959_ML_A5_v1_2023/01/04 GE959_ML_A5_v1_20230104.indb 64 GE959_ML_A5_v1_20230104.indb 64 2023/1/4 17:37:34 2023/1/4 17:37:34...
Need help?
Do you have a question about the GE959 and is the answer not in the manual?
Questions and answers