Table of Contents
Advertisement
Quick Links
Save This Manual for Future Reference
Original Instruction
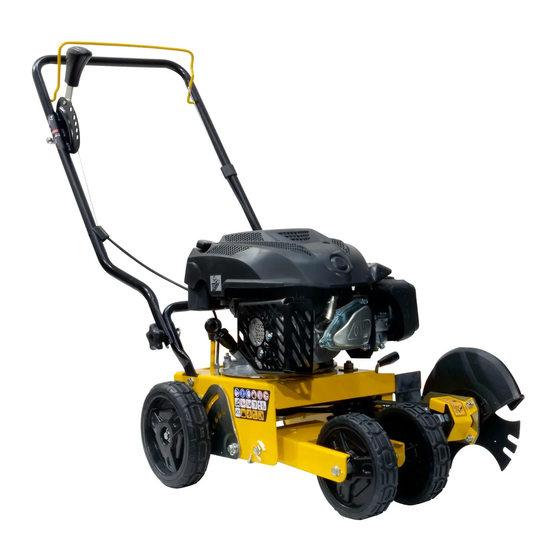
WALK-BEHIND LAWN EDGER
Operator's Manual
MODEL NUMBER :
33909
SERIAL NUMBER :
Both model number and serial number may be found on the main label.
You should record both of them in a safe place for future use.
FOR YOUR SAFETY
READ AND UNDERSTAND THE ENTIRE MANUAL BEFORE
OPERATING MACHINE
Advertisement
Table of Contents

Related Manuals for TOPMAQ 33909


Summary of Contents for TOPMAQ 33909
- Page 1 Original Instruction WALK-BEHIND LAWN EDGER Operator’s Manual MODEL NUMBER : 33909 SERIAL NUMBER : Both model number and serial number may be found on the main label. You should record both of them in a safe place for future use.
-
Page 2: Recycling And Disposal
Assembly information. Know your machine Features & Controls Operation Maintenance Specifications Storage Trouble Shooting Parts Schedule Model Number 33909 Displacement 150cc Max. Cutting Depth 57 mm Blade Size 228 mm Blade Thickness 2.5 mm Cutting Height Options: 6-position Weight... - Page 3 SYMBOLS Shut off the engine, disconnect T h e r a t i n g p l a t e o n y o u r m a c h i n e m a y spark plug wire, and make certain all show symbols.
- Page 4 safety glasses with side shields when operating and SAFETY while performing an adjustment or repair. General Safety Rules Always use approved ear protection while you operate the product. Noise for a long period can cause noise- induced hearing loss. UNDERSTAND YOUR MACHINE Always keep hands and feet away from all moving Read this manual and labels affixed to the machine parts during operation.
-
Page 5: Specific Safety Rules
Keep a Class B fire extinguisher on hand when your skin and change clothes immediately. operating this machine in dry areas as a precautionary Store fuel in containers specifically designed and measure. approved for fuel storage. The muffler keeps the noise levels to a minimum and Store fuel in a cool, well-ventilated area, safely away sends the exhaust fumes away from the operator. - Page 6 OPERATION SAFETY by slipping or tripping. Do not hold on to the edger if Do not force the machine. Use the correct machine for you are falling; release the handle immediately. your application. The correct machine will do the job If the machine should start to make an unusual noise or better and safer at the rate for which it is designed.
-
Page 7: Contents Supplied
continued use. For safety protection, frequently check excessive grease of carbon build up to reduce the all edger components and replace immediately with chance of a fire hazard. original equipment manufacture’s parts only. Use Never douse or squirt the unit with water or any other of parts which do not meet the original equipment liquid. -
Page 8: Upper Handle
Remove the bolts and wing knobs from the ASSEMBLY handle. This walk-behind lawn edger was partially Align the holes in the upper handle with assembled at the factory. To assemble your the holes in the lower handle, then secure machine follow the below instructions. and tighten by using the bolts and wing knobs. - Page 9 C O N T R O L B A R A N D C O N T R O L CABLE Hook the tabs of the control bar into the holes on the upper handle. Attach the Z type end of the cable into the control bar from outside to inner side as shown.
-
Page 10: Know Your Machine
KNOW YOUR MACHINE Features and Controls Control Bar Cutting Depth Control Lever Primer Bulb Curb Wheel Height Lock Plate Adjustable Front Wheel Curb Wheel Adjustment Lever Blade Angle Adjustment Lever Edger Blade Walk-Behind Lawn Edger... -
Page 11: Operation
Control Bar ADD OIL TO ENGINE Squeeze the control bar allows the engine to start The engine is shipped without oil. and run. Release the lever stops the engine. Once the engine is started, the blade will start rotating. Do not start the engine before adding oil. - Page 12 IMPORTANT: DO NOT OVERFILL! This equipment and/or its engine may include evaporative emissions c o n t r o l s y s t e m c o m p o n e n t s , r e q u i r e d t o m e e t E P A a n d / o r C A R B r e g u l a t i o n s , t h a t w i l l only function properly when the fuel tank has been filled to the...
-
Page 13: Adjusting Cutting Depth
CHANGING THE CUTTING ANGLE The blade can be adjusted 20 degrees from vertical in either direction. This will allow you to use the edger for beveled edging. Using the beveled edge at a deep depth will cut a trench into the ground. ADJUSTING CUTTING DEPTH Move the depth control lever forward to increase the depth. -
Page 14: Starting Engine
STARTING ENGINE EDGING LAWNS Edging is best performed when conditions Be sure no one other than the are dry. If the soil is too wet, dirt may clog operator is standing near the edger up in the blade guard and cause splattering. while starting engine or operating Move edger to a desired area to begin the unit. -
Page 15: Maintenance
MAINTENANCE In the maintenance schedule you can see which Always stop engine, allow engine parts of your machine requires maintenance, to cool, disconnect stark plug, and at which intervals it should take place. The and ground against engine before intervals are calculated based on average use performing any type of maintenance of the machine, and may differ depending on on your machine. -
Page 16: Engine Care
ENGINE CARE Refer to the engine manual packed A list of key engine maintenance jobs required s e p a r a t e l y w i t h y o u r u n i t f o r more detailed information and a for good performance by the edger are listed below. -
Page 17: Belt Replacement
BELT REPLACEMENT The edger drive belt is subject to wear and should be replaced if any signs of cracking, shredding or rotting are present. To replace the belt, proceed as follows: Stop the engine. Wait for all moving parts to stop. Disconnect the wire from the spark plug. -
Page 18: Troubleshooting
STORAGE Do not use strong detergents or petroleum based cleaners when cleaning plastic parts. Chemicals can If the walk-behind lawn edger will not be used damage plastics. for a period longer than 30 days, follow the steps below to prepare your unit for storage. Inspect for any loose or damaged parts. - Page 19 Connect and tighten spark Spark plug wire is loose plug wire Clean fuel line. Fill tank with Blocked fuel line or stale fuel clean, fresh gasoline Vent plugged Engine runs Clear vent Water or dirt in fuel system erratically Drain fuel tank. Refill with Dirty air cleaner fresh fuel Improper...
-
Page 20: Parts Schedule
PARTS SCHEDULE Walk-Behind Lawn Edger... -
Page 21: Parts List
PARTS LIST Description Q'ty Description Q'ty Control Bar Lock Nut M10 Upper Handle Chassis Screw M5x10 Short Limit Sleeve Depth Control Lever Knob-Right Adjustment Spring Depth Control Lever Fixed Shaft Lock Nut M8 Long Limit Sleeve Lock Nut M12 Depth Control Lever Knob-Left Flat Washer M12 Bolt M8x45 Support Sleeve... - Page 22 Description Q'ty Blade Flange Nut M16 Blade Guard Front Wheel Spacer 1 Rear Wheel Belt Mud Rubber Flap Throttle Control Cable Cutting Depth Control Cable Walk-Behind Lawn Edger...
- Page 23 Walk-Behind Lawn Edger Walk-Behind Lawn Edger...
Need help?
Do you have a question about the 33909 and is the answer not in the manual?
Questions and answers