Table of Contents
Advertisement
Quick Links
economical
leading design
clean air approved
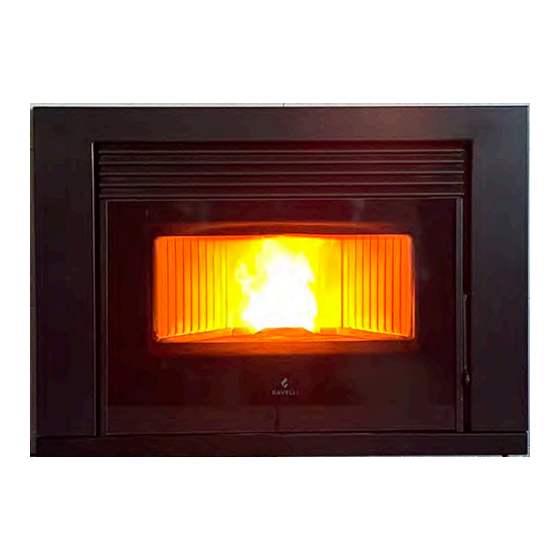
Sofia
Wood Pellet Fire
Owners & Installation Manual
PLEASE READ THIS ENTIRE MANUAL BEFORE INSTALLATION, AND USE OF THIS WOOD PELLET FIRE.
FAILURE TO FOLLOW THESE INSTRUCTIONS COULD RESULT IN PROPERTY DAMAGE, BODILY INJURY,
OR EVEN DEATH.
Contact your local building or fire official about restrictions and installation requirement in your area.
Advertisement
Chapters
Table of Contents

Related Manuals for Pellet Fire Solutions RAVELLI Sofia

Summary of Contents for Pellet Fire Solutions RAVELLI Sofia
- Page 1 economical leading design clean air approved Sofia Wood Pellet Fire Owners & Installation Manual PLEASE READ THIS ENTIRE MANUAL BEFORE INSTALLATION, AND USE OF THIS WOOD PELLET FIRE. FAILURE TO FOLLOW THESE INSTRUCTIONS COULD RESULT IN PROPERTY DAMAGE, BODILY INJURY, OR EVEN DEATH.
- Page 2 Wood Pellet Fire by a non-registered Sofia installer will void the warranty, and may result in your local authority refusing to approve the necessary permits. If you require a registered Pellet Fire Solutions Installer, please contact us directly on info@pelletfiresolutions.co.nz...
-
Page 3: Table Of Contents
Owner's Section - Table of Contents Introduction................5 1.1 Specifications................ 5 Safety Warnings & Recommendations....... 6 Installation................... 6 2.2 Deciding where to locate your wood pellet burning fire.. 7 2.3 Ash.................... 7 2.4 Clinkering.................. 7 2.5 Filling Fuel Hopper.............. 7 Flammable Liquids..............8 2.7 Operating Instructions............... 8 Safety Devices................Responsibility................8 2.10 Spare Parts................. - Page 4 Operating your Pellet Fire............. 15 Description of Handheld Set............15 Handheld Touch Radio Initialization........... 15 Description of the Display............16 6.4 Time and Date Settings............... 17 Loading the Auger............... 17 6.6 Setting Operating Temperature and Power....... 18 Turning the Device on..............18 Operating Phases of the Stove..........6.9.1 Alarms ..................
-
Page 5: Introduction
All national and local regulations shall be complied with when installing this appliance. Your local Pellet Fire Solutions dealer will be happy to assist you in obtaining information with regards to your local building codes and installation restrictions. -
Page 6: Safety Warnings & Recommendations
Please read this manual before installing or operating the stove. If you require further information, please contact your Pellet Fire Solutions dealer. Installatio n mus t b e performe d b y authorize d personnel, who must give the purchaser a declaration of conformity of the appliance, and who will installed. -
Page 7: Deciding Where To Locate Your Wood Pellet Burning Fire
• Do not clean the stove until the structure and the ashes have cooled down completely. Carry out all operations with maximum safety. Sofia should be installed in a centrally located position within the home. This will assist the appliance to perform to the level required. As the Sofia heats space by convecting air through... -
Page 8: Flammable Liquids
Pellet Fire Solutions declines all responsibility deriving from the improper use of the stove, from its incorrect use by the user, by unauthorised modifications and/or repairs, or from the use of spare parts which are not original. -
Page 9: What Are Wood Pellets
What are Wood Pellets? Wood pellets are made from sawdust and wood shavings. The material used cannot contain any foreign substance such as glue, varnish or synthetic substances. Subjecting it to high pressure, the wood is pressed through a plate with holes, and due to the high pressure, the sawdust is heated activating the natural binders of the wood. -
Page 10: Pellet Combustion
Pellet Combustion Combustion is simply a chemical reaction between combustible and carburant. The result of this reaction is the heat. The three elements that are required for combustion are: -Combustible (pellet) -Carburant (oxygen available in the air) -Ignition (electrical resistance for ignition) PELLET To achieve combustion, the combustible and the carburant must be available in the correct proportions. -
Page 11: Maintenance And Cleaning
5. Maintenance and Cleaning Maintenance of the stove must be performed at least once a year and should be planned in advance with the Technical Assistance Service. In some conditions, such as turning the stove on and off or inappropriate use, the combustion products can contain small soot particles that build up in the smoke evacuation system. -
Page 12: Cleaning The Ash Drawer
Cleaning the Ash Drawer The ash drawer must be cleaned every 30 days, (depending on the amount of time the stove is used and what type of pellet is used). To clean the ash drawer, proceed as follows: Slide for ashes Cleaning the Pellet Hopper To clean the pellet tank, proceed as follows:... - Page 13 To clean the combustion chamber, proceed as follows: 1- Remove the vermiculite stop Clean up 2-Deep cleaning INSPECTION HATCH GASKET Note: The operation must be carried out with a cold stove, using an ash-type aspirator.
-
Page 14: End Of Season
5.7 End of Season At the end of every season we recommend vacuuming out any ash and dust that may still be inside. 5.8 Trouble Shooting The stove does not work • closely follow the directions in the dedicated chapter of this manual. •... -
Page 15: Operating Your Pellet Fire
Fuel supply consists in the insertion of pellets from the top of the stove, by opening the door. During pellet loading prevent the pel- are properly close. let bag from coming into contact with hot surfaces. How to load the pellets Fuel supply consists in the insertion of pellets from the top of the stove, by opening the door. -
Page 16: Description Of The Display
Serial port Handheld cable connection socket ADJ radio: button to connect your handheld to the board Signalling LED Red: active alarm Yellow: Waiting communication with the handheld set Green: Cooker switched on Cooker ON/OFF key The flashing yellow LED indicates that the circuit board is waiting to receive the signal from the handheld set. pressing the enter key on the handheld set, the components start communicating with each other. -
Page 17: Time And Date Settings
6.4 Time and date setting Below are given the steps for accessing the relative menu. MENU USER USER SCREW FEEDING COMFORT CLIMA USER CHRONOTHER SETTINGS MANUFACTURER AIR-PELLET SET ENGINEER STOVE STATE Press the key “access menu” to Press the key Press the key “selection”... -
Page 18: Setting Operating Temperature And Power
ALWAYS EMPTY THE BRAZIER BEFORE TURNING THE STOVE ON AND ALWAYS CHECK THAT ALL NONE OF ITS HOLES IS CLOGGED NEVER EMPTY THE RBAZIER INSIDE THE HOPPER. FIRE HAZARD. Setting Operating Temperature and Power: Set the two values following the indications given in the chapter “Description of display”... - Page 19 Comfort climate The activation of this function enables the stove to reduce pellet consumption by activating the modulation phases, after the desired temperature has been reached. Subsequently, the stove checks that the temperature is maintained steady for a preset time. If this condition is met, it automatically switches off, and on display appears the writing ECO.
- Page 20 Description of menu functions Press the key to access the MENU page MENU USER MANUFACTURER ENGINEER The TECHNICIAN and MANUFACTURER menus are protected by password. Chronothermostat With the Chrono-thermostat function you can program the automatic switch ON/OFF of the stove for each day of the week for each day of the week in 4 independent time intervals (SET CHRONO 1-2-3-4) Below are given the steps for accessing the relative menu starting from Stand-By mode.
- Page 21 Settable switch-on program Settable switch-off program Day of the week with active program Number of "chrono" program (1-2-3-4) Setting the power upon programming Setting ambient temperature By pressing the Increment key you can change each value and, at step 3, enable the days of the week; By pressing the Increment key you can change each value and, at step 3, enable the days of the week;...
- Page 22 Stove State Below are given the steps for accessing the relative menu starting from Stand-By mode. MENU USER USER SCREW FEEDING SCREW FEEDING USER CHRONOTHERMOSTAT CHRONOTHERMOSTAT MANUFACTURER AIR-PELLET SET ENGINEER AIR-PELLET SET STOVE STATE STOVE STATE Press the key Press the key “access Press the key “selection”...
- Page 23 Settings Below are given the steps for accessing the relative menu starting from Stand-By mode. MENU USER USER SCREW FEEDING COMFORT CLIMA USER CHRONOTHERMOSTAT SETTINGS MANUFACTURER AIR-PELLET SET ENGINEER STOVE STATE Press the key Press the key “confirm” “selection” to quickly Press the key “access menu”...
- Page 24 Stove phase synthetical layout PHASE DESCRIPTION The stove is in the switch off phase and the cooling phase has not been completed yet. FINAL CLEANING SWITCH ON The heater pre-heating phase has started and the pellets start to fall into the grate. The pellets ignite and take advantage of the heat in the intake air that passes through the WAITING FOR FLAME incandescent heater tube.
-
Page 25: Alarms
GENERIC ALARM The stove is in alarm state; refer to the throubleshooting chapter. The stove has detected an anomaly; refer to the throubleshooting chapter. ANOMALY (general) Warning Pop-Up FLAME DESCRIPTION Adjust RDS RDS SYSTEM ADJUSTMENT system It shows that the testing procedure and initial parameter calibration have not been completed REQUEST or have been performed incorrectly. - Page 26 - Check for the presence of pellets in the - The pellet tank is empty. container. Top up, if necessary. - Empty the tank to see if there are any - The gear motor is not loading pellets objects inside that may prevent the proper operation of the auger.
-
Page 27: Maintenance Record
Maintenance Record DATE WORK CARRIED OUT SIGNATURE... -
Page 28: Warranty Information
Pedestals, separately (see Panels & Legs clarifications Pellet Fire Solutions warrants to the original owner of the and exclusions pellet fire at the site of installation, and to any transferee below). taking ownership of the pellet fire at the original site of... -
Page 29: Warranty Exclusions
Warranty Exclusions The warranty is void if: The pellet fire has been over-fired or operated in This warranty does not cover the following: atmospheres contaminated by chlorine, fluorine, or other • Changes in surface finishes as a result of normal use. damaging chemicals. -
Page 30: Proof Of Purchase/Warranty
9. Proof of Purchase/Warranty Use this page to note down the details of your wood pellet fi re purchase, and attach the receipt and any other documents/ business cards from the retailer that sold you the fi re. Name of Store where Pellet fi re was purchased: ....................... Date of Purchase: ....................... - Page 31 Installation Section - Table of Contents 1. Dimensions Ravelli Sofia............Deciding where to locate your wood pellet burning fire place..Floor Protection................. Installation ................Dimensions – Sofia Insert & Built in Heater........ Clearances & Specifications ............Example of Cavity Design............
-
Page 32: Dimensions Ravelli Sofia
1. Dimensions Ravelli Sofia Unit of Measurement Height Width Depth Weight Diameter of smoke exhaust duct Min.-max. calorofic power 3.0 - 9.0 Min.-max. hourly consump- Kg/h 0.6 – 1.45 tion of pellets Electrical power absorbed during operation Supply V - Hz 220 –... -
Page 33: Deciding Where To Locate Your Wood Pellet Burning Fire Place
Therefore a 150mm forward projecting floor protector will be sufficient. Hearth testing of the Ravelli Sofia ARS 22/3116 and 22/3112 R1 showed that on exposed combustible surfaces front of the freestanding heater, no measure locations exceeded the temperature limits specified in AS/NZS 2918:2018 The unit can be installed in an existing fireplace or in a special compartment built to measure and covered with plasterboard;... -
Page 34: Installation
RBV 7010 COMPACT MPACT Installation Disegno tecnico - Dessin technique - Technical drawing General Information chnique - Technical drawing There are two critical components when installing a Sofia Insert Wood Pellet Fire: 1) Ensuring the wall cavity is the necessary size and 2) ensuring relevant clearances to combustibles are adhered to both inside and outside the cavity. -
Page 35: Clearances & Specifications
2.2 Clearances & Specification Installing into an existing cavity - New Build or Masonry As the Sofia Insert Wood Pellet Fire is typically installed extend to a minimum of 320mm above the top of the fi into a m asonry cavity, it can still be installed into Within the cavity, there must be a minimum of 320mm... -
Page 36: Example Of Cavity Design
100mm Page 7... -
Page 37: Positioning Of The Sofia Pellet Fire
Check clearance for service – as the Sofia is Installation of the Ravelli Sofia Wood Pellet Fire must be undertaken by an approved installer, who designed to be pulled out, as long as there is front The fi re requires a 230 volt power supply and access, this should be suffi... -
Page 38: Television Clearances
10. Before connecting the pellet fire electrically, the Producer’s Statement must be forwarded to Pellet Warranty/Producer’s Statement must be forwarded to Pellet Fire Solutions - connection of the exhaust spigot must be completed pelletfiresolutions.co.nz (specifically for non-aluminium pellet fires) with the info@pelletfiresolutions.co.nz... -
Page 39: Seismic Restraint
Adjusting the Support Frame (if required) The Sofia Wood Pellet Fire must be installed on the supplied, adjustable support frame. The height of this frame can be set at the home- owner’s desired height. The frame is adjusted by manipulating the bolts, which are located on each of the four legs to achieve the desired height. -
Page 40: Examples Of Installation
Examples of installation of a pellet insert In this type of installation we can notice that the fitting was used to enable connecting the insert to the chimney Protection from rain (so-called “bayonet” mount). Flue For safety reasons and to ensure proper operation, we recommend you fit pipes into the chimney. -
Page 41: Electrical Connection
2.9 Electrical Connection ! IMPORTANT The connections must be set up by a technician that is qualified and/or authorised by the Manufacturer. Electrical connection The insert is equipped with a three-pole cable (Fig.2), for a correct installation it is necessary to provide the dedicated electrical connection under magneto-thermic (Fig.1) of adequate size according to the absorption of the generator in order to guarantee the maximum safety of the installation. -
Page 42: Circuit Board Layout
Schema elettrico per modelli: Schema elettrico AIR TOUCH RCV1000L 2.10 Circuit Board Layout Relè 220V doppio contatto Fase Fase RETE ALIMENTAZIONE 220 V Microcontatto apertura camino RETE ALIMENTAZIONE 220 V Neutro Neutro LEGEND: Safety devices Probes Sicurezze T1 - Vacuum switch S1 - Fume probe (J) T2 - Pellet safety S2 - External thermostat... -
Page 43: Sofia Insert Flue Kit (#56)
2.11 Ravelli Sofia Insert Flue Kit This flue kit may be used in replacement applications in masonry chimneys. The overall height of the flue is 6.0m. Kit is supplied in two cartons. Each 56 Insert Flue Kit contains:- Stainless steel inner liner ø75mm x 900mm long... -
Page 44: Sofia Built In Flue Kit (#55)
2.12 Ravelli Sofia (non-Chimney installation) This flue kit may be used in new or existing timber chimneys. The overall height of the flue is 3.6m. Kit is supplied in a carton. 600mm from roof penetration Each 55 Built-in-Heater Flue Kit... -
Page 45: Installation Data Sheet
3. Installation Data Sheet Name of Owner: Name of Dealer: ________________________________ ________________________________ Address: Address: ________________________________ ________________________________ ________________________________ ________________________________ ________________________________ ________________________________ ________________________________ ________________________________ Phone: Phone: ________________________________ ________________________________ Model: __________________________ Name of Installer: ________________________________ Serial Number: ____________________ Address: Date of Purchase: __________ (dd/mm/yy) ________________________________ Date of Installation: _________... -
Page 46: Maintenance Record
4. Maintenance Record DATE WORK CARRIED OUT SIGNATURE... -
Page 47: Producer Statement And Warranty Registration Form
Declaration by Owner: I hereby certify the above particulars are true and correct. My Pellet Fire Technician has demonstrated to me the correct operation of my Pellet Fire. I understand that warranty conditions require an authorised Pellet Fire Solutions Installer to complete the installation...
Need help?
Do you have a question about the RAVELLI Sofia and is the answer not in the manual?
Questions and answers