Table of Contents
Advertisement
Quick Links
Advertisement
Table of Contents

Related Manuals for Bertram 700


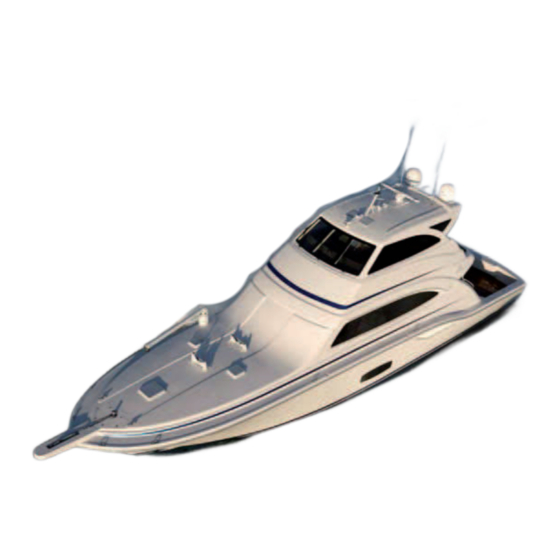
Summary of Contents for Bertram 700
- Page 1 OWNER’S MANUAL...
- Page 2 This manual has been created by Studio ti in compliance with UNI EN ISO 10240:2004, for BERTRAM. Any reprinting, either in whole or in part, without prior written approval by BERTRAM is strictly prohibited. 3663 N.W. 21st Street, Miami, Florida 33142 (305) 633-8011 www.studio-ti.it...
- Page 3 - Height maximum above waterline 19 ft 6 in - 5,93 m** - Cockpit surface 270 sq ft - 15.6 m manual, but it will be delivered separately by BERTRAM and will have to be stored with this manual. Displacements - Displacement, unladen 95681 lb - 43.4 ton...
- Page 4 Exclusions. This Limited Warranty is NOT applicable to: registered subsequent owners, that it will repair or replace defects in (a) items manufactured by Bertram for one (1) year and (b) the yacht’s hull and its Damage to a yacht part or component, caused by any alteration, fiberglass structural components for five (5) years.
- Page 5 Modifications, Subsequent Owners. This limited warranty may only be draft and performance characteristics; since these are estimated or modified in writing by an authorized Bertram officer. No dealer or other party obtained from test runs. may modify the Limited Warranty. Subsequent owners to the First Owner...
- Page 6 NOTES: Studio ti 75608 700-08EB...
- Page 7 INDEX...
-
Page 8: Table Of Contents
MOORING & DOCKING..............51 5.5.6 Hydraulic Cylinder ................85 4.7.1 Before leaving the shore..............51 BOW THRUSTER ................87 4.7.2 Departing from the shore ..............51 ANTI ROLLING GYRO (OPTIONAL) ..........89 4.7.3 Before entering the harbor, be sure you ......... 52 Studio ti 75608 700-08EB... - Page 9 ENGINE CONTROL PANEL ............141 FRESH WATER SYSTEM ..............188 PROPELLERS ................. 142 REFILLING THE WATER TANK............193 8.5.1 Propellers service ................. 144 FRESH WATER SYSTEM MAINTENANCE ........194 8.5.2 Periodic checks on propellers............145 9.4.1 Fresh water tank................194 Studio ti 75608 700-08EB...
- Page 10 Staterooms with head: Master, guests, VIP ........288 10.4.2 SECTION B - Circuit breakers protecting the 230 V AC users ..245 11.4 APPLIANCES..................290 10.5 24 V DC USER HELM STATION ELECTRIC PANEL...... 247 11.4.1 Skylights ..................290 Studio ti 75608 700-08EB...
- Page 11 BLACK AND GRAY WATER SYSTEM DRAIN.........359 14.1 GENERAL MAINTENANCE SAFETY STANDARDS....... 332 15.5 PROPELLERS SHAFTS ..............360 14.2 SACRIFICAL ANODES ..............337 15.6 FRESH WATER SYSTEM ..............361 14.2.1 Periodic Check Of External Anodes ..........338 15.7 BILGE PUMP ..................362 Studio ti 75608 700-08EB...
- Page 12 INDEX 15.8 FRESH WATER PUMP..............363 15.9 OIL TRANSFER PUMP..............364 15.10 ELECTRO-HYDRAULIC HELM SYSTEM........367 15.11 TRIM TAB SYSTEM................. 371 15.12 GLENDINNING CABLEMASTER............. 373 15.13 AIR-CONDITIONING UNIT .............. 375 Studio ti 75608 700-08EB...
- Page 13 INDEX NOTES: Studio ti 75608 700-08EB...
- Page 14 INDEX NOTES: Studio ti 75608 700-08EB...
-
Page 15: Introduction
INTRODUCTION HOW TO USE THIS MANUAL DESCRIPTION OF THE YACHT GETTING UNDERWAY INSTRUMENTATION & EQUIPMENT HELM STATION ON DECK PROPULSION SYSTEMS HYDRAULIC SYSTEMS ELECTRICAL SYSTEM INTERIOR DETAILS INTRODUCTION SAFETY DEVICES & EQUIPMENT YACHT LIFTING & ONSHORE HANDING MAINTENANCE TROUBLESHOOTING... -
Page 16: Welcome
No single book can cover all the aspects of pleasure boating and BERTRAM personnel. seamanship, but your BERTRAM Owner’s Manual is a key resource for learning about your yacht and its equipment, and for acquiring an understanding of its operational characteristics and maintenance requirements. - Page 17 − INSTRUMENTATION & EQUIPMENT − HELM STATION − ON DECK − PROPULSION SYSTEMS − HYDRAULIC SYSTEMS − ELECTRICAL SYSTEM − INTERIOR DETAILS − SAFETY DEVICES & EQUIPMENT − YACHT LIFTING & ONSHORE HANDING − MAINTENANCE − TROUBLESHOOTING Studio ti 75608 700-08EB...
-
Page 18: Customer Support
CUSTOMER SUPPORT BERTRAM WARNING 3663 N.W. 21st Street Miami, Florida 33142 In case you lose or damage the manual, BERTRAM will always be able (305) 633-8011 to supply you with a new copy. Fax (305) 635-1388 www.bertram.com To ensure a readily available supply of spare parts and the capability to WARNING provide prompt and reliable service, BERTRAM selects all your yacht’s... - Page 19 If necessary, damages to the yacht and the people on board. BERTRAM Customer Support Service will deal with your requests in order to obtain fast services and the respect of the applicable rules. At purchasing, the owner should mail the Warranty Registration Card to activate the Limited Warranty.
-
Page 20: Hull Identification
INTRODUCTION HULL IDENTIFICATION BERTRAM has focused on building high quality yachts for the You will find the hull identification numbers affixed to your yacht in two international yachting market since 1961. Safety is a high priority, and all places. BERTRAM yachts undergo certification to the requirements of the One is integral to the hull laminate, and the other is engraved on the applicable registries to obtain a Classification Certificate. - Page 21 INTRODUCTION NOTES: Studio ti 75608 700-08EB...
- Page 22 INTRODUCTION NOTES: Studio ti 75608 700-08EB...
-
Page 23: How To Use This Manual
INTRODUCTION HOW TO USE THIS MANUAL DESCRIPTION OF THE YACHT GETTING UNDERWAY INSTRUMENTATION & EQUIPMENT HELM STATION ON DECK PROPULSION SYSTEMS HYDRAULIC SYSTEMS ELECTRICAL SYSTEM INTERIOR DETAILS HOW TO USE THIS MANUAL SAFETY DEVICES & EQUIPMENT YACHT LIFTING & ONSHORE HANDING MAINTENANCE TROUBLESHOOTING... -
Page 24: Read This Manual Carefully
This Yacht comes with the BERTRAM Limited Warranty, which describes the terms and conditions under which defects in your yacht will be repaired. Familiarize yourself with the warranty and follow instructions regarding proper operation and maintenance. -
Page 25: Stay Alert
CAUTION Indicates a potentially hazardous situation that, if not avoided, may result in minor or moderate injury or property damage. This signal word may also be used to alert against unsafe practices. Studio ti 75608 700-08EB... -
Page 26: Special Safety Warnings
The cause of the burn is described here. Forbidden areas: It forbids the access, the transit or the stop in a dangerous area. DANGER The forbidden area is described here: it is forbidden to access dangerous areas or to approach moving mechanical parts. Studio ti 75608 700-08EB... -
Page 27: Know Your Responsibilities As A Yacht Owner/Operator
OWNER/OPERATOR this manual for important information about safety procedures. If your Bertram is to be operated in the waters regulated by the United Every yacht owner and operator must be knowledgeable about the yacht States Coast Guard, there are certain requirements that must be met. - Page 28 HOW TO USE THIS HANDBOOK NOTES: Studio ti 75608 700-08EB...
-
Page 29: Description Of The Yacht
INTRODUCTION HOW TO USE THIS MANUAL DESCRIPTION OF THE YACHT GETTING UNDERWAY INSTRUMENTATION & EQUIPMENT HELM STATION ON DECK PROPULSION SYSTEMS HYDRAULIC SYSTEMS ELECTRICAL SYSTEM INTERIOR DETAILS DESCRIPTION OF THE YACHT SAFETY DEVICES & EQUIPMENT YACHT LIFTING & ONSHORE HANDING MAINTENANCE TROUBLESHOOTING... -
Page 30: Main Dimensions And Weight Data
− Height maximum above waterline 19 ft 6 in - 5,93 m − Cockpit surface 270 sq ft - 15.6 m − Displacement, unladen 95681 lb - 43.4 ton − Displacement fully laden 119500 lbs - 54.2 ton Studio ti 75608 700-08EB... -
Page 31: Main Technical Data
WARNING Power 2217 mhp/1630 kW at 2450 rpm Fuel consumption per engine BERTRAM Yachts are designed to obtain a correct transversal trim with at rated power 414.4 l/h (109.5 gal) full optional equipment, and with spare propellers and shafts. If the yacht is not equipped with full optional, spare propellers and... -
Page 32: Mooring Equipment
DESCRIPTION OF THE YACHT MOORING EQUIPMENT 1. Cleats 2. Chocks Studio ti 75608 700-08EB... -
Page 33: Warning And Safety Labels
Keep all the labels clean and legible. Replace them if they are lost or damaged. The extinguisher plate (A) is located near each fire extinguisher. This section shows the locations of the warning notice labels with their application points. Studio ti 75608 700-08EB... - Page 34 DESCRIPTION OF THE YACHT NOTES: Studio ti 75608 700-08EB...
-
Page 35: Getting Underway
INTRODUCTION HOW TO USE THIS MANUAL DESCRIPTION OF THE YACHT GETTING UNDERWAY INSTRUMENTATION & EQUIPMENT HELM STATION ON DECK PROPULSION SYSTEMS HYDRAULIC SYSTEMS ELECTRICAL SYSTEM INTERIOR DETAILS GETTING UNDERWAY SAFETY DEVICES & EQUIPMENT YACHT LIFTING & ONSHORE HANDING MAINTENANCE TROUBLESHOOTING... -
Page 36: Your Keys
The universal key opens a door even if it is locked from inside. Specific task keys are described as follows. The engine keys are provided with different colored BERTRAM floating key holders. Two (2) copies are included for each engine. -
Page 37: Preparing To Get Underway
CLOSE the thru-hull fitting by moving the valve lever perpendicularly to the thru-hull fitting body. Remove and clean the filter baskets, reassemble the filters and then OPEN the thru-hull valves. Studio ti 75608 700-08EB... - Page 38 − Check that all loose materials are properly fixed. − Check that the loads are distributed evenly and the yacht floats on its BERTRAM furnishes the equipment required by the international lines without excessive list and in proper fore-and-aft trim.
-
Page 39: Safety Equipment Check
The designated helmsman must ensure that all passengers are properly informed of safety equipment locations and of equipment proper use (fire extinguishers, life raft, throwable PFD’s, personal PFD’s, etc.). Studio ti 75608 700-08EB... -
Page 40: General Safety Considerations
People can fall off the yacht at any time. Do not hesitate to require that persons wear PFD’s (life jackets). PFD’s may be worn in any weather, underway, at the shore, or at anchor. Studio ti 75608 700-08EB... -
Page 41: Final Pre-Departure Checklist
− Switch on all 24 V circuits from the switch panel board. Check the proper operation of each system and then switch off the systems not to be used. − Check the battery charge level (Volts) on the switch panel board. Recharge the battery if indicated. Studio ti 75608 700-08EB... -
Page 42: Starting The Engines
− Check if alternator drive belts are cracked, broken or damaged. − Check for the presence of loose wire connections, or worn out wires. − Check the fuel quantity. Drain water from relevant separator. Open the fuel supply valve. Studio ti 75608 700-08EB... - Page 43 Pour lubricating oil into engine by means of proper fill fitting (2). For refilling quantity “Technical Data” DANGER handbooks delivered by MTU. Before starting an engine, make sure that nobody stays within the dangerous area of the engineroom. Studio ti 75608 700-08EB...
- Page 44 − Place it back up to detent. − Pull out dipstick again. The oil level should be between the two notches in the dipstick and must never drop below the lower notch. Top up oil as necessary. Studio ti 75608 700-08EB...
- Page 45 − Bring both control heads (1), (2) to “NEUTRAL” position (vertical individual levers). − Press the button on the panel of control heads according to the mode and head you intend to actuate. • EASIDOCK • AUTOTROLL • ONE LEVER • WARM UP Studio ti 75608 700-08EB...
- Page 46 WARNING We suggest avoiding slow running for periods longer than 5 minutes. The low idle run implies major wear of the engine mechanical parts and is the most harmful of the poisonous exhausts. Studio ti 75608 700-08EB...
-
Page 47: Control & Drive
1000 rpm. WARNING Even if the automatic pilot controls the route, supervise navigation anyway. Studio ti 75608 700-08EB... -
Page 48: Checks After Start Of Thrust Engines
− Plug out the shore cords if connected. − Remove moorings and check for loose mooring ropes or floating objects hindering the propellers movement. DANGER Make sure that no crew stands in front of gas exhausts and near the mooring ropes. Studio ti 75608 700-08EB... -
Page 49: Stopping The Engines
− check for possible leaks from the shaft seals; − rinse the yacht with fresh water; − connect electrical power supply from shore; − keep air ventilators in the engineroom running for about 30 minutes for ventilation and air cooling. Studio ti 75608 700-08EB... -
Page 50: Navigation With Only One Engine
This operation is allowed only in case of life danger for the persons onboard and for the safety of the yacht itself, however when the engine is running it should not run higher than 1000 rpm. Studio ti 75608 700-08EB... -
Page 51: Mooring & Docking
A basic rule to keep in mind is to maneuver the yacht at low speed, in order to have enough time to react and for evaluating the situation; then, in case of accidental contact with other vessels, you will not cause any serious damage. Studio ti 75608 700-08EB... -
Page 52: Before Entering The Harbor, Be Sure You
If the yacht is to be side moored, haul on fore and aft lines until yacht is close and parallel to the shore. Adjust the fenders for best protection of the yacht’s hull. Studio ti 75608 700-08EB... -
Page 53: When The Yacht Is Safely Secured To The Shore
− check that the shore power cable is properly connected, has enough slack and will not fall into the water. − turn OFF the battery switch. − check that all deck equipment is stowed correctly. Studio ti 75608 700-08EB... - Page 54 Be extremely cautious when near hot and moving parts. Wear hearing protection if the engines are running. Studio ti 75608 700-08EB...
- Page 55 Open hatches can be hazards when the yacht is underway. To avoid injury or death to persons onboard and/or flooding when the yacht is underway, ensure that all deck hatches, portlights, engineroom hatches, etc. are secured in the CLOSED position before getting underway. Studio ti 75608 700-08EB...
-
Page 56: Operating The Yacht Underway
If necessary, or when in restricted waters, you can steer the yacht with the engines by varying and/or reversing the engine speeds and alternating power from port and starboard engines. Studio ti 75608 700-08EB... -
Page 57: Operating In Shallow Water
“Trim Tabs” in the AT THE HELM chapter. closure is not watertight, do not aim water directly onto the window − Adjust the speed to accommodate sea conditions. when washing down the yacht. Studio ti 75608 700-08EB... - Page 58 No one should be seated on the spoiler or forward decks when the yacht is underway. Studio ti 75608 700-08EB...
-
Page 59: Precautions While Underway
The autopilot cannot see. changes in yacht speed or during maneuvering. No one should be seated on the spoiler or forward decks when the yacht is underway. Studio ti 75608 700-08EB... - Page 60 This operation is allowed only in case of life danger for the persons onboard and for the safety of the yacht itself, however when the engine is running it should not run higher than 1000 rpm. Studio ti 75608 700-08EB...
-
Page 61: Navigation In Bad Weather Conditions
CAUTION BERTRAM declines any responsibility for the improper use of the yacht, in relation to the wave height conditions. CAUTION... -
Page 62: Weather
In the absence of a state enforcement agency, contact the U.S. Coast Guard office nearest the accident site. Other countries have other reporting requirements. Consult your nation’s boating law enforcement agency. Studio ti 75608 700-08EB... -
Page 63: Anchoring
Operate the anchor windlass with the engines running, in order to stopper. Don’t let the windlass carry the load of anchor chain or line. provide the high voltage required and reduce the stress by slowly moving the yacht toward the anchor without passing the chain. Studio ti 75608 700-08EB... -
Page 64: Determining Scope
Always keep in mind the extent of the arc or circle in which Read ANCHORING PRECAUTIONS on the next paragraph. you’ll swing in relation to other yachts in the anchorage. Studio ti 75608 700-08EB... -
Page 65: Anchoring Precautions
Persons involved with anchoring operations must take care to protect hands and fingers from the windlass gears and to avoid feet or legs being caught. Studio ti 75608 700-08EB... -
Page 66: Fueling The Yacht
(1) carrying a switch and a buzzer. At switch activation, the buzzer starts sounding when the tank is nearly full. By setting the switch to OFF, the buzzer stops. Fueling screen Starboard fuel inlet Studio ti 75608 700-08EB... - Page 67 Keep filters clean. DANGER Do not smoke during refueling. During refueling, do not leave the yacht unattended. During refueling, do not leave the engines running. ENVIRONMENT Dispose of fuel carefully: it is highly polluting. Studio ti 75608 700-08EB...
- Page 68 − Exhaust system removes gases created by the engine and vents − fuel tank - secure fuel tank fill fitting cap them aft. − spills - wipe spillage − Inspect entire system for tightness on a frequent basis. Leaks may permit carbon monoxide exposure. Studio ti 75608 700-08EB...
-
Page 69: Preventive Maintenance
For example, if a maintenance task is scheduled every 100 hours or 3 months; such task must be repeated at 200 hours or after 6 months, at 300 hours or after 9 months and so on. Studio ti 75608 700-08EB... -
Page 70: Cold Weather Maintenance Cautions
For more information on the maintenance and service needs of your yacht and its equipment, see the sections in this manual that reference the specific components, machinery and equipment manufacturer’s manuals for information about special attention during freezing weather. Studio ti 75608 700-08EB... - Page 71 GETTING UNDERWAY NOTES: Studio ti 75608 700-08EB...
- Page 72 GETTING UNDERWAY NOTES: Studio ti 75608 700-08EB...
- Page 73 INTRODUCTION HOW TO USE THIS MANUAL DESCRIPTION OF THE YACHT GETTING UNDERWAY INSTRUMENTATION & EQUIPMENT HELM STATION ON DECK PROPULSION SYSTEMS HYDRAULIC SYSTEMS ELECTRICAL SYSTEM INTERIOR DETAILS INSTRUMENTATION & SAFETY DEVICES & EQUIPMENT EQUIPMENT YACHT LIFTING & ONSHORE HANDING MAINTENANCE TROUBLESHOOTING...
-
Page 74: Instrumentation & Equipment
3. Second helm station drive wheel 4. Helm system power unit 5. Large hydraulic cylinder 6. Small hydraulic cylinder (power-steering) 7. Electric motor with oil pump 8. Tank 9. Control valve block 10. Solenoid valve block Studio ti 75608 700-08EB... -
Page 75: Components Of The System
Electro-hydraulic power unit The helm system power unit is located in the engineroom. Autopilot compass The transducer of the autopilot compass, is located in the bilge under the dunnages of the passageway. Studio ti 75608 700-08EB... - Page 76 At high speed, the use of the autopilot is dangerous and not protects against overexposure. recommended. Anyway, pay always attention when underway and use − The operator must inspect the driving system frequently for a smooth, of the above mentioned device. free and full range operation. Studio ti 75608 700-08EB...
-
Page 77: Operation
4 complete drive wheel turns are needed to move the wheel from end to end. Once the autopilot is connected, it moves the power-steering cylinder with the same reactions described above. Studio ti 75608 700-08EB... -
Page 78: Electro-Hydraulic Helm System
The helm system can be controlled from the helm stations on the enclosed bridge and consists of following devices. 1. Hydraulic power unit with tank 1. Main helm station driving pump 2. Second helm station driving pump 3. Hydraulic cylinders Manual disengagem ent button Studio ti 75608 700-08EB... -
Page 79: Rudders Stroke (Travel) Check
When the check is completed, bring the rudders to the center. CAUTION In case of a remarkable imprecision or failure when checking the rudder stroke, contact the BERTRAM Customer Support. CAUTION The hydraulic power unit to operate must be electrically powered by the circuit breaker located on the main electric panel. -
Page 80: Driving System Maintenance
24 hours. If the drive wheel is turned too quickly, the oil may foam. In that case, wait for 24 hours before bleeding the system. Studio ti 75608 700-08EB... - Page 81 As navigation without hydraulic drive is very dangerous, it is of utmost importance to keep a moderate speed and a careful steering until you reach the harbor or a rescue squad arrives. Studio ti 75608 700-08EB...
- Page 82 Should frequent oil topping up be necessary, check all fittings and tubes Hydraulic oil is toxic. Dispose of old oil and oily waste materials only in to see if there is a leak. an approved toxic materials disposal facility. Studio ti 75608 700-08EB...
-
Page 83: Trim Tabs
It is therefore necessary to test how they respond very are evenly distributed and the yacht sits level on its lines, you will use carefully and in open sea. the trim tabs in a “normal” manner. Studio ti 75608 700-08EB... -
Page 84: Trim Tabs Oil Level Check
Remove oil filling cap. Drain the oil by removing the drain cap. Screw in 3. Solenoid valves drain cap and proceed with oil filling through the open filler cap. Replace 4. Oil draining cap and tighten the fill cap when done. 5. Oil filling cap Studio ti 75608 700-08EB... -
Page 85: Hydraulic Cylinder
Clean the cylinders periodically to remove possible spots of corrosion that can impair their efficiency. To reduce the risk of corrosion, retract the cylinder rods each time you leave or moor the yacht, and when the yacht is on land. Studio ti 75608 700-08EB... - Page 86 INSTRUMENTATION & EQUIPMENT Trim tabs controls in the helm station Trim tabs Trim stabilizer control unit 1. Trim tabs controls in the helm station 2. Trim tabs 3. Trim tab power unit Studio ti 75608 700-08EB...
-
Page 87: Bow Thruster
For the continuous operation of the bow thruster, refer to the handbook delivered by the manufacturer. DANGER When the bow thruster is not used, always disconnect the control unit. 1. Joystick and power switch 2. Bow thruster Bow thruster Studio ti 75608 700-08EB... - Page 88 Remember to disconnect power supply to the system when maneuvers are ended or during normal navigation. DANGER Always stop the bow thruster before undertaking inspection or maintenance tasks by disconnecting the switches and possibly also the battery terminals. Studio ti 75608 700-08EB...
-
Page 89: Anti Rolling Gyro (Optional)
For further information on their use and maintenance see the manufacturer manuals. DANGER The ARG housing is not solid. Do not lay objects on the ARG or sit on it. WARNING The ARG is not watertight. If submerged by seawater it could get damaged. Studio ti 75608 700-08EB... - Page 90 Starboard power unit 1. Port anti rolling gyro 2. Power unit for port anti rolling gyro 3. Starboard anti rolling gyro 4. Power unit of starboard anti rolling gyro 5. Helm station anti rolling gyro controls Studio ti 75608 700-08EB...
- Page 91 INSTRUMENTATION & EQUIPMENT NOTES: Studio ti 75608 700-08EB...
- Page 92 INSTRUMENTATION & EQUIPMENT NOTES: Studio ti 75608 700-08EB...
-
Page 93: Helm Station
INTRODUCTION HOW TO USE THIS MANUAL DESCRIPTION OF THE YACHT GETTING UNDERWAY INSTRUMENTATION & EQUIPMENT HELM STATION ON DECK PROPULSION SYSTEMS HYDRAULIC SYSTEMS ELECTRICAL SYSTEM INTERIOR DETAILS HELM STATION SAFETY DEVICES & EQUIPMENT YACHT LIFTING & ONSHORE HANDING MAINTENANCE TROUBLESHOOTING... -
Page 94: Helm Station
Very general and limited information for first startup and initial operation of your yacht is included in this manual. For specific directions about the use of the individual systems and equipment, consult the manuals provided by the individual equipment manufacturers or contact the BERTRAM Customer Support. Studio ti 75608 700-08EB... -
Page 95: Main Helm Station
It is a good rule to keep the screens clean by washing them with wet and clean rags, avoid using chemical or abrasive products. CAUTION During the yacht cleaning and washing take care not to throw water on the electrical components. Studio ti 75608 700-08EB... -
Page 96: Section A - Upper Helm Station Console
This instrument allows to carry out calls in DSC mode (Digital Selective Call). Studio ti 75608 700-08EB... - Page 97 IS OFF - no fault is waiting to be processed. 12. Port engine stop button This button allows and indicates the port engine stop. 13. Port engine start button This button allows and indicates the port engine start. Studio ti 75608 700-08EB...
- Page 98 This function is only intended as last resort to maintain maneuverability in hazardous situations. Therefore when you find yourself in such a situation, head to the nearest landing and inform immediately MTU customer support. Studio ti 75608 700-08EB...
- Page 99 This switch enables the activation of the anchor windlass from the helm station. 23. Digital chain counter (optional) This device activates the anchor windlass and displays at the same time the length of the chain deployed, by means of a graphic display at liquid crystals. Studio ti 75608 700-08EB...
- Page 100 28. Generator room bilge flood signal light This light indicates the flood of the bilge in the generator room. 29. Engineroom bilge flood signal light This light indicates the flood of the bilge in the engineroom. Studio ti 75608 700-08EB...
- Page 101 This light indicates the flood of the aft bilge. 35. Mid yacht bilge flood signal light This light indicates the activation of the mid yacht flood signal. 36. Fore bilge flood signal lamp This lamp indicates the flood of the fore bilge. Studio ti 75608 700-08EB...
- Page 102 This switch allows parallel connection of the user/engine batteries to supply additional power for starting the engines. This happens only if the batteries are not sufficiently charged. 49. Horn switch This switch allows the activation of the horn. Studio ti 75608 700-08EB...
- Page 103 Displays the warning lights connected to the firefighting system in the engineroom and includes the NORM/OVERRIDE switch. 51. Starboard engine ON/OFF switch This switch allows to start or to stop the starboard engine. 52. Underwater lights switch This switch allows the activation of the underwater lights. Studio ti 75608 700-08EB...
-
Page 104: Section B - Lower Helm Station Console
• STARBOARD & PORT ARROWS: they allow to turn the searchlight in both direction; • UP & DOWN ARROWS: they allow to raise or to lower the searchlight. 4. Bow thruster control panel This contains the controls for the bow thruster. Studio ti 75608 700-08EB... - Page 105 Once the hindrance has been bypassed, the device can be switched on again by resetting the course. Studio ti 75608 700-08EB...
- Page 106 The panel carries several buttons for the screen wiper control. Each button allows to activate and to adjust the screen wiper speed and to control the screen washer pump. 11. VHF-DSC microphone VHF microphone with remote control function on channels and output power. Studio ti 75608 700-08EB...
-
Page 107: Section D - Magnetic Compass
Since a compass seldom can be corrected to zero deviation on all headings, the technician who compensates your compass should give you a deviation card showing the correction to be applied in navigational calculations. Keep this card at the helm station at all times. Studio ti 75608 700-08EB... - Page 108 You must record the deviation for each individual compass that you use, because the position of each compass relative to the materials around it determines the deviation. Studio ti 75608 700-08EB...
-
Page 109: Second Helm Station
MTU customer support. 5. Port engine stop button This button allows and indicates the port engine stop. 6. Port engine start button This button allows and indicates the port engine start. Studio ti 75608 700-08EB... - Page 110 MTU customer support. 11. Starboard engine stop button This button allows and indicates the stop of starboard engine. 12. Starboard engine start This button enables and indicates the start of starboard engine. Studio ti 75608 700-08EB...
- Page 111 15. Drive wheel By turning the drive wheel you actuate an hydraulic pump that operates the piston located in the helm gear compartment, this in turn is connected to the rudder and allows to drive the yacht. Studio ti 75608 700-08EB...
-
Page 112: Heads Block
In “trolling” mode (optional) the function of the heads block changes adjustment adjustment according to the standard mode. aft range ahead range Clutch: 0% slip (grip) and max. Clutch: 0% slip (grip) and max. speed when trolling speed when trolling B00255 Studio ti 75608 700-08EB... - Page 113 CONTROL LEDs lights up red steadily, to indicate that the station has taken over the control and that the operator is engaging either the ahead or the astern gear. For more information see the Manufacturer's manual. Studio ti 75608 700-08EB...
- Page 114 (20) percent. The Autotroll Mode allows for slipping the clutches to go between 30 and 70 percent of idle speed. It allows fine-tune movement of the yacht by pressing the panel HIGH or LOW buttons. Studio ti 75608 700-08EB...
-
Page 115: Engine Alarm Devices
The engine and gear data visualization is carried out graphically on a display with digital indication of the values obtained. The led as the visualization listing all incoming alarms with detailed information, indicate the alarms status. For a more detailed description refer to the specific handbook. Studio ti 75608 700-08EB... -
Page 116: Instrumentation
Mayday call. channel The DSC/ENT key selects the DSC menu for Digital Selective Calls. change key For the activation of transceiver’s particular functions, see the specific manual delivered by the Manufacturer. Studio ti 75608 700-08EB... - Page 117 DSC system and are programmed for emergency calls, individual or collective. The users of VHF DSC radio can contact other ships equipped with DSC system, avoiding unnecessary radio traffic and improving the communications from ship to ship. Studio ti 75608 700-08EB...
-
Page 118: Radar/Chartplotter/Fishfinder
The controls are the same as the whole NAVNET system, waves. thus enabling different configurations. For a more detailed description refer to the specific handbook. Studio ti 75608 700-08EB... -
Page 119: Autopilot
The autopilot’s performance can be influenced by many factors. For this reason we recommend its use only as a help to navigation. A careful and continuous monitoring must always be kept under the best navigation and sea conditions. Studio ti 75608 700-08EB... -
Page 120: Multifunctional Screen
The text mode gives up to four informations at the same time between the data available. The display layout can be customized according to requirements. For a more detailed description refer to the specific handbook. Studio ti 75608 700-08EB... - Page 121 HELM STATION NOTES: Studio ti 75608 700-08EB...
- Page 122 HELM STATION NOTES: Studio ti 75608 700-08EB...
-
Page 123: On Deck
INTRODUCTION HOW TO USE THIS MANUAL DESCRIPTION OF THE YACHT GETTING UNDERWAY INSTRUMENTATION & EQUIPMENT HELM STATION ON DECK PROPULSION SYSTEMS HYDRAULIC SYSTEMS ELECTRICAL SYSTEM INTERIOR DETAILS ON DECK SAFETY DEVICES & EQUIPMENT YACHT LIFTING & ONSHORE HANDING MAINTENANCE TROUBLESHOOTING... -
Page 124: Enclosed Bridge - Exterior
ON DECK ENCLOSED BRIDGE - EXTERIOR 1. Settee 2. Access door 3. Second helm station Studio ti 75608 700-08EB... -
Page 125: Main Deck - Exterior
9. WASTE black water drain fitting 10. Staterooms skylights 11. Anchor locker with washdown faucet • anchor windlass (available only with optional pulpit) 12. Enclosed bridge access stair 13. Lit rod compartment 14. Transom fish box 15. Transom door and gate Studio ti 75608 700-08EB... -
Page 126: Navigation Lights
Studio ti 75608 700-08EB... - Page 127 WARNING Check the bulb operation before setting up for navigation to avoid any inconvenient by night use. WARNING Replace the bulbs with the same visual fields. Studio ti 75608 700-08EB...
-
Page 128: Anchor
Inside of the locker is located the anchor with relevant chain and recovery line. WARNING Always maneuver the anchor with the utmost care, to avoid to damage the vessel and the people onboard. The locker houses inside also a faucet for the anchor and relevant chain washdown. Studio ti 75608 700-08EB... -
Page 129: Anchor Windlass
1. Lever connecting bushing It allows the lever connection. 2. Capstan It allows to pull a line. 3. Wildcat It allows to retrieve and to deploy the anchor. 4. Safety hook It allows to lock the anchor chain. Studio ti 75608 700-08EB... - Page 130 The anchor chain is fastened to the yacht by means of a line and a hook Attach the stopper to the chain after the anchor is on deck. system. If it is not possible to remove the anchor from the sea bed this system will make it possible to resume navigation. Studio ti 75608 700-08EB...
-
Page 131: Anchor Windlass Activation Controls
Make sure that the electric motor is not supplied when the anchor windlass is operated manually (even when the lever to release the clutch is moved), as persons in possession of the anchor windlass remote control may accidentally activate it. Studio ti 75608 700-08EB... - Page 132 Namely during those operations, an excessive gliding Studio ti 75608 700-08EB...
- Page 133 In windy or strong current conditions, start the engines and keep the foredeck towards the anchor position to avoid the breakage of the hawse. Once the anchor is retrieved, fasten the chain stopper, before resuming navigation. Studio ti 75608 700-08EB...
-
Page 134: Windlass Cleaning And Service
The accidental application of power to the windlass control box. Remove any corrosion and coat terminals with corrosion could injure the person servicing the equipment. Secure the chain with inhibitor. the chain stopper and remove the chain from the wildcat. Studio ti 75608 700-08EB... - Page 135 ON DECK NOTES: Studio ti 75608 700-08EB...
- Page 136 ON DECK NOTES: Studio ti 75608 700-08EB...
-
Page 137: Propulsion Systems
INTRODUCTION HOW TO USE THIS MANUAL DESCRIPTION OF THE YACHT GETTING UNDERWAY INSTRUMENTATION & EQUIPMENT HELM STATION ON DECK PROPULSION SYSTEMS HYDRAULIC SYSTEMS ELECTRICAL SYSTEM INTERIOR DETAILS PROPULSION SYSTEMS SAFETY DEVICES & EQUIPMENT YACHT LIFTING & ONSHORE HANDING MAINTENANCE TROUBLESHOOTING... -
Page 138: Engine Room Access
The engines maintenance is a special operation that has to be carried out by specialized personnel. Contact BERTRAM Customer Support to BERTRAM declines all responsibility for proposed corrective action receive suitable help. -
Page 139: Propulsion Systems
This operation is allowed only in case of life danger for the persons onboard and for the safety of the yacht itself, however when the engine is running it should not run higher than 1000 rpm. Studio ti 75608 700-08EB... -
Page 140: Engines
For any problem concerning the use or the maintenance of the engines, refer to the fixture manuals or directly to the MTU Customer Service. WARNING We suggest you to read the MTU operating instruction manual carefully and in detail. Studio ti 75608 700-08EB... -
Page 141: Engine Control Panel
Lights up when the engine is ready to run. 3. EMERGENCY STOP button Enables the engine stop in case of emergency. 4. Display Displays the operational status of the engine. For further information, refer to manufacturer manual. Studio ti 75608 700-08EB... -
Page 142: Propellers
If items such as a fishing tower, tender, davit, or anything else that changes the displacement or trim of the vessel are added to your boat, it may be necessary to adjust the propeller specifications. Bertram Yacht is not responsible for any changes that may become necessary. Please contact a propeller specialist for recommendations based on the modifications that were made. - Page 143 WARNING BERTRAM Yachts are designed to obtain a correct transversal trim with full optional equipment, and with spare propellers and shafts. If the yacht is not equipped with full optional, spare propellers and shafts, some weights might have been installed to correct the transversal trim.
-
Page 144: Propellers Service
The propellers, the starboard and port one, are not interchangeable between them and with others, as they have been projected according to specific features of Your yacht. Replace only with genuine spare parts supplied by BERTRAM Customer Support. Studio ti 75608 700-08EB... -
Page 145: Periodic Checks On Propellers
Check to ensure that replacement propellers meet the specifications of your yacht. Do not replace the propellers of your yacht with others of unknown or doubtful origin. Contact the BERTRAM Customer Support for more details. Studio ti 75608 700-08EB... -
Page 146: Propeller Shaft, Stuffing Box Case And Shaft Support
Remember to check the shaft seal clamps after a period of inactivity of the yacht before turning the shafts again, otherwise you might damage them. 1. Flange coupling 2. Gearbox 3. Shaft seal 4. Shaft support 5. Neoprene bushing Propeller shaft seal Studio ti 75608 700-08EB... -
Page 147: Shafts Line, Stuffing Box Seal And Shafts Supports Bushings Maintenance
The shaft seals prevent water from leaking around the shaft and into the boat. The seals installed in your BERTRAM are of the dripless type and do not require adjustment as in a traditional stuffing box. Special nitrile lip seals endure a watertight fit around the shaft. A constant supply of water is necessary for cooling and lubricating the shaft and seal. -
Page 148: Gearbox (Transmission)
− couple the engine with the propeller shaft and reduce the number of the propeller revolutions; − to reverse the propeller direction; − stop the propeller shaft motion (idle). Read the gearbox operating instruction manual carefully and in detail. Studio ti 75608 700-08EB... -
Page 149: Gearbox Service
Remove filter and gasket. Carry out check according to the time intervals suggested by the manufacturer. Oil filter replacement Have the expected maintenance carried out at correct time intervals and by authorized and qualified personnel only, to keep the gearboxes perfectly efficient. Studio ti 75608 700-08EB... -
Page 150: Gearbox Check
WARNING Before checking the oil level, check that the oil temperature of the gearbox is as per normal operation specifications. ENVIRONMENT Recover waste oil, according to the laws in force relevant to special waste disposal. Studio ti 75608 700-08EB... -
Page 151: Fuel And Lubrication Systems
The engine data cards are very important when repairs are necessary. Keep them together and store them with your warranty in a secure, readily available location. NOTICE Read the engine operating instruction manual carefully. Flexible strut Studio ti 75608 700-08EB... -
Page 152: Propulsion Engines Maintenance
For coolant features refer to the User’s Manual of the Manufacturer. Cooling system drain Drain the cooling liquid only with cool engine following the procedure suggested by the Manufacturer. For more information, consult the Manufacturer’s manual. Studio ti 75608 700-08EB... - Page 153 Manual delivered by the Manufacturer. WARNING With BERTRAM it is absolutely necessary to view the various ENVIRONMENT components documentation delivered by the Manufacturer; for any problem relevant to the use or maintenance, you can refer directly to the Dispose of waste materials (engine oil, fuel, filters, etc.) by respecting...
- Page 154 Unlock the plug slowly to DANGER release the pressure. Compressed air at high pressure may create the risk of injuries. Do not direct compressed-air jets at persons. Wear protective goggles, safety masks and ear protectors. Studio ti 75608 700-08EB...
- Page 155 Do not use compressed water or air to clean Do not service air filter when engine is running: dirt may penetrate the air filter element. Anyone of these liquids or methods could damage inside of engine. the element. Studio ti 75608 700-08EB...
- Page 156 Use oil filters exclusively recommended by the manufacturer. WARNING The fuel spilled on hot surfaces or electric components may cause a fire. To avoid possible injuries, disconnect the starter switch when fuel filters or water/fuel separator elements are replaced. Clean fuel leaks immediately. Studio ti 75608 700-08EB...
-
Page 157: Fuel System
Fuel Quality Quality of fuel is crucial for efficient performance of the engines installed on your BERTRAM 700 yacht. Purchase fuel only from reliable high- volume filling stations. This will help ensure the quality of the fuel itself, as well as the probability that the fuel has not been stored for a long period inside the shore tank. -
Page 158: Fuel Tank Filling
Unless the valve is operated each time the level is checked, the level indicated refers to the tank. last check. WARNING WARNING Stop all engines when refueling. When refueling open both fill fittings of the yacht. Studio ti 75608 700-08EB... -
Page 159: Fuel System
When using fuel containing water, the water/fuel separator filters, to serious damages can impair the hold impurities and to separate injection system. possible water. Studio ti 75608 700-08EB... - Page 160 Due to high temperature in engineroom, oil or fuel leaks can evaporate and create a serious risk of fire break. DANGER Fuel leak can be the cause of fire. Periodically check the integrity of Your installation. Studio ti 75608 700-08EB...
- Page 161 PROPULSION SYSTEMS “RACOR” separator filters for port engine Level gauge and generator Level gauge Buzzer “RACOR” separator Users manifold filters for starboard engine and generator Studio ti 75608 700-08EB...
-
Page 162: Water & Fuel Separator Filters For The Engines
− Remove the cover (4) and fill the device with clean fuel. − Close the cover and tighten T-handle (5) firmly by hand. LEFT RIGHT LEFT RIGHT BOTH OPEN BOTH SHUT OFF OPEN CLOSED CLOSED OPEN POINTS DANGER TO INLET/ POSITION OUTLET B00106 Studio ti 75608 700-08EB... - Page 163 − Fill the device with clean fuel, then replace the cover. Tighten T- a good procedure also when the engine is off. handle by hand and reopen by hand. − Start the engine and check for leaks. If necessary, remedy with the engine off. Studio ti 75608 700-08EB...
-
Page 164: Water & Fuel Separator Filters For The Generators
− Tighten T-handle by hand and reopen by hand. with a twist movement. − Start the engine and check for leaks. If necessary, remedy with the − Fit the new filter (having the same filtering features of the replaced engine off. filter). Studio ti 75608 700-08EB... - Page 165 If the problem continues and the filtering element is new, contact your dealer. WARNING The separators have to be checked at regular intervals as suggested by manufacturer, so as not to impair the engines operation. Studio ti 75608 700-08EB...
-
Page 166: Lube Oil System
6. Lever for starboard users It allows exclusive selection of starboard engine, generator and gearbox. 7. Oil pump circuit breaker This switch allows to activate or deactivate the oil transfer pump. Filling/draining outlet User manifold for oil transfer pump Studio ti 75608 700-08EB... - Page 167 No open flames, no electric sparks. Do not smoke. Avoid ignition sources. Risk of fires and explosions! WARNING Do not remove the tank filling plug when the engine is running, because the hydraulic installation under pressure may cause injuries. Before releasing pressure, stop the engine. Studio ti 75608 700-08EB...
- Page 168 • wear of outer coatings as consequence of rubbing; WARNING • swelling of outer coatings. Do not refill oil over the notch MAX of the dipstick. Overfilling may damage the engine! WARNING Filling of the cooling system only by cooled down engine. Studio ti 75608 700-08EB...
- Page 169 United States. If such discharge causes a film, or sheen upon, or a discoloration of the surface of the water, or causes a sludge or emulsion beneath the surface of the water, it is considered a violation of the regulation. Studio ti 75608 700-08EB...
-
Page 170: Engine Cooling System
Before opening the intake seacock filter for cleaning, remember to close the hull cut-off valve. If the yacht is left unattended, close as a precaution, all intake seacock cut-off valves; when they have to be used again, remember to re-open them. Studio ti 75608 700-08EB... - Page 171 1. Port engine intake seacock valve 4. Port generator intake seacock valve 2. Starboard generator intake seacock valve 5. Starboard generator intake seacock valve 3. Port generator intake seacock filter 6. Starboard generator intake seacock filter Studio ti 75608 700-08EB...
-
Page 172: Bilge Suction Of The Engines In Emergency
WARNING In case of emergency it is possible to pump the water from the bilge through the seawater pumps of each engine. Studio ti 75608 700-08EB... -
Page 173: Exhaust System
When starting the engines, check that the exhaust discharges water; this means that the engines cooling system and exhaust cooling system work correctly. Accelerate if no water comes out. If the problem carries on, refer to the BERTRAM Customer Support. Studio ti 75608 700-08EB... - Page 174 PROPULSION SYSTEMS Engine exhaust Engine exhaust system 1. Engine exhaust 2. Engine exhaust system Studio ti 75608 700-08EB...
-
Page 175: Engine Exhaust System Inspection
Exhaust outlet blockage, even if partial, may compromise proper engine operation. Ensure that the exhaust outlets are free of deposits, growths, and fouling. Ensure that the parts of the check valves (flappers) move freely and without any obstruction. Studio ti 75608 700-08EB... -
Page 176: Engineroom Ventilation System
PROPULSION SYSTEMS 8.15 ENGINEROOM VENTILATION SYSTEM Engineroom ventilation system displacement Port air inlets and blowers Port ARG ventilator Starboard air inlets and blowers Starboard ARG ventilator 1. Air inlets 2. Engineroom ventilator blowers 3. ARG ventilators Studio ti 75608 700-08EB... - Page 177 Operation NOTICE The engineroom ventilation system provides the necessary air exchange for the correct operation of the propulsion systems of your BERTRAM After navigation in particularly rough seas, it may be necessary to rinse 700 yacht. the salt residuals from the components near the inlets of the engineroom.
- Page 178 PROPULSION SYSTEMS NOTES: Studio ti 75608 700-08EB...
-
Page 179: Hydraulic Systems
INTRODUCTION HOW TO USE THIS MANUAL DESCRIPTION OF THE YACHT GETTING UNDERWAY INSTRUMENTATION & EQUIPMENT HELM STATION ON DECK PROPULSION SYSTEMS HYDRAULIC SYSTEMS ELECTRICAL SYSTEM INTERIOR DETAILS HYDRAULIC SYSTEMS SAFETY DEVICES & EQUIPMENT YACHT LIFTING & ONSHORE HANDING MAINTENANCE TROUBLESHOOTING... -
Page 180: Electric Pumps
Studio ti 75608 700-08EB... - Page 181 Care has to be taken because the intake seacock of the engine is quickly closed after opening the bilge strainer valve. WARNING Be very careful when resetting the valves to the outboard suction position when the bilge is dry, in order not to compromise the engine parts. Studio ti 75608 700-08EB...
-
Page 182: Bilge Automatic/Manual Suction System Displacement
4. Fore bilge pumps 5. Engines thru-hull fittings 6. Bilge pump fuses 7. Synoptic panel inside of general cabinet 8. Helm station controls and LEDs Generator room Engineroom electric General electric panel Fore bilge pumps bilge pump panel Studio ti 75608 700-08EB... - Page 183 HYDRAULIC SYSTEMS Bilge automatic/manual suction system Bilge pump Engines thru-hull fittings Level sensor Drain manifold Studio ti 75608 700-08EB...
- Page 184 HYDRAULIC SYSTEMS Page intentionally white Studio ti 75608 700-08EB...
- Page 185 WARNING Keep the bilge dry to allow a prompt detection of water presence and to reduce the risk of slipping, besides creating a less aggressive environment for the fixtures. Studio ti 75608 700-08EB...
-
Page 186: Bilge Pump Operation Check
Before doing any kind work on the bilge pumps, DISCONNECT the pumps’ electrical power from the battery. − Ensure that a pump never runs dry. Running dry can destroy the pump impeller. Studio ti 75608 700-08EB... -
Page 187: Priming A Pump
Verify any sign of obstruction in the pipes at least once every six NOTICE months. Avoid voiding the manufacturer’s warranty. An electric pump should be repaired only by an authorized and qualified technician, using approved spare parts designed for the pump. Studio ti 75608 700-08EB... -
Page 188: Fresh Water System
This system is equipped with a empty tank, the low-pressure cut-out switch will shut off the pump. pressure relief valve. NOTICE The fresh water tank can be filled only through fill fitting. It cannot be filled using the shoreside quick-connect fitting. Studio ti 75608 700-08EB... - Page 189 5. Fill fitting 6. Tank vent 7. Shoreside water inlet with quick-connect fitting 8. Pressure switch 9. Distribution manifolds 10. Tank water level gauge Shore water Pump & filter Salon electric Manifolds and captive air inlets panel tank Studio ti 75608 700-08EB...
- Page 190 Notwithstanding the presence of a, pressure switch, check the broken pipe. pressure on the pressure gauge installed on the switch. Studio ti 75608 700-08EB...
- Page 191 HYDRAULIC SYSTEMS Fresh water system Water heater Pressure switch Pump Captive air tank Inlet To the enclosed bridge Manifolds Filter Tank vent Ball valve Studio ti 75608 700-08EB...
- Page 192 HYDRAULIC SYSTEMS Page intentionally white Studio ti 75608 700-08EB...
-
Page 193: Refilling The Water Tank
If there is a risk of freezing, do not top off tanks. WARNING During the refilling of fresh water pay attention to the filling hose. Water spillage may cause electrical short-circuits. Do not leave the fresh water hose and fill fitting unattended. Level gauge Studio ti 75608 700-08EB... -
Page 194: Fresh Water System Maintenance
− Check the fittings for tightness and evidence of corrosion. − Check the air pressure inside the tank. If it is lower, restore it to a maximum with a bicycle pump or a compressor. For range values refer to the specific equipment manufacturer’s handbook. Studio ti 75608 700-08EB... -
Page 195: Seawater System
The seawater faucets are clearly labeled to prevent the accidental use of seawater for drinking or cooking. Do not use this system for fighting electrical fires, because of the potential for shock hazard. Studio ti 75608 700-08EB... - Page 196 CAUTION Before carrying out maintenance on the sea water circuit, cut-off its operation and close the intake seacock valve. Before restarting the system circuit, make sure that the cut-off valve is completely open. Studio ti 75608 700-08EB...
-
Page 197: Thru-Hull Fittings And Intake Seacock
(seaweeds, jellyfish, other foreign matter, etc.) intake seacock filters of the various devices. in the water in which the yacht is operating. Studio ti 75608 700-08EB... -
Page 198: Air-Conditioning System
The machinery room cooling units have a dedicated sump pump to discharge the condensate water. All air conditioning units are 230 V AC and powered through the differential circuit breakers in the salon AC distribution panel. Studio ti 75608 700-08EB... - Page 199 It is recommended to always keep a good air circulation inside the yacht; for this purpose it can be helpful to keep the system set to dehumidifier or anyway on. Intake seacock and filter Distribution manifolds Studio ti 75608 700-08EB...
-
Page 200: Chiller Unit Control Panel
Important memory function After changing modes, programming settings, setpoint, etc., wait at least 30 seconds before turning off main power supply in order for new settings to be maintained in memory. Studio ti 75608 700-08EB... - Page 201 7 (7/8 = 0.8 °C). For function 4, the factory setting of 4 (or 0.5 °F) should be changed to 2 (2/8 = 32.54 °F). For these functions °F (or 8) = 0.6 °C (or 5). For more information, consult the manufacturer’s manual delivered separately. Studio ti 75608 700-08EB...
-
Page 202: Air Conditioning System Maintenance
Replace the impeller if it is worn. Whereas, if the pumps head is made of bronze, then the impeller is too, and regular maintenance is not needed as often. Seawater filter Check the seawater strainer daily. Remove any debris. Studio ti 75608 700-08EB... -
Page 203: Black Water (Sewage) System
Do not put anything other than human waste and single-ply toilet paper into the WC. Before entering the harbor, check the black water (sewage) tank and drain it if necessary (beyond land borders) to avoid having to return to the open sea to empty the tank. Studio ti 75608 700-08EB... -
Page 204: Wc Control Panels
HYDRAULIC SYSTEMS 9.9.2 WC Control Panels Toilets control panel 1. WC Control Panels CAUTION Close the various safety valves of the WCs drains and intakes, when they are not used. Studio ti 75608 700-08EB... -
Page 205: System Operation
“After use” are pressed. Each WC has a retting pump conveying black waters into the black water (sewage) tank. The tank, the macerator pumps and the draining valves are located in the bilge under the passageway of the stateroom area. Studio ti 75608 700-08EB... - Page 206 3. Buzzer. Sounds when the tank is full riding, and also within the limit of beaches visited by swimmers, as 4. It clears off the buzzer stated in the single decree of the Port Authorities. 5. System test Studio ti 75608 700-08EB...
- Page 207 HYDRAULIC SYSTEMS WASTE fitting Macerator pump Overboard discharge Salon electric panel WASTE fitting Manifolds and WC solenoid valves Studio ti 75608 700-08EB...
-
Page 208: Tank Pump-Out By Shore Pump
When the draining is complete, remove the hose and firmly tighten the cap of drain fitting. WASTE starboard drain fitting Studio ti 75608 700-08EB... - Page 209 HYDRAULIC SYSTEMS Black water system Electric pump WC solenoid valve Siphon break Tee connection Overboard draining Tank vent Fresh water manifolds Outlet dockside suction Studio ti 75608 700-08EB...
- Page 210 HYDRAULIC SYSTEMS Page intentionally white Studio ti 75608 700-08EB...
-
Page 211: Black Water System Maintenance
Verify the pipe and connection condition at least once every three months. Protect with suitable products at least once every six months: • the toilet solenoid valves; • the black water pump. Carefully clean the black water tank when required but at least once a year. Studio ti 75608 700-08EB... -
Page 212: Gray Water System
A momentary push button switch is provided to manually override the automatic operating function. Salon electric panel Gray water pump Studio ti 75608 700-08EB... -
Page 213: Gray Water System Maintenance
• fully clean the pump; Verify the pump condition at least once every six months. NOTICE Do not use very aggressive products or lye-based dissolvers for the tank cleaning. For more information contact BERTRAM Customer Support. Studio ti 75608 700-08EB... - Page 214 HYDRAULIC SYSTEMS Page intentionally white Studio ti 75608 700-08EB...
- Page 215 HYDRAULIC SYSTEMS Gray water system Electric pump Overboard draining Tee connection Studio ti 75608 700-08EB...
- Page 216 HYDRAULIC SYSTEMS Page intentionally white Studio ti 75608 700-08EB...
- Page 217 HYDRAULIC SYSTEMS NOTES: Studio ti 75608 700-08EB...
- Page 218 HYDRAULIC SYSTEMS NOTES: Studio ti 75608 700-08EB...
-
Page 219: Electrical System
INTRODUCTION HOW TO USE THIS MANUAL DESCRIPTION OF THE YACHT GETTING UNDERWAY INSTRUMENTATION & EQUIPMENT HELM STATION ON DECK PROPULSION SYSTEMS HYDRAULIC SYSTEMS ELECTRICAL SYSTEM INTERIOR DETAILS ELECTRICAL SYSTEM SAFETY DEVICES & EQUIPMENT YACHT LIFTING & ONSHORE HANDING MAINTENANCE TROUBLESHOOTING... -
Page 220: Electrical System Description
Do not use in case of faults on the batteries recharging circuits, for user batteries and do not disconnect them during navigation. instance of the engines alternators. We advise to use this system only in emergency cases. Studio ti 75608 700-08EB... - Page 221 The DC power systems are supplied by three banks of batteries: engine alternator, driven by the same unit. bank (24 V), user bank (24 V) and generator batteries (12 V). The AC system can be powered either by the shore electric network or by the onboard generators. Studio ti 75608 700-08EB...
- Page 222 16. 24 V/5000 VA inverter − leave the yacht unguarded with the electrical system powered, except for the circuits of the bilge automatic suction pumps, of the firefighting protection and of the alarms (driven by batteries). Studio ti 75608 700-08EB...
-
Page 223: Location Of Electrical Equipment On Board
ELECTRICAL SYSTEM 10.1.1 Location of electrical equipment on board Port electric power Helm station electric panel connection from shore Starboard electric Secondary Main electric panel power supply electric panel Studio ti 75608 700-08EB... - Page 224 ELECTRICAL SYSTEM Battery charger 24 V/100 A battery charger Inverter Battery equalizer 24 V/50 A battery charger 24 V/2500 VA Battery disconnector panel Generators Engine power Inverter Engine control panels unit 24 V/5000 VA Studio ti 75608 700-08EB...
- Page 225 Use electric devices with double isolation or earthing (ground). WARNING Do not allow the cable end of shore supply to float in the water. This can cause an electric field and following injuries or even the death of the swimmers nearby. Studio ti 75608 700-08EB...
-
Page 226: Electrical System Warnings
CAUTION CAUTION Have a BERTRAM authorized electrical engineer inspect the Never deactivate the battery disconnectors with the engines running or differential circuit breakers, the electric panels and other components of you may damage the engine alternators. - Page 227 Do not replace your vessel’s circuit breakers of fuses with breakers or Replace automatic breakers or fuses with same amperage. Never alter fuses of higher amperage than those installed by BERTRAM. Choose overcurrent protection. differential circuit breakers and fuses for the spare circuits with ratings that match the load of the equipment, but does not exceed the current carrying capacity of the cables in each branch circuit.
- Page 228 WARNING Explosion/Fire Hazard - Check bilge and generator compartment for fumes. WARNING Carbon monoxide poisoning: − Operate generator only in a well ventilated area. Carbon monoxide poison, created by the engine internal combustion, is extremely toxic. Studio ti 75608 700-08EB...
-
Page 229: Main Electric Panel
D. Circuit breakers protecting the 230 V AC users WARNING High voltage Disconnect the electric power supply before opening the door. WARNING Switch off the generators and disconnect the shore power supply before opening the panel. Studio ti 75608 700-08EB... -
Page 230: Section A - Voltmeter, Ammeter For 24 V Dc And Circuit Breakers Protecting The 24 V Dc Users
Powers the light system of the salon. 9. Fuel level gauge Powers the fuel level gauge. 10. Black water (sewage) tank signal Powers the signal system of black waters (sewage) holding tank. 11. Fish box macerator Powers the fish box macerator. Studio ti 75608 700-08EB... - Page 231 This switch powers the ventilators of the anti rolling gyros (ARG). 24. Available Switch available for auxiliary system. 25. Available Switch available for auxiliary system. 26. Available Switch available for auxiliary system. 27. Available Switch available for auxiliary system. Studio ti 75608 700-08EB...
-
Page 232: Section B - Generator Signal And Control Panel
Allows to start/stop of the starboard generator. • Stop • Start 4. Fresh water pump switch Allows to start/stop the fresh water pump. 5. Fresh water level gauge Indicates the fresh water level in the tank. Studio ti 75608 700-08EB... - Page 233 When releasing the button all LEDs must go out and the buzzer must clear off. 10. Squelch button This button allows to disconnect the buzzer. 11. Buzzer This signal buzzer activates to indicate a fire hazard. Studio ti 75608 700-08EB...
- Page 234 Red light, indicates the bilge flood in the engineroom. 14. Fire in the engineroom Red light, indicates a fire in the engineroom. 15. Fore bilge Red light, indicates the foredeck bilge flood. 16. Foredeck fire Red light, indicates a fire in the foredeck. Studio ti 75608 700-08EB...
- Page 235 21. Gray water tank drain switch Allows the drain of the gray water tank. 22. LED of gray water tank Indicates the level of the gray water tank. • Full: if light is on the gray water tank is full. Studio ti 75608 700-08EB...
-
Page 236: Section C - Voltmeters, Ammeters For 230 V Ac Lines And Circuit Breakers Protecting The 230 V Ac Network And Switches For A/C Units
This light indicates reverse polarity on shore outlet 2. 9. Signal light of shore outlet 1 reverse polarity This light indicates reverse polarity on shore outlet 1. 10. 50 A shore outlet 1 This switch powers shore outlet 1. Studio ti 75608 700-08EB... - Page 237 This switch allows to select on chiller 2 the heat/cool/off modes. 19. Chiller 3 This switch allows to select on chiller 3 the heat/cool/off modes. 20. Chiller 4 This switch allows to select on chiller 4 the heat/cool/off modes. Studio ti 75608 700-08EB...
-
Page 238: Section D - Circuit Breakers Protecting The 230 V Ac Users
7. Port air conditioning Powers the port air conditioning unit. 8. Available Switch available for auxiliary systems. 9. Air conditioning pump Powers the air conditioning system pump. 10. Port salon lights Powers the port light system of the salon. Studio ti 75608 700-08EB... - Page 239 17. Air conditioning pump Powers the air conditioning system pump. 18. Available Switch available for auxiliary systems. 19. Air conditioning 3 Powers the air conditioning unit 3. 20. Air conditioning 2 Powers the air conditioning unit 2. Studio ti 75608 700-08EB...
- Page 240 This switch powers the watermaker. 27. Starboard air conditioning Powers the air conditioning unit starboard. 28. Salon air conditioning This switch powers the air conditioning unit of the salon. 29. Washdown pump Powers the washdown pump. Studio ti 75608 700-08EB...
- Page 241 Powers the air conditioning unit in the cockpit. 36. Icemaker (Eskimo) This switch powers the icemaker. 37. Master stateroom air conditioning Powers the air conditioning of the Master stateroom. 38. Galley air conditioning Powers the air conditioning unit in the galley. Studio ti 75608 700-08EB...
-
Page 242: Secondary Electric Panel
B. Circuit breakers protecting the 230 V AC users WARNING High voltage Disconnect the electric power supply before opening the door. WARNING Switch off the generators and disconnect the shore power supply before opening the panel. Studio ti 75608 700-08EB... -
Page 243: Section A - Circuit Breakers Protecting The 24 V Dc Users
This instrument measures the voltage of the 24 V DC line. 10. Available Switch available for auxiliary systems. 11. Available Switch available for auxiliary systems. 12. Available Switch available for auxiliary systems. 13. Available Switch available for auxiliary systems. Studio ti 75608 700-08EB... - Page 244 Powers the port head ventilator. 18. Black water pump This switch powers the black waters pump. 19. Available Switch available for auxiliary systems. 20. Available Switch available for auxiliary systems. 21. Available Switch available for auxiliary systems. Studio ti 75608 700-08EB...
-
Page 245: Section B - Circuit Breakers Protecting The 230 V Ac Users
5. Port electric outlets This switch powers the port electric power outlets of the yacht. 6. Bow lights Powers the bow light system. 7. Available Switch available for auxiliary systems. 8. Available Switch available for auxiliary systems. Studio ti 75608 700-08EB... - Page 246 19. Starboard electric outlets This switch powers the starboard electric power outlets of the yacht. 20. Bow lights Powers the bow light system. 21. Available Switch available for auxiliary systems. 22. Available Switch available for auxiliary systems. Studio ti 75608 700-08EB...
-
Page 247: Dc User Helm Station Electric Panel
B. Circuit breakers protecting the 24 V DC users WARNING High voltage Disconnect the electric power supply before opening the door. WARNING Switch off the generators and disconnect the shore power supply before opening the panel. Studio ti 75608 700-08EB... -
Page 248: Section A - Voltmeter And Ammeter For 24 V Dc Batteries
Allows to select on voltmeter and ammeter the reading of the voltage and current values at engines, users battery terminals. 3. Ammeter for battery current absorption It measures the current (amperes) absorbed by the users/engines 24V DC batteries banks, according to relevant switch (2) selection. Studio ti 75608 700-08EB... -
Page 249: Section B - Circuit Breaker Protecting The 24 V Dc Users
This switch powers the air compressor for the operation of the horn. 12. Electro-hydraulic steering system This switch powers the power unit of the electro-hydraulic helm system. 13. Exhaust gas temperature This switch powers the sensor of the exhaust gas temperature. Studio ti 75608 700-08EB... - Page 250 Switch available for auxiliary systems. 22. Available Switch available for auxiliary systems. 23. Available Switch available for auxiliary systems. 24. Available Switch available for auxiliary systems. 25. Available Switch available for auxiliary systems. 26. Available Switch available for auxiliary systems. Studio ti 75608 700-08EB...
-
Page 251: Ac User Helm Station Electric Panel
In the helm station is installed another electric panel equipped with circuit breakers protecting the 230 V AC users. WARNING High voltage Disconnect the electric power supply before opening the door. WARNING Switch off the generators and disconnect the shore power supply before opening the panel. Studio ti 75608 700-08EB... - Page 252 10. Underwater lights Powers the underwater light system. 11. Available Switch available for auxiliary systems. 12. Available Switch available for auxiliary systems. 13. Available Switch available for auxiliary systems. 14. Available Switch available for auxiliary systems. Studio ti 75608 700-08EB...
-
Page 253: Dc User Helm Station Electric Panel
A. Circuit breakers protecting the 12 V DC users B. Voltmeter for 12 V DC batteries WARNING High voltage Disconnect the electric power supply before opening the door. WARNING Switch off the generators and disconnect the shore power supply before opening the panel. Studio ti 75608 700-08EB... -
Page 254: Section A - Circuit Breakers Protecting The 12 V Dc Users
Switch available for auxiliary systems. 7. Available Switch available for auxiliary systems. 8. Available Switch available for auxiliary systems. 9. Available Switch available for auxiliary systems. 10. Available Switch available for auxiliary systems. 11. Available Switch available for auxiliary systems. Studio ti 75608 700-08EB... -
Page 255: Section B - Voltmeter For 12 V Dc Batteries
1. Voltmeter for 12 V DC batteries It measures the voltage at the terminals of the 12 V DC batteries, actuated by proper test switch (2). 2. Battery test switch Checks the correct operation of batteries confirmed by voltmeter (1). Studio ti 75608 700-08EB... -
Page 256: 24 V Dc Battery Disconnector Panel
The following main sections have been identified, in order to make the descriptions easier: A. Circuit breakers protecting the engines and fuses for bilge pumps and firefighting system B. 12 V/24 V DC battery disconnectors Studio ti 75608 700-08EB... - Page 257 The battery disconnectors are designed for use under normal operating conditions. If this switch opens the DC circuit while the engine is being started, the switch should be replaced as soon as possible to avoid future failure. Studio ti 75608 700-08EB...
-
Page 258: Section A - Circuit Breakers Protecting The Engines And Fuses For Bilge Pumps And Firefighting System
4. Generator room bilge pump 5. Aft bilge pump 6. Bilge flood alarm signal panel 7. Firefighting signal panel 8. Firefighting system WARNING Remove fuse from bilge pump of engineroom, before beginning any mechanical intervention in the engineroom. Studio ti 75608 700-08EB... - Page 259 13. Normal It provides power to the engine battery banks. 14. Backup It provides power to the service (house) battery banks. 15. CCU Powers the engine control panel (CCU). 16. ZF Powers the gearbox (ZF) electronics. Studio ti 75608 700-08EB...
-
Page 260: Section B - 12 V/24 V Battery Disconnectors
This switch connects or disconnects the 24 V DC battery bank for starboard engine. 7. Users 24 V batteries This switch connects or disconnects the 24 V DC battery bank for users. 8. 24 V bow thruster batteries Switch allowing to connect or disconnect the bow thruster. Studio ti 75608 700-08EB... -
Page 261: Generator
10.9 GENERATOR 10.9.1 Operation On board of your BERTRAM 700 yacht are installed two KOHLER generators, located in the generators’ room. On the fuel tank, you can easily locate the power generator supply, which can be cut-off by means of two delivery valves, on which you can handle to cut off the fuel lines in case of emergency and to shut off the generators. -
Page 262: Generator Control Panel
WARNING Carbon monoxide poisoning: − Operate generator only in a well ventilated area. Carbon monoxide poison, created by the engine internal combustion, is extremely toxic. Generator control panel WARNING Fire/explosion danger Check generator compartment for fumes. Studio ti 75608 700-08EB... - Page 263 3. Port generator intake seacock filter 7. Valve of the fuel line to starboard generator (close in case of 4. Starboard generator intake seacock valve generator leaks or carry out maintenance) 5. Starboard generator intake seacock filter 8. Generator silencers Studio ti 75608 700-08EB...
-
Page 264: Generator Lubrication System
Maintain the oil level between the Min and Max marks on the dipstick. NOTICE Do not operate the generator if the oil level is below the Min or above the Max mark. Studio ti 75608 700-08EB... -
Page 265: Generator Cooling System
Hot coolant and steam in the cooling system of a warm engine may cause severe injury or death. Coolant Check and Filling See manufacturer’s manual. Flushing and Cleaning Procedure See manufacturer’s manual. Impeller Inspection and Replacement Procedure See manufacturer’s manual. Studio ti 75608 700-08EB... -
Page 266: Generator Fuel System
Tighten or replace the hose clamps and/or hangers as needed. − Check that the exhaust outlet is unobstructed. − Visually inspect for exhaust leaks. − Check for carbon or soot residues in the exhaust components. These residues indicate exhaust leaks, which must be repaired. Studio ti 75608 700-08EB... -
Page 267: Batteries
NEVER clog the air inlets of the cases containing the batteries because voltmeter. the natural ventilation of the batteries must always be ensured so that they do not overheat. Studio ti 75608 700-08EB... -
Page 268: Shore Electric Power Supply
The “out-limit” switch is located in the guide and roller assembly. The nylon safety collar activates the “out-limit” switch and serves as a mechanical stopping device should the “out-limit” switch fail. Polarity indicators on main electric panel Studio ti 75608 700-08EB... - Page 269 − If the polarity is correct, red light off, turn ON the master circuit breaker relevant to the shore outlet in use, then select the shore power source on main electric panel. Studio ti 75608 700-08EB...
- Page 270 Inspect the system at − disconnect the shore power cable and rewind it by means of the least once a year. cablemaster; − fasten tightly lid of shore power supply outlet. Studio ti 75608 700-08EB...
- Page 271 This will help to prevent arcing. The shore power outlet is set at 50 A to protect the shore power supply cord fitting. Do not exceed a current absorption of 50 A. Studio ti 75608 700-08EB...
-
Page 272: Battery Charger
• Batteries charged and in floating stage Communication fault − LED “Power On” blinks • LED “Float” or “Boost” is on - Communication network fault - Security voltage charge • Check the network connection (internal & external) Studio ti 75608 700-08EB... - Page 273 LED “Bat” blinks − LED “Bat” blinks − LED “Fuse” blinks • Faulty external sensor temperature • floating phase to 09 position • The charger is on stand-by for 30 seconds • Check the external sensors connections Studio ti 75608 700-08EB...
- Page 274 Before working on the battery charger, disable the generators and the shore power supply line. Risk of electrical shock, which can cause severe injury or death, exists when electric power is present or is turned on by accident. Studio ti 75608 700-08EB...
- Page 275 Never attempt to charge a frozen battery or to use it to start engines. Charging or drawing on a battery with frozen electrolyte may cause an explosion and/or fire. Studio ti 75608 700-08EB...
-
Page 276: 24 V Dc Voltage Equalizer
24-volt bank, and it is not capable of sensing unbalanced loads within the battery bank. For further information, refer to manufacturer manual. Studio ti 75608 700-08EB... -
Page 277: Inverter
According to the load the inverter will switch off after a short period. If the inverter is disabled by means of switch placed on the front panel, the link with network power supply is not cut out. Studio ti 75608 700-08EB... - Page 278 ELECTRICAL SYSTEM NOTES: Studio ti 75608 700-08EB...
-
Page 279: Interior Details
INTRODUCTION HOW TO USE THIS MANUAL DESCRIPTION OF THE YACHT GETTING UNDERWAY INSTRUMENTATION & EQUIPMENT HELM STATION ON DECK PROPULSION SYSTEMS HYDRAULIC SYSTEMS ELECTRICAL SYSTEM INTERIOR DETAILS INTERIOR DETAILS SAFETY DEVICES & EQUIPMENT YACHT LIFTING & ONSHORE HANDING MAINTENANCE TROUBLESHOOTING... -
Page 280: Interior Details - Enclosed Bridge
ENCLOSED BRIDGE 1. Sofa with peaks below and ventilation system 2. Port first mate seat 3. Electric wiring location 4. Helm station 5. Starboard first mate seat 6. Services cabinet 7. Main deck access stair (interior) Studio ti 75608 700-08EB... -
Page 281: Interior Details - Main Deck
1. Salon access door 2. Entertainment center 3. Main electric panel 4. Forward Upper Dinette With Table 5. Secondary electric panel 6. Stateroom area access stairs 7. Galley 8. Salon sofa 9. Salon table 10. Salon window Studio ti 75608 700-08EB... -
Page 282: Access To The Enclosed Bridge
When underway, the yacht’s normal movement in the water can cause the slipping or falling of persons with the potential hazard of serious injury or even death. Persons should remain seated in secure locations when the yacht is underway. Studio ti 75608 700-08EB... - Page 283 CAUTION Use extra caution when moving from one place to another, especially if the change involves using a ladder or stairs. To prevent falls on ladders and stairs, always use handrails when ascending or descending. Studio ti 75608 700-08EB...
-
Page 284: Main Deck Description - Interior
While underway, the access door must be closed. Starboard of the salon is arranged with the entertainment center consisting of a color TV-set and of a stereo system with relevant speakers; with various cabinets housing inside the main electric panel and the icemaker. Studio ti 75608 700-08EB... - Page 285 The system is supplied at 230 V AC. It is automatically switched on when the hose is plugged into the vacuum receptacle, and is automatically switched off when the hose is removed. Replacement collection bags are available from: Wal-Vac, Inc. 318 Mart Street SW Grand Rapids, Michigan 49508 Studio ti 75608 700-08EB...
- Page 286 Children are allowed to use the galley only when they are able to use its Along the stairs, protected by a lid items correctly and to understand the dangers specified in the special is installed the secondary electric instruction handbooks. The help of an adult is essential. panel. Studio ti 75608 700-08EB...
-
Page 287: Belowdeck
1. Helm gear compartment 2. Generators room 3. Engineroom 4. Master stateroom 5. Crew/Day head 6. Access stairs 7. Crew stateroom 8. VIP head 9. VIP stateroom 10. Starboard guests’ stateroom 11. Starboard guests’ head 12. Master head Studio ti 75608 700-08EB... -
Page 288: Staterooms With Head: Master, Guests, Vip
− the sump pump; the ceiling. − the bilge pumps; The stateroom has its own head − holding tank discharge; with shower. − holding tank pump; − bow thruster; − grey water pump. Studio ti 75608 700-08EB... - Page 289 All staterooms are equipped with self-adjusting air conditioning and portholes, illuminating and ventilating the room. All portholes are equipped with shading mosquito net. CAUTION During navigation it is necessary to unlock the safety closure of the fore skylight. Studio ti 75608 700-08EB...
-
Page 290: Appliances
Check for water seal at least once every three months. Clean seals when required and replace if necessary Dishwasher maintenance See manufacturer’s manual indicated. CAUTION Fridge/freezer maintenance During navigation it is necessary to unlock the safety closure of the fore See manufacturer’s manual indicated. skylight. Studio ti 75608 700-08EB... - Page 291 INTERIOR DETAILS NOTES: Studio ti 75608 700-08EB...
- Page 292 INTERIOR DETAILS NOTES: Studio ti 75608 700-08EB...
- Page 293 INTRODUCTION HOW TO USE THIS MANUAL DESCRIPTION OF THE YACHT GETTING UNDERWAY INSTRUMENTATION & EQUIPMENT HELM STATION ON DECK PROPULSION SYSTEMS HYDRAULIC SYSTEMS ELECTRICAL SYSTEM INTERIOR DETAILS SAFETY DEVICES AND SAFETY DEVICES & EQUIPMENT EQUIPMENT YACHT LIFTING & ONSHORE HANDING MAINTENANCE TROUBLESHOOTING...
-
Page 294: General Safety Standards
SAFETY DEVICES AND EQUIPMENT 12.1 GENERAL SAFETY STANDARDS BERTRAM designed and built your yacht with your safety and the safety The time you invest in reading this manual about safety will provide you of your guests as its highest priority. Nevertheless, the primary... - Page 295 This operation is allowed only in case of life danger for the persons onboard and for the safety of the yacht itself, however when the engine is running it should not run higher than 1000 rpm. Studio ti 75608 700-08EB...
-
Page 296: General Safety Considerations
Never jump from or onto the yacht. Never use machinery These PFD’s are excellent safety gear to have for yourself and your control devices, drive wheels, etc. as handholds. Failure to observe guests. these practices can result in illness, serious injury or death. Studio ti 75608 700-08EB... -
Page 297: Rules Of Navigation
Make sure that the engineroom is properly ventilated when engines and/ Keep a proper watch ahead of and around the yacht at all times when underway. or generator are running. Studio ti 75608 700-08EB... - Page 298 WARNING Tampering with, interrupting, removing or bypassing any safety device installed on your yacht can result in serious damage to your yacht and/ or cause personal injury or death to persons onboard. Studio ti 75608 700-08EB...
-
Page 299: Pfd's - Personal Flotation Devices And Life-Saving Equipment
(supplied or not). Bertram furnishes type II adult size (90 lbs) PFDs. This type of PFD is If the vessel is not used commercially, PFDs may be type I, II, or III. - Page 300 Bertram supplies one type IV device. You should mount this device in a suitable location. We recommend about 60 feet of light line be attached to the device.
-
Page 301: Yacht's Areas & Escape Routes
E. Salon, dinette and galley F. Enclosed bridge WARNING You have therefore, according to the nature and position of the danger or fire source, to choose very carefully the most safe and suitable escape route. B01591 Studio ti 75608 700-08EB... - Page 302 DANGER It is forbidden to stay or to walk on the corridor and on the side yacht foredeck, while underway, because no railing prevents the risk of falling at sea. Studio ti 75608 700-08EB...
-
Page 303: Enclosed Bridge Area
12.4.2 Salon, dinette and galley area The salon, dinette and galley area shows a single access and exit (escape route). From salon, dinette and galley area, use the exit path towards the cockpit (2nd Path). 2nd Path B01592 Studio ti 75608 700-08EB... -
Page 304: Master, Guests' & Vip Staterooms Area
4th Path escape route. During navigation it is compulsory to unlock the safety closure of the fore skylight, so as to grant a safe and quick escape. B01063 Studio ti 75608 700-08EB... -
Page 305: Fire Prevention
CAUTION combustible materials (e.g. oily rags and waste materials) anywhere aboard the yacht. Do not use water for extinguishing electric or electronic equipment fires. Studio ti 75608 700-08EB... -
Page 306: Fire Emergency
VHF or SSB radios. − Extinguish all open flames. Do not open engineroom access hatch, until the fire is completely − Do not open the engineroom access hatches for at least 15 minutes. extinguished. Studio ti 75608 700-08EB... -
Page 307: Leaving The Yacht
The fuel leaks will float with the current and may ignite. When out of danger, verify the presence of all those who were onboard, and help those in need. − Use the distress signal. − Keep all together to make the rescue easier. Studio ti 75608 700-08EB... -
Page 308: Fire Extinguishing
Failure to observe these practices can result in illness, serious injury or death. Studio ti 75608 700-08EB... -
Page 309: Firefighting Systems
SAFETY DEVICES AND EQUIPMENT 12.8 FIREFIGHTING SYSTEMS 12.8.1 Firefighting system displacement Fixed firefighting system emergency control in the engineroom FM200 fixed fire extinguisher B01614 Studio ti 75608 700-08EB... -
Page 310: Portable Fire Extinguishers
Service portable extinguishers at an authorized facility and in accordance with the manufacturer’s recommendations and applicable regulations. For further information refer to the extinguisher manual or address to the manufacturer. Studio ti 75608 700-08EB... -
Page 311: Maintenance Of Portable Fire Extinguishers
(are) unobstructed. − the fixed system has not been discharged. NOTICE Maintain all firefighting equipment and controls according to the Manufacturer’s instructions. Have the firefighting equipment serviced at regular intervals by a qualified technician. Studio ti 75608 700-08EB... -
Page 312: Engine Room Fixed Fire Extinguishing System
In the helm station is placed the control panel for the firefighting system. The red indicator light will illuminate on the helm station panel or on main electric panel and the buzzer sounds, indicating an overheat condition in the engineroom or generator room. Studio ti 75608 700-08EB... - Page 313 Do not open the engineroom access hatch. The fixed fire extinguisher will fight fires only in the engineroom. Fires outside the engineroom should be fought with the portable hand-held extinguishers. Studio ti 75608 700-08EB...
- Page 314 The switch must always be set to NORMAL. Use OVERRIDE only in case of collision risk because of navigation in confined waters and to restart the engines after system discharge. WARNING OVERRIDE switch has to be used only in case of real emergency. Studio ti 75608 700-08EB...
- Page 315 2. FM200 cylinder 3. Delaying cylinder 4. Firefighting panel on the enclosed bridge 5. Firefighting system control panel 6. Firefighting panel on main electric panel 7. Firefighting system LED System controls Main electric panel Fire extinguisher Studio ti 75608 700-08EB...
- Page 316 Verify the operation at least once every three months and remove any powder deposits carefully. grease cables and connections at least once a year. Studio ti 75608 700-08EB...
- Page 317 To avoid diseases, injuries or death caused by the breathing − Have the fixed fire extinguisher system and any hand-held fire of the fumes, make sure that nobody stays in the engineroom during the extinguishers serviced as soon as possible. system discharge. Studio ti 75608 700-08EB...
- Page 318 CAUTION Before entering the engineroom after a fire, be certain that the fire is totally extinguished. Prior to entering, ventilate the room by opening the hatches. Studio ti 75608 700-08EB...
- Page 319 Protect DANGER eyes and skin during installation or maintenance of the firefighting systems. The safety pin inserted prevents the activation of the manual discharge (by means of tie-rod). Studio ti 75608 700-08EB...
- Page 320 When checking the system pressure, the system or the environment temperature must be determined. The green area of the pressure gauge indicates the system pressure at 70 °F (21.1 °C). To determine the pressure state of the system, adjust the temperature. Studio ti 75608 700-08EB...
-
Page 321: Recommended Items To Have Onboard
− 1 gal of hydraulic oil for the trim tabs − tool kit − 1 gal of anti-freeze coolant liquid − 35 oz of oil for the bow thruster − 1 gal of oil for the electro-hydraulic system − 1 navigation light bulb set Studio ti 75608 700-08EB... - Page 322 SAFETY DEVICES AND EQUIPMENT NOTES: Studio ti 75608 700-08EB...
- Page 323 INTRODUCTION HOW TO USE THIS MANUAL DESCRIPTION OF THE YACHT GETTING UNDERWAY INSTRUMENTATION & EQUIPMENT HELM STATION ON DECK PROPULSION SYSTEMS HYDRAULIC SYSTEMS ELECTRICAL SYSTEM INTERIOR DETAILS YACHT LIFTING & ONSHORE SAFETY DEVICES & EQUIPMENT HANDING YACHT LIFTING & ONSHORE HANDING MAINTENANCE TROUBLESHOOTING...
-
Page 324: Yacht Lifting And Launching
Because a great difference may exist between different load conditions (e.g., yacht empty and yacht fully-loaded) the lifting straps must be arranged at the time of lifting according to the yacht’s load conditions. SLING B01513 Studio ti 75608 700-08EB... - Page 325 WARNING Do not allow any personnel to walk under or work under items or equipment supported by hoisting equipment. Hoisted items or equipment can fall if not safely supported leading to serious personal injury or death. Studio ti 75608 700-08EB...
-
Page 326: Storing The Yacht Ashore
TY-28, Boat Lifting And Storage, from ABYC at www.abycinc.org or by calling (in the USA) 1-410-956-1050. NOTICE BERTRAM declines any responsibility for the location of the lifting straps, the lowering or lifting of the yacht, and the integrity of the support points placed by other yacht yards. -
Page 327: Towing
Take on board only as many persons as your yacht can carry safely, and proceed to the nearest harbor. Inform the Coast Guard immediately. Studio ti 75608 700-08EB... - Page 328 Take added care if towing, or being towed, with nylon lines. These lines stretch, and if a fitting fails or the line parts, the end can snap back with sufficient force to cause injury or death. Studio ti 75608 700-08EB...
- Page 329 YACHT LIFTING & ONSHORE HANDING NOTES: Studio ti 75608 700-08EB...
- Page 330 YACHT LIFTING & ONSHORE HANDING NOTES: Studio ti 75608 700-08EB...
- Page 331 INTRODUCTION HOW TO USE THIS MANUAL DESCRIPTION OF THE YACHT GETTING UNDERWAY INSTRUMENTATION & EQUIPMENT HELM STATION ON DECK PROPULSION SYSTEMS HYDRAULIC SYSTEMS ELECTRICAL SYSTEM INTERIOR DETAILS MAINTENANCE SAFETY DEVICES & EQUIPMENT YACHT LIFTING & ONSHORE HANDING MAINTENANCE TROUBLESHOOTING...
-
Page 332: General Maintenance Safety Standards
Wear protective clothes suitable with the kind of work to carry out (helmets, safety shoes and protective goggles, overalls). Button up the cuffs, do not use ties or scarves and do not leave your long hair loose. Studio ti 75608 700-08EB... - Page 333 The lifted equipment may fall and hurt you. Do not walk or work under lifted equipments not safely supported and secured. DANGER The moving parts of the engine are dangerous; do not open the housings if the yacht is in use. Studio ti 75608 700-08EB...
- Page 334 A frozen battery may explode if used or charged; do not start a yacht controls to release the residual pressure. Prevent the engine start with with a frozen battery. To avoid the battery freezing keep it always disconnected hoses. completely charged. Studio ti 75608 700-08EB...
- Page 335 Wash accurately with warm water and soap the skin eventually polluted with oil: do not use gasoline, diesel or petroleum and anyway seek expert medical help. Studio ti 75608 700-08EB...
- Page 336 Manufacturer’s Yard. BERTRAM declines all responsibility concerning tampering carried out by third parties on equipment installed in the Yard. Such non authorized tampering, besides causing the immediate lose of warranty rights, can cause damages to the yacht and to people on board.
-
Page 337: Sacrifical Anodes
There also may be internal anodes in other equipment that uses seawater as a cooling liquid. Check and replace these anodes according to the maintenance schedule and instructions in the Manufacturer’s manuals for the specific equipment. Studio ti 75608 700-08EB... -
Page 338: Periodic Check Of External Anodes
Failure to replace the anodes can cause the spreading of corrosion on the other metallic parts. NOTICE It is necessary to check the wear (wasting) of the anodes frequently, and to replace them when they are 50% of their original size. Studio ti 75608 700-08EB... -
Page 339: Long-Term Lay-Up (Decommissioning)
If the yacht is stationed outside, cover it with a waterproof sheet placed in such a way that allows ventilation. Otherwise the formation of mould on the yacht surface could be helped. Studio ti 75608 700-08EB... - Page 340 Wash all metallic parts with fresh water and protect them with a corrosion- Clean teak decks and trim with a cleaning solution recommended for inhibiting product. teak. Avoid harsh cleaning products that can strip the wood of its natural oils. Studio ti 75608 700-08EB...
- Page 341 Refrigerators and icemaker Remove all foodstuffs/ice, etc. and clean the interiors. Leave doors open to allow ventilation. Clean the exteriors of the units. Disconnect and drain icemaker supply lines. Studio ti 75608 700-08EB...
-
Page 342: Commissioning The Yacht
− Warm up the engines by allowing the engine rpm to advance at intervals of several minutes at each speed before bringing them to full speed. − Stop the engines. Replace fuel filters. Replace oil filters. Top up engine oil if necessary. See the engine manuals for instructions. Studio ti 75608 700-08EB... -
Page 343: Bottom Maintenance
WARNING bottom in your area of operation. If you need assistance to select the right coating for Your yacht, contact the BERTRAM Customer Support. Bad maintenance condition (barnacles, etc.) may cause cavitation and damage shafts, rudders, propellers, etc. -
Page 344: Renewing Antifouling Protection
Antifouling is poisonous, it should never be burnt, use only authorized elimination procedures and in case of doubts contact the authorities in charge. The sandblasting operations and removal of anti-fouling must be carried out with suitable clothes and protections. Studio ti 75608 700-08EB... -
Page 345: General Maintenance
To remove the old antifouling, do not use sandblasting that may damage gel-coat surface and the anti-osmosis resin and expose fibers. As suggested by the antifouling Manufacturer’s use paint removers or, as an alternative, wet sanding. Studio ti 75608 700-08EB... -
Page 346: Light Alloys And Stainless Steel
The aft glass wall is not watertight, so do not point the bolt of water towards the window, when washing. WARNING Do not use brushes or abrasive rags on metallic fittings, not even on rusty spots, scratches on the surface result in a less shiny appearance. Studio ti 75608 700-08EB... -
Page 347: Sunpad Cushions
• dry with a soft cloth not leaving any residuals. Preservation: • store the upholstery clean and dry in a cool and ventilated area without moisture; • do not lay heavy objects on the upholstery when stored. Studio ti 75608 700-08EB... -
Page 348: Instrumentation And Navigation Lights
Clean them at least once a week. Protect the piston for the enclosed bridge gauge console opening with suitable products, at least once every six months. WARNING Do not use chemical or abrasive products. Studio ti 75608 700-08EB... -
Page 349: Replacement
Sometimes the use of non-genuine spare parts may cause the withdrawal of the Manufacturer’s warranty. WARNING Check the bulb operation before setting up for navigation to avoid any inconvenient by night use. Studio ti 75608 700-08EB... -
Page 350: Bulb Replacement
The bulb graft is of indent-type. After grafting the new bulb, proceed in reverse sequence to restore the initial conditions. DANGER Lights develop heat. Do not approach inflammables. Studio ti 75608 700-08EB... -
Page 351: Directable Light
After grafting bulb, fingers the glass of the new bulb. proceed in reverse sequence to After grafting bulb, restore the initial conditions. proceed in reverse sequence to restore the initial conditions. Studio ti 75608 700-08EB... -
Page 352: Passageway Bilge Overhead Light
Then replace the bulb. The bulb is bulb. The bulb is screw-tightened. screw-tightened. After grafting bulb, After grafting bulb, proceed in reverse sequence to proceed in reverse sequence to restore the initial conditions. restore the initial conditions. Studio ti 75608 700-08EB... -
Page 353: Step Lights
After grafting bulb, proceed in reverse sequence to restore the initial conditions. Studio ti 75608 700-08EB... - Page 354 MAINTENANCE NOTES: Studio ti 75608 700-08EB...
-
Page 355: Troubleshooting
INTRODUCTION HOW TO USE THIS MANUAL DESCRIPTION OF THE YACHT GETTING UNDERWAY INSTRUMENTATION & EQUIPMENT HELM STATION ON DECK PROPULSION SYSTEMS HYDRAULIC SYSTEMS ELECTRICAL SYSTEM INTERIOR DETAILS TROUBLESHOOTING SAFETY DEVICES & EQUIPMENT YACHT LIFTING & ONSHORE HANDING MAINTENANCE TROUBLESHOOTING... -
Page 356: Main Notes
The corrective actions must be performed by specialized personnel. CAUTION BERTRAM declines any responsibility for proposed corrective action carried out by unskilled personnel. CAUTION For matters relating to specific equipment and for troubleshooting any equipment, please refer to the Owner’s manual of that equipment. -
Page 357: Equipment
TROUBLESHOOTING 15.2 EQUIPMENT For further information, please refer to BERTRAM Customer Support. Problem Cause Action − Power line fuses of users blown − Check the line and replace the fuses 1. Equipment not powered on − Wiring disconnected − Check wiring connections −... -
Page 358: Fuel System
TROUBLESHOOTING 15.3 FUEL SYSTEM For further information, please refer to BERTRAM Customer Support. Problem Cause Action − Circuit valves closed or not fully open − Check/open 1. Irregular fuel supply engines generators − Filters clogged − Clean Studio ti 75608 700-08EB... -
Page 359: Black And Gray Water System Drain
TROUBLESHOOTING 15.4 BLACK AND GRAY WATER SYSTEM DRAIN For further information, please refer to BERTRAM Customer Support. Problem Cause Action − Circuit valves closed or not fully open − Check/open 1. Black water (sewage) tank or gray water tank drain irregular −... -
Page 360: Propellers Shafts
TROUBLESHOOTING 15.5 PROPELLERS SHAFTS For further information, please refer to BERTRAM Customer Support. Problem Cause Action − Too long inactivity period and lack of − Carry out proper maintenance 1. Excessive vibrations and noise maintenance − Failure in the propulsion system −... -
Page 361: Fresh Water System
TROUBLESHOOTING 15.6 FRESH WATER SYSTEM For further information, please refer to BERTRAM Customer Support. Problem Cause Action − Circuit valves closed or not fully open − Check/open 1. No water at the outlets − Empty tanks − Fill the tanks and bleed the circuit −... -
Page 362: Bilge Pump
TROUBLESHOOTING 15.7 BILGE PUMP For further information, please refer to BERTRAM Customer Support. Problem Cause Action − No voltage − Check the value of the line voltage 1. The pump does not start − Blocked impeller − Clean the impeller and the pump casing −... - Page 363 TROUBLESHOOTING 15.8 FRESH WATER PUMP For further information, please refer to BERTRAM Customer Support. Problem Cause Action − No water − Check the water supply 1. The pump does not start − Overheating due to high temperature − Add cold water <95 °F (35 °C) −...
- Page 364 TROUBLESHOOTING 15.9 OIL TRANSFER PUMP For further information, please refer to BERTRAM Customer Support. Problem Cause Action − Closed valves − Open valves 1. Water flow restriction − Plugged suction − Eliminate restriction − Air leak at suction − Locate and repair leak −...
- Page 365 − Solid particles in fluid − Install the suction strainer. Clean the suction strainer − Air or gas in the fluid − Eliminate air or gas from fluid − Worn or damaged pump − Inspect and repair as required Studio ti 75608 700-08EB...
- Page 366 6. Seal leaks − Solid in fluids − Add suction strainer − Damaged during field replacement − Inspect and replace damaged components − Seal material incompatible with fluid − Verify original application conditions. Address to Customer Support. Studio ti 75608 700-08EB...
- Page 367 TROUBLESHOOTING 15.10 ELECTRO-HYDRAULIC HELM SYSTEM For further information, please refer to BERTRAM Service Department. Problem Cause Action − − Air bubbles or foam into the system The oil level into the tank is too low and Verify/Check doesn’t allow suction pipe to be completely plunged.
- Page 368 − − Restriction of the pump suction pipes or Verify/Check possible obstruction of the filter − − Air in leakages into the suction pipes or by Verify/Check the pump’s seals − − Worn pump Verify/Check Studio ti 75608 700-08EB...
- Page 369 (the filter could be dirty or not suitable) − − Big lacks of charge along the suction line Verify/Check − − Worn pump’s components Verify/Check/Replace − − Relief valve vibrations Verify/Check − − Mechanical vibration due to a bad anchor Verify/Check action Studio ti 75608 700-08EB...
- Page 370 − − Seals are faulty, broken or mounted in a Verify/Check wrong way − Too hot oil − Verify/Check − − Pump overcharged motor Too viscous oil Verify/Check − − Obstructed delivery fine excessive Verify/Check resistance Studio ti 75608 700-08EB...
- Page 371 TROUBLESHOOTING 15.11 TRIM TAB SYSTEM For further information, please refer to BERTRAM Customer Support. Problem Cause − The oil level into the tank is too low and doesn’t allow suction pipe to be completely plunged. In 1. Air bubbles or foam into the system this way, the pump sucks oil and air contemporarily −...
- Page 372 − Seals are faulty, broken or mounted in a wrong way − Too hot oil − Action 8. Pump overcharging the motor − Too viscous oil − Obstructed delivery fine or excessive resistance Studio ti 75608 700-08EB...
- Page 373 TROUBLESHOOTING 15.12 GLENDINNING CABLEMASTER For further information, please refer to BERTRAM Customer Support. Problem Cause Action − Tripped breaker − Reset breaker 1. Non-functional (either no power or unit has power and does not respond) − Power wire incorrectly connected to relay −...
- Page 374 - see cable adjustment − Defective motor − Disconnect motor wires from relay box. Apply power directly to motor wires, motor should run one direction of other. No response from motor, replace Studio ti 75608 700-08EB...
- Page 375 TROUBLESHOOTING 15.13 AIR-CONDITIONING UNIT For further information, please refer to BERTRAM Customer Support. Problem Cause Action − − Turn circuit breaker on 1. Display does not operate − Check CX/CXP cable and connections − Replace keypad/display − Replace power logic board −...
- Page 376 7. Compressor cycle on and off − Water flow restriction − Clear restriction − Condensate drain is clogged − Clean out drain holes 8. Water dripping inside cabin − Blockage in hose − Clean hose. Check downhill routing of hose Studio ti 75608 700-08EB...
- Page 377 TROUBLESHOOTING NOTES: Studio ti 75608 700-08EB...
- Page 378 TROUBLESHOOTING NOTES: Studio ti 75608 700-08EB...
- Page 379 TECHNICAL PLANS...
Need help?
Do you have a question about the 700 and is the answer not in the manual?
Questions and answers