Table of Contents
Advertisement
Quick Links
Advertisement
Table of Contents

Related Manuals for MiCo BioMed Veri-Q PCR 316 QD-P100

Summary of Contents for MiCo BioMed Veri-Q PCR 316 QD-P100
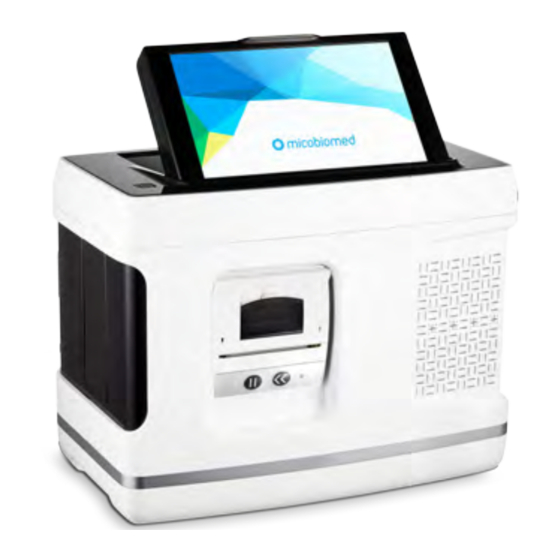
- Page 1 Veri-Q PCR 316 QD-P100 User Manual Apr. 2020 Cat No. 9R501...
- Page 2 Model name : QD-P100 For safe use, please use the device after reading the manual thoroughly. Please furnish this document at a designated location so it can be used at all times. MiCo BioMed Co., Ltd. and 4 Floor , 54 Changeop-ro, Sujeong-gu,...
-
Page 3: Table Of Contents
Veri-Q PCR 316 QD-P100 User Manual Table of Contents 1. Before you begin 6. Warranty Policy 1-1. About the manual 7. Return Policy 1-2. General Requirements for Installation 8. Classification of Symbols 1-3. How to Obtain More Information 1-4. About Customer Support 9. -
Page 4: Before You Begin
1-4. About Customer Support Mico Biomed is using 070-5227-6000 for prompt customer support of the product and to minimize inconvenience. We are also prepared to listen to our customer’s questions and comments at all times from the customer’s voice(Q&A) bulletin board at Mico BioMed Co., Ltd. -
Page 5: Purpose Of Use
Veri-Q PCR 316 QD-P100 User Manual 2. Safety Guideline QD-P100 System is an electronic and mechanical device. Since there is a risk of electric shock or physical injury, you must operate the device according to the user manual. The manufacturer is not held responsible for problems arising from not observing the safety precautions. - Page 6 Veri-Q PCR 316 QD-P100 User Manual 2-3-2. Shipping and Transport ● In case of an emergency, immediately unplug the power cable. QD-P100 System is packaged in a hard case, and is shipped in a box. The hard case includes QD-P100 System and its components. The product componentss, specification, PCR installation, and usage method are explained in detail later on.
- Page 7 Veri-Q PCR 316 QD-P100 User Manual the cause of product breakdown. 5) Transport while carrying it with a hand. 8. Do not place items that can interfere with the operation around the product. This may interfere with the operation of the product, and abnormality may occur when operating the door.
- Page 8 The QD-P100 is optimized to use with Veri-Q PCR 316 reagent kit made by Mico BioMed and it couldn’t - When using the device in connection to a computer, set “Turn off monitor”, “Turn off hard disk”, guaranteed performance excepting the system.
-
Page 9: Product Component And Specification
Veri-Q PCR 316 QD-P100 User Manual 3. Product Component and Specification Optional Components Chip cradle 3-1. Product Composition and Characteristic SW CD The warranty period of the product is 1 year from the date of purchase. However, in case of a breakdown due to the user’s negligence, free warranty is not available. - Page 10 Veri-Q PCR 316 QD-P100 User Manual 3-1-3. Device Structure and Name 4. Side View 1. Front View 3-1-4. How to Install Product 2. Top View 1. Device Connection 1) Open the hard case. 2) Check whether nothing is wrong with the components and the device.
- Page 11 Veri-Q PCR 316 QD-P100 User Manual - Installation Location The backside should be installed more than 10cm away from the wall. The side of the device should be installed more than 20cm away from the wall or other items. 6) Install QDInstallManager.exe 2.
-
Page 12: How To Use
Veri-Q PCR 316 QD-P100 User Manual 3.2 How to Use 3-2-1. Device Operation and Experiment Preparation If the device and the computer are installed and connected according to the product installation method, check the normal operation of the device and start the experiment. - Page 13 Veri-Q PCR 316 QD-P100 User Manual ■Select the light source of the sample to be measured. ■Set the number of cycles of the sample to be measured. ■Select a number of protocol steps. ■Set the temperature and time of the sample to be measured.
- Page 14 Veri-Q PCR 316 QD-P100 User Manual ■The door of the device can be opened and closed by pressing Chip In/Out button. ■Progress can be checked in the View tab while PCR is in progress. ■The device can be operated by pressing RUN START button.
-
Page 15: Preparation For Experiment
Veri-Q PCR 316 QD-P100 User Manual 3-3 Preparation for Experiment ■When PCR is finished, a pop-up window informing that the PCR is finished pops up. For sample preparation, see the instructions for use of Veri-Q PCR 316 reagent kit made by Mico BioMed 3-3-1. - Page 16 Veri-Q PCR 316 QD-P100 User Manual 3-3-3. LabChip Case Mounting 3-3-4. LabChip Insertion As shown in the photo below, the left part is the bottom board and the right part is the part that will Chip door will automatically open once the device is turned on. When inserting the chip case, the cover the left part.
-
Page 17: How To Install And Use The Operating Program
Veri-Q PCR 316 QD-P100 User Manual 4. How to Install and Use the Operating Program 4-1-2. CP210x Driver Install(32bit, 64bit) 4-1. Execution of Distribution CD and Installation of Operating Program 4-1-1. Execution of Distribution CD <Figure 1> QD-P100 Distribution Program Folder and Execution File <Figure 3>... - Page 18 Veri-Q PCR 316 QD-P100 User Manual <Figure 7> CP210x 64Bit Driver Install Execution Screen-4 5. Select “Finish” button as shown in <Figure 7>. <Figure 5> CP210x 64Bit Driver Install Execution Screen-2 4-1-3. QD-P100 Software Install 3. Select “I accept this agreement” and then “Next” button as shown in <Figure 5>.
- Page 19 Veri-Q PCR 316 QD-P100 User Manual <Figure 9> QD-P100 Software Install Execution Screen-2 2. Select “Next” button as shown in <Figure 9>. <Figure 11> QD-P100 Software Install Execution Screen-4 4. Select “Finish” button and finish installation as shown in <Figure 11>.
-
Page 20: How To Use The Operating Program
Veri-Q PCR 316 QD-P100 User Manual 4-1-5. DaViewIndy(PDF Viewer) 4-2. How to Use the Operating Program 4-2-1. Working Wizard In the working wizard, you can view the list of settings previously experimented and the list of result files. <Figure 13> DaViewIndy Installation <Figure 1>... - Page 21 Veri-Q PCR 316 QD-P100 User Manual This program turns off if “Yes” is pressed. If “Retry” is pressed, it attempts to connect once again. If 3. Working Select “Ignore” button is pressed, the screen of the program is displayed, but the connection with the device Quick Start : Shows the quick execution list of the set working files.
- Page 22 Veri-Q PCR 316 QD-P100 User Manual 1. Default Protocol 3. Import Protocol QD-P100 basically provides 6 Protocols. You can select and use a desired Protocol out of Protocol Type You can import and use the Protocol files saved in the PC. The extension of the Protocol file is .ptcl.
-
Page 23: Pcr Chip Setting
Veri-Q PCR 316 QD-P100 User Manual 4-3-1. Default Chip 5. Save Protocol File QD-P100 basically provides 3 Chip Settings. (FAM, CY5 and FAM-CY5) You can select and use the If you press “OK” button in the edit / create pop-up window after finishing all setting on the Protocol, a desired Chip Setup as shown in <Figure 11>. - Page 24 Veri-Q PCR 316 QD-P100 User Manual 4-3-3. Import Protocol You can import and use the Chip Setting file saved in a PC. The extension of Chip Setting file is .cs16. <Figure 15> Condition of selecting multiple channels in Chip View 2.
- Page 25 Veri-Q PCR 316 QD-P100 User Manual - Select Color Style 3. Sample Name The user can set the sample name for each channel. “Sample Name All” can set all sample name value of the selected channel, and “Sample Name Each” can set the sample name for each channel. In addition, you can save or import the set sample name as a file.
-
Page 26: Operation
Veri-Q PCR 316 QD-P100 User Manual 4.4. Operation <Figure 23> QD-P100 rtPCR Working Status Screen <Figure 21> QD-P100 rtPCR Start Run Screen 4-4-2. Working Status 1. Chip Setup & Run Status 4-4-1. Run Information The setting on a chip can be modified even during an experiment. However, the type and quantity <Figure 21>... -
Page 27: Data Analysis
Veri-Q PCR 316 QD-P100 User Manual 4-5. Data Analysis 2. Chart Option If you right-click the mouse in the graph area and press ”Chart Option, ” a pop-up window appears as shown in <Figure 26>. This is a function for adjusting the value of x-axis and y-axis of the graph. If you click the padlock button, input value will be activated, and thus you will be able to set the desired values. - Page 28 Veri-Q PCR 316 QD-P100 User Manual <Figure 28> Auto/User Baseline Setting Pop-up Window 4. Threshold line Option If you right-click the mouse on the graph area and view the submenu of ”Thresholdline, ” there are 2 functions. ”Auto Detection” automatically searches the threshold line.
- Page 29 Veri-Q PCR 316 QD-P100 User Manual 4-5-3. Protocol Information And if you bring the mouse to the threshold line as shown in <Figure 31>, the mouse pointer image changes, and if you move the mouse up and down while holding the left button of the mouse, you In “Protocol”...
-
Page 30: Troubleshooting
Veri-Q PCR 316 QD-P100 User Manual 5. Troubleshooting 5.2. Maintenance 5-2-1. Cleaning 5.1. Error Message 1. QD-P100 does not require periodic cleaning. If a user wants to clean the device, please follow this guideline. 2. Turn off QD-P100 3. Gently wipe the LCD surface with a soft cloth. -
Page 31: Warranty Policy
Veri-Q PCR 316 QD-P100 User Manual 6. Warranty Policy 8. Classification of Symbols Unless there is a separate written agreement, our product is protected from visible or invisible defect, The packaging, the identification plate of the device, and the manual may contain the following nonfulfillment of manufacturing and materials for a period of 1 year from the date of distribution. -
Page 32: Disposal Of Electrical & Electronic Equipment
Veri-Q PCR 316 QD-P100 User Manual 9. Disposal of Electrical & Electronic Equipment 11. Purchase of Reagents and Consumables 11-1. Consumables LabChip must use only QD-P100 product manufactured by MiCoBioMed. Please check the homepage for purchase detail information (http://micobiomed.com/) 11-2. Reagents Only PCR Kits optimized for QD-P100 equipment manufactured by MiCoBioMed must be used. -
Page 33: Maintenance Checklist
12. Maintenance Checklist Equipment Checklist (QD-P100) 1. Daily Checklist 3. Quarterly Checklist Checklist Pass Fail Checklist Pass Fail The equipment is in the designated location. The weekly checklist has been completed. No foreign objects or leaks can be found around the equipment. The operation status has been checked by pressing the RUN START button after inserting a blank chip. - Page 34 MEMO MEMO...
- Page 35 PCR 316 QD-P100 User Manual Apr. 2020 MiCo BioMed Co., Ltd. and 4 Floor , 54 Changeop-ro, Sujeong-gu, Seongnam-si, Gyeonggi-do, Korea, 13449 TEL: +82-70-5227-6000 FAX: +82-70-5227-6001~2...
Need help?
Do you have a question about the Veri-Q PCR 316 QD-P100 and is the answer not in the manual?
Questions and answers