Table of Contents
Advertisement
Quick Links
Advertisement
Table of Contents

Related Manuals for DARKROOM AUTOMATION F-STOP

Summary of Contents for DARKROOM AUTOMATION F-STOP
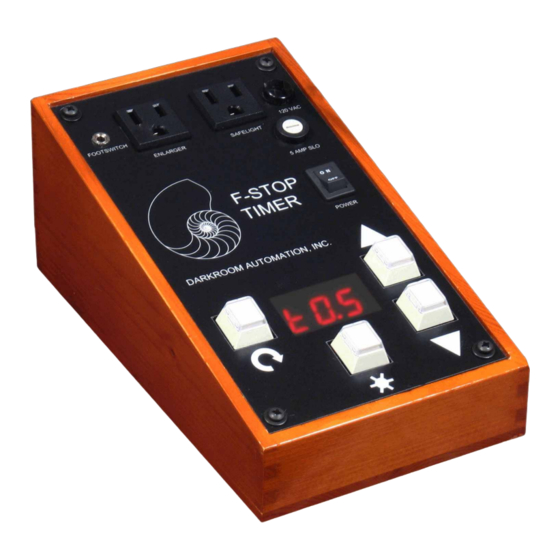
- Page 1 DARKROOM AUTOMATION MEMORY f-STOP TIMER INSTRUCTION MANUAL...
-
Page 2: Table Of Contents
APPENDIX B: STOPS TO SECONDS..23 Contents Copyright 2007, 2008, 2021 Release 1.05 31 October 2021 Add flashing of total exposure time when making test strips. DARKROOM AUTOMATION 1412 Dorsh Road Cleveland Ohio 44121-3840 USA 216.956.5795 nolindan@ix.netcom.com... -
Page 3: Installation
INSTALLATION Power: 90 - 130 VAC, 60Hz nominal. Enlarger: 300 watts maximum incandescent or cold light. If more wattage is needed then the enlarger should be wired through a contactor with the timer controlling the contactor coil. Safelight: 100 watts maximum incandescent. Do not use sodium vapor or fluorescent safelights as they are not designed for rapid on-off cycling. - Page 4 In many displays the last two digits in the LED display show the exposure setting directly in stops. Stops are related to time as follows: Display Exposure in stops time in seconds 891.4 955.4 -1.0 It is possible to set negative stops in some instances. stops is 1/2 a second, -2.0 stops is 1/4 second and so on.
- Page 5 Keys Notes on Key Operation: • Tapping or hitting a key means pushing the key down momentarily - just as you would tap a key on a keyboard. The timer often acts on the release stroke in order to differentiate a tapped key from a held key. •...
-
Page 6: Basic Mode
Subsequent sections deal with other timer modes. The timer is normally in basic f-stop timing mode when you turn it on. The timer will turn on in seconds mode if so enabled, see the chapters on setup and seconds mode. -
Page 7: Base Exposure
• Drydown adjustment - - percentage decrease in exposure to compensate for print darkening when drying. Only active if drydown has been enabled in setup mode. j0.0 To speed cycling through the basic menu, some items - are skipped after a base exposure has been made - just cycle through the menu one more time to see them. -
Page 8: Burning
If multiple dodges are to be made the shortest dodge must be made first. 1. Set the base exposure but do not expose d0.5 2. Press the menu key to advance to dodging and enter the number of stops to hold back. 3. -
Page 9: Progressive Burning
3. Insert the burning card. 4. Press the expose key. 5. If more than one burn is to be made then return to step 2 and enter the next burn exposure. 6. To burn within the just burned area go to the next section on progressive burning, below. -
Page 10: Test Strips
Test Strips The timer can make test prints with any base and exposure increment. The timer can make either progressive test strips where a strip of the paper is covered with each exposure or it can make individual test prints in a series of increasing exposures. -
Page 11: Making A Print, An Example
With each advance of the card across the paper, the timer exposes for the additional amount of time needed to expose the next strip along with remainder of the sheet. This might seem confusing at first - as an example: Base exposure = 2.0;... -
Page 12: Speed Adjustment
a. Press the mode key and use the up down keys to set the timer to a p1.0 progressive burn of stops; b. Cover the foreground, lower sky and clouds; c. Press the exposure key to make the additional 1 stop burn for the upper sky. Paper Speed Adjustment The paper speed adjustment compensates for changes in paper sensitivity. -
Page 13: Memories
MEMORIES Introduction Description The timer’s memory feature lets you program and play back the sequence of base, dodge and burn exposures you use to make a print. The timer has 15 memory banks of 20 steps each. You can keep multiple prints/programs in a single memory bank. -
Page 14: Basic Operations
Basic Memory Operations Entry and Exit Make sure the memory feature is enabled. If the memory prompt does not show up then enter setup mode and turn on the memory feature. Enter memory mode from basic mode by pressing the menu button until the display shows . - Page 15 Step types There are 14 step types. They are: Display Description blank step base xposure ow contrast exposure of a split-grade pair igh contrast exposure of a split-grade pair odge exposure urn exposure rogressive burn exposure eset progressive start exposure to the base burn * Î...
- Page 16 Exposure value and type are set and viewed with the menu key: Set the exposure value by pressing the menu key when a step is displayed - the 1E2. E2.0 display changes from Step type Exposure Set the exposure in stops with the arrow keys. Return to the step display by pressing the menu key again.
-
Page 17: Single Grade Exposures
Before deleting step 2: After deleting step 2: 1E2. 1E2. 2b1. 2b.5 3b.5 Jd1. Kd1. InS. Insert a step by pressing the up arrow until the display shows . Pressing the menu key will insert a new step after the current step and the display will show a blank step at the new location. - Page 18 For clarity the display/exposures are shown in the manual with the entire exposure setting. Normally a base exposure of 3.2 stops at step 5 would show on the display 5E3. -- however, in the instructions below it will be illustrated as a display of 5E3.2 and the truncation will be eliminated.
- Page 19 Burning 4b1.0 Burn steps are also optional, the number limited only by available memory. Burns can be made in any order. A set of progressive burns can follow each burn. Filter Prompts 3F2.5 Filter prompts are an aid when making burns with different contrast grade filters.
-
Page 20: Split Grade Exposures
4p1.2 Dark lining cloud #1 5.4 = print + sky + cloud #1 + dark lining Reset to sky burn (3.5 = print + sky) Î 6p1.0 Cloud #2 in sky 4.5 = print + sky + cloud #2 7p1.1 Dark lining cloud #2 5.6 = print + sky + cloud #2 + dark lining Additional waypoints can be set in the middle of progressive sequences. - Page 21 Contrast Control or Independent Exposures The two base exposures for split grade printing are labeled for high contrast and for low contrast. The two can be in any order. There are two options in how the exposures relate to each other. The selection is made in the timer’s setup mode and applies to all split grade printing.
-
Page 22: Seconds Mode
• Hit the up arrow to change to mer mode - -stops. • Hold the menu key down to enter basic f-Stop mode. The display will show stops. The timer remembers the current mode when it is powered off and will power up in the same mode. -
Page 23: Appendix A: Timer Setup
APPENDIX A: TIMER SETUP Enter setup mode by holding the menu key down. Hold the menu key down in setup mode to return to timer mode. The timer may return to F-Stop or Seconds ti.F ti.S timing depending on the setting of the timer type Pressing the menu key takes you from one setup item to the next. - Page 24 Print adjustment enable Ju.y Enable paper speed adjustment Ju.n Disable adjustment - you may want to do this if you never use adjustment Drydown compensation enable %.d.y Enable drydown compensation in percent %.d.n Disable drydown compensation - you may want to do this if you never use compensation Focus timeout tF.y...
-
Page 25: Appendix B: Stops To Seconds
APPENDIX B: STOPS TO SECONDS Stops Seconds Stops Seconds Stops Seconds -3.0 0.12 2.83 64.00 -2.9 0.13 3.03 68.59 -2.8 0.14 3.25 73.52 -2.7 0.15 3.48 78.79 -2.6 0.16 3.73 84.45 -2.5 0.18 4.00 90.51 -2.4 0.19 4.29 97.01 -2.3 0.20 4.59 103.97...
Need help?
Do you have a question about the F-STOP and is the answer not in the manual?
Questions and answers