Table of Contents
Advertisement
Quick Links
Advertisement
Table of Contents

Subscribe to Our Youtube Channel
Related Manuals for Human HumaCount 60TS

Summary of Contents for Human HumaCount 60TS
- Page 1 HumaCount 60 | User Manual 16420/601...
- Page 3 No part of this documentation may be reproduced in any form, nor processed, copied or distributed by means of electronic systems, without prior permission of Human GmbH in writing. Since all precautionary measures were taken into account in producing these operating instructions, the manufacturer accepts no responsibility for any errors or omissions.
-
Page 5: Table Of Contents
CONTENTS TABLE OF CONTENTS 1 SAFETY INSTRUCTIONS 1.1 INTRODUCTION 1.2 USER WARRANTY 1.3 INTENDED USE OF THE INSTRUMENT [IVD] 1.4 GENERAL SAFETY WARNINGS 1.5 DISPOSAL MANAGEMENT CONCEPT 1.6 INSTRUMENT DISINFECTION 1.7 BIOHAZARD WARNING 2 SYSTEM DESCRIPTION 2.1 THE INSTRUMENT 2.1.1 Patient Testing 2.1.2 Reagents 2.1.3 Technical Operation 2.1.4 Calibration... - Page 6 3 ROUTINE UTILIZATION AND MEASUREMENT 3.1 SAMPLE HANDLING 3.2 SAMPLE ANALYSIS 3.2.1 Sample Preparation 3.2.2 Running a (new) Sample 3.2.3 Results 3.2.4 Warning flags 3.2.5 Paramter Limits (Normal Ranges) 3.2.6 Blank Measurement 3.2.7 Using Pre-Diluted Mode 3.3 THE MEASUREMENT PROCESS 3.3.1 Control Panels 3.3.2 Display 3.3.3 Touch screen...
- Page 7 CONTENTS 5.2.2 Neutralization of Waste 5.3 WEEKLY USER MAINTENANCE 5.3.1 Cleaning Needle Washing Head 6 TROUBLESHOOTING 6.1 REGULAR TROUBLESHOOTING PROCEDURES 6.2 SPECIFICATIONS 6.3 FLUIDIC SCHEMATICS 7 APPENDIX 7.1 REAGENT SOLUTIONS AND CONSUMPTION...
-
Page 9: Safety Instructions
HUMAN, not regularly maintained, used with equipment not approved by HUMAN or used for purposes for which it was not designed. -
Page 10: Intended Use Of The Instrument [Ivd]
1.4 General Safety Warnings Use only chemical reagents and accessories specified and supplied by HUMAN and/or mentioned in this manual. Place the product so that it has proper ventilation. The instrument should be installed on a stationary flat working surface, free from vibrations. -
Page 11: Disposal Management Concept
1.6 Instrument Disinfection Analytical instruments for in vitro diagnostic involve the handling of human samples and controls which should be considered at least potentially infectious. Therefore every part and accessory of the respective instrument which may have come into contact with such samples must equally be considered as potentially infectious. -
Page 12: Biohazard Warning
1.7 Biohazard warning Analytical instruments for in vitro diagnostic application involve the handling of human samples and controls which should be considered at least potentially infectious. Therefore every part accessory respective instrument which may have come into contact with such samples must equally be considered as potentially infectious. - Page 13 SAFETY INSTRUCTIONS Notes:...
- Page 14 HumaCount 60 | User manual...
-
Page 15: System Description
SYSTEM DESCRIPTION 2 SYSTEM DESCRIPTION The HumaCount 60 is a fully automated cell counter designed for in vitro diagnostic use, developed for small clinics and point-of-care lab offices. 2.1 The Instrument HumaCount 60 is a fully automated, bench-top hematology cell counter. If the equipment is used in a It implements the so-called Coulter-method for counting cells passing through manner different from which... -
Page 16: Reagents
Both parameters describe the distribution width, but from different aspects. User can select the units to use for displaying RDW and PDW parameters. 2.1.2 REAGENTS Use only reagents supplied by HUMAN with the analyzer, otherwise accuracy cannot be guaranteed. HC-DILUENT:... -
Page 17: Calibration
SYSTEM DESCRIPTION 2.1.4 CALIBRATION HumaCount 60 arrives to your laboratory factory-calibrated and ready to use. However, calibration needs updating whenever you find that the results have slightly changed, or a different or new control material is used. With each control material you receive for the instrument, you will find a control sheet listing the parameters the instrument should match. -
Page 18: Environmental Factors
Power supply Connect the power supply to the instrument. Attach power cord outlet to Do not switch on the analyzer the external power supply of HumaCount 60 and plug the other end into a before connecting external properly grounded AC outlet. power supply to it and to the AC outlet, well... - Page 19 SYSTEM DESCRIPTION Operation at an altitude over 3000 meters (9000 ft) is not recommended, because the throughput will be degraded. Instrument is safe for transient voltages to INSTALLATION CATEGORY II and POLLUTION DEGREE 2. Environmental and electrical characteristics provide accuracy and precision of the instrument and maintain a high level of operational safety for lab personnel.
-
Page 20: Turning The Instrument On, Main Menu
Waste contains poisonous regulations substances (because the system is operated according to instructions contained herein chemical content) and human origin substances meaning biohazard. These substances are 2.2.2 TURNING THE INSTRUMENT ON, MAIN MENU representing potential danger to In case you use an external printer (for information, read manual shipped environment. -
Page 21: Turning The Instrument Off
SYSTEM DESCRIPTION Tap a touch-screen item to activate the menu element. In some cases, a priming cycle is necessary prior to sample introduction. The Wait 5 minutes before initia- instrument will perform priming cycle automatically if additional liquid in the ting any measuring process to tubing system is required. -
Page 22: Preparing For Shipment
In Main menu, select SHUTDOWN. The following screen appears: SHUTDOWN SHUT DOWN (1) Select Shutdown. The analyzer will perform the necessary steps to prevent failure pneumatic system, and then gives a tone indicating that it is safe to shut it off. Turn off the instrument using the power switch on the rear panel. -
Page 23: Handling In Emergency
SYSTEM DESCRIPTION Next, should connect the cleaning tube kit to the reagent inputs, submerging the free end in a bottle containing at least 100 ml of distilled water. Cleaning tube kit connected The analyzer will flush any remaining reagents from the system into the waste container. -
Page 24: Replacing Paper Into The Printer
2.2.6 REPLACING PAPER INTO THE PRINTER To replace paper in the printer: open the paper lid (pull the lid upwards by the handle) remove central plastic roller of old paper roll unwind new paper roll, so that the “starting edge” is coming from down under towards you gently drop the new roll into the holder of the printer, and hold the... -
Page 25: Accessories
SYSTEM DESCRIPTION 2.2.7 ACCESSORIES In case of damage or missing item, please contact the supplier immediately. TABLE 1 Accessories HumaCount 60 Hematology Analyzer 16420/60 User Manual 16420/601 Reagent Tubing kit (with coloured tubes): 16420/622 - Diluent Tube (green) - Lyse Tube (yellow) - Cleaner Tube (blue) - Waste Tube (red) - Cleaning Tube Kit... -
Page 26: Instrument Features
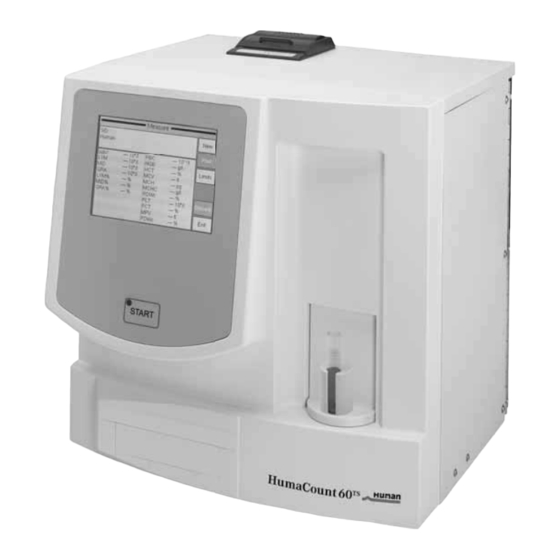
2.3 Instrument features Figures 5 and 6 show front and rear view of the analyzer, with controls and connectors. FIGURE 5 Front View 1 Built-in thermal printer 2 START button with status indicator 3 Front panel USB socket 4 Color LCD Touchscreen 5 Sample Holder with interchargeable adapters HumaCount 60... -
Page 27: Parts Of The Analyzer
SYSTEM DESCRIPTION FIGURE 6 Rear View 1 Built-in thermal printer 2 Instrument label (S/N, manuf.data) 3 Reagent Connector 4 Power Switch 5 USB A connectors 6 USB B connectors 7 Power source connector 8 External grounding connector 2.4 Parts of the Analyzer The hematology analyzer is composed of three main units: Fluidic System: Performs sampling, diluting, mixing, and lysing... -
Page 28: Control Material
2.5 Control Material The analyzer allows continuous monitoring of measurement performance with HC-CONTROL hematology control (control blood). This must match the types of samples usually run on the instrument. Specification for this material (assay values and allowed tolerances along with expiry date) is always packed with the approved control material. -
Page 29: Navigating In The Menu System
SYSTEM DESCRIPTION If the calibration was successful, you will return to the original screen. 2.6.2 NAVIGATING IN THE MENU SYSTEM The instrument uses a menu system to initiate actions and to access settings. Navigate in the menu system by simply touching the LCD at the item you want to open/activate. -
Page 30: Menu Structure
2.6.3 MENU STRUCTURE Measure Re-run Blank Print Discard Database Detail / Table view Edit record Print Filter Trends Manage Maintenance Cleaning Cleaning Hard cleaning Drain chamber Calibration Factors Measure History Quality control References Measure Diagram Database Diagnostics Device information Self test Reagent status Volumes Settings... -
Page 31: Method Of Operation
SYSTEM DESCRIPTION When you have to enter data, an on screen keyboard appears on the screen. It can be a numerical or alphanumeric keyboard, depending on the function. 2.7 Method of Operation 2.7.1 IMPENDANCE METHOD The impedance method (a.k.a. Coulter-method) counts and sizes cells by detecting and measuring changes in electrical impedance when a particle in a conductive liquid passes through a small aperture. -
Page 32: Principle Of Hgb Measurement
In that case, cyanide and any other chemical composition formed using cyanide is environmentally dangerous. Contact the reagent manufacturer for safety measures. The manufacturer (HUMAN GmbH) is not liable for any damage caused by using cyanide based reagents with any of its analyzers. - Page 33 SYSTEM DESCRIPTION Mean Corpuscular Average hemoglobin content of Hemoglobin – MCH erythrocytes, calculated from RBC and HGB (pg, fmol) values. MCH = HGB / RBC Mean Corpuscular Hemoglobin Calculated from the HGB and HCT values. Concentration – MCHC MCHC = HGB / HCT absolute Unit of measurement is displayed according (g/dl, g/l, mmol/l)
-
Page 34: Absolute And Linearity Ranges Of Parameters
2.7.4 ABSOLUTE AND LINEARITY RANGES OF PARAMETERS The analyzer provides specified accuracy within its linearity range. Beyond this linearity range, the instrument can display results but accuracy is impaired. If a value is over the maximum range of guaranteed linearity, the instrument cannot measure it and the result will be marked with an E (Error) flag. - Page 35 SYSTEM DESCRIPTION QC results allow trend analysis for SD, CV% Mean. Maintenance Diagnostics / QC1 Press HOME to go to Main menu. Press BACK to go back to previous menu.
- Page 36 Control material is a defined and controlled quality prepared (almost artificial) blood product. It has conserved and treated blood cells inside which allows this material to be stable for a much longer time than normal blood would be. The “Measure” option will become active only if there are reference values entered for the actual QC Lot.
- Page 37 SYSTEM DESCRIPTION Maintenance Quality control / Measure The software saves all results automatically to the selected QC lot database. Press Discard to remove data from QC series. Exit returns to the QC menu. 2.7.5.3 Diagram QC Diagram displays the trends of parameters with respect to time. The screen will show two parameters at a time.
- Page 38 2.7.5.4 Database This option displays the contents of the QC database. You can browse in this view just like in the regular database view. Functions (selection, browsing, QC database is a filtered details, printing) are the same as well. view of the normal data- base.
-
Page 39: Routine Utilization And Measurement
ROUTINE UTILIZATION AND MEASUREMENT 3 ROUTINE UTILIZATION AND MEASUREMENT 3.1 Sample Handling Since some time will usually elapse between collection of samples and counting, it is necessary to preserve the sample with an anti-coagulant to prevent large groups of cells forming into clots or lumps of cell matter that will clog the cell counter. - Page 40 FIGURE 8 Tubes used in Vacutainer adapter Vacutainer with sample blood Sample tube with 5 ml control (cap removed) blood Below you can see 3 types of microtainer tubes used in micro adapter. These are only examples given by us, you can try to use other type of microtainers as well. FIGURE 9 Tubes used in micro adapter...
-
Page 41: Sample Analysis
ROUTINE UTILIZATION AND MEASUREMENT FIGURE 10 Tubes used in control adapter Remove the cap!! It is 1. Position the sample tube in the sample rotor. very important 2. Press START key. because the tip will not pierce the cap! The sample rotor will turn the vial into the inside of the instrument and needle draws sample from the tube. -
Page 42: Running A (New) Sample
3.2.2 RUNNING A (NEW) SAMPLE MEASURE This is the screen where you can start measurements. Exit will return to the Main menu Press New to enter data for the sample. Software allows the user to enter information for every sample. If an external PC keyboard (via USB) is used, it is suggested to be connected before turning the instrument on. - Page 43 Change lyse Volume of lyse reagent added to MIX dilution controls performance of WBC 3-part differential. Default lyse setting for each sample type (Human, control, Child, etc.) are specified by SW. Default lyse quantity can be adjusted in Patient limits menu (Settings / Measurement Limits)
- Page 44 Lyse volume Select an increased (+0.1, +0.2ml) volume if the separation between lysed RBCs and WBC populations is poorly differentiated, resulting in increased WBC and LYM counts. Select a decreased (-0.1, -0.2ml) volume if the WBC histogram seems to be shrunk to the left, i.e. the different WBC populations are overlapped.
-
Page 45: Results
ROUTINE UTILIZATION AND MEASUREMENT When all parameters are set, press the START button to save your settings and Do not reach inside the start the measurement. instrument, as the need- le can injure you! 3.2.3 RESULTS When analysis is complete, the following screen is displayed, including all measured and calculated parameters as well... - Page 46 linearity range The analyzer found that the cell count is higher exceeded in WBC than the linearity range of the analyzer. Make a stage pre-dilution, and run the same sample in prediluted mode RBC cells found in cells were detected during sample measurement.
- Page 47 ROUTINE UTILIZATION AND MEASUREMENT Warning flags in lowercase refer to RBC or PLT problems. Flag Meaning Recommended user action linearity range ex- The analyzer found that the cell count is ceeded in PLT/RBC higher than the linearity range of the analyzer. TABLE 5 stage Make a predilution, and run the same sample in...
-
Page 48: Paramter Limits (Normal Ranges)
Limits define normal ranges. Outside this range, parameters will be flagged: – or +. Settings Measurement Normal ranges The “Human” (profile) button brings up the profile selection menu. Prev and Next allow browsing among parameters. Parameter order: WBC RBC HGB... -
Page 49: Using Pre-Diluted Mode
ROUTINE UTILIZATION AND MEASUREMENT 1. Optimal – all results are within acceptable ranges. 2. Blank is high – ! flag displayed at relevant results. 3. Blank exceeds acceptability – no results displayed. Parameter 1. No flag at 2. ! flag at result 3. -
Page 50: The Measurement Process
3.3 The Measurement Process For the Schematics of the fluidics system, see Section 6.3. Sample aspiration and dilution: Stages of the blood testing process 25 l of anti-coagulated (K3-EDTA) whole blood sample is aspirated into the sampling needle, and mixed with 4 ml of diluent and held in the chamber (MIX dilution). -
Page 51: Display
ROUTINE UTILIZATION AND MEASUREMENT 3.3.2 DISPLAY The display is 320 x 240 dots, high contrast backlit high-color graphic LCD module, with integrated touch screen. 3.3.3 TOUCH SCREEN The LCD screen has a touch-sensitive foil on the front surface. If the operator touches the LCD active area gently, the analyzer can recognize it and identify the position where the screen was pressed. - Page 52 FIGURE 12 Printout on external printer FIGURE 11 Thermal paper printout HumaCount 60 | User manual...
- Page 53 ROUTINE UTILIZATION AND MEASUREMENT FIGURE 13 Database Table Printout FIGURE 14 QC graphical printout on FIGURE 15 built-in printer QC graphical printout on external printer...
- Page 54 HumaCount 60 | User manual...
-
Page 55: Advanced Operation
ADVANCED OPERATION 4 ADVANCED OPERATION 4.1 Diagnostics Diagnostics menu allows access to system information and hardware check-up Maintenance Diagnostics Press HOME to go to Main menu. Press BACK to go back to previous menu. 4.1.1 DEVICE INFOMATION Device information shows system hardware and software setup. Maintenance Diagnostics/ Device Information... -
Page 56: Self Test
4.1.2 SELF TEST Self test is a procedure to verify proper operation of essential components of the instrument. Self test should be performed: At installation. After replacing any component. After extended time out of use. During self test, the analyzer checks system components, and displays the results. -
Page 57: Database
ADVANCED OPERATION 4.2 Database Patient results are stored in the memory in chronological order, and can be retrieved at any time. Data storing capacity is 1000 measurements, including the complete parameter list, histograms, flags, sample data, and date/time of measurements. If memory is full, newest (actual) record will overwrite oldest record. -
Page 58: Database Service
4.2.1 DATABASE SERVICE Detail will open up the parameter and histogram view of a record. DATABASE Detail Table returns to the table view. Print sends the record to the printer. Edit opens up the dialog for data manipulation record. Exit returns to the Main menu. DATABASE Detail Edit... - Page 59 ADVANCED OPERATION Patient ID can be 19 characters long and the name of the patient can hold 40 characters. DATABASE Detail Arrows database record view allows browsing database, and you can also look at histograms and various diagnostic parameters of the sample.
-
Page 60: The Filter / Select Function
WBC histogram RBC histogram 4.2.2 THE FILTER / SELECT FUNCTION DATABASE Filter Date allows defining the start and end dates for the search. Sample ID and Patient ID can narrow the search. If you enter “5” for sample id, then all records, whose Sample ID contains expression... -
Page 61: Printing Records
ADVANCED OPERATION 4.2.3 PRINTING RECORDS DDATABASE Print If there is no record selected, then the software prints the actual (top / detail view) record. If there is more than 1 record selected, then you will be able to choose between individual printing (Result by result), or Table format. -
Page 62: Calibration
4.3 Calibration The analyzer stability can be monitored with HC-CONTROL control blood. Performing determinations regularly verifies continued optimal performance. It is recommended to do calibration in the following cases: 1. At analyzer installation, before beginning the analyses. 2. After replacing any component, related to the process of dilution or measurement. -
Page 63: Calibration With Factors
ADVANCED OPERATION 4.3.1 CALIBRATION WITH FACTORS Factor based calibration allows adjustment of primary parameters with a factor Maintenance Calibration / Factors Press white data field to modify calibration factor. A numeric input screen will show up so that you can enter values. All values must be in the 0.8…1.2 range. -
Page 64: Settings
Maintenance Calibration/Measurement Prior to starting the calibration measurements, you have to define some basic parameters for the upcoming measurements. 4.4 Settings Selecting Settings accesses various lists of options. Settings Press BACK to go back to MAIN menu. HumaCount 60 | User manual... -
Page 65: Printer Settings
ADVANCED OPERATION 4.4.1 PRINTER SETTINGS Printer settings menu allows setting up parameters of report printing. Settings Printer settings Settings Printer settings / Device Printer: Selection between built-in or USB printer. If the printer is recognized, the screen will show the printer’s name. Format: Selects printout... - Page 66 Settings Printer settings / Format Press Accept approve changes made. Press Cancel to go back to previous menu keeping the old settings. Limits: Enable / Disable parameter limit (normal range) printing. Warnings: If Enabled, warning flags appear on the report as well. Histograms: Enable / Disable graph printing.
-
Page 67: General Settings
ADVANCED OPERATION 4.4.2 GENERAL SETTINGS General settings control operation of the following functions. Settings General Select any of the following options: Press Accept to approve changes made. Press Exit to go back to previous menu. 4.4.3 MEASUREMENT This section groups measurement related options and settings. 4.4.3.1 Unit settings Unit settings menu allows to set up units of parameters displayed or printed. - Page 68 4.4.3.2 Normal ranges Limits define normal ranges. Outside this range, parameters will be flagged: – or +. Settings Measurement Normal ranges The “Human” (profile) button brings up the profile selection menu Prev and Next allow browsing among parameters. Parameter order: WBC RBC...
- Page 69 ADVANCED OPERATION 4.4.3.3 Settings Settings Measurement/Settings/ Result Auto print will print report automatically when the results are displayed Auto send will automatically transmit results if a PC is connected Barcode allows setting scanned data to be entered as Sample ID or Patient ID Accept saves changes made Cancel returns...
-
Page 70: Date And Time
Settings Measurement / Settings Auto print will print the report automatically when the results are displayed. Auto send will automatically transmit results if a PC is connected. Barcode allows setting scanned data to be entered as Sample ID or Patient ID. Accept saves changes made. -
Page 71: Multi User Mode
ADVANCED OPERATION 4.4.5 MULTI USER MODE The analyzer allows operation in a multi-user environment, where users can have different rights and access levels. This feature is accessed upon startup, and can of course be customized. The analyzer by deafult operates in a multi-user environment – however the user should not notice this functionality. - Page 72 User Admin cannot be deleted. Admin pass- word cannot be changed. Admin password: 0000 Use Remove User option to disable its access. HumaCount 60 | User manual...
- Page 73 ADVANCED OPERATION User Type BASIC has limited access to the menu tree: Measure Options Re-run Blank Print Discard Database Detail / Table view Edit record Print Filter Trends Manage Maintenance Cleaning Cleaning Hard cleaning Drain chamber Calibration Factors Measure History Quality control (forbidden) Diagnostics...
- Page 74 HumaCount 60 | User manual...
-
Page 75: Maintenance
MAINTENANCE 5 MAINTENANCE In the Maintenance menu you can initiate procedures, for cleaning, calibration or specific performance analysis. Maintenance Touch menu item of the desired function. Home will return to the Main menu. Back returns to the previous level. The power supply unit and internal electronic boards... - Page 76 Cleaning starts a washing cycle using the system cleaner reagent connected to the analyzer. This action is recommended if clogging problems are experienced (C or Q error flag), or the blank is high. Hard cleaning initiates a process that uses a light solution of hypochlorite (NaHCL), and washes the sampling needle and related tubing with it.
-
Page 77: Reagent Status
MAINTENANCE Calibration runs are saved automatically. If you find that a result should not be used, use the Discard button to delete the measurement so that it is not used for calibration. Maintenance Calibration/Measurement/ Result Result will display the average of each parameter of accepted measurements compared to the target value and the calibration... -
Page 78: How To Empty Waste Container
Empty the waste tank when this warning message appears. See next Section for neutralization steps. 5.2.2 NEUTRALIZATION OF WASTE Waste contains human origin substances representing biohazard. These substances are representing potential danger to environment. For this reason, safe handling of the waste liquid is very important Neutralization of biohazard waste: Put 2 ml per liter of hypochlorite solution into the waste. - Page 79 MAINTENANCE Exit User Management Auto Login Set Auto Login Set will allow login- free starting of the analyzer. Select the user to be logged in automatically. With Auto Login Off selected, the instrument will prompt for a user and a password upon startup.
-
Page 80: Weekly User Maintenance
5.3 Weekly User Maintenance Perform weekly maintenance before turning on the power switch. The right side has a side door giving access to the fluidic system and the mechanical parts easily. 5.3.1 CLEANING NEEDLE WASHING HEAD Needle washing head cleans the outer surface of the aspirating needle with diluent. -
Page 81: Troubleshooting
200…900 Sampling method Open tube system with automatic sample rotor. Sample types Human (general), male, female, baby, toddler and child. High-voltage pulse on aperture in each analysis Clog prevention cycle, chemical cleaning and high pressure back-flush of the aperture using Cleaner reagent. - Page 82 Easy-to-use, menu driven user interface with touch- User interface screen and separate START button, status LED. English, Spanish, Portuguese, French, Russian, Languages available Indonesian, German 1000 results, with RBC, PLT, and WBC 3-part Data capacity histogram Host computer USB B port interface Data back-up method USB mass storage device (PenDriveTM)
-
Page 83: Fluidic Schematics
TROUBLESHOOTING 6.3 Fluidic Schematics FIGURE 17... - Page 84 HumaCount 60 | User manual...
-
Page 85: Appendix
APPENDIX 7 APPENDIX 7.1 Reagent Solutions and Consumption Reagents supplied by Human are the only ones recommended for use with the analyzer. Reagents supplied by Human GmbH are the only ones recommended for use with the analyzer. 1. 1. An isotonic saline solution used to dilute whole blood... - Page 88 HUMAN Gesellschaft für Biochemica und Diagnostica mbH Max-Planck-Ring 21 • 65205 Wiesbaden • Germany Tel.: +49 6122/9988 0 • Fax: +49 6122/9988 100 eMail: human@human.de • www.human.de...
Need help?
Do you have a question about the HumaCount 60TS and is the answer not in the manual?
Questions and answers