Advertisement
Quick Links
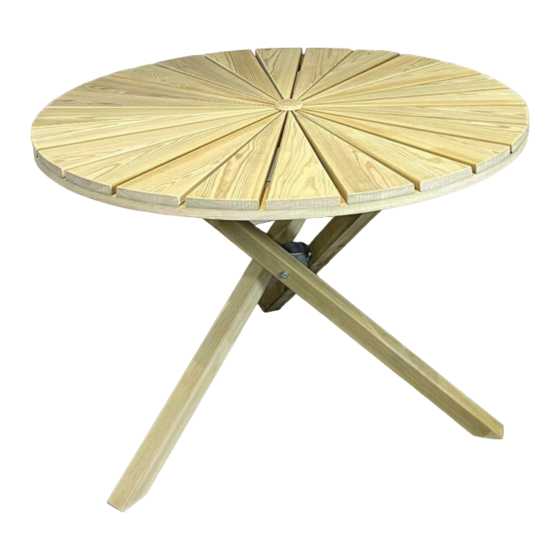
SUNSHINE TABLE
Kit List
1 x Tabletop
3 x Legs
3 x Screws
3 x Nuts, and Washers
1 x Circular Hinge
2. Finger-tighten the bolts to the legs and
circular triple hinge, it is important to ensure
that the angled cuts at the bottom of each leg
face in the circular direction (see picture 2).
DON'T FORGET TO PAINT ON THE FURNITURE PROTECTOR AS SOON AS THE
PRODUCT IS ASSEMBLED, UNLESS ANOTHER FINISH IS TO BE APPLIED.
1 |
Sustainably Sourced & Ergonomically Designed
ASSEMBLY GUIDE
Picture 2
1. Start by placing your tabletop upside down,
on an elevated surface around hip height for
ease (see picture 1).
3. When all three legs are attached, open them
up so the notched ends can reach and slot into
place snuggly on the edges of the table support
planks. Note: They do not go exactly in the
middle of the support planks that they reach
(see picture 3).
Picture 1
Picture 3
www.pepegarden.co.uk
Advertisement

Related Manuals for PEPE SUNSHINE

Summary of Contents for PEPE SUNSHINE
- Page 1 ASSEMBLY GUIDE SUNSHINE TABLE Kit List 1 x Tabletop 3 x Legs 3 x Screws 3 x Nuts, and Washers Picture 1 1 x Circular Hinge 1. Start by placing your tabletop upside down, on an elevated surface around hip height for ease (see picture 1).
- Page 2 ASSEMBLY GUIDE SUNSHINE TABLE Picture 4 Picture 5 4. Once the legs are in place, screw and attached them into the tabletop using the pre-drilled holes. When screwed in, tighten up each bolt connecting to the circular hinge (see pictures 4 and 5).
Need help?
Do you have a question about the SUNSHINE and is the answer not in the manual?
Questions and answers