
Related Manuals for Xvent Breeze BR-15


Summary of Contents for Xvent Breeze BR-15
- Page 1 OPERATING AND INSTALLATION INSTRUCTIONS FOR THE COMMERCIAL BREEZE AIR CURTAIN Version 1 – GBR (11/05/2022) D-502-0260...
-
Page 2: Table Of Contents
TABLE OF CONTENTS General information .................................. 5 1.1. Introduction ..............................5 1.2. Warnings and Symbols ............................. 5 1.3. Using the curtain .............................. 6 1.4. Transport, Delivery Control, and Storage ......................6 1.4.1. Transport ..............................6 1.4.2. Delivery Inspection ............................6 1.4.3. - Page 3 3.1.7. Curtain alignment ............................12 3.1.8. Unpacking the curtain - preparation before installation ................12 3.2. Vertical installation ............................13 3.2.1. Fixing the curtain base to the floor ......................13 3.2.1.2. Bottom curtain connection - from the floor - base (curtain regulation at the bottom - at the floor).... 14 3.2.2.
- Page 4 4.2.5. Curtain switch-off delay device ........................28 4.2.6. Magnetic door contact ..........................28 4.2.7. Technical parameters of the regulation accessory - part of standard delivery of the curtain ....... 29 4.2.8. Description of regulation settings ....................... 29 4.2.8.1. Setting the curtain performance according to the size - height of the shielded opening ......29 4.2.8.2.
-
Page 5: General Information
1. General information 1.1. Introduction This "Installation and Operating Instructions" document is for the Breeze Air Curtain (hereafter referred to as Curtain, product), which is used to separate the internal and external environment by air flow and hot air heating of the required space. Detailed familiarisation with this document is important for the correct and safe installation and functioning of the curtain. -
Page 6: Using The Curtain
1.3. Using the curtain The Breeze air curtain is designed to separate the indoor from the outdoor environment by air flow. With this function, the curtain prevents the indoor air from escaping from the indoor environment to the outdoor environment when the door, gate, etc. is open... If the curtain is equipped with a water or electric heat exchanger, the curtain can heat the indoor space in which it is installed when the door is closed. -
Page 7: Before Commencing The Installation
1.6. Before Commencing the Installation Before commencing the installation, we recommend that you attach the serial plate (by default, supplied with the package) to the operating documentation (e.g.: equipment operations log, etc.), which is subsequently kept for a later maintenance records and servicing. Before starting any installation or maintenance work, the power must be switched off and the main switch secured against being switched on again. -
Page 8: Exhaust Vanes
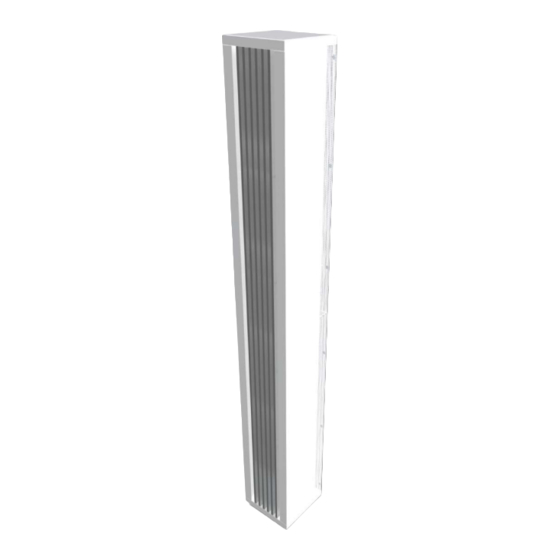
2.1.7. Exhaust vanes The exhaust vanes are designed from aluminium profiles, which are coated against corrosion, mechanical damage with "anodizing" (artificial corundum). It does not serve to direct the airflow. The air flow direction is solved in the chapter according to the selected installation position. 2.1.8. -
Page 9: Main Dimensions And Minimum Working Space Requirements Of The Breeze Air Curtain
2.2. Main dimensions and minimum working space requirements of the Breeze air curtain Fig. 4 Tab. 1 2.3. Technical parameters of Breeze air curtains 2.3.1. BREEZE-15 Tab. 2 2.3.2. BREEZE-20 Tab. 3 Version 1 – GBR (11/05/2022) D-502-0260... -
Page 10: Breeze-25
2.3.3. BREEZE-25 Tab. 4 EC Declaration of Conformity – the current and full version of the EC Declaration of Conformity can be found on our website www.xvent.cz in the Breeze product documents 2.4. Technical data of water exchangers 2.4.1. BR1-15-ACV1S-xxx Tab. -
Page 11: Br1-20-Acv1S-Xxx
2.4.2. BR1-20-ACV1S-xxx Tab. 6 2.4.3. BR1-25-ACV1S-xxx Tab. 7 3. Unit Installation 3.1. General information, recommendations and safety before and during installation of the Breeze air curtain 3.1.1. Electrical safety before installation of the curtain before starting any installation work, the power supply to the prepared wiring must be switched off for commissioning of the unit. -
Page 12: Modification Of Heating Distribution System
3.1.2. Modification of heating distribution system it is advisable to use filters for coarse dirt particles in the heating distribution system to protect the water exchanger from possible damage from the existing pipes. 3.1.3. Load capacity of the installation site the selected installation site must be suitable for the permanent load by the curtain. -
Page 13: Vertical Installation
Fig. 7 Please, return all unwanted or obsolete products and packaging to the relevant recycling sites where they will be disposed of professionally. Dispose of the parts of the product that cannot be utilised to a controlled landfill. Only a product recycled in this way can be reused properly and returned to the utility. -
Page 14: Bottom Curtain Connection - From The Floor - Base (Curtain Regulation At The Bottom - At The Floor)
e) Mount the base to the floor so that the anchor bolts are at the extreme positions of the anchor slots for a possibility of later increasing of the curtain pre-blow. The curtain should be automatically rotated outwards by 10°. Make the final rotation of the curtain pre-blow according to local conditions. - Page 15 3.2.2.2. Bottom curtain connection - from the floor (bottom curtain regulation - at the floor) Position the unpacked curtain on the palette according to the final position (exhaust, regulation location) Move the curtain as close as possible to the base installed so that the power media can be connected via the shortest route CURTAIN PREPARATION - CONNECTING PERIPHERY...
-
Page 16: Vertical Installation - Chained Curtains
Reinstall the sidewall / regulation cover on the curtain and secure with M6x20 screw Position the curtain and slide it onto the base guide rails Secure the curtain to the base with 6 self-tapping screws 3.5x9.5 (included in the "BREEZE-BASE" base Ø... - Page 17 SETTING THE LOWER CURTAIN - THE SAME ORIENTATION OF THE CONNECTING PERIPHERY PROCEDURE STEPS AS IN CHAPTER 3.2.2.2. (IN ADDITION, THE WIRELESS THERMOSTAT MUST BE PAIRED WITH THE CHAINED CURTAIN BEFORE THE CURTAIN IS MOUNTED TO THE BASE) Fig. 15 Fig.
-
Page 18: Side Anchoring Of The Chained Assembly
Make sure that the curtain is oriented within the correct position range of the connecting periphery to the supply media - top curtain connection, see Chapter 3.2.2.1. Ensure that all safety principles arising from the handling of the curtain are observed to prevent damage to property and personal health. -
Page 19: Horizontal Installation
3.6. Horizontal installation The surface (e.g.: wall) and auxiliary structures that are needed to anchor the curtain must have an adequate load capacity based on the weight of the selected curtain type. Anchoring material and auxiliary structures are not provided by the supplier. Provided by the user according to local conditions. See Chapter 3.4.1 for installation examples. -
Page 20: Examples Of Hanging The Curtain - Horizontal Installation
3.6.4. Examples of hanging the curtain - horizontal installation Installation on the ceiling and on the wall using Installation on the ceiling and on the wall using the wall bracket and the "BREEZE-HINGE" the wall bracket and M6 threaded rods. accessory set. -
Page 21: Horizontal Installation - Chaining Of Curtains
Raise the curtain so that the mounting screw lugs are aligned LIFTING THE CURTAIN TOGETHER WITH THE PALLET AND FURTHER INSTALLATION (SEE 3.6.4.) Fig. 23 Insert the M6x20 bolt through both lugs and secure with the nut (bolt and nut included in the "BREEZE- HINGE"... -
Page 22: Preparation Of Curtains Before Chaining
3.7.1. Preparation of curtains before chaining before lifting the curtain to the installation position , remove the lids of the sidewalls that come into contact with each other. o Remove the locking screw M6x20 o Remove the sidewall lid o Fit the "BREEZE-CONNECT" connecting piece to the first curtain ready to be lifted to the working position, so that ½... -
Page 23: Installation Of Chained Curtains
3.7.2. Installation of chained curtains Install the chained curtains in the mounting position separately according to 3.6.5. Mounting - hanging the curtains in the working position Make sure that the joint edges of the individual curtains are properly aligned. The "BREEZE-CONNECT" connecting piece ensures guiding into the correct "matched"... -
Page 24: Wiring And Electrical Installation
3.9. Wiring and electrical installation 3.9.1. General Information – Safety Only persons qualified for this work with valid authorization and knowledge of the relevant standards and directives may carry out the relevant wiring and electrical installation of the curtains. Before starting any installation work, the power supply to the prepared wiring must be switched off for commissioning of the unit. -
Page 25: Wiring And Description Of Power And Control Terminals
To determine the correct cross-section of the conductors and the correct fusing, the length of the route from the connection point to the curtain must be taken into account. The actual cross-section of the supply conductors and the actual value of the circuit breaker must be assessed by an electrical designer or another qualified person. -
Page 26: Wiring Description Of 1 Curtain - Unheated Version (Br-Xx-Acs1-Xxx)
3.9.3.3. Wiring description of 1 curtain - unheated version (BR-xx-ACS1-xxx) Terminal marked as L - supply phase. Fig. 34 Terminal marked as N - neutral conductor. Green/yellow terminal marked as PE - earth conductor Terminal marked as DS slave - used to connect chained curtains to be controlled by a single door contact. -
Page 27: Electrical Parameters Shown On The Curtain
3.10. Electrical parameters shown on the curtain Fig. 36 4. Regulation 4.1. General Information – Safety Only qualified persons with valid authorization and knowledge of the relevant standards and directives may carry out the wiring of the control elements. Before starting any installation work, it is necessary to switch off the power supply. -
Page 28: Power Control Terminals
4.2.1. Power control terminals description of terminals given in Chapter 3.9.2. and 3.9.3 4.2.2. receiver of the signal from the wireless room thermostat: the receiver is integrated in the curtain regulation and it can be used for indication - setting of: 1. -
Page 29: Technical Parameters Of The Regulation Accessory - Part Of Standard Delivery Of The Curtain
4.2.7. Technical parameters of the regulation accessory - part of standard delivery of the curtain Magnetic door contact Wireless room thermostat Tab. 11 Tab. 12 4.2.8. Description of regulation settings Based on the local situation, consider setting the regulation before placing it in the final position. Especially when chaining curtains and when installing the regulations vertically (towards the floor). -
Page 30: Description Of Regulation Logic
Fig. 40 Coarse adjustment in three time ranges Use a small flat tip screwdriver to change the position of the slider; do not damage the slider. Fine adjustment within the selected time range Turn the potentiometer with a small flat tip screwdriver to avoid damaging it. -
Page 31: Wiring Diagram Of The Breeze Curtain
5. Wiring diagram of the Breeze curtain 5.1. Electric version - BR1-xx-ACE1S-xxx Version 1 – GBR (11/05/2022) D-502-0260... -
Page 32: Water Version - Br1-Xx-Acv1S-Xxx
5.2. Water version - BR1-xx-ACV1S-xxx Version 1 – GBR (11/05/2022) D-502-0260... -
Page 33: Unheated Version - Br1-Xx-Acs0S-Xxx
5.3. Unheated version - BR1-xx-ACS0S-xxx Version 1 – GBR (11/05/2022) D-502-0260... -
Page 34: Example Of Chained Curtains Wiring
5.4. Example of chained curtains wiring The door contact chaining is shown by the bold dashed line Version 1 – GBR (11/05/2022) D-502-0260... -
Page 35: Commissioning
6. Commissioning 6.1. Prior to first startup, check the following: Make sure that no objects that could damage the unit (e.g.: tools) are left in the curtain. Check all hydraulic connections (tightness of the vent valve, connection sockets, mounted valves) for proper connection. - Page 36 1. LOOSEN (!!DO NOT UNSCREW!!) SCREWS USING A SOCKET WRENCH Fig. 41 2. BEND THE COVER TO THE SIDE AND THEN UNSNAP IT FROM THE SCREW DETAIL OF THE SNAPPED COVER (THERE IS A SLOT ON THE COVER) Fig. 42 3.
- Page 37 4. CLEAN THE INTAKE COVER WITH A VACUUM CLEANER - FROM BOTH SIDES (BE CAREFUL NOT TO DAMAGE THE COVER) Fig. 44 5. AFTER CLEANING, MOUNT THE INTAKE COVERS BACK - FIRST HOOK ON ONE SIDE TO THE SCREWS AND THEN BEND THE COVER TO HOOK IT ON THE OTHER SIDE.
-
Page 38: Servicing
8. Servicing observe the provisions generally applicable for the country. During any servicing, the curtain must be disconnected from the mains and the heating water supply to the curtain exchanger must be switched off. Work must be carried out after the heat exchanger has cooled down. Any service work on the electric system must be carried out by a qualified person. -
Page 39: Final Decommissioning, Dismantling, And Disposal
9. Final Decommissioning, Dismantling, and Disposal At the end of the machine's service life or when it would be uneconomical to repair it, dismantle the machine completely. During the dismantling process, the generally applicable safety regulations must be observed for the safe execution of all the work activities. -
Page 40: In Conclusion
– warranty repair. In the case of an unjustified complaint, all the costs relating to such complaint shall be borne by the complainant. 11. In Conclusion If you have any questions about this product, do not hesitate to contact us. Contact Address: Xvent s.r.o. Poděbradská 289 53009 Pardubice-Trnová Czech Republic www.xvent.cz Version 1 –...
Need help?
Do you have a question about the Breeze BR-15 and is the answer not in the manual?
Questions and answers