
Related Manuals for Xvent WiIND Series


Summary of Contents for Xvent WiIND Series
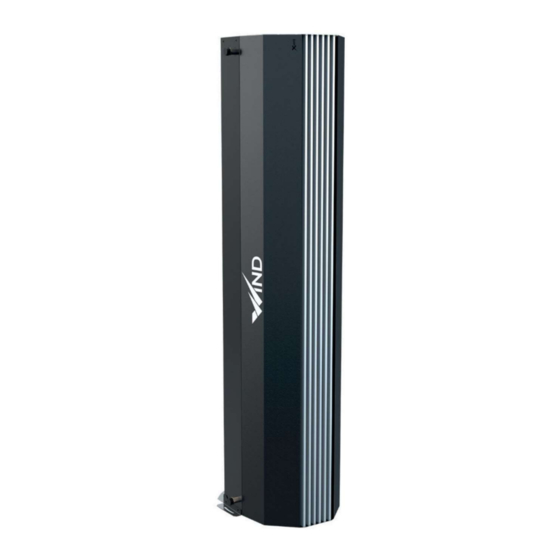
- Page 1 INSTALLATION AND OPERATING MANUAL FOR THE WIND AIR CURTAIN (FOR INDUSTRIAL AND COMMERCIAL USE) Verze 1 – GBR (25.8.2020) D-502-0171...
-
Page 2: Table Of Contents
CONTENT General information ..................................4 1.1. Introduction ..................................4 1.2. Use of the unit ................................. 4 1.3. Transport, inspection of delivery and storage ........................4 1.4. Contents of the package ..............................5 1.5. Before start of installation ............................... 5 Technical parameters ..................................5 2.1. - Page 3 3.6. Horizontal installation - curtain chaining ........................15 3.6.1. Installation of the auxiliary anchoring structure ......................15 3.6.2. Determination of the installation location for the chained curtains ................15 3.6.3. Auxiliary anchoring structures for chained curtains ...................... 15 3.6.4. Correct installation in horizontal position during curtain chaining ................15 3.6.4.1.
-
Page 4: General Information
1. General information Introduction 1.1. This document "Installation and Operating Manual" is intended for the Wind air curtain (hereinafter the "curtain"), which is used to separate the interior from the external environment by a stream of air and for hot-air heating of the required space. Detailed familiarisation with this document is important for the correct and safe installation and functioning of the curtain. -
Page 5: Contents Of The Package
Contents of the package 1.4. WIND 1 air curtain Quick manual + Safety Data Sheet Name plate Before start of installation 1.5. Before starting the installation, we recommend that you attach the serial nameplate (normally delivered with the unit in its package) to the operational documentation (e.g.: equipment operating book, etc.), which is subsequently kept for a later maintenance record and the respective servicing. -
Page 6: Main Dimensions And Requirements For The Minimum Working Space For The Wind Curtain
Main dimensions and requirements for the minimum working space for the WIND curtain 2.2. VERTICAL INSTALLATION HORIZONTAL INSTALLATION MIN. OPERATING AND INSTALLATION SPACE Verze 1 – GBR (25.8.2020) D-502-0171... -
Page 7: Technical Data
2.3. Technical data EC Declaration of Conformity – the current and full version of the EC Declaration of Conformity can be seen on our website www.xvent.cz under the Wind (category „hot air heating“) product documents 2.4. Technical data of water heaters Verze 1 –... -
Page 8: Installation - Installation Of Air Curtains In The Working Position
other technical parameters can be found in the catalogue sheet 3. Installation – installation of air curtains in the working position 3.1. General information, recommendations and safety during installation of the Wind air curtain 3.1.1. Electrical safety when installing the curtain Before starting any assembly works, it is necessary to switch off the power supply to the prepared electrical installation for subsequent activation of the unit. -
Page 9: Minimum Safety Distance From Flammable Substances
If this distance is not observed, the curtain may not work properly and the fans may be damaged or the noise of the unit may increase. The curtain exhaust must be set in such direction that there is no draft in the heated space, and, at the same time, for the best separation of spaces –... -
Page 10: Vertical Installation - Curtain Chaining
The diameter of the anchoring material (clamps, bolts into dowels) must be 10 mm. A washer shall be placed under the head of the anchoring screws/nuts to better distribute the curtain weight. Screw the holder into the floor in such a way that the anchoring screws are in the end positions of the anchoring grooves for the subsequent possibility of increasing the pre-blow of the curtain. -
Page 11: Side Anchoring Of The Chained Assembly
Use recommended accessories (WIND- CONNECT) to connect the curtain in case of chaining Anchoring to the floor using a rotating holder (WIND-HOLDER) - not included in the packaging. Screwing in by using a suitable connecting material. 3.3.2. Side anchoring of the chained assembly When chaining multiple curtains, each subsequent curtain must be additionally anchored from the side to maintain the stability of the entire assembly. -
Page 12: Vertical Installation - Increased Barrier Effect
3.4. Vertical installation – increased barrier effect To increase the barrier effect, the curtain can be installed on both sides of the curtained opening (e.g. permanently open gates for loading and unloading trains) The curtains shall be installed in accordance with the same procedure as described in points 3.2 and 3.3. SELECT THE CURTAIN ACCORDING TO THE WIDTH OF THE DOOR OPENING, DEPENDING ON THE ACTIVE BLOWING DISTANCE (AVAILABLE IN THE TECHNICAL DATA) -
Page 13: Determination Of The Installation Site
3.5.2. Determination of the installation site Determine the place for curtain installation; exhaust of the curtain must be flush with the door frame opening at the minimum distance from the wall (see 3.1.4. and 3.1.5.). If this is not possible, the general rule for correct positioning and subsequent turning of the curtain (pre-blow setting) applies, i.e. -
Page 14: Examples Of Curtain Suspension - Horizontal Installation
Examples of Curtain Suspension – Horizontal Installation 3.5.4.1. Installation on the ceiling using the M8-10 Installation on the wall using the wall threaded rods. Threaded rods M8-10 are console and threaded rods M8-10. Consoles not included in the delivery. It is ensured and M8-10 threaded rods are not included in by the user according to local conditions. -
Page 15: Horizontal Installation - Curtain Chaining
When handling the curtain, take into account its weight and ensure that all safety principles are observed so that no damage to the property or health of persons occurs. Secure the screw connections with the nuts against spontaneous unscrewing and subsequent fall. 3.6. - Page 16 To facilitate suspension, we recommend using simple hinges (WIND-HINGE accessories), which are attached to the prepared threaded nuts on the side of the curtain (use M6x20 screws). Use it also in case of mounting via "WIND-CONNECT" connecting piece Install the "WIND-CONNECT" connecting piece onto the side of the first chained curtain, so that 1/2 of the connecting piece protrudes from the chained curtain.
-
Page 17: Examples Of Curtain Suspension - Horizontal Installation - Chaining
Examples of curtain suspension - horizontal installation – chaining 3.6.4.1. Installation on the ceiling using the M8-10 Installation on the wall using the wall threaded rods. Threaded rods M8-10 are console and threaded rods M8-10. Consoles not included in the delivery. It is ensured and M8-10 threaded rods are not included in by the user according to local conditions. -
Page 18: Water Exchanger Connection
S etting the correct curtain pre-blow is the basic prerequisite for proper separation between the interior and the outer space. At the curtain, the pre-blow is adjusted by turning the entire curtain. Pre-blowing adjustment using the lamellas is not possible. Minimum –... -
Page 19: Venting (Discharge) Valve
3.8.3. Venting (discharge) valve Water exchangers are fitted with venting screws on the inlet and drainage collectors. Venting of the exchanger is done by loosening the vent screw. 3.8.4. Example hydraulic diagram of unit connection Legend: 1. Wind 2. speed regulator with thermostat 3. -
Page 20: Electrical Installation And Electrical Connection
3.9. Electrical installation and electrical connection 3.9.1. General Information - Safety The relevant electrical installation and electrical assembly of the units may only be performed by persons qualified for this activity with valid authorization and knowledge of the applicable standards and directives. -
Page 21: Description Of Power And Control Terminals - Electrical Diagram Of Motors
If it is necessary to remove the wire from the terminal, press the orange locking button located on the terminal using a suitable tool and then pull the wire out of the terminal accordingly. The optimum cross-section of the conductor must be selected according to the actual length of the conductor route;... -
Page 22: Connection To The Mains
The connection of the power supply and control terminals must be carried out in such a way that they cannot be either inter-connected nor switched among each other. This would result in the destruction of the unit fan and possible further damage to the property and health of persons. 3.9.4. -
Page 23: Control Elements
4.2. Control elements Verze 1 – GBR (25.8.2020) D-502-0171... -
Page 24: Atacama Heating Unit Wiring Diagram
5. Atacama heating unit wiring diagram 5.1. Details of connecting the main terminal box to the regulator ELEMENTAIR-E-M1 and with the accessories 5.2. Connection of the Wind curtain with the regulator ELEMENTAIR-E-M1 Verze 1 – GBR (25.8.2020) D-502-0171... -
Page 25: Connection Of Chained Wind Curtains With Regulator Elementair-E-M1
5.3. Connection of chained Wind curtains with regulator ELEMENTAIR-E-M1 Verze 1 – GBR (25.8.2020) D-502-0171... -
Page 26: Commissioning
6. Commissioning 6.1. Before the first start check the following: If there are no objects in the curtain that could damage the unit (e.g. tools); If all the hydraulic connections are properly connected (tightness of the vent valve, connection branch and the mounted valve);... -
Page 27: Service
Using an appropriate wrench, remove the fan from the unit rear plate. Clean the fan with brush. Alternatively, wash with a cloth soaked with soap water. Clean the water exchanger and inner housing of the unit with the vacuum cleaner Re-assemble the fan back into the rear plate of the unit. -
Page 28: Troubleshooting Procedure
8.1. Troubleshooting procedure 9. Decommissioning and recycling All unused or not operable products and packaging should be returned to the appropriate recycling locations where they will dispose of them in a professional manner. Please dispose the unusable parts of the product in a controlled landfill. Only like this the recycled product can be reused and bring a new benefit. -
Page 29: Warranty
Party. 11. Conclusion If you have any doubts about this product, please do not hesitate to contact us. Contact address: Xvent s.r.o. Poděbradská 289 53009 Pardubice-Trnová Czech Republic www.xvent.cz Verze 1 – GBR (25.8.2020) D-502-0171...
Need help?
Do you have a question about the WiIND Series and is the answer not in the manual?
Questions and answers