Advertisement
Quick Links
Advertisement

Related Manuals for Monitor Audio IA125-4


Summary of Contents for Monitor Audio IA125-4
- Page 1 Installation Amplifiers 2G Product Manual...
- Page 2 Welcome to Installation Amplifiers 2G Register your Installation Amplifier Register your amplifier using the QR code Thank you for purchasing this Monitor Audio amplifier. or visit monitoraudio.com/registration This product has been designed to provide configurable, consistent and reliable high performance audio power amplification for residential, commercial and entertainment applications.
- Page 3 Connections overview The Installation Amplifier’s signal input and output connections are accomplished via Mains Power Connection RCA Phono and Euroblock style connectors. A GPIO (General Purpose In/Out) Euroblock Installation Amplifiers incorporate a power factor corrected power supply and can be connector enables some amplifier functions to be controlled, and wireless or RJ45 socket used with mains input voltage from 100V AC to 240V AC, 50/60Hz.
- Page 4 Connecting to network control Before making input, output and GPIO connections, it is particularly important that the Wireless Connection output amplifier format is configured appropriately for the speakers that are to be A mobile, laptop or desktop device with WiFi functionality and a web browser is required. connected.
- Page 5 Setup and signal routing Thanks to their network based configuration features, our Installation Amplifiers offer considerable versatility in terms of sources, signal routing, installation zones and output modes. Inputs can be freely assigned to installation zones, and those zones assigned freely to the available amplifier outputs in either Lo-Z or Hi-Z modes.
- Page 6 Setup and signal routing Dashboard With the Installation Amplifier succesfully connected to a network, searching the IP address from a web browser displays the Installation Amplifiers configuration Dashboard screen, as shown in the image opposite. From the Dashboard the power can be switched On/ Off and the volume for each zone can be adjusted.
- Page 7 Setup and signal routing Zone Tab The Zone Tab enables installation zones to be defined and named, and provides access to further submenus. Zones might be bar or restaurant areas for example, or different rooms in a home. For all Zone Tab menus, the installation zone under configuration is selected by highlighting one of the zone identifiers (A, B, C or D) at the top of the page.
- Page 8 Setup and signal routing Output Tab The Output tab enables amplifier outputs to be named and provides access to further sub-menus. For all Output Tab menus, the amplifier output under configuration is selected by highlighting one of the output identifiers (1, 2, 3 or 4) at the top of the page. Note: The number of individual outputs available for configuration will depend on the Installation Amplifier model and the input, zone and output mode configuration.
- Page 9 Setup and signal routing Output Setup Open the configuration Dashboard and select the Output Tab. • Select the output to be configured. • Specifying a Zone as stereo will automatically generate three output channel options: left channel, right channel or summed mono. The summed mono signal can potentially be used to drive a subwoofer (left -0dB + right -0dB).
- Page 10 Setup and signal routing Settings Tab The Settings Tab enables miscellaneous amplifier settings to be configured and installation data to be recorded. The Settings Tab provides access to further sub-menus. • The System Information menu provides text fields for the recording of installation data.
- Page 11 This will prevent others from making further changes to your preset. A selection of Presets for Monitor Audio loudspeaker combinations and individual loudspeakers is available from our website: monitoraudio.com To import presets select Import and then locate the preset file (*.zcp). You can also import presets that have been added to your Speaker Library, which can be generated in the Settings tab.
- Page 12 GPIO setup and connection Our Installation Amplifiers provide a GPIO socket that enables remote control of volume, standby, mute and trigger functions. The GPIO connector pin functions are described Potentiometer in the GPIO Settings menu shown below. The connection of GPIO based remote volume (>10kΩ) control and standby/mute are illustrated on the right.
- Page 13 Input, output and GPIO cable connections Cable connections to the Input and Output block connectors should be made with bare wire with a maximum thickness of 14 AWG for the GPIO connector and 12 AWG for the speaker connector. Insert the cable into the relevant opening on the Phoenix connector and secure it in place using a flat headed screwdriver.
- Page 14 Installing Mounting Note: The rack mounting and desk/wall mounting components described and illustrated on the right are not supplied with half rack models, but are available to purchase as accessories. Contact your local MA dealer for more information. Half rack Installation Amplifier models can be configured for rack installation using one Rack Ears connected standard rack ‘ear’...
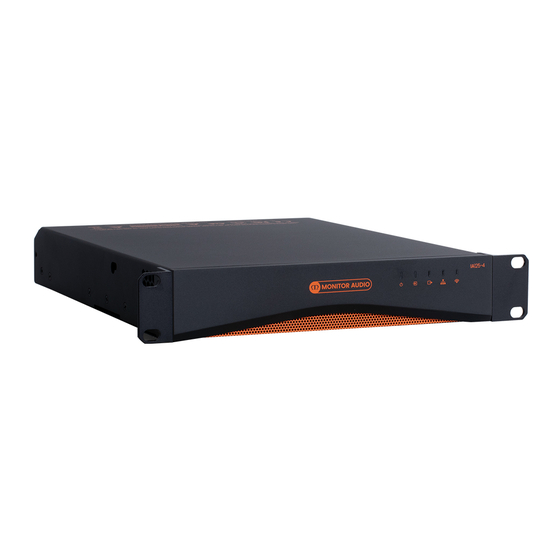
- Page 15 Operation Front LED colour matrix Once all connections have been made and configuration options selected, the The front panel LED indicators will illuminate to indicate the following operational states: Installation Amplifier(s) are ready for use. If an input signal above -60dB is present on any input, the front panel Input and Standby indicators will illuminate orange to indicate normal amplifier operation.
- Page 16 In the unlikely event that there is a defect with this product, it is covered by Model IA60-4 IA125-4 the Monitor Audio manufacturer’s warranty, provided that the product was Channels supplied by an authorised Monitor Audio retailer. Output Power @ 4 Ohms/8 Ohms...
- Page 17 Specifications Model IA750-2 IA750-4 Channels Output power @2 Ohms 2 x 750W SE 4 x 750W SE Output Power @ 4 Ohms 2 x 750W SE, 1 x 1500W BTL 4 x 750W SE, 2 x 1500W BTL Output Power @ 8 Ohms 2 x 400W SE, 1 x 1500W BTL 2 x 400W SE, 2 x 1500W BTL Output Power @ 70V...
- Page 18 Monitor Audio Ltd. 24 Brook Road Rayleigh, Essex SS6 7XJ England Tel: +44 (0)1268 740580 Email: info@monitoraudio.group monitoraudio.com ©Monitor Audio Ltd. | V1-2022 - Installation Amplifier 2G Manual...
Need help?
Do you have a question about the IA125-4 and is the answer not in the manual?
Questions and answers