Table of Contents
Advertisement
Advertisement
Table of Contents

Related Manuals for Tufner T903


Summary of Contents for Tufner T903
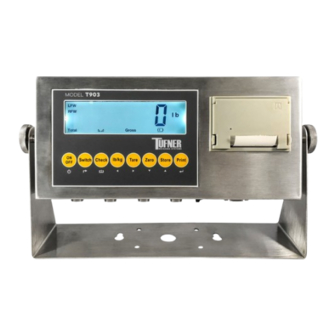
- Page 1 T903 Portable Static Weighing Indicator User’s Manual (4 Channels) (6 Channels)
- Page 2 Safety Instruction For safety operation pls. follow the safety instruction. WARNING Setting. Calibration Inspection and Maintain of the indicator is prohibited by Non-professional staff. WARNING Pls. make sure the weighing display have good ground in using. WARNING indicator static sensitive equipment,cut off the power during electrical connections, internal components touched by hand is prohibited, and please take the measure of anti-...
-
Page 3: Table Of Contents
LIST LIST................................1 1. PRODUCT INTRODUCTION......................1 1.1 M UNCTION................................1.2 T ECHNICAL PARAMETER............................DRAWING..................................1.4 B ATTERY INSTRUCTION.............................. 2. INSTALLATION AND CALIBRATION...................2 2.1 C HECK....................................2.2P OWER SUPPLY CONNECTION........................... 2.3 C ONNECTION OF LOAD CELL AND INDICATOR....................2.4 C OMMUNICATION INTERFACE........................... 3. -
Page 4: Product Introduction
1. Product Introduction 1.1 Main Function Portable Static Weighing Indicator MWI01 is designed for static axle scale. It can connect with 1,2,3,4,5,6 weighing pads to weigh the truck. It owns manual weighing mode and automatic weighing mode. It can be normal weighing or accumulative weighing. Varied weighing ways to meet different requirements. -
Page 5: Drawing
1.3 drawing 1.4 Battery instruction 1. when you use the internal battery first time,you should charge the battery fully, to prevent low voltage resulted from self leakage of battery. 2. when the “ ” is flashing, it means low battery, pls. charge it in time. 3. -
Page 6: Connection Of Load Cell And Indicator
2.3 Connection of load cell and indicator The indicator can connect with 4 weighing pads or 24 pcs of load cells 350Ω at most. Quick disconnect of load cell as below. The number of weighing pads and load cells correspond to the weighing modes. If the pads or load cells are connected at the right way, the indicator can’t work. - Page 7 pads should be connected with the indicator. And press ”store” button to accumulate the axle weigh and print. Then press “printing” to print the final accumulative weight and...
-
Page 8: Communication Interface
save. Example:Two pads work with the indicator to weigh a truck with three axles. a. The pads should connect with LFW,RFW interfaces; b. Parameter setting:working mode[ModE 2] setting“2”;printing format[PF - 2]setting“2”;Axles [ALE - 3]setting“3”. c. Drive the first axle of the truck on the weighing pads. Press ”Switch” button, indicator can display the axle weight and the each weight of the wheels and the percentage of each wheel weight from the axle weight. -
Page 9: Basic Operation
3. Basic operation 3.1 Keypad Instruction Weighing data Kg/lb Weighing unit: kg/lb Percentage,show how many percentage the pad weight take on the whole weight Tare Tare Gross Gross weight Net weight The weighing data is stable Weight is zero The weight of the left front wheel The weight of the right front wheel The weight of the left back wheel The weight of the right back wheel... -
Page 10: Power On & Off
Zero Zero the weight within tolerance Tare At G.W mode, get the tare weight. At N.W mode, clear the tare, get the G.W Kg/lb Covert between kg and lb convert Check Check and read the saved weight data to print. Switch Switch the weight between the pad weight and the total weight. -
Page 11: Unit Switch
3.5 Unit Switch To press “Unit” button for switching the unit between “KG” and “LB”. 3.6 Checking Weighing mode, press “Check” button to show “C 0030” (30 records existing), input “C 0020” and press “ Print” to check 20 record. Display show “REAd-0”. Choosing”1” to show date, time, axle, tare weight and total weight one by one. -
Page 12: Step Of Calibration Operation
RIGHT EXIT THE MENU 4.2 Step of calibration operation F1 menu:setting working mode, unit, decimal, graduation and span. Step Operation Display Remark F1 menu [Mode 2] Weighing pad working mode:1/2/3/4 press [CAL--0] Zero Calibration: press [CAL--1] 0=Zero calibration is not performed. 1=Perform zero calibration. - Page 13 [SCALE6] Pad choose:calibration for the 6th pad [CAL--0] Zero Calibration: press [CAL--1] 0=No need calibration 1= need calibration press...
-
Page 14: Application Function Parameters Setting Chart
or press to jump [SPAN-0] 0=No need loading calibration press [SPAN-1] 1=loading calibration press or press to jump [0100.00] Loading calibration: press Setting loading 100,00 an put the 100kg weight on the 2 pad. Loading choice: load the weight as press possible As max capacity, at least 10%... - Page 15 press [Baud-1] Baud rating setting press 0:600; 1:1200; 2:2400; 3:4800 4:9600; 5:19200; press 6:38400 7:57600; 8:115200 [CP - 1] Communication format setting press 0: communication is off. press 1: Communication format 1, connected to [OFF-00] Automatic power off setting: press or [OFF-10] 00: no power-off Automatic power-offer after ten min.
-
Page 16: Serial Interface Reception Command
[S-0560] 560 records in indicator. Max. recording press is 2000 cps. [HE-1.0A] PCB version 1.0A press [SE-1.00] Software version 1.00 press [LFW Check the left front wheel ad code press code] [RFW Check the right front wheel ad code press code] [LRW Check the left back wheel ad code... -
Page 17: Command 2
CR: carriage return LF: line feed 5.2 Command 2 (workable with second display from Yaohua, Baud rate 600) 6.Print format 6.1 Normal Printing format Three pads: Single pad: Double pads: Four pads: WEIGHING REPORT WEIGHING REPORT WEIGHING REPORT WEIGHING REPORT ------------------------------ ------------------------------ ------------------------------... -
Page 18: Maintenance
Time: 11:10:41 Time: 11:10:41 Vehicle: Vehicle: Cargo:34 Cargo:34 LW: 420.5kg LFW: 420.5kg RW: 419.5kg RFW: 419.5kg Axle01: 840.0kg Axle01: 840.0kg LW: 309.5kg LRW: 309.5kg RW: 297.0kg RRW: 297.0kg Axle02: 607.0kg Axle02: 607.0kg LFW: 420.5kg ------------------------------ Net: 1447.0kg RFW: 419.5kg Tare:0.0kg Axle03: 840.0kg Gross: 1447.0kg... -
Page 19: Daily Maintain
weighing condition ERR16 Tare when no load To load some, then tare ERR17 Out of tare range Decrease the tare weight The S/N number wrong Assure the S/N number within ERR25 when checking weighing record Number of records Printing format wrong ERR30 Printing format setting”2”... -
Page 20: Packing List
7.3Packing list Packing list ITEM NAME UNIT PACKING Weighing indicator Plastic bag Accessories bag China/DC8.4V US/DC8.4V UK/DC/8.4V Adapter EU/DC8.4V AU/DC8.4V OTHERS USER MANUAL 3-core aviation RS232 plug Serial port plug DB9-9 core Certificate Packing list...
Need help?
Do you have a question about the T903 and is the answer not in the manual?
Questions and answers