Table of Contents
Advertisement
Available languages
Available languages
Quick Links
Advertisement
Chapters
Table of Contents

Summary of Contents for Sonus Faber ARENA
- Page 1 A R E N A HOME CINEMA SOLUTIONS OWNER’S MANUAL...
-
Page 2: Table Of Contents
1.1 - INFORMAZIONI PER L’UTENTE Gentile Cliente, Desideriamo ringraziarLa e complimentarci con Lei per aver scelto i diffusori Arena per il suo impianto audio/audio-video. Poiché è nostro preciso interesse che Lei ottenga il miglior risultato possibile nell’ascolto e che ciò... -
Page 3: Informazioni Di Sicurezza
Le seguenti condizioni fanno decadere la garanzia sul prodotto: • Il diffusore acustico è stato smontato o modificato da personale diverso da quello del centro assistenza autorizzato da Sonus faber; • Il diffusore acustico è stato usato in modo non conforme a quanto descritto in questo manuale. -
Page 4: Installazione
3. INSTALLAZIONE 3.1 - CONTENUTO DELL’IMBALLO • Diffusore • Cornice • Template per il foro • Copertura protettiva • Scatola accessori: griglie in tessuto, viti, copri viti. 3.2 - DISIMBALLO Procedere al disimballo come indicato di seguito. Seguire le seguenti indicazioni generali: •... -
Page 5: Montaggio
3.3 - MONTAGGIO 3.3.1 - SEGNARE SULLA PARETE L’AREA DI TAGLIO MEDIANTE IL TEMPLATE IN DOTAZIONE TAGLIARE LUNGO IL PERIMETRO SEGNATO Assicurarsi, in via preventiva, che l’area di taglio sia compresa tra i due montanti. Per il corretto funzionamento del sistema di fissaggio, mantenere una distanza di almeno 4 cm tra il bordo laterale del foro e il montante più... - Page 6 3.3.2 - COLLEGARE I CAVI AUDIO AL DIFFUSORE Fare attenzione alla polarità dei morsetti durante il collegamento. I collegamenti vanno effettuati con gli apparecchi spenti!
- Page 7 3.3.3 - INSERIRE LA CORNICE NEL FORO PRATICATO 3.3.4 - SPINGERE LE ALETTE METALLICHE A CONTATTO CON IL MURO INTERNO Rimuovere gli elastici ferma posizione.
- Page 8 3.3.5 - AVVITARE LA CORNICE Avvitare fino a fine corsa senza forzare le viti di fissaggio per evitare di danneggiare il sistema di bloccaggio. 3.3.6 - INSERIRE IL DIFFUSORE ACUSTICO NELLA CORNICE...
-
Page 9: Rimozione Del Diffusore
3.3.7 - AVVITARE IL DIFFUSORE ACUSTICO ALLA CORNICE CHIUDERE CON I COPRI VITI 3.4 - RIMOZIONE DEL DIFFUSORE 3.4.1 - SVITARE IL DIFFUSORE ACUSTICO DALLA CORNICE 3.4.2 - SCOLLEGARE I CAVI AUDIO DAL DIFFUSORE... -
Page 10: Manutenzione E Pulizia
3.4.3 - SVITARE LA CORNICE E ALLINEARE LE ALETTE METALLICHE RIMUOVERE LA CORNICE DAL MURO Effettuare l’operazione con gli apparecchi spenti! 4. MANUTENZIONE E PULIZIA I diffusori acustici non necessitano di manutenzioni particolari se non di una periodica pulizia generale. Per l’eventuale polvere depositata sul mobile, sui pannelli frontali e sugli altoparlanti, usare un pennello morbido facendo molta attenzione a non danneggiare le delicate membrane degli altoparlanti. -
Page 11: Specifiche Tecniche
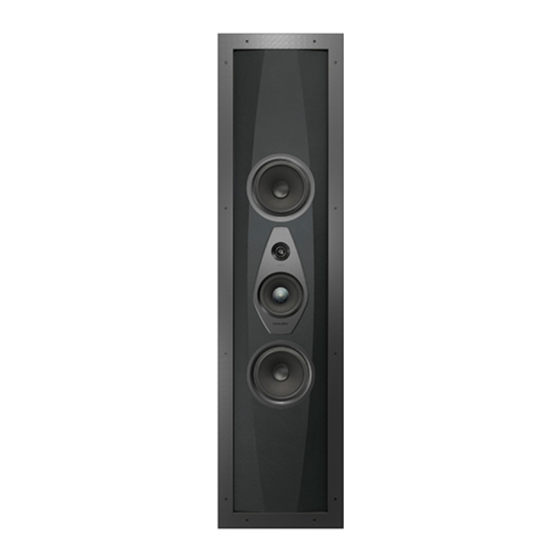
5. SPECIFICHE TECNICHE ARENA 30 ARENA 20 ARENA S15 Array Balanced Speaker type 4 way 3.5 way Sub-Woofer Low frequency transducer 2 x 8 in 2 x 8 in 4 x 6.5 in Mid/High frequency 2 x 6.25 in - 38 mm Dome Tw 6.25 in - 19 mm Dome Tw... -
Page 12: General Information
The loudspeakers are designed and manufactured according to the highest quality standards. Should however a fault or a malfunction occur, all Sonus faber products are covered by a standard warranty that covers material, technical and manufacturing defects and/or inconsistencies for two (2) years from the date of purchase by the original owner. -
Page 13: Safety Information
The product warranty will be void under the following conditions: • If the product has been disassembled or modified by persons other than a Sonus faber authorized service center; • If the product has been used in a manner that is not consistent with the indications contained within this manual. -
Page 14: Installation
3. INSTALLATION 3.1 - PACKAGING CONTENTS • Speaker • Frame • Template for the hole • Protective cover • Accessories box: fabric grids, screws, screw covers. 3.2 - UNPACKING Respect the following general indications: • It is advisable to open the packaging as close to the final location as possible. •... -
Page 15: Assembly
3.3 - ASSEMBLY 3.3.1 - MARK THE AREA TO BE CUT ON THE WALL USING THE TEMPLATE SUPPLIED Previously, make sure that the cutting area is between the two uprights! For correct operation of the fixing system, maintain a distance of at least 4 cm between the lateral edge of the hole and the nearest upright. - Page 16 3.3.2 - COLLEGARE I CAVI AUDIO AL DIFFUSORE Pay attention to the polarities of the terminals during connection. The connections must be made with the equipment turned off!
- Page 17 3.3.3 - INSERT THE FRAME IN THE DRILLED HOLE 3.3.4 - PUSH THE METALLIC FINS INTO CONTACT WITH THE INTERNAL WALL Remove the rubber bands...
- Page 18 3.3.5 - SCREW THE FRAME Tighten the locking screws fully home without force, to prevent damage to the locking system! 3.3.6 - INSERT THE LOUDSPEAKER IN THE FRAME...
-
Page 19: Remove The Loudspeaker
3.3.7 - SCREW THE LOUDSPEAKER TO THE FRAME CLOSE WITH THE SCREW COVERS 3.4 - REMOVE THE LOUDSPEAKER 3.4.1 - UNSCREW THE LOUDSPEAKER FROM THE FRAME 3.4.2 - DISCONNECT THE AUDIO CABLES FROM THE LOUDSPEAKER... -
Page 20: Maintenance And Cleaning
3.4.3 - UNSCREW THE FRAME AND ALIGN THE METAL FINS REMOVE THE FRAME FROM THE WALL Perform the operation with the appliances off! 4. MAINTENANCE AND CLEANING The loudspeakers do not require any particular maintenance operations, just general periodic cleaning. It is recommended to use a soft brush to eliminate any dust that may have accumulated on the cabinet, the front panels, and the loudspeakers themselves, taking care not to damage the loudspeakers’... -
Page 21: Technical Specifications
5. TECHNICAL SPECIFICATIONS ARENA 30 ARENA 20 ARENA S15 Array Balanced Speaker type 4 way 3.5 way Sub-Woofer Low frequency transducer 2 x 8 in 2 x 8 in 4 x 6.5 in Mid/High frequency 2 x 6.25 in - 38 mm Dome Tw 6.25 in - 19 mm Dome Tw... -
Page 22: Informations Générales
1.1 - INFORMATIONS POUR L’UTILISATEUR Cher Client, Nous tenons à vous remercier et à vous féliciter d’avoir choisi des enceintes Arena pour votre système audio/audio-vidéo. Sachant que nous avons à cœur que vous obteniez les meilleurs résultats d’écoute possibles en toute sécurité, nous vous invitons à... -
Page 23: Informations De Sécurité
La garantie sur le produit sera automatiquement annulée dans les conditions suivantes: • L’enceinte acoustique a été démontée ou modifiée par un personnel autre que celui du centre d’assistance autorisé par Sonus faber; • L’enceinte acoustique a été utilisée de manière non conforme à ce qui est décrit dans ce manuel. -
Page 24: Installation
3. INSTALLATION 3.1 - CONTENU DE L’EMBALLAGE • Enceinte • Cadre • Gabarit pour le trou • Couverture de protection • Boîte d’accessoires: grilles en tissu, vis, cache-vis. 3.2 - DÉBALLAGE Procéder au déballage comme indiqué ci-dessous. Suivre les indications suivantes générales: •... -
Page 25: Montage
3.3 - MONTAGE 3.3.1 - MARQUER LA ZONE DE COUPE SUR LE MUR EN UTILISANT LE GABARIT FOURNI EN DOTATION DÉCOUPER LE LONG DU PÉRIMÈTRE TRACÉ S’assurer à l’avance que la zone de coupe se situe entre les deux montants. Pour que le système de fixation fonctionne correctement, maintenir une distance d’au moins 4 cm entre le bord latéral du trou et le... - Page 26 3.3.2 - COLLEGARE I CAVI AUDIO AL DIFFUSORE Veiller à respecter la polarité des bornes lors du branchement. Les branchements doivent être effectués avec les appareils éteints!
- Page 27 3.3.3 - INSÉRER LE CADRE DANS LE TROU PRATIQUÉ 3.3.4 - POUSSER LES AILETTES MÉTALLIQUES EN CONTACT AVEC LA PAROI INTÉRIEURE Retirer les élastiques de blocage de position.
- Page 28 3.3.5 - VISSER LE CADRE Visser complètement les vis de fixation sans forcer afin d’éviter d’endommager le système de blocage. 3.3.6 - INSÉRER L’ENCEINTE ACOUSTIQUE DANS LE CADRE...
-
Page 29: Retrait De L'enceinte
3.3.7 - VISSER L’ENCEINTE AU CADRE ET FERMER AVEC LES CACHE-VIS 3.4 - RETRAIT DE L’ENCEINTE 3.4.1 - DÉVISSER L’ENCEINTE DU CADRE 3.4.2 - DÉCONNECTER LES CÂBLES AUDIO DE L’ENCEINTE... -
Page 30: Entretien Et Nettoyage
3.4.3 - DÉVISSER LE CADRE ET ALIGNER LES AILETTES MÉTALLIQUES RETIRER LE CADRE DU MUR Effectuer l’opération avec les appareils éteints! 4. ENTRETIEN ET NETTOYAGE Les enceintes ne nécessitent pas d’entretien spécial outre un nettoyage régulier général. S’il y a de la poussière sur le meuble, les panneaux frontaux et les haut-parleurs, utiliser un pinceau doux en faisant très attention de ne pas endommager les membranes délicates des haut-parleurs. -
Page 31: Spécifications Techniques
5. SPÉCIFICATIONS TECHNIQUES ARENA 30 ARENA 20 ARENA S15 Array Balanced Speaker type 4 way 3.5 way Sub-Woofer Low frequency transducer 2 x 8 in 2 x 8 in 4 x 6.5 in Mid/High frequency 2 x 6.25 in - 38 mm Dome Tw 6.25 in - 19 mm Dome Tw... -
Page 32: Allgemeine Informationen
Sollten Zweifel oder weitergehende Fragen bestehen, empfehlen wir Ihnen, sich an das technische Personal Ihres Händlers, an den offiziellen Vertrieb von Sonus faber in Ihrem Land oder auch direkt an Sonus faber zu wenden. Hierzu schreiben Sie bitte eine E-Mail an customerservice@sonusfaber.com. -
Page 33: Sicherheitshinweise
Defekts beigelegt werden. Bei folgenden Bedingungen verliert die Garantie ihre Gültigkeit: • Das Produkt wurde von anderen Personen als einem von Sonus faber autorisierten Kundendienstzentrum zerlegt oder verändert; • Das Produkt wurde entgegen den Vorgaben in diesem Handbuch unsachgemäß gebraucht. -
Page 34: Installation
3. INSTALLATION 3.1 - PACKUNGSINHALT • Lautsprecher • Rahmen • Schablone für die Wandöffnung • Schutzabdeckung • Zubehörschachtel: Stoffgitter, Schrauben, Schraubenabdeckungen. 3.2 - AUSPACKEN Gehen Sie beim Auspacken wie folgt vor. Halten Sie sich an folgende allgemeine Vorgaben: • Es ist ratsam, die Produkte so nah wie möglich an ihrem endgültigen Standort auszupacken •... -
Page 35: Montage
3.3 - MONTAGE 3.3.1 - MITHILFE DER SCHABLONE AN DER WAND DEN AUSSCHNITTSBEREICH ANZEICHNEN Zuvor sicherstellen, dass der Ausschnittbereich zwischen den beiden Seitenteilen liegt. Halten Sie für eine ordnungsgemäße Funktion des Befestigungssystems einen Abstand von mindestens 4 cm zwischen dem seitlichen Rand der Öffnung und dem nächstgelegenen Seitenteil ein. - Page 36 3.3.2 - COLLEGARE I CAVI AUDIO AL DIFFUSORE Beim Anschluss auf die Polarität der Klemmen achten. Der Anschluss muss bei ausgeschalteten Geräten erfolgen.
- Page 37 3.3.3 - DEN RAHMEN IN DIE HERGESTELLTE ÖFFNUNG EINSETZEN 3.3.4 - DIE METALLLASCHEN GEGEN DIE INNENFLÄCHEN DER WAND DRÜCKEN Die Gummibänder, die die Position halten, entfernen.
- Page 38 3.3.5 - DEN RAHMEN FESTSCHRAUBEN Die Befestigungsschrauben bis zum Anschlag ohne übermäßigen Kraftaufwand einschrauben, um die Arretierung nicht zu beschädigen. 3.3.6 - DEN LAUTSPRECHER IN DEN RAHMEN EINSETZEN...
-
Page 39: Ausbau Des Lautsprechers
3.3.7 - DEN LAUTSPRECHER AN DEN RAHMEN SCHRAUBEN DIE SCHRAUBENKÖPFE MIT DEN SCHRAUBENABDECKUNGEN VERSCHLIEẞEN 3.4 - AUSBAU DES LAUTSPRECHERS 3.4.1 - DEN LAUTSPRECHER VOM RAHMEN ABSCHRAUBEN 3.4.2 - DIE AUDIOKABEL VOM LAUTSPRECHER ABKLEMMEN... -
Page 40: Pflege Und Reinigung
3.4.3 - DEN RAHMEN ABSCHRAUBEN UND DIE METALLLASCHEN AUSRICHTEN DEN RAHMEN VON DER WAND ENTFERNEN Den Vorgang bei ausgeschalteten Geräten ausführen! 4. PFLEGE UND REINIGUNG Außer einer regelmäßigen allgemeinen Reinigung erfordern die Lautsprecher keine besondere Pflege. Für den Staub, der sich auf dem Möbelstück, den Frontpaneelen und den Lautsprechern abgesetzt hat, verwenden Sie bitte einen weichen Pinsel. -
Page 41: Technische Spezifikationen
5. TECHNISCHE SPEZIFIKATIONEN ARENA 30 ARENA 20 ARENA S15 Array Balanced Speaker type 4 way 3.5 way Sub-Woofer Low frequency transducer 2 x 8 in 2 x 8 in 4 x 6.5 in Mid/High frequency 2 x 6.25 in - 38 mm Dome Tw 6.25 in - 19 mm Dome Tw... -
Page 42: Общие Сведения
системы внимательно прочитать настоящее руководство по эксплуатации. В случае возникновения каких-либо сомнений или интереса, обращайтесь к техническому персоналу в Вашем пункте продаж, к официальному дилеру Sonus faber в Вашей стране или непосредственно в компанию Sonus faber, написав по адресу customerservice@sonusfaber.com. -
Page 43: Правила Техники Безопасности
Акустические системы должны сопровождаться описанием обнаруженной неисправности или дефекта. Отмена гарантии на изделие происходит на следующих условиях: • Акустическая система демонтирована или модифицирована персоналом, отличным от авторизованного сервисного центра Sonus faber. • Громкоговоритель использовался способом, несоответствующим описанию из настоящего руководства. 2. ПРАВИЛА ТЕХНИКИ БЕЗОПАСНОСТИ... -
Page 44: Установка
3. УСТАНОВКА 3.1 - СОДЕРЖИМОЕ УПАКОВКИ • Акустическая система • Рамка • Шаблон для отверстия • Защитное покрытие • Коробка с принадлежностями: тканевые решетки, винты, колпачки для винтов. 3.2 - РАСПАКОВКА Выполните распаковку в указанном ниже порядке. Соблюдайте следующие указания общего характера: •... -
Page 45: Монтаж
3.3 - МОНТАЖ 3.3.1 - С ПОМОЩЬЮ ПРИЛАГАЕМОГО ШАБЛОНА ОТМЕТЬТЕ НА СТЕНЕ ОБЛАСТЬ РАЗРЕЗА И РАЗРЕЖЬТЕ ПО ОТМЕЧЕННОМУ ПЕРИМЕТРУ PУ Предварительно проверьте, что зона разреза располагается между двумя стойками. Для правильной работы системы крепления соблюдайте расстояние не менее 4 см между боковым... - Page 46 3.3.2 - COLLEGARE I CAVI AUDIO AL DIFFUSORE PУ При подключении обратите внимание на полярность клемм. Подключение должно выполняться с выключенными устройствами!
- Page 47 3.3.3 - УСТАНОВИТЕ РАМКУ В ПРОСВЕРЛЕННОЕ ОТВЕРСТИЕ 3.3.4 - ПРОТОЛКНИТЕ МЕТАЛЛИЧЕСКИЕ ЯЗЫЧКИ ДО СОПРИКОСНОВЕНИЯ С ВНУТРЕННЕЙ СТЕНОЙ PУ Снимите эластичные элементы удерживания положения.
- Page 48 3.3.5 - ЗАКРУТИТЕ РАМКУ Затяните крепежные винты до упора без приложения чрезмерного усилия, чтобы не повредить систему крепления. 3.3.6 - ВСТАВЬТЕ АКУСТИЧЕСКУЮ СИСТЕМУ В РАМКУ PУ...
-
Page 49: Демонтаж Акустической Системы
3.3.7 - ЗАКРУТИТЕ АКУСТИЧЕСКУЮ СИСТЕМУ К РАМКЕ И ЗАКРОЙТЕ КОЛПАЧКАМИ ДЛЯ ВИНТОВ 3.4 - ДЕМОНТАЖ АКУСТИЧЕСКОЙ СИСТЕМЫ 3.4.1 - ОТКРУТИТЕ АКУСТИЧЕСКУЮ СИСТЕМУ ОТ РАМКИ 3.4.2 - ОТСОЕДИНИТЕ АУДИОКАБЕЛИ ОТ АКУСТИЧЕСКОЙ СИСТЕМЫ PУ... -
Page 50: Обслуживание И Очистка
3.4.3 - ОТКРУТИТЕ РАМКУ, ВЫРОВНЯЙТЕ МЕТАЛЛИЧЕСКИЕ ЯЗЫЧКИ И СНИМИТЕ РАМКУ СО СТЕНЫ Выполняйте операцию при выключенных устройствах! 4. ОБСЛУЖИВАНИЕ И ОЧИСТКА Акустические системы не требуют специального обслуживания, кроме периодической общей очистки. Для удаления пыли, осевшей на корпус, передние панели и динамики, используйте мягкую кисточку, стараясь... -
Page 51: Технические Характеристики
5. ТЕХНИЧЕСКИЕ ХАРАКТЕРИСТИКИ ARENA 30 ARENA 20 ARENA S15 Матричный балансный Тип колонки 4-полосная 3,5-полосная сабвуфер Низкочастотный 2 x 8 дюймов 2 x 8 дюймов 4 x 6,5 дюймов преобразователь 2 x 6,25 дюймов - 38 мм Средне/ 6,25 дюймов - 19 мм... - Page 52 NOTE...
- Page 53 © COPYRIGHT 2022 World copyright reserved Sonus faber reserves the right to change any technical and/or aesthetical feature of its products at any time without any previous notice. Компания Sonus faber оставляет за собой право изменять любые технические и/или эстетические характеристики своей продукции в любое время без предварительного...
- Page 54 Sonus faber S.p.A. Via Meucci, 10 - 36057 Arcugnano (VI) - Italy Tel. 0444/288788 - fax 0444/288722 - info@sonusfaber.com...
Need help?
Do you have a question about the ARENA and is the answer not in the manual?
Questions and answers