Advertisement
Advertisement
Table of Contents

Related Manuals for Audiolab 7000A


Summary of Contents for Audiolab 7000A
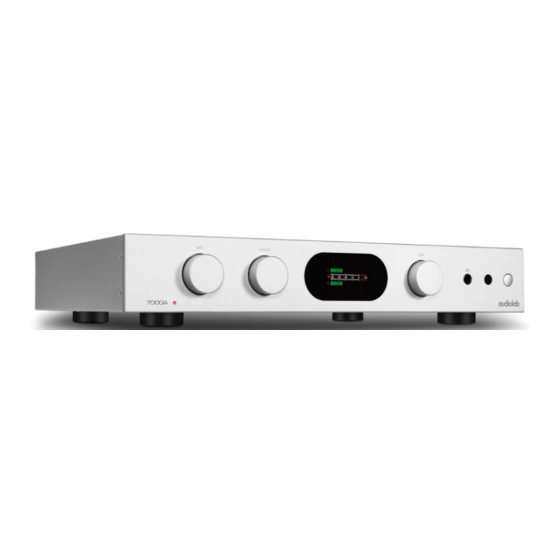
- Page 1 Audiolab 7000A User Manual...
-
Page 2: Important Safety Information
1: Important Safety Information This lightning flash with an arrowhead symbol within an equilateral triangle is intended to alert the user to the presence of non-insulated “dangerous voltage” within the product’s enclosure that may be of sufficient magnitude to constitute a risk of electric shock. Warning: To reduce the risk of electric shock, do not remove cover (or back) as there are no user-serviceable parts inside. -
Page 3: Fcc Statement
impeded by covering the ventilation openings with items such as newspaper, tablecloths, curtains etc. WARNING: Only use attachments/accessories specified or provided by the manufacturer (such as the exclusive supply adapter, battery etc.). WARNING: Please refer to the information on the exterior panel of the enclosure for electrical and safety information before installing or operating the apparatus. WARNING: To reduce the risk of fire or electric shock, do not expose this apparatus to rain or moisture. - Page 4 reasonable protection against harmful interference in a residential installation. This equipment generates, uses and can radiate radio frequency energy and, if not installed and used in accordance with the instructions, may cause harmful interference to radio communications. However, there is no guarantee that interference will not occur in a particular installation.
- Page 5 The audiolab 7000A LED on screen glows green or blue to indicate that the unit is decoding and playing an MQA stream or file, and denotes provenance to ensure that the sound is identical to that of the source material. It glows blue to indicate it is playing an MQA Studio file, which has either been approved...
- Page 6 2: Contents Audiolab 7000A Getting Started Control and Function Remote Headset Connection Menu Options System Operation Playing Operation Warranty Specification...
-
Page 7: Getting Started
Introduction of 7000A Welcome to the Audiolab 7000A. ESS9038 and we hope you will enjoy its performance for many years to come. Please read through this manual to obtain the very best performance from your 7000A. Features • Full DAC (ESS 9038) and preamp facilities •... -
Page 8: Unpacking The Equipment
The unit must be mounted on a solid, level and stable surface. Before you connect the Audiolab 7000A to the AC mains power, ensure your AC mains voltage corresponds to the rating on the rear panel of the product. If in doubt,... -
Page 9: Controls And Functions
2.Controls and Functions... -
Page 10: Remote Handset
3.Remote Handset... - Page 11 7000A-xxxx' and connect. Once paired, the Bluetooth icon will appear on the 7000A display. If you switch to another input on the 7000A your mobile device will be disconnected after 60 seconds. To reconnect, select BT on the 7000A and it will connect to the last paired device, or select '...
- Page 12 The trigger connections are made using "3.5 to 3.5mm" jack interconnects (not include). Mains Input Before connecting the AC power cord to the 7000A, please make sure the Power Switch is in the OFF position. Switch it to the ON position after connecting the unit to the AC mains.
-
Page 13: Menu Options
5.Menu Options Filter Configure the digital filter for the audio DAC. Linear Phase (Slow Roll-Off) is the default setting. Someone may prefer one type of filter over others. • Linear Phase (Fast Roll-Off) – Select the Select the Linear Phase Fast Roll-Off filter. •... - Page 14 Upsampling 7000A will extend the sampling rate to 352.8/384kHz by default. You can set OFF as you prefer. DPLL This setting is used for changing the bandwidth of the digital phase lock loop of the D/A converter to accommodate different levels of jitter on the incoming SPDIF signal.
- Page 15 Balance Adjust the Left and Right balance of the 7000A output stage. Input Sensitivity It provides additional volume control offset values for AUX/XLR/PHONO. You can enter the sub menus to set the value by remote control or MODE knob.
- Page 16 Power On Limit sets the maximum out of standby volume level. When coming out of standby the volume will be set to the level used at the end of the previous session or to the Power On Limit value whichever is lowest. This will avoid a sudden loud signal at the beginning of a new session. Display Option Access the various display options for the 7000A front panel display.
- Page 17 Display Settings Brightness: Adjust the brightness of the 7000A front panel display. Display Time Out: Adjust the time at which the 7000A display will revert to your chosen display option, from the home screen, after performing volume adjust and other operations.
- Page 18 Trigger Activate or deactivate the 12V trigger function of the 7000A. Language There are multiple different languages you can choose from to display your system so you can view information in your preferred language. Default language is English.
- Page 19 The auto standby feature will by default put the unit into standby after 20 minutes of inactivity. This feature can be configured and set to 20 minutes, 60 minutes or Never. Reset Reset the 7000A to the factory default settings.
- Page 20 Version Check the current operation firmware version of System and PC USB.
-
Page 21: System Operations
Standby Mode The 7000A will enter standby mode after being powered on. Press the “Standby” button to bring the 7000A out of standby, the power indicator LED becomes brighter and the display shows “Audiolab” welcome screen while the unit is getting ready for operation. - Page 22 Pre-power Mode The pre-amplifier section is internally disconnected from the power amplifier. The 7000A can be used as a stand alone power amplifier (ie. part of an AV setup). This mode can also be used if additional signal processing is required, connecting the pre-out to an external signal processor and then take the output from the processor to the 7000A Power-IN.
- Page 23 The menu enables you to customize the unit and optimize the interface with other equipment in your system. 7000A has 13 different menu pages. Press the MENU key on the remote to enter menu mode,and then press VOL- or VOL+ to turn to different setting, confirm to the sub menu. You...
-
Page 24: Playing Operations
7.Playing Operations Playing PC USB input USB DRIVERS To download Windows Drivers, please see the separate manual. Any firmware updates will also be available from www.audiolab.co.uk Connect your computer to 7000A via USB cable (type A to Type B), change the source to PC USB using the handset or the SELECT button on the front panel. - Page 25 Audiolab Ltd. warrants this product, subject to the terms and conditions below, to be free from defects in materials and workmanship. During the warranty period Audiolab will repair or replace (at Audiolab’s option) this product, or any defective part in this product, if it is found to be defective due to faulty materials, workmanship or function. The warranty period may vary from country to country.
- Page 26 This warranty gives you specific legal rights, and you may have other statutory rights, which vary from state to state or county to county. How to claim: To obtain warranty service contact the Audiolab authorized dealer from which you purchased this product. Do not dispatch goods without the prior agreement of the dealer, Audiolab or their authorized distributors.
-
Page 27: Specification
9.Specification BRAND Audiolab Model 7000A General description Integrated Amplifier Design philosophy and core technology 2x70W(8ohm) / 2x110W(4ohm) Class AB ES9038Q2M 32-bit DAC 2.8" 480x640 large size full view IPS LCD Built in certified hardware MQA Full decoder (PC USB,Coax/Optical) Support Bluetooth 5.0(aptX/aptX LL) - Page 28 4.5mV (Phone MM, Volume=0dB) Input Impedance 10K(Line) 47K // 100pF(Phono MM) < 0.0005% (1KHz @ 2V, Volume = 0dB) Total Harmonic Distortion (THD) 20Hz-20kHz (+/-0.1dB) Frequency response 2.3V max. (Volume = 0dB) Output voltage 100 ohm Output impedance Signal-to-Noise ratio >...
- Page 29 Signal-to-Noise ratio (S/N) > 110dB (A-weighted) Max. Output Current Headphone Amplifier Total Harmonic Distortion (THD) < 0.01% (1kHz, 50mW ) Output Impedance 4 ohm Load impedance 20-600 ohm General Standby Power Consumption <0.5W Net weight 9.7KG Gross weight 11kg 440 x156 x 327 Dimensions (mm) (W x H x D) 540 x 412 x 210 Carton Size (mm) (W x H x D)
Need help?
Do you have a question about the 7000A and is the answer not in the manual?
Questions and answers