Table of Contents
Advertisement
Quick Links
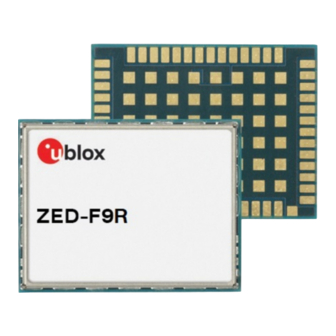
ZED-F9R
Getting started with high-precision sensor fusion
Application note
Abstract
This application note leads the user through the steps necessary to evaluate and prototype a sensor
fusion-based system using the ZED-F9R. The document cuts across many types of product
documentation especially for beginners.
UBX-22035176 - R01
C1-Public
www.u-blox.com
Advertisement
Table of Contents

Subscribe to Our Youtube Channel
Related Manuals for Ublox ZED-F9R

Summary of Contents for Ublox ZED-F9R
- Page 1 Application note Abstract This application note leads the user through the steps necessary to evaluate and prototype a sensor fusion-based system using the ZED-F9R. The document cuts across many types of product documentation especially for beginners. UBX-22035176 - R01 C1-Public...
-
Page 2: Document Information
ZED-F9R - Application note Document information Title ZED-F9R Subtitle Getting started with high-precision sensor fusion Document type Application note Document number UBX-22035176 Revision and date 9-Jan-2023 Disclosure restriction C1-Public This document applies to the following products: Product name ZED-F9R u-blox or third parties may hold intellectual property rights in the products, names, logos, and designs included in this document. - Page 3 Document information ..........................2 Contents ................................3 Introduction ............................. 5 1.1 Required items ............................. 5 1.1.1 Operational ZED-F9R module ......................5 1.1.2 GNSS antenna requirements ......................5 1.1.3 Host system ............................6 1.1.4 Odometer data ............................ 6 1.1.5 Correction data ........................... 6 Communicating with the receiver in u-center ................
- Page 4 ZED-F9R - Application note 7.2 Preserving calibration ..........................24 7.3 Performing a basic test drive........................24 7.4 Scenario testing ............................24 Appendix ..............................25 A.1 Recording logs ............................. 25 A.2 Replaying logs ............................25 A.3 Interference of GNSS signals ......................25 A.4 Communications and protocols ..................... 26 A.5 Basic alignment &...
-
Page 5: Required Items
1.1.1 Operational ZED-F9R module At the center of the setup is the ZED-F9R module installed on a printed circuit board (PCB). We recommend the C102-F9R evaluation kit for first-time users, as it provides a tested, ready-to-use device for most purposes. A custom design is also allowed, provided it follows the module’s hardware design requirements (see [1]). - Page 6 ZED-F9R - Application note 1.1.3 Host system Certain functionality in the setup needs to be implemented by a host system. This includes: • Configuring the receiver • Monitoring and debugging the receiver • Providing odometer data to the receiver • Providing correction data to the receiver All of the above can be done in u-center, except for providing odometer data to the receiver.
- Page 7 8. Click Poll. The view should look like the following when the receiver is operating properly: Figure 1: u-center UBX-MON-VER message 2.2 Updating the receiver firmware Please update to the latest receiver firmware if the shipped ZED-F9R module has an older version. u- blox receiver firmware binaries are available on the ZED-F9R product website.
- Page 8 Figure 2: u-center firmware update 2.3 Storing configuration settings ZED-F9R is fully configurable with UBX configuration interface messages. The configuration database in the receiver's RAM holds the current configuration that is used by the receiver at run- time. It is constructed on start-up of the receiver from several sources of configuration. The configuration interface and the available keys are described in the F9 HPS 1.30 Interface description...
- Page 9 ZED-F9R - Application note 2.4 Modifying the receiver configuration in UBX-CFG-VALSET view Figure 3 shows the UBX-CFG-VALSET message view. 1. Select the configuration items from the Group and Key Name dropdown menus and add these to the list of configuration items to set by clicking the Add to list button.
- Page 10 ZED-F9R - Application note Figure 4: Generation 9 configuration view During the evaluation phase, it is most simple to write the configuration directly to flash. During development and series production, it is recommended to write the configuration to the RAM or BBR layer at startup.
-
Page 11: Installation
ZED-F9R - Application note Installation The first step of setting up the ZED-F9R is installing it into the vehicle. Proper installation is vital for the navigation performance of the receiver, as its internal sensors must be able to measure the dynamics of the vehicle accurately in a consistent way. - Page 12 ZED-F9R - Application note Figure 6: IMU frame and installation frame Figure 7: Orientation information. Z-axis points upwards. UBX-22035176 - R01 Contents Page 12 of 30 C1-Public...
-
Page 13: Mounting The Antenna
ZED-F9R - Application note Finally, attach the receiver rigidly to the vehicle’s frame. meaning that it must not be able to move relative to the vehicle. This also means that the receiver must not be attached to any part of the vehicle that is able to move. -
Page 14: Gnss Setup
ZED-F9R - Application note GNSS setup Setting up the F9R for good GNSS performance is simple: just make sure the receiver has good quality signals. The default configuration of the receiver firmware is suitable for most use cases and does not need to be modified for most applications. - Page 15 ZED-F9R - Application note Figure 9: u-center Data view 4.2 Changing enabled constellations The enabled satellite constellations and signals are controlled by configuration items in the CFG- SIGNAL group. A constellation is enabled when the constellation’s enable key and both the L1 and L2 band keys are set to 1.
-
Page 16: Rtk Setup
ZED-F9R - Application note RTK setup For proper RTK performance, the receiver requires a continuous feed of correction data. It is available from correction data providers through either NTRIP or MQTT protocols, each requiring application software for fetching the data from the provider’s server and feeding it to the receiver through serial ports. - Page 17 ZED-F9R - Application note Figure 12: NTRIP client log 5.2 Setting up MQTT client in u-center IoT devices and applications require a reliable, robust, and secure messaging protocol. That is where MQTT comes in. MQTT is an OASIS standard messaging protocol for the Internet of Things (IoT). It is designed as an extremely lightweight publish/subscribe messaging transport that is ideal for connecting remote devices with a small code footprint and minimal network bandwidth.
- Page 18 ZED-F9R - Application note To view more details of the MQTT client’s operation, click the connection symbol. The MQTT Log window is displayed. Figure 14: MQTT client log 5.3 Monitoring RTK status Make sure the receiver is getting correction data by monitoring the RTK status in u-center (see Figure 15): •...
- Page 19 ZED-F9R - Application note Sensor fusion setup The final and most important part of the setup is setting up the receiver for sensor fusion. The receiver depends heavily on the internal IMU data, odometer data from the vehicle, and proper configuration.
- Page 20 ZED-F9R - Application note 6.1.4 UBX-ESF-MEAS sample code u-blox has collaborated with the OpenMower project to provide an example of integrating the ZED- F9R in a robotic application. The u-blox driver source code can be found here. In the OpenMower project, wheel ticks from two individual wheels are provided to the receiver. The...
- Page 21 6.2.1 Dynamic platform model ZED-F9R supports different dynamic platform models to adjust the high-precision sensor fusion navigation engine to the expected application, that is, a vehicle and its expected operation environment. It is important to select the correct model to ensure that the sensor fusion works as expected.
- Page 22 With priority navigation mode, the receiver can output at 1-30 Hz. Priority navigation mode rate can be configured with the CFG-RATE- NAV_PRIO configuration item. Consult the ZED-F9R Integration manual for more information.
-
Page 23: Calibration And Testing
Before being able to perform sensor fusion, the receiver must calibrate itself with vehicle dynamics and odometer data. This is done automatically over time by the receiver while the vehicle is being driven. Consult chapter 3.2.7 of the ZED-F9R Integration manual for more details about the calibration process. - Page 24 While the receiver will get calibrated eventually during normal operation of the vehicle, an accelerated initialization and calibration procedure can be performed during evaluation. See section 3.2.7.2 of the ZED-F9R Integration manual [1]. 7.2 Preserving calibration Without preventive measures, the receiver calibration only persists while the receiver is powered on, i.e., the calibration is lost and the receiver needs to be re-calibrated after every power cycle.
-
Page 25: Recording Logs
ZED-F9R - Application note A Appendix A.1 Recording logs Follow these steps to record a logfile in u-center: 1. Open u-center and connect to the receiver 2. Enable the messages that need to be monitored 3. (Optional) Enable debug messages with the debug button (Figure 18, 1). This enables messages that are required for u-blox support to assist in debugging any receiver issues. - Page 26 ZED-F9R - Application note Figure 20: u-center UBX-MON-SPAN showing the spectrum at the L1 and L2 bands A.4 Communications and protocols One reason that a fixed ambiguity is not achieved may be the corrections not being received or used. Figure 21 shows the UBX-MON-COMMS message used for monitoring the traffic at the communication ports.
- Page 27 ZED-F9R - Application note Figure 22: u-center UBX-RXM-COR showing SPARTN messages being used and decrypted A.5 Basic alignment & position offset checks There are few drive tests to see whether lateral and longitudinal offsets are an issue. • On a flat surface, drive in a straight line, turn around and return to the same spot. If there is an unacceptable offset between the out and back track, advanced configuration is needed.
-
Page 28: Troubleshooting Checklist
ZED-F9R - Application note Figure 23: u-center UBX-RXM-COR showing RTCM message types being received A.8 Dropping out of dead reckoning periodically • Have the physical dimensions and orientation of the system changed? Has the equipment been installed in the same position as before when it was working? •... - Page 29 ZED-F9R - Application note Calibration related: • Is the calibration drive suitable for the vehicle type? • Did the calibration drive result in a calibrated and initialized system? Final test: • During the test drive after calibration, does the carrier range status stay consistently in...
-
Page 30: Related Documentation
ZED-F9R - Application note Related documentation ZED-F9R Integration Manual, UBX-20039643 F9 HPS 1.30 Interface Description, UBX-22010984 Euler angles visualization tool, available in https://compsci290- s2016.github.io/CoursePage/Materials/EulerAnglesViz/ ☞ For product change notifications and regular updates of u-blox documentation, register on our website, www.u-blox.com.
Need help?
Do you have a question about the ZED-F9R and is the answer not in the manual?
Questions and answers