Advertisement
Legal Disclaimer
TO THE MAXIMUM EXTENT PERMITTED BY APPLICABLE LAW, THE PRODUCT DESCRIBED, WITH ITS HARDWARE, SOFTWARE AND FIRMWARE, IS PROVIDED "AS IS", WITH ALL FAULTS AND ERRORS, AND EZVIZ MAKES NO WARRANTIES, EXPRESS OR IMPLIED, INCLUDING WITHOUT LIMITATION, MERCHANTABILITY, SATISFACTORY QUALITY, FITNESS FOR A PARTICULAR PURPOSE, AND NON-INFRINGEMENT OF THIRD PARTY. IN NO EVENT WILL EZVIZ, ITS DIRECTORS, OFFICERS, EMPLOYEES, OR AGENTS BE LIABLE TO YOU FOR ANY SPECIAL, CONSEQUENTIAL, INCIDENTAL, OR INDIRECT DAMAGES, INCLUDING, AMONG OTHERS, DAMAGES FOR LOSS OF BUSINESS PROFITS, BUSINESS INTERRUPTION, OR LOSS OF DATA OR DOCUMENTATION, IN CONNECTION WITH THE USE OF THIS PRODUCT, EVEN IF EZVIZ HAS BEEN ADVISED OF THE POSSIBILITY OF SUCH DAMAGES.
TO THE MAXIMUM EXTENT PERMITTED BY APPLICABLE LAW, IN NO EVENT SHALL EZVIZ'S TOTAL LIABILITY FOR ALL DAMAGES EXCEED THE ORIGINAL PURCHASE PRICE OF THE PRODUCT.
EZVIZ DOES NOT UNDERTAKE ANY LIABILITY FOR PERSONAL INJURY OR PROPERTY DAMAGE AS THE RESULT OF PRODUCT INTERRUPTION OR SERVICE TERMINATION CAUSED BY:
- IMPROPER INSTALLATION OR USAGE OTHER THAN AS REQUESTED;
- THE PROTECTION OF NATIONAL OR PUBLIC INTERESTS;
- FORCE MAJEURE;
- YOURSELF OR THE THIRD PARTY, INCLUDING WITHOUT LIMITATION, USING ANY THIRD PARTY'S PRODUCTS, SOFTWARE, APPLICATIONS, AND AMONG OTHERS.
REGARDING TO THE PRODUCT WITH INTERNET ACCESS, THE USE OF PRODUCT SHALL BE WHOLLY AT YOUR OWN RISKS. EZVIZ SHALL NOT TAKE ANY RESPONSIBILITES FOR ABNORMAL OPERATION, PRIVACY LEAKAGE OR OTHER DAMAGES RESULTING FROM CYBER ATTACK, HACKER ATTACK, VIRUS INSPECTION, OR OTHER INTERNET SECURITY RISKS; HOWEVER, EZVIZ WILL PROVIDE TIMELY TECHNICAL SUPPORT IF REQUIRED. SURVEILLANCE LAWS AND DATA PROTECTION LAWS VARY BY JURISDICTION. PLEASE CHECK ALL RELEVANT LAWS IN YOUR JURISDICTION BEFORE USING THIS PRODUCT IN ORDER TO ENSURE THAT YOUR USE CONFORMS TO THE APPLICABLE LAW. EZVIZ SHALL NOT BE LIABLE IN THE EVENT THAT THIS PRODUCT IS USED WITH ILLEGITIMATE PURPOSES.
IN THE EVENT OF ANY CONFLICTS BETWEEN THE ABOVE AND THE APPLICABLE LAW, THE LATTER PREVAILS.
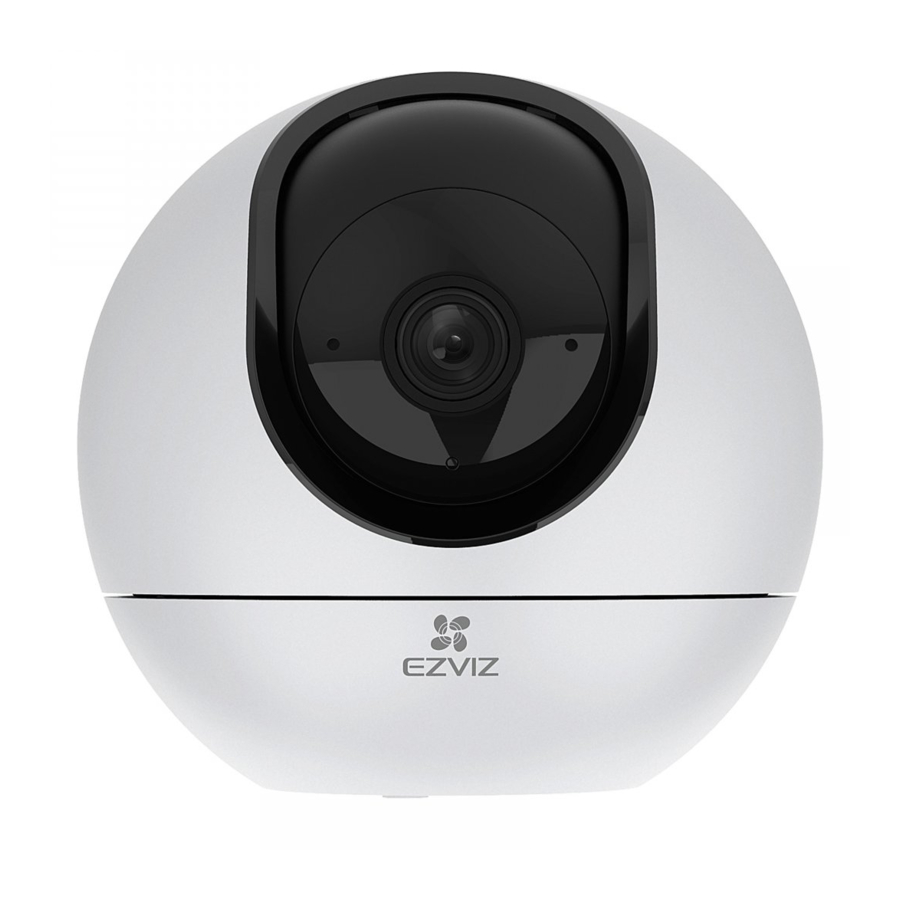
Overview
Package Contents

 The power adapter's appearance is subject to the actual one you have bought.
Basics

| Name | Description | |
| LED Indicator |  | Solid Red: Camera starting up. |
 | Slow-flashing Red: Network exception. | |
 | Fast-flashing Red: Camera exception (e.g. Micro SD card error). | |
 | Solid Blue: Video being viewed in the EZVIZ app. | |
 | Slow-flashing Blue: Camera running properly. | |
 | Fast-flashing Blue: Camera ready for Wi-Fi connection. | |

| Name | Description |
| Micro SD Card (sold separately) | Initialize the card in the EZVIZ app before using it. |
| Reset Button | Hold for 5 seconds to restart and set all parameters to default. |

Setup
Power-on
Plug the power cable into the camera, and then plug the power adapter into an outlet as shown in the figure below.

Connect to the Internet
Get the EZVIZ App
- Connect your mobile phone to Wi-Fi (suggested).
- Download and install the EZVIZ app by searching "EZVIZ" in the App Store or Google PlayTM.
- Launch the app and register an EZVIZ user account.

EZVIZ App


If you have already used the app, please make sure that it is the latest version. To find out if an update is available, go to the app store and search for EZVIZ.
Add camera to EZVIZ
- Hold the reset button for 5s. When the LED indicator flashes blue quickly, indicates that the camera is ready for Wi-Fi configuration.

- Log in to your EZVIZ user account.
- On the Home screen, tap "+" on the upper-right corner to go to the Scan QR Code interface.
- Scan the QR code on the Quick Start Guide cover or on the body of the camera.
![]()
- Follow the EZVIZ app wizard to finish Wi-Fi configuration.


If you want to change your camera's Wi-Fi, press and hold the reset button for 5s and repeat the steps above.
Installation
Use Micro SD Card (Optional)
Insert Micro SD Card
- Rotate the sphere upwards until you see the card slot.
- Insert the Micro SD card (sold separately) into the card slot as shown in the figure below.


Install the Base
The camera can be placed horizontally or mounted on the ceiling. Here we take ceiling mounting as an example.
- Please install the device indoor as the device is not waterproof.
- Make sure the ceiling is strong enough to withstand three times the weight of the camera.
- Avoid positioning the camera in an area that gets a lot of light shining directly into the camera lens.
- Recommended mounting height: 3 meters above the ground.
- Place the drill template onto the surface you have chosen to mount the camera.
- (For cement wall/ceiling only) Drill screw holes according to the template, and insert three anchors.
- Use three metal screws to fix the camera base.
Install the Camera
Mount the camera to the base, and turn it clockwise until it is fixed.

View Your Device
Live View
When you launch the EZVIZ app, the device page displays as shown below.
You can view and listen to a live feed, take snapshots or recordings, and choose video definition as needed.

Swipe left and right across the screen to see more icons.
| Icon | Description | |
 | Share. Share your device with anyone you want. | |
 | Settings. View or change the device settings. | |
 | Video History. View Recordings. | |
 | Snapshot. Take a snapshot. | |
 | Record. Manually start/stop recording. | |
| Pan/Tilt. Supports horizontal and vertical rotation. | |
| Speak. Start using talk and listen. | |
| Definition. Select video resolution from Ultra HD, Hi-Def or Standard. | |
 | Privacy Mode. Enable to hide the screen display. |


Please refer to the actual interface for specific information.
Settings
In the settings page, you can set the parameters of the device.
| Parameter | Description |
| Audio | Audio functions. When disabled, neither live view or recorded videos will have audio. |
| Status Light | You can tell device status by different lights shining. When disabled, lights will be off.
|
| IR Light | IR light helps the device get black and white images in low light conditions. When disabled, quality of images captured in dark environments will be influenced. |
| Alarm Notification | Alarm Notification: You can select different detecting modes and the device will give out alarms accordingly. When enabled, you will receive notifications 24/7 with no Notification Schedule set.
|
| Time Zone | You can select time zone as needed here. |
| Daylight Saving Time | Select daylight saving time as needed. |
| Date Format | You can select date format as needed here. |
| Wi-Fi | You can see the Wi-Fi that the device has been connected to, and you can tap to connect another Wi-Fi. |
| Cloud Storage | You can subscribe cloud storage here. |
| Storage Status | You can see the storage status of your cloud and memory card here. |
| Device Version | You can see the device version here. |
| Image Encryption | If enabled, images captured by the device can only be avaliable after you enter a password. |
| Change Encryption Pass word | You can change your encryption password here. The default password is the device verification code. |
| Flip image | Tap to flip images |
| Advanced Image Settings | You can select different shooting modes here.
|
| Offline Notification | If enabled, notifications will be pushed to your app once the device is offline. |
| User Guide | You can read user guide of the device here. |
| About | You can mark where the device is installed, and get product category, device model, serial number, and device QR code here. |
| Restart | Tap to restart your device. |
| Delete Device | Tap to delete the device from your EZVIZ account. |
| For privacy protection, please remove SD card or other storage media(if any)when transferring the device to others. | |
EZVIZ Connect
Use Amazon Alexa
These instructions will enable you to control your EZVIZ devices with Amazon Alexa. If you run into any difficulties during the process, please refer to Troubleshooting.
Before you start, make sure that
- EZVIZ devices are connected to the EZVIZ app.
- In the EZVIZ app, turn off the "Image Encryption" in the Device Settings page.
- You have an Alexa-enabled device (i.e Echo Spot, Echo-Show, All-new Echo-Show, Fire TV (all generations), Fire TV stick (second generation only), or Fire TV Edition smart TVs).
- The Amazon Alexa app is already installed on your smart device, and you have created an account.
To Control EZVIZ devices with Amazon Alexa
- Open the Alexa app and select "Skills and Games" from the menu.
- On the Skills and Games screen, search for "EZVIZ", and you will find "EZVIZ" skills.
- Select your EZVIZ device's skill, then tap ENABLE TO USE.
- Enter your EZVIZ username and password, and tap Sign in.
- Tap the Authorize button to authorize Alexa to access your EZVIZ account, so that Alexa can control your EZVIZ devices.
- You will see "EZVIZ has been successfully linked", then tap DISCOVER DEVICES to allow Alexa to discover all your EZVIZ devices.
- Go back to Alexa app menu and select "Devices", and under devices you will see all your EZVIZ devices.
Voice Command
Discover a new smart device via the "Smart Home" menu in the Alexa app or the Alexa Voice Control function. Once the device is found, you can control it with your voice. Speak simple commands to Alexa.
Your device's name for example: "show xxxx camera," can be modified in the EZVIZ app. Every time you change the name of the device, you will need to discover the device again to update the name.
Troubleshooting
What do I do if Alexa fails to discover my device?
Check if there are any Internet connecting problems.
Try to reboot the smart device and re-discover the device on Alexa.
Why does the device's status show "Offline" on Alexa?
Your wireless connection might have been disconnected. Reboot the smart device and re-discover on Alexa.
Internet access on your router could be unavailable. Check if your router is connected to the Internet and try again.
For details about countries that support the using of Amazon Alexa, see its official website.
Use Google Assistant
With the Google Assistant, you can activate your EZVIZ device and watch live by speaking Google Assistant voice commands.
The following devices and apps are required:
- A functional EZVIZ app.
- In the EZVIZ app, turn off the "Image Encryption" and turn on the "Audio" in the Device Settings page.
- A TV with functional Chromecast connecting to it.
- The Google Assistant app on your phone.
To get started, follow the steps below
- Set up the EZVIZ device and make sure it works properly on the app.
- Download the Google Home app from the App Store or Google Play StoreTM and log into your Google account.
- On the Myhome screen, tap "+" on the upper-left corner, and select "Set up device" from the menu list to go to the Set up interface.
- Tap Works with Google, and search for "EZVIZ", where you will find "EZVIZ" skills.
- Enter your EZVIZ username and password, and tap Sign in.
- Tap the Authorize button to authorize Google to access your EZVIZ account, so that Google can control your EZVIZ devices.
- Tap Return to app.
- Follow the above steps to complete the authorization. When synchronization is completed, EZVIZ service will be listed under your list of services. To see a list of compatible devices under your EZVIZ account, tap on the EZVIZ service icon.
- Now try some commands. Use the name of the camera that you created when you set up the system.
Users can manage devices as a single entity or in a group. Adding devices to a room allows users to control a group of devices at the same time using one command.
See the link for more information:
https://support.google.com/googlehome/answer/7029485?co=GENIE.Platform%3DAndroid&hl=en
FAQ
What kind of network connection does the camera support
The camera supports wireless connection and wired connection, which can be selected according to the network situation.
If the camera is offline, will the video recording be continued?
If the camera is powered on but disconnect to the Internet, then video recording on micro SD card will continue but cloud recording will stop. If the camera is powered off, both video recordings will stop.
Why the alarm is triggered when nobody in the image?
Try to set the alarm sensitivity lower. Please notice that vehicle and animals are also the trigger source.
What if I forget my password
Please go to the EZVIZ app > login page, tap on "Forgot password?" > Enter your account's email address or phone number. (Send)> Input the verification code > Reset your password.
Why can't I receive my verification code
- If you registered the account via email, please check your junk mail.
If still haven't received the verification code, you might have email filter/block restricting this email, please check with your email provider. - If you registered an account via mobile number, please confirm whether your mobile can receive SMS short codes or not.
- If you still haven't received the verification code, please provide your number, your country, time of request to the support center at support@ezvizlife.com or contact your regional support team.
How to solve Wi-Fi configuration failed
Please check the following settings:
- Ensure that your mobile phone is connected to the Wi-Fi and the Wi-Fi network is working properly.
- Check the network condition:
- Make sure your network has no firewall or other limits.
- Ensure the router can distribute IP address to your device or disable the static IP setting (DHCP is enabled by default on all EZVIZ devices).
- Reset your camera; ensure that your device is in ready mode or Wi-Fi configuration mode > then use the EZVIZ app for device Wi-Fi configuration.
For additional information about the device, please refer to www.ezvizlife.com.
Regulatory Information
This product and - if applicable - the supplied accessories too are marked with "CE" and comply therefore with the applicable harmonized European standards listed under the Radio Equipment Directive 2014/53/EU, the EMC Directive 2014/30/EU, the RoHS Directive 2011/65/EU.
For more information see: www.recyclethis.info.
EC DECLARATION OF CONFORMITY
Hereby, Hangzhou EZVIZ Software Co., Ltd. declares that the radio equipment type [refer to the cover of the quick start guide] is in compliance with Directive 2014/53/EU.
The full text of the EC DECLARATION OF CONFORMITY is available at the following web link: http://www.ezvizlife.com/declaration-of-conformity.
Important Safety Information
Note: Please read the manual before using the device.

Alternating current. Direct current.

This symbol on the device indicates that the safety compatibility manual and / or installation manual must be read, which contains information related to the safe operation of the device.

Be sure to read these instructions before operating the equipment.
 This symbol on the device indicates that the surface or component is overheating. If you touch this surface, you may cause personal injury.

To reduce the risk of personal injury due to overheating of the components, wait until the surface cools down before touching it.

The separate earthing terminal must be permanently connected to earth.
For SELV DC input: the DC power source shall comply with the Safety Extra-Low Voltage (SELV) requirements of EN/IEC 60950-1, EN/IEC 62368-1.
The power source should meet limited power source or PS2 requirements according to IEC/EN 60950-1 or IEC/EN 62368-1.
Do not block ventilation openings while the system is on, and keep at least 2 cm distance from ventilation openings and walls or other things which may block the openings.
Disposal of a battery into fire or a hot oven, or mechanically crushing or cutting of a battery that can result in an explosion.
Leaving a battery in an extremely high temperature surrounding environment that can result in an explosion or the leakage of flammable liquid or gas.
A battery subjected to extremely low air pressure that may result in an explosion or the leakage of flammable liquid or gas.
Dispose of used batteries according to the instructions.
Replace only with the same or equivalent type recommended by the manufacturer.
THE PRODUCT IS BUILT IN A REPLACEABLE BATTERY.
Do not ingest battery, Chemical Burn Hazard.
This product contains a coin/button cell battery. If the coin/button cell battery is swallowed, it can cause severe internal burns in just 2 hours and can lead to death.
Keep new and used batteries away from children.
If the battery compartment does not close securely, stop using the product and keep it away from children.
If you think batteries might have been swallowed or placed inside any part of the body, seek immediate medical attention.
Risk of fire or explosion if the battery is replaced by an incorrect type.
Do not attempt to disassemble, repair, or alter the device.
To avoid electric shock, please wear shoes with rubber soles. To avoid injuries, please wear glooves when maintaining the device. Warning: If you are not familiar with knowledge of cable laying and cable connection, please make sure that the power switch has been turned off before installation and maintenance.
If you want to disconnect the device from the power source, please unplug the DC power terminal that connects the power adapter and device.
Flame may spread outside and ignite nearby combustible material without front cover! Please reinstall the front cover correctly before normal operation.
Do not detach the front cover when the device is working properly. The front cover can only be detached when you need to restart the device. After restarting the device, please reinstall the front cover correctly before normal operation.
Use only power adapters listed in the Table.
| Adapter manufacture | Adapter model |
| Shenzhen Honor Electronic Co., Ltd | ADS-10LA-06 05010EPCU/EPC(US), ADS-10RH-06 05010EPB (UK), ADS-10RH-06 05010EPG(EU), ADS-10RH-06 05010EPSA(SA), ADS-10RH-06 05010EPBR(BR), ADS-10RH-06 05010EPI(IN), ADS-12CG-06 05010EPC(JP) |
| Sichuan Jiuzhou Electronic Technology Co., Ltd | DYS05200CQ-U, DYS05200CQ-E |
A 5V2A adapter is recommended, if the power adapter is not included in the package.
Trademarks Acknowledgement
EZVIZ™,  ™, and other EZVIZ's trademarks and logos are the properties of EZVIZ in various jurisdictions. Other trademarks and logos mentioned below are the properties of their respective owners.
COPYRIGHT © Hangzhou EZVIZ Software Co., Ltd.. ALL RIGHTS RESERVED. Any and all information, including, among others, wordings, pictures, graphs are the properties of Hangzhou EZVIZ Software Co., Ltd. (hereinafter referred to as "EZVIZ"). This user manual (hereinafter referred to as "the Manual") cannot be reproduced, changed, translated, or distributed, partially or wholly, by any means, without the prior written permission of EZVIZ. Unless otherwise stipulated, EZVIZ does not make any warranties, guarantees or representations, express or implied, regarding to the Manual.

Documents / Resources
References
![www.apple.com]() App Store - Apple
App Store - Apple![play.google.com]() Google Play
Google PlaySet up your Google Nest or Home speaker or display - Android - Google Nest Help
![www.ezvizlife.com]() EZVIZ - Creating Easy Smart Homes
EZVIZ - Creating Easy Smart Homes![www.recyclethis.info]() HOME
HOME![www.ezvizlife.com]() Declaration of Conformity | EZVIZ
Declaration of Conformity | EZVIZ

Download manual
Here you can download full pdf version of manual, it may contain additional safety instructions, warranty information, FCC rules, etc.
Advertisement


Need help?
Do you have a question about the C8C and is the answer not in the manual?
Questions and answers