
Subscribe to Our Youtube Channel
Related Manuals for Unique CLASSIC RETRO UGP-24CR DW T


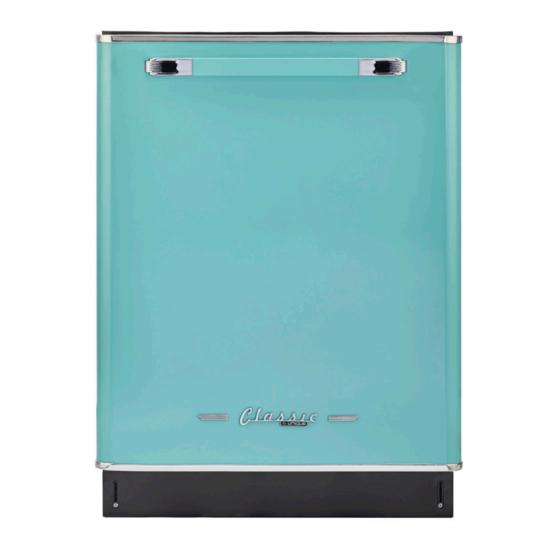
Summary of Contents for Unique CLASSIC RETRO UGP-24CR DW T
- Page 1 CLASSIC RETRO BY UNIQUE 24” DISHWASHER MODEL NUMBER: UGP-24CR DW T, UGP-24CR DW B, UGP-24CR DW LG, UGP-24CR DW W INSTALLATION GUIDE serial number: NOV22V1 E219644 6JA4...
-
Page 2: Important Safety Instructions
MANUFACTURED & CERTIFIED BY Unique Appliances Ltd IMPORTANT SAFETY INSTRUCTIONS CAUTION RISK OF ELECTRIC SHOCK DO NOT OPEN This symbol indicates that dangerous voltage constituting a risk of electric shock is present within your refrigerator. This symbol indicates that there are important operating and maintenance instructions in the literature accompanying your refrigerator. -
Page 3: Read Carefully
INSTALLATION INSTRUCTIONS READ CAREFULLY. KEEP THESE INSTRUCTIONS. If you have an installation problem, contact your dealer or installer. You are responsible for providing adequate electrical, exhausting, and other connecting facilities. Preparing to install your dishwasher Parts supplied: Screws Top mounting Hose clamp Drain hose clips x2... - Page 4 INSTALLATION INSTRUCTIONS/ENCLOSURE REQUIREMENTS Material needed (purchased separately): Strain relief Hot water line (min. Fitting (3/4"). Teflon thread Three wire nuts (UL listed) (for electrical 3/8 in. copper) kit The other end should be sized seal tape (two included in kit) connections) to fit the water supply Universal Power Cord...
- Page 5 ENCLOSURE REQUIREMENTS/DIMENSIONS FIG 2. Cabinet Dimensions FIG 1. 24" (61 cm) Dishwasher Door sits 1" proud of the countertop 25" (63.5 cm) 24” Dishwasher Dimension 24” 27” 24” 27” 1.7” 1.7” 17” 24” 23” 23” 25.6” 25.6” Front View Side View Top View 17”...
-
Page 6: Enclosure Requirements
ENCLOSURE REQUIREMENTS Countertop Dishwasher If installing into a corner Allow 2 in. (5.08 cm) min. clearance between dishwasher and adjacent cabinet, wall, or other appliances. Allow 25.63 in. (65.1 cm) min. clearance from the front of the dishwasher for opening the door. 25.63"(65.1cm) Clearance for door opening 2"... -
Page 7: Installing The Dishwasher
INSTALLING THE DISHWASHER Method 1 - Air gap with a waste tee or garbage disposal connection 32 in. (81.28 cm) (min.) 32 in. (81.28 cm) (min.) 18in. (45.72 cm) 18 in. (45.72 cm) Method 2 - High drain with a waste tee or garbage disposal connection You must provide a method to attach the drain hose to the underside of the countertop. - Page 8 INSTALLING THE DISHWASHER Cont'd WARNING Improper connection of the equipment ground conductor creates a risk of electric shock. Consult a qualified electrician or service person if you have any doubts as to whether the appliance is properly grounded. Direct Wire Method •...
- Page 9 INSTALLING THE DISHWASHER Cont'd Preparing the hot water line The water connection is on the left side of the dishwasher. • Hot water pipes can enter the opening from the side, back or bottom within the shadow area. • The hot water supply pipe can be passed through the same hole as the electricity/drain hose. Alternatively, you can drill an additional hole with a maximum diameter of 3.81 cm (1.5 inches) for the hot water pipe.
-
Page 10: Step 1: Check The Door Balance
INSTALLING THE DISHWASHER Cont'd Connecting the water line to the water supply 1. Turn off the water supply. 2. Install a hand shut-off valve in an accessible location, such as under the sink. This is optional, but strongly recommended, and may be required by local codes. 3. -
Page 11: Step 2: Adjust The Leveling Legs
INSTALLING THE DISHWASHER Cont'd Step 2: Adjust the leveling legs 1 Move the dishwasher close to the installation location and lay it on its back. Note: Make sure that the leveling feet are loosened before standing the dishwasher upright. They may be tight from shipping/packaging. 2 Measure the installation height and the dishwasher height. -
Page 12: Step 4: Install To Power
INSTALLING THE DISHWASHER Cont'd Step 4: Install to power Turn off the electricity to the dishwasher’s electrical circuit. Make sure that the electrical power is turned off at the source. Warning: •If your house wiring is not 2-wire with a ground, a ground must be provided by the installer. •If your house wiring is aluminum, be sure to use cUL/UL Listed anti-oxidant compound and aluminum-to-copper connectors. - Page 13 INSTALLING THE DISHWASHER Cont'd Direct wiring 1 Remove the junction box cover from the power supply junction box on the wall. Ground to green White to white Black to black Junction Box Insert wires through strain relief fitting and tighten 2 Locate the three dishwasher wires, (white, black, and green) with stripped ends, then insert the dishwasher wires through the small hole in the junction box.
-
Page 14: Step 5: Install The 90° Water Supply Elbow
INSTALLING THE DISHWASHER Cont'd Step 5: Install the 90° water supply elbow 1 Install the 90° elbow onto the water valve. Do not overtighten the 90° elbow. The water valve bracket could bend or the water valve fitting could break. 2 Position the end of the elbow to face the floor when the dishwasher is upright. -
Page 15: Step 6: Connecting The Water Supply Line
INSTALLING THE DISHWASHER Cont'd Step 6: Connecting the water supply line 1 Make sure that you wrapped the 90° elbow with Teflon thread seal tape twice. 2 Slide the compression nut, then the ferrule over the end of the water supply line. Note: If you have a steel-grated line, you do not need a ferrule or compression nut. -
Page 16: Step 7: Install The Drain Hose
INSTALLING THE DISHWASHER Cont'd Step 7: Install the drain hose 1 Make sure that the leveling feet are loosened before standing the dishwasher upright. They may be tight from shipping/packaging. 2 Turn the dishwasher upright. 3 Slide a screw-type hose clamp onto the right-angled end of the drain hose. 4 Install the drain hose to the dishwasher drain outlet on the back of the dishwasher, then tighten the screw-type hose clamp. -
Page 17: Step 9: Slide The Dishwasher Partially Into The Cabinet
INSTALLING THE DISHWASHER Cont'd Step 8: Install the drain hose 1 Insert the drain hose into the hole in the cabinet wall. If a power cord is used, guide the end through a separate hole. Tip: Position the water line and house wiring on the floor to avoid interfering with the base of the dishwasher. Maximum drain hose length 10ft. -
Page 18: Step 10: Position The Dishwasher Under The Countertop
INSTALLING THE DISHWASHER Cont'd Step 10: Position the dishwasher under the countertop Tip: Check tub insulation blanket, if equipped. It should be positioned so it is not bunched up or interfering with door springs. Check by opening and closing the door. 1 Position the dishwasher in front of the opening, then slide the dishwasher into the opening a few inches at a time. -
Page 19: Step 12: Securing The Dishwasher To The Countertop
INSTALLING THE DISHWASHER Cont'd 3 If the edge of the door hits the side of the tub, the dishwasher is not installed correctly. Adjust the leveling legs to align the door to the tub. Note: Keep dishwasher level Turn the legs to adjust the level You'll need: Phillips screwdriver... - Page 20 INSTALLING THE DISHWASHER Cont'd Method 2 1 Remove the plastic tub caps from the inside of the dishwasher tub. 2 Drive a wood screw through the hole in the side of the dishwasher into the cabinet frame. IMPORTANT: Drive the screws straight and flush. Protruding screw heads will scratch the side if the dishwasher.
-
Page 21: Step 13: Connecting The Drain Hose
INSTALLING THE DISHWASHER Cont'd Step 13: Connecting the drain hose 1 Cut on the marked line as required for your installation. The drain hose’s molded end will fit Cutting lines 5/8” or 1" diameter connections on the air gap, waste tee, or garbage disposal. IMPORTANT: Follow all local codes and ordinances. -
Page 22: Method 1 - Air Gap To A Waste Tee Or Garbage Disposal
INSTALLING THE DISHWASHER Cont'd Method 1 - Air gap to a waste tee or garbage disposal Airgap Airgap Waste tee installation Garbage disposal installation Method 2 - High drain loop to a waste tee or garbage disposal Fasten to the underside Fasten to the underside of the countertop of the countertop... -
Page 23: Step 14: Performing A Pre-Test Check
INSTALLING THE DISHWASHER Cont'd 4 If connecting the drain line to a garbage disposal, make sure that the drain plug has been removed. Your dishwasher will not drain if the plug is left in place. Remove the Plug You'll need: Coupler for Screw-type extending drain line... -
Page 24: Step 15: Wet Testing The Dishwasher
INSTALLING THE DISHWASHER Cont'd Step 15: Wet testing the dishwasher 1 Turn on the power supply (or plug the power cord into the outlet, if equipped). 2 Turn on your dishwasher (refer to the User Guide for instructions). 3 Open the door, select the Rinse only cycle, and press START/Cancel, close the door within four seconds of pressing START/Cancel. - Page 25 WIRING DIAGRAM Warning: Disconnect electrical power before servicing. Caution: Label all wires prior to disconnection. Wiring errors can cause improper and dangerous operation. Verify operation after servicing.
-
Page 26: Rating Plate
Unique Appliances Ltd. Tous droits réservés. Total Current Rated Voltage 8.4A AC 120V Conçu et fabriqué par: Unique Appliances Ltd. Designed and manufactured by: Unique Appliances Ltd., Total Courant Tension Nominale 2245, chemin Wyecroft, local 5, Oakville (Ontario) L6L 5L7. - Page 28 ©2022 Unique Appliances Ltd., 2245 Wyecroft Road #5, Oakville, Ontario, Canada, L6L 5L7 www.uniqueappliances.com...
Need help?
Do you have a question about the CLASSIC RETRO UGP-24CR DW T and is the answer not in the manual?
Questions and answers