Sign In
Upload
Download
Table of Contents
Contents
Add to my manuals
Delete from my manuals
Share
URL of this page:
HTML Link:
Bookmark this page
Add
Manual will be automatically added to "My Manuals"
Print this page
×
Bookmark added
×
Added to my manuals
Manuals
Brands
Kubota Manuals
Lawn Mower
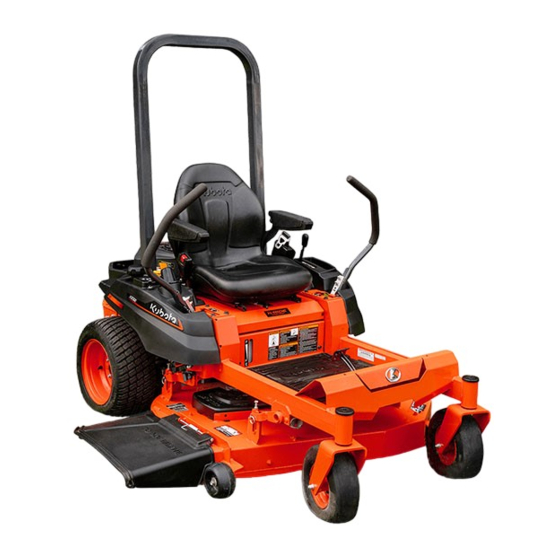
Z232KW-AU
Operator's manual
Kubota Z232KW-AU Operator's Manual
Zero turn mower
Hide thumbs
1
2
3
Table Of Contents
4
5
6
7
8
9
10
11
12
13
14
15
16
17
18
19
20
21
22
23
24
25
26
27
28
29
30
31
32
33
34
35
36
37
38
39
40
41
42
43
44
45
46
47
48
49
50
51
52
53
54
55
56
57
58
59
60
61
62
63
64
65
66
67
68
69
70
71
72
73
74
page
of
74
Go
/
74
Contents
Table of Contents
Troubleshooting
Bookmarks
Table of Contents
Table of Contents
Safe Operation
Servicing of Machine
Dealer Service
Warranty
Scrapping the Machine
Specifications
Specification Table
Implement Limitations
Terms of Use
Instrument Panel and Controls
Instrument Panel, Switches and Hand Controls
Mower
Mower Mounting
Mounting the Mower Deck
Adjusting the Mower
Dismounting the Mower Deck
Operating the Engine
Getting on and off the Machine Safely
Starting the Engine
Choke Knob
Throttle Lever
Key Switch
Stopping the Engine
Check During Operating
Fuel Gauge
Hour Meter
Cold Weather Starting
Warming up the Engine
Warm-Up and Transmission Oil in the Low Temperature Range
Jump Starting
Operating the Machine
Operating a New Machine
Changing Lubricating Oil for New Machine
Burnishing PTO Clutch
Starting the Machine
Operator's Seat
Seat Belt
Mower Lift Pedal
Throttle Lever
Parking Brake Lever
Motion Control Lever
Stop Position of the Motion Control Lever
Operating Position of the Motion Control Lever
Adjustment of the Motion Control Lever
Stopping the Machine
Parking the Machine
Transporting the Machine
Hydrostatic Transaxle Bypass Rods
Accessory
Accessory Electrical Outlet
Operating the Mower
Mowing Tips
Adjusting the Cutting Height
Operating the Mower
PTO Switch
Starting the Machine
Tires and Wheels
Tires
Inflation Pressure
Wheels
Installing the Rear Wheels
Removing the Front Caster Wheels
Installing the Front Caster Wheels
Maintenance
Service Intervals
Lubricants and Fuel
Periodic Service
Raising and Lowering the Operator's Seat
Daily Check
Checking the Engine Oil Level
Checking the Amount of Fuel and Refueling
Checking and Cleaning the Air Intake Screen
Checking the Tire Pressure
Inflation Pressure
Checking Movable Parts
Every 50 Hours
Checking the Engine Start System
Checking the OPC System
Checking the Muffler and Spark Arrester (if Equipped)
Every 100 Hours
Changing the Engine Oil
Cleaning the Air Cleaner Paper Element
Cleaning the Engine Cooling System
Checking the Spark Plug
Checking the Fuel Filter
Checking the Battery Condition
Non-Accessible Maintenance-Free Type Batteries
Checking the Battery Voltage
Charging the Battery
Storing the Battery
Adjusting the Throttle Cable
Adjusting the Choke Cable
Every 200 Hours
Replacing the Engine Oil Filter
Replacing the Air Cleaner Paper Element
Every 300 Hours
Cleaning the Combustion Chamber
Checking the Valve Seats and Clearance
Every 1 Year
Checking the Battery Condition
Checking Fuel Lines
Checking the Muffler and Spark Arrester (if Equipped)
Changing the Engine Oil
Every 4 Years
Replacing the Fuel Lines
Service as Required
Replacing Fuses
Checking and Replacing Blades
Replacing the Mower Belt
Adjusting the Electric Clutch
Adjustment
Motion Control Lever
Adjusting HST Neutral Position
Adjusting Maximum Speed (Forward)
Motion Control Lever Alignment
Checking the Alignment
Aligning the Motion Control Levers
Mower Deck Level
Anti-Scalp Rollers
Leveling the Mower Deck (Side-To-Side)
Checking the Level (Side-To-Side)
Adjusting the Level (Side-To-Side)
Leveling the Mower Deck (Front-To-Rear)
Checking the Level (Front-To-Rear)
Adjusting the Level (Front-To-Rear)
General Tightening Torque Specification
Storage
Storing the Machine
Removing the Machine from Storage
Troubleshooting
Engine Troubleshooting
Battery Troubleshooting
Machine Troubleshooting
Mower Troubleshooting
Index
Advertisement
Quick Links
1
Servicing of Machine
2
Lubricants and Fuel
Download this manual
BA . K . 1 - 1 . - . AK
PRINTED IN U.S.A.
Z
2
3
2
K
W
A
English (Australia)
U
Code No. K3007-7125-1
©
2022 Kubota Corporation
OPERATOR'S MANUAL
1WCFF00001A01
READ AND SAVE THIS MANUAL
MODEL
Z232KW-AU
Table of
Contents
Previous
Page
Next
Page
1
2
3
4
5
Advertisement
Table of Contents
Troubleshooting
TROUBLESHOOTING
67
BATTERY TROUBLESHOOTING
69
MOWER TROUBLESHOOTING
70
Need help?
Do you have a question about the Z232KW-AU and is the answer not in the manual?
Ask a question
Questions and answers
Related Manuals for Kubota Z232KW-AU
Lawn Mower Kubota Z231BR-AU Operator's Manual
Zero turn mower (85 pages)
Lawn Mower Kubota Z251KH-AU Operator's Manual
Zero turn mower (85 pages)
Lawn Mower Kubota Z231KW-AU Operator's Manual
Zero turn mower (76 pages)
Lawn Mower Kubota Z242KH-AU Operator's Manual
Zero turn mower (90 pages)
Lawn Mower Kubota Z231BR Operator's Manual
Zero turn mower (86 pages)
Lawn Mower Kubota ZG222A-AU Operator's Manual
Zero turn (105 pages)
Lawn Mower Kubota ZD221 Operator's Manual
Zero turn mower (95 pages)
Lawn Mower Kubota ZG124E-AU Operator's Manual
Zero turn mower (85 pages)
Lawn Mower Kubota ZD21N-EC Workshop Manual
(253 pages)
Lawn Mower Kubota zd 331 Manual
(96 pages)
Lawn Mower Kubota ZD1011 Operator's Manual
Zero turn mower (100 pages)
Lawn Mower Kubota Z411 Operator's Manual
Zero turn mower (90 pages)
Lawn Mower Kubota ZD1211-AU Operator's Manual
Zero turn mower (106 pages)
Lawn Mower Kubota ZD326-EU-2 Operator's Manual
Zero turn mower (109 pages)
Lawn Mower Kubota Z122E-AU Operator's Manual
Zero turn mower (87 pages)
Lawn Mower Kubota WSM Workshop Manual
Zero turn mower (369 pages)
This manual is also suitable for:
Fr651
Table of Contents
Save PDF
Print
Rename the bookmark
Delete bookmark?
Delete from my manuals?
Login
Sign In
OR
Sign in with Facebook
Sign in with Google
Upload manual
Upload from disk
Upload from URL


Need help?
Do you have a question about the Z232KW-AU and is the answer not in the manual?
Questions and answers