Table of Contents
Advertisement
Advertisement
Table of Contents
Troubleshooting

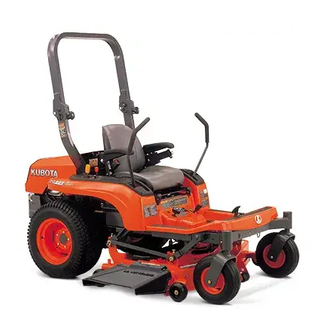
Related Manuals for Kubota ZD221


Summary of Contents for Kubota ZD221
- Page 1 OPERATOR'S MANUAL MODEL ZD221 K3131-7121-3 READ AND SAVE THIS MANUAL...
-
Page 2: Universal Symbols
ABBREVIATION LIST Abbreviations Definitions American Petroleum Institute Power Take Off RH/LH Right-hand and left-hand sides are determined by facing in the direction of forward travel ROPS Roll-Over Protective Structures Revolutions Per Minute Society of Automotive Engineers UNIVERSAL SYMBOLS As a guide to the operation of your tractor, various universal symbols have been utilized on the instruments and controls. -
Page 3: Safety First
FOREWORD You are now the proud owner of a KUBOTA ZERO TURN MOWER. This machine is a product of KUBOTA's quality engineering and manufacturing. It is made of excellent materials and under a rigid quality control system. It will give you long, satisfactory service. -
Page 4: Table Of Contents
CONTENTS SAFE OPERATION ....................1 SERVICING OF MACHINE ..................1 SPECIFICATIONS....................... 3 IMPLEMENT LIMITATIONS ..................6 INSTRUMENT PANEL AND CONTROLS..............7 MOWER MOUNTING ....................9 MOUNTING THE MOWER DECK ................9 ADJUSTING THE MOWER ................... 10 DISMOUNTING THE MOWER DECK ..............10 OPERATING THE ENGINE.................. - Page 5 CONTENTS STOPPING......................26 PARKING ....................... 26 TRANSPORTING....................27 OPERATING THE MOWER ..................28 MAKING THE MOST OF YOUR MOWER............. 28 ADJUSTING CUTTING HEIGHT ................28 OPERATING MOWER................... 30 PTO Lever ........................30 Starting ........................... 30 TIRES AND WHEELS ....................31 TIRES........................31 Inflation Pressure......................
- Page 6 CONTENTS Changing Gear Box Oil....................54 EVERY 200 HOURS ....................54 Changing Engine Oil....................... 54 Replacing Engine Oil Filter ..................... 55 Checking Radiator Hose and Clamp ................55 Checking Hydraulic Hose ....................56 Replacing Transmission Oil Filter [HST]................. 56 Adjusting the Motion Control Lever Pivot................ 57 Checking Intake Air Line....................
- Page 7 CONTENTS ENGINE TROUBLESHOOTING ................74 BATTERY TROUBLESHOOTING ................. 75 MACHINE TROUBLESHOOTING ................. 75 MOWER TROUBLESHOOTING................76...
- Page 8 4. KUBOTA recommends the use of a Roll Over etc. As appropriate or required. Protective Structures (ROPS) and seat belt in almost 8.
- Page 9 Do not allow anyone near 18. Use only implements recommended by KUBOTA. Use the attachments while in operation. proper ballast to front or rear of machine to reduce the...
- Page 10 1. To avoid tip over, operate across the slopes not up and cleaning, or servicing any PTO-driven equipment. down. Stay off hills and slopes too steep for safe 3. Use the PTO with KUBOTA approved attachments. operation. The speed of PTO: 2.
- Page 11 SAFE OPERATION 9. Keep first aid kit and fire extinguisher handy at all times. 6. SERVICING AND STORAGE 10. Do not remove the radiator cap while coolant is hot. When cool, slowly rotate cap to the first stop and allow C Servicing sufficient time for excess pressure to escape before 1.
- Page 12 For your safety do not rely or hydraulically supported devices, they may leak down, suddenly drop or be accidently lowered. 27. See your local Recycling Center or KUBOTA Dealer to learn how to recycle or get rid of waste products.
- Page 13 SAFE OPERATION 7. DANGER, WARNING AND CAUTION LABELS...
- Page 14 SAFE OPERATION...
- Page 15 SAFE OPERATION...
- Page 16 SAFE OPERATION...
- Page 17 2. Clean danger, warning and caution labels with soap and water, and dry with a soft cloth. 3. Replace damaged or missing danger, warning and caution labels with new labels from your local KUBOTA Dealer. 4. If a component with danger, warning and caution label(s) affixed is replaced with new part, make sure new label(s) is (are) attached in the same location(s) as the replaced component.
-
Page 18: Safe Operation
When in need of parts or major service, be sure to see your KUBOTA Dealer. When in need of parts, be prepared to give your dealer the machine, engine and mower serial numbers. - Page 19 SERVICING OF MACHINE (1) ROPS serial No.
-
Page 20: Specifications
SPECIFICATIONS SPECIFICATIONS Model ZD221-48 ZD221-54 Model D782-E3-ZD-1 Max. engine power (Gross) kW (HP) 15.7 (21) (*1) Type Liquid-cooled Number of cylinders 67 x 73.6 Bore and stroke mm (in.) (2.64 x 2.90) Total displacement cm (cu. in.) 778 (47.5) Engine... - Page 21 (in.) 0 (0) 1 speed Revolution (2530 rpm at 3200 engine rpm) Drive system Shaft drive, KUBOTA 10 tooth involute spline Clutch type Wet multi disks PTO brake Wet single disk (Specifications and design subject to change without notice)
- Page 22 SPECIFICATIONS Model RCK48P-222Z RCK54P-227Z Suitable machine ZD221 Mounting method Quick joint, Parallel linkage Adjustment of cutting height Dial gauge Cutting width mm (in.) 1225 (48) 1375 (54) Cutting height mm (in.) 25 to 127 (1.0 to 5.0) Weight (Approx.) kg (lbs.)
-
Page 23: Implement Limitations
Use with implements which are not sold or approved by KUBOTA and which exceed the maximum specifications listed below, or which are otherwise unfit for use with the KUBOTA Machine may result in malfunctions or failures of the machine, damage to other property and injury to the operator or others. [Any malfunctions or failures of the machine resulting from use with improper implements are not covered by the warranty.]... -
Page 24: Instrument Panel And Controls
INSTRUMENT PANEL AND CONTROLS INSTRUMENT PANEL AND CONTROLS ILLUSTRATED CONTENTS ILLUSTRATED CONTENTS Parking brake pedal......11, 22 (10) Cutting height control dial..... Parking brake lock pedal...... 11, 22 (11) Key switch..........Lift lock lever........(12) Easy checker (TM)....... Motion control lever......11, 23 (13) Hour meter........... - Page 25 INSTRUMENT PANEL AND CONTROLS ILLUSTRATED CONTENTS (1) Anti-scalp roller (Front)......28 (2) Anti-scalp roller (Rear)......
-
Page 26: Mower Mounting
MOWER MOUNTING MOWER MOUNTING MOUNTING THE MOWER DECK To avoid personal injury: A Park the machine on a firm and level surface. A Apply the parking brake. A Stop the engine and remove the key. 1. Before mounting the mower deck, raise the lift links to the full up position. -
Page 27: Adjusting The Mower
MOWER MOUNTING ADJUSTING THE MOWER See "OPERATING THE MOWER" section. DISMOUNTING THE MOWER DECK For dismounting the mower deck, reverse the above procedures. (1) Universal joint (A) "PULL" (2) Coupler 10. After mounting the mower, check the mower level. If necessary, adjust the mower level and anti-scalp rollers. -
Page 28: Operating The Engine
OPERATING THE ENGINE OPERATING THE ENGINE STARTING THE ENGINE To avoid personal injury: 1. Sit on the operator's seat. A Read "SAFE OPERATION" in the front of this manual. 2. Apply the parking brake. A Read the danger, warning and caution labels located on the machine. -
Page 29: Motion Control Lever
OPERATING THE ENGINE 3. Make sure that the PTO lever is in the 5. Release the hydraulic lift control pedal "DISENGAGED" (OFF) position. to the "DOWN" position. (1) PTO lever "ENGAGED" (ON) (1) Hydraulic lift control pedal Depressing: "UP" "DISENGAGED" (OFF) Release: "DOWN"... -
Page 30: Key Switch
OPERATING THE ENGINE BKey Switch OFF.... The position where the key can be inserted into or removed from the key switch. [When the key is turned this position, the engine shuts off.] ON....The engine keeps running. PREHEAT... The super glow plug is heated. START.. -
Page 31: Check During Operating
2. Move the machine to the level surface, and apply the electrical charging system or consult your local KUBOTA Dealer. parking brake. 3. Place the throttle lever in the engine idle position, and let the engine run for a few minutes. -
Page 32: Hour Meter
(1) Hour meter corrected, the unit will be damaged. Contact your local COLD WEATHER STARTING KUBOTA Dealer for adjustment. When the ambient temperature is below -5 ) and the engine is very cold. (If the engine fails to start after 10 seconds, turn off the key for 30 seconds. -
Page 33: Jump Starting
OPERATING THE ENGINE JUMP STARTING A This machine has a 12 volt negative (-) ground starting system. A Use only same voltage for jump starting. To avoid personal injury: A Use of a higher voltage source on a machine could A Battery gases can explode. -
Page 34: Stopping The Engine
4. Apply the parking brake. machine. Then open the hood and pull engine stop lever (Red mark) and hold it until the engine stops. Then contact your local KUBOTA Dealer immediately. To avoid personal injury: A Do not operate the machine until the engine stop system is repaired. -
Page 35: Operating The Machine
OPERATING THE MACHINE OPERATING THE MACHINE OPERATING NEW MACHINE How a new machine is operated and maintained To avoid personal injury: determines the life of the machine. A The machine relies upon the engine driven A new machine just off the factory production line has transmission for speed, direction and steering been, of course, tested, but the various parts are not control. -
Page 36: Operating Foldable Rops
A Before proceeding to fold the ROPS, check for possible interference with installed implements and attachments. If interference occurs, contact your KUBOTA Dealer. BTo Fold the ROPS 1. Unscrew the knob bolts 1 to 2 turns. (1) ROPS 2. Remove both lock pins. -
Page 37: To Raise The Rops To Upright Position
OPERATING THE MACHINE BTo Raise the ROPS to Upright Position BAdjustment of Foldable ROPS A Adjust free fall of the ROPS upper frame regularly. 1. Remove both hair pins and lock pins. A If you feel less friction when folding the ROPS, tighten the nut (1) until you feel the right friction in the movement and then replace the cotter pin. -
Page 38: Starting
Contact Adjust the seat belt for proper fit and connect to the your local KUBOTA Dealer for adjustment. buckle. The seat belt is auto-locking retractable type. A Do not depress the hydraulic lift control pedal... -
Page 39: Throttle Lever
OPERATING THE MACHINE 3. Accelerate the engine. 4. Unlock the parking brake. BThrottle Lever BParking Brake Pedal Moving the throttle lever backward decreases the engine To release the parking brake: speed and moving it forward increases the engine speed. Depress the brake pedal and release slowly with your right foot, without pressing the parking brake lock pedal. -
Page 40: Motion Control Lever
OPERATING THE MACHINE Stop position 5. Operate the machine. C Neutral lock position A Forward and reverse movement of the motion control BMotion Control Lever levers are prevented when levers are in "NEUTRAL LOCK" position. (Engine can only be started with levers in this position.) To avoid personal injury: A Understand how to use the motion control... - Page 41 We recommend you to contact your local A To make restarting on the slopes easier, this machine KUBOTA Dealer. has the "CREEP" position. C Re-start on the slopes A If hand pressure is released from the motion control levers after moving them from the "NEUTRAL LOCK"...
- Page 42 OPERATING THE MACHINE FORWARD: GENERAL RIGHT TURN: A Push both motion control levers forward equally at the A Push left motion control lever further forward than the same time. For travel forward in a straight line. right motion control lever. For forward travel to the right.
-
Page 43: Work Light (Optional Kit)
OPERATING THE MACHINE WORK LIGHT (OPTIONAL KIT) PARKING TO LOCK: Depress the parking brake pedal firmly with your right foot, and the parking brake lock pedal simultaneously with your left foot. Then release the parking brake pedal while handling the parking brake lock pedal down. -
Page 44: Transporting
OPERATING THE MACHINE TRANSPORTING 1. Transport the machine on a trailer. A Fasten the machine to the trailer. A To prevent the hood from opening by wind while in transit, it is necessary to either load the machine backward or use a suitable tie down for the hood. 2. -
Page 45: Operating The Mower
OPERATING THE MOWER OPERATING THE MOWER MAKING THE MOST OF YOUR MOWER 1. When using your mower for the first time, choose a smooth level area and cut in straight and slightly overlapping strips. 2. The size and type of the area to be mowed will determine the proper mowing pattern. - Page 46 OPERATING THE MOWER Reference A Never allow roller to contact the ground continuously A Set the position for a recommended ground clearance as premature roller wear may develop if set of 19 mm (3/4 in.). incorrectly. (Figure shows a setting position of cutting height 2.0" A Anti-scalp rollers must maintain a minimum clearance or 2.25") of 6 mm (1/4 in.) to the ground.
-
Page 47: Operating Mower
OPERATING THE MOWER OPERATING MOWER BStarting To avoid serious injury or death: A Do not operate the mower without the To avoid serious injury or death: A Engine components can get extremely hot from discharge deflector being in place properly. operation. -
Page 48: Tires And Wheels
TIRES AND WHEELS TIRES AND WHEELS TIRES WHEELS A When re-fitting a wheel, tighten the wheel bolt to the following torques then recheck after traveling 200 m To avoid personal injury: (200 yards) changing directions several times. A Do not attempt to mount a tire. This should be done by a qualified person with the proper equipment. -
Page 49: Remove And Install Front Caster Wheels
TIRES AND WHEELS BRemove and Install Front Caster Wheels C Removing 1. Park the machine on a firm and level surface. 2. Stop the engine and apply parking brake. 3. Lift the front of machine with a safe lifting device. 4. -
Page 50: Maintenance
MAINTENANCE MAINTENANCE SERVICE INTERVALS The following servicing tasks should be carried out on the machine at the stated running-time intervals. Indication hour meter (Hr) Ref. No. Items After Page since every Engine oil Change 200Hr Engine oil every Replace filter 200Hr Transmission fluid and... - Page 51 *4 Replace only if necessary. A The items listed above (@ marked) are registered as emission related critical parts by KUBOTA in the U.S.EPA non-road emission regulation. As the engine owner, you are responsible for the performance of the required maintenance on the engine according to the above instruction.
-
Page 52: Periodic Service Chart Label
MAINTENANCE PERIODIC SERVICE CHART LABEL (1) Part No. K3131-6552-4 (ENGLISH) (2) Part No. K3131-6553-4 (SPANISH) -
Page 53: Lubricants, Fuel And Coolant
Front anti scalp roller pivot boss Note * Oil amount when the oil level is at the upper level of the oil level gauge. A To prevent serious damage to hydraulic systems, use only KUBOTA genuine fluid or its equivalent. - Page 54 We recommend the use of KUBOTA UDT or SUPER UDT fluid for optimum protection and performance. (Consult your local KUBOTA Dealer for further detail.) Do not mix different brands together.
-
Page 55: Periodic Service
PERIODIC SERVICE PERIODIC SERVICE HOW TO OPEN THE HOOD AND STEP BStep To open the step, pull the grip. To avoid personal injury from contact with moving parts: A Never open the hood while the engine is running. A Never open the step while the engine is running. -
Page 56: How To Open The Lever Guide
PERIODIC SERVICE HOW TO OPEN THE LEVER GUIDE 3. Raise the operator's seat to the "LOCK" position. To avoid personal injury: A Park the machine on a firm and level surface. A Stop the engine, remove the key and apply the parking brake. -
Page 57: Lift-Up Point
PERIODIC SERVICE LIFT-UP POINT BRear side: Hoist the rear frame with nylon slings. Or jack up the bottom plate. To avoid personal injury, death or machine damage: A Do not work under the machine unless it is secured by safe stands or suitable blocking. BFront side: Hook nylon slings at the front frame. -
Page 58: Daily Check
If either of these do not Walking Tire pressure, wear and engine operate properly, contact around the damage your local KUBOTA Dealer machine Oil and water leak immediately. Engine oil level Check for abnormal noise and vibration. Transmission fluid level... -
Page 59: Checking Engine Oil Level
PERIODIC SERVICE BChecking Engine Oil Level BChecking Amount of Fuel and Refueling To avoid personal injury: To avoid personal injury: A Always stop the engine and remove the key A Handle fuel carefully. If the engine is running, before checking oil. do not fill the fuel tank. -
Page 60: Checking And Cleaning Radiator Screen To Prevent Overheating
PERIODIC SERVICE Viscosity Sulf Copp Distillation Viscosity Ceta Kinematic Temperature saybolt, cSt or weig strip mm /s Corro 90% Point at 100 at 40 sion 32.6 40.1 0.50 No.3 (540) (640) BChecking and Cleaning Radiator Screen to Prevent Overheating To avoid personal injury: A Be sure to stop the engine and remove the key before cleaning. -
Page 61: Inflation Pressure
PERIODIC SERVICE BInflation Pressure BChecking Transmission Fluid Level Though the inflation pressure is factory-set to the prescribed level, it naturally drops slowly in the course of 1. Park the machine on a flat surface, lower the time. Thus, check it and inflate as necessary. implement to the ground and shut off the engine and remove the key. -
Page 62: Checking Coolant Level
A If the radiator cap has to be removed, follow the caution above and securely retighten the cap. A Use clean, distilled water and anti-freeze to fill the radiator and the recovery tank. A If water should leak, consult your local KUBOTA Dealer. -
Page 63: Every 50 Hours
4. Turn the key switch to "START" position. A If the engine cranks Test 1 through 4, consult your 5. The engine must not crank. local KUBOTA Dealer to have the unit checked before operation. Test 2 (OPERATOR ON THE SEAT) 1. -
Page 64: Checking Gear Box Oil Level
PERIODIC SERVICE BChecking Gear Box Oil Level BLubricating Grease Fittings To avoid personal injury: To avoid personal injury: A Always stop the engine and remove the key A Be sure to stop the engine and remove the key before checking oil. before greasing. -
Page 65: Oiling
PERIODIC SERVICE BOiling (1) Front lift arm (LH, RH) (1) Machine universal joint (1) Seat adjuster (1) Motion control lever pivot bushing (LH, RH) (2) Bushing (1) Motion control lever contact position (LH, RH) - Page 66 PERIODIC SERVICE (1) Lift control cable (oil) (1) Anti-scalp rollers (1) Throttle cable (oil) (1) Throttle cable (oil)
-
Page 67: Every 100 Hours
PERIODIC SERVICE EVERY 100 HOURS BChecking Fuel Lines and Fuel Filter BCleaning Air Cleaner Primary Element 1. Remove the air cleaner cover and primary element. 2. Clean the primary element: To avoid personal injury: A When dry dust adheres to the element, blow A Be sure to stop the engine and remove the key compressed air from the inside, turning the when attempting to make the following checks... -
Page 68: Adjusting Fan Drive Belt Tension
PERIODIC SERVICE (1) Tension bolt (A) 10 mm (0.4 in.) (2) Dynamo (3) Adjusting bolt BAdjusting Parking Brake To avoid personal injury: A Park the machine on a firm and level surface. A Stop the engine and chock the wheels before checking or adjusting. -
Page 69: Battery Condition
PERIODIC SERVICE Check on the slope 5. Release the parking brake completely. 1. Place the machine on a 17 ramp. 6. Hold the brake rod lightly. 2. Apply the parking brake. 7. Check the brake spring play. 3. Place the motion control levers in "NEUTRAL LOCK" position and shut off the engine. - Page 70 PERIODIC SERVICE The original battery is a maintenance-free, non- accessible type battery. If the battery is weak, the engine will be difficult to start and the lights will become dim. It is important to check the battery periodically. (1) Vent well (A) "HIGHEST LEVEL"...
-
Page 71: Every 150 Hours
PERIODIC SERVICE EVERY 150 HOURS EVERY 200 HOURS BChanging Gear Box Oil BChanging Engine Oil To avoid personal injury: To avoid personal injury: A Be sure to stop the engine and remove the key A Be sure to stop the engine and remove the key before changing the oil. -
Page 72: Replacing Engine Oil Filter
Check for oil leaks around filter gasket. A To prevent serious damage engine, replacement element of the recommended type must be used. Use only a genuine KUBOTA filter or its (1) Radiator core equivalent. (2) Radiator hose (3) Clamp (1) Engine oil filter... -
Page 73: Checking Hydraulic Hose
6. After the new filter has been replaced, the transmission fluid level normally lowers a little. Add fluid to proper level. Check for oil leaks around filter gasket. A To prevent serious damage or premature failure to the hydraulic system, use only a KUBOTA genuine filter. -
Page 74: Adjusting The Motion Control Lever Pivot
A If the motion control lever pivot bolt is maladjusted, motion control may be difficult. (1) Hose (2) Clamp BCleaning Engine Shroud Consult your local KUBOTA Dealer for this service. (1) Motion control lever (A) "FREE TRAVEL" (2) Bolt, Nut 18.6 to 20.6 N-m Tightening torque (1.9 to 2.1 kgf-m,... -
Page 75: Every 400 Hours
PERIODIC SERVICE EVERY 400 HOURS BChanging Transmission Fluid and Rear Axle Gear Case Oil (RH and LH) To avoid personal injury: A Be sure to stop the engine and remove the key before changing or checking the oil. A Allow transmission case cool... -
Page 76: Cleaning Transmission Strainer
SAE J814c. BReplacing Fuel Filter A When the anti-freeze is mixed with water, the anti- Consult your local KUBOTA Dealer for this service. freeze mixing ratio must be less than 50%. Freezing Point Boiling Point *... -
Page 77: Every 1500 Hours
A To prevent serious damage to the engine, use only a 7. Kubota's genuine long-life coolant has a service life of 2 years. Be sure to change the coolant every 2 years. KUBOTA genuine filter. -
Page 78: Every 2 Years
4. Fill with clean water and cooling system cleaner. 5. Follow directions of the cleaner instruction. Consult your local KUBOTA Dealer for this service. 6. After flushing, fill with clean water and anti-freeze until the coolant level is just below the fill port on the BReplacing Fuel Lines radiator. -
Page 79: Service As Required
PERIODIC SERVICE C Protected circuit SERVICE AS REQUIRED CAPACITY BReplacing Fuses FUSE NO. Protected circuit Replacement of the fuse 20 A Engine stop 1. Raise the operator's seat. 2. Remove the blown fuse. 15 A Charge system 3. Place a new fuse of the same capacity in position. 15 A Main system 15 A... - Page 80 PERIODIC SERVICE C Replacing [RCK48P, RCK54P] 1. Tilt up the mower deck. (See "HOW TO TILT UP THE MACHINE" in "PERIODIC SERVICE" section.) 2. Wedge a block of wood between the blade and mower housing or use a box wrench over the pulley nut to prevent the spindle from rotating while removing the blade bolts;...
-
Page 81: Mower Belt Replacement
PERIODIC SERVICE BMower Belt Replacement 1. Remove the mower deck from the machine according to the procedure "DISMOUNTING THE MOWER DECK". 2. Remove the left and right hand shield from the mower deck. 3. Clean around the gear box. 4. Remove the belt from the tension pulley. 5. -
Page 82: Adjustment
(3) Beam plate adjustments correctly and safely, please (4) Panel screen contact your local KUBOTA Dealer. 8. Remove the beam plate and the panel screen. 9. Loosen the lock nut of the motion control rod. Adjust the motion control rod until axle rotation stops. -
Page 83: Creep Speed
ADJUSTMENT BMAXIMUM SPEED (FORWARD) BCREEP SPEED Consult your local KUBOTA Dealer for this service. 1. Lift-up and secure with jack stands or blocking the rear BMOTION CONTROL LEVER ALIGNMENT of the machine frame. 2. Remove both rear wheels. C Check the alignment 3. -
Page 84: Mower Deck Level
ADJUSTMENT C Aligning the control levers MOWER DECK LEVEL 1. Stop the engine and apply the parking brake. BANTI-SCALP ROLLERS 2. Loosen the nut and remove the lever guide. Lever position (High or Low) 3. Remove the bolts and select the motion control lever To avoid personal injury;... -
Page 85: Level Mower Deck (Side-To-Side)
ADJUSTMENT Rear side anti-scalp roller BLEVEL MOWER DECK (Side-to-Side) 8. Adjust the height of the rear side anti-scalp roller to one of three positions to approximately 19 mm (3/4 in.) between rollers and the ground. Adjust both side rollers to the same height. To avoid personal injury: A Park the machine on a firm and level surface. -
Page 86: Level Mower Deck (Front-To-Rear)
ADJUSTMENT BLEVEL MOWER DECK (Front-to-Rear) To avoid personal injury: A Park the machine on a firm and level surface. A Engage the parking brake. A Disengage PTO. A Stop the engine, remove the key and remove the mower u-joint while checking or adjusting the level of the mower deck. - Page 87 ADJUSTMENT Less than 6 mm (1/4 in.) Front-to-Rear Front side must be lower adjustment than Rear side. C Adjusting level (Front-to-Rear) 1. Raise up the mower deck to the transport position. (Also the top end). 2. Turn the cutting height set dial to the 3 in. cutting height position.
-
Page 88: General Torque Specification
ADJUSTMENT GENERAL TORQUE SPECIFICATION American standard cap screws Metric cap screws with UNC or UNF threads GR.5 GR.8 Class 8.8 Class 10.9 SAE grade No. Property class (ft-lbs) 8 - 9.6 12 - 14.4 (ft-lbs) 7.2 - 8.3 (N-m) 10.7 - 12.9 16.1 - 19.3 (N-m) 9.81 - 11.3... -
Page 89: Tightening Torque Chart
ADJUSTMENT TIGHTENING TORQUE CHART Thread Hexa-Bolt No mark size Head size ft-lbs kgf-m ft-lbs kgf-m d (mm) B (mm) 13.0 - 15.2 17.8 - 20.6 1.9 - 2.1 17.5 - 20.3 23.5 - 27.5 2.4 - 2.8 12 or 13 (14.1 1.1) (19.2... -
Page 90: Storage
STORAGE STORAGE REMOVING THE MACHINE FROM STORAGE To avoid personal injury: 1. Check the tire air pressure and inflate the tires if they A Do not clean the machine with engine running. are low. A To avoid danger exhaust fume 2. -
Page 91: Troubleshooting
A Loose or defective fan belt. A Adjust or replace fan belt. A Dirty A Remove all trash. radiator core grille screens. A Coolant flow route corroded. A Flush cooling system. If you have any questions, contact your local KUBOTA Dealer. -
Page 92: Battery Troubleshooting
A Charging A Contact system your local trouble. KUBOTA Dealer. If you have any questions, contact your local KUBOTA Dealer. MACHINE TROUBLESHOOTING Trouble Cause Countermeasure A Hydrostatic transmission fluid is A Replenish oil. Machine operation is not smooth. -
Page 93: Mower Troubleshooting
TROUBLESHOOTING MOWER TROUBLESHOOTING Trouble Cause Countermeasure A PTO system is not normal: A See your Kubota Dealer. Blade does not rotate. PTO system malfunctioning. A PTO system is normal: A Replace. Broken mower belt. A Weaken tension spring. A Replace. - Page 94 A Ground speed too fast. A Slow down. A Debris wrapped around mower spindles. A Clean mower. A Front of deck too low. A Adjust mower deck. (See "MOWER DECK LEVEL" "ADJUSTMENT" section.) If you have any questions, contact your local KUBOTA Dealer.
- Page 95 Miles de personas confían en el saber hacer de KUBOTA y su tecnología, experiencia y servicio al cliente. Usted también puede...
Need help?
Do you have a question about the ZD221 and is the answer not in the manual?
Questions and answers
how do you remove the radiator screen
what type grease fitting are used on kubota 221 shaft,metric or sae