Advertisement
Important Information
This quick start guide will help you setup the SECUR360 doorbell system. For additional support, go to www.heath-zenith.com/Secur360.
- Minimum system requirement for the SECUR 360 app
- iOS 10.0 or higher
- Android 6.0 or higher
You Will Need
- Password for your home wi-fi network
- Broadband internet connection with home wi-fi router
- For camera operation – Optimal upload speed of 3Mb/s.
- Existing wired chime
- 16 Volt AC transformer
- Phillips screwdriver
- Flat-head screwdriver
NOTICE: Install the SECUR360 doorbell in a covered location; away from direct sunlight, rain, and humidity. Do not allow salt water or other conductive liquids to come into contact with the doorbell.

To maintain the compliance with the RF exposure guideline, place the base unit at least 7.875" (20 cm) from nearby persons.
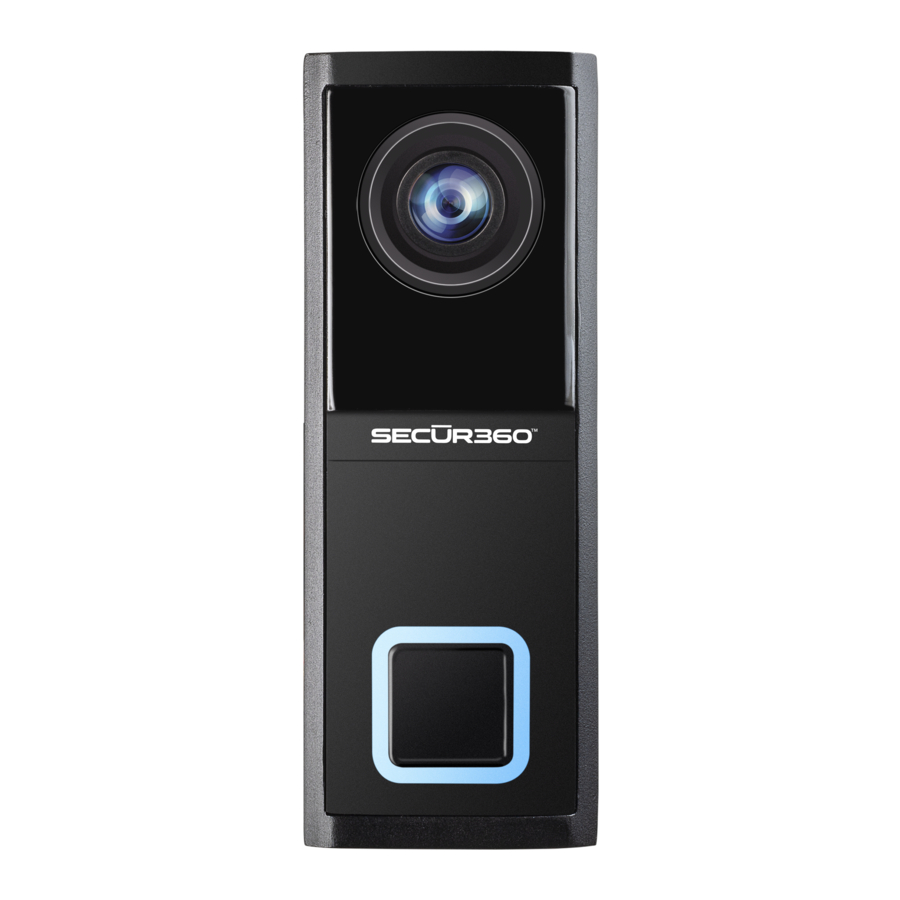
Know Your System
- Use the illustration below to get to know the different components of your new SECUR360 doorbell.

Mount the Push Button Backplate

- Remove existing wired push button.
- Using a small phillips screwdriver, remove the screw on the bottom of the video doorbell to remove back.
- Insert the existing push button wires through the hole in the backplate.
- Attach backplate to wall using the #6 screws provided (only use the screws included to ensure proper installation).
Wire the Push Button Backplate

- Using a small phillips screwdriver, attach the two wires from the chime and transformer to the screw terminals on the push button backplate.
NOTE: The wires may be connected to either screw. - To activate the battery, open the side of the rubber cover labeled "RST" on the back of the push button cover and slide the switch to the left.
- Slide the cover up into the backplate and rotate down into place. Replace the screw removed in step 2.
Install the Power Module
- Remove the chime cover from the existing chime.
- Label the chime wires according to the terminal they are attached to (TRANS, FRONT, REAR).
- Remove the transformer (TRANS) wire and connect it to one of the wires on the power module using the wire quick connect (included). Connect the power module spade connector on this wire to the transformer (TRANS) screw terminal.
- Remove the wire going to the doorbell (either FRONT or REAR) and connect it to the other wire on the power module using the wire quick connect (included). Connect the power module spade connector on this wire to the screw terminal the wire was previously attached to.
- Use the double-sided tape to attach the power module to the chime (if space is available behind the chime cover) or to the outside of the chime cover.
- Replace the cover.
![]()
Do not allow the power module or wires to touch the tone bars (mechanical chime – if installed) or cover the speaker (electronic chime) as this may affect the sound of the chime when activated.


 - Ensure the orange quick connect paddles are completely up (perpendicular) before inserting chime wires. After wires are inserted, press the orange paddles down to secure the wires. Gently pull on the wires to ensure they are secured.
Example 1: Electronic chime

Example 2: Mechanical chime

Download the SECUR360 App
- Go to the App Store SM or Google Play™ and search for the "S ECUR 360" app and download.
![]()
![www.apple.com]()
![play.google.com]()


Create a SECUR360 Account
- On your mobile device, open the SECUR 360 app and press the "Register" button to create a new account.
- Type your email address and select "Get
- Verification Code."
NOTE: You will use your email address to log into your account in the future. - The app will send an email with a verification code. Type the verification code in the app.
- Enter a password and select "Done".
NOTE: Most special characters are acceptable. However, there might be some that will not be allowed such as the "@" symbol.
For additional support, go to www.heath-zenith.com/Secur360
Adding the SECUR360 Doorbell
![]()
Before adding the SECUR 360 doorbell to the app, ensure your mobile device is connected to the same wi-fi network that the S ECUR 360 doorbell will be using.- Allow the SECUR 360 doorbell 1 minute to fully boot-up. The S ECUR 360 doorbell will flash RED when the doorbell is ready.
- On your mobile device, open the SECUR 360 app.
- Ensure the app is showing the Home screen. If not, press the Home icon at the bottom of the screen.
- To add a device, press the "+" icon at the top of the screen or the "Add a Device" button.
NOTE: If multiple devices have been installed previously, scroll down the list of devices to see the "Add a Device" button. - Ensure "Add Manually" is selected at the top of the screen.
- Select "HeathZenith" in the left-hand column and then select "Video Doorbell".
- Press "Confirm indicator slowly blinks" button.
- Ensure the correct network is selected and type the network password. Press "Confirm".
- Follow the remaining app instructions to complete the doorbell setup.
Setup Your Chime Type
![]()
If you have a mechanical chime (see example 2), no setup is necessary.- For electronic chimes (see example 1), open the SECUR 360 app.
- Go to "Settings" > "Bell Settings" > "Digital".
- Adjust the "Ringtone Duration" to match the length of the digital ringtone.

Documents / Resources
References
Download manual
Here you can download full pdf version of manual, it may contain additional safety instructions, warranty information, FCC rules, etc.
Advertisement

Need help?
Do you have a question about the SECUR360 9600 and is the answer not in the manual?
Questions and answers