Niles RS6Si Installation & Operating Manual
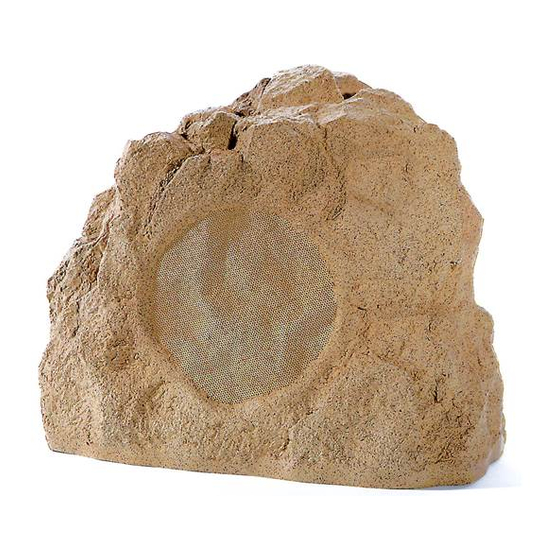
Weatherproof rock loudspeaker
Hide thumbs
Also See for RS6Si:
- Specification sheet (2 pages) ,
- Installation manual (25 pages) ,
- Installation manual (27 pages)
Advertisement
Niles Audio
Corporation
12331 S.W. 130 Street
Miami, Florida 33186
1-800-BUY-HIFI
©2008 Niles Audio Corporation. All rights reserved. Niles reserves the right
Tel: (305) 238-4373
to change product specifications without notice. Niles, the Niles logo and
Blending High Fidelity and Architecture are registered trademarks of Niles Audio
Fax: (305) 238-0185
Corporation. ConeForward, TCC, GeoRealistic and MicroPerf are trademarks of
www.nilesaudio.com
Niles Audio Corporation.
Advertisement
Table of Contents

Related Manuals for Niles RS6Si


Summary of Contents for Niles RS6Si
- Page 1 12331 S.W. 130 Street Miami, Florida 33186 1-800-BUY-HIFI ©2008 Niles Audio Corporation. All rights reserved. Niles reserves the right Tel: (305) 238-4373 to change product specifications without notice. Niles, the Niles logo and Blending High Fidelity and Architecture are registered trademarks of Niles Audio Fax: (305) 238-0185 Corporation.
- Page 2 I N S T A L L A T I O N & O P E R A T I O N G U I D E RS6Si Weatherproof Rock Loudspeaker L E N D I N G I G H...
-
Page 3: Table Of Contents
CONGRATULATIONS Thank you for choosing a Rock Loudspeaker from Niles. With proper installation and operation, you’ll enjoy years of trouble free use. Niles manufactures the industry’s most complete line of custom installation components and accessories for audio/video systems. To see the complete Niles product assortment, visit us on the Internet at: www.nilesaudio.com... -
Page 4: Introduction
They will sound good and look good no matter what Mother Nature does to them. The RS6Si series loudspeaker is a two-way stereo input loudspeaker in an acoustic suspension enclosure. The loudspeaker can be wired to play stereo from one cabinet or to act as a wide dispersion single channel loudspeaker. -
Page 5: Features & Benefits
Shaped grilles match the features on the front of the rock, making them blend into the cabinet. All of this extra attention to detail leads to a GeoRealistic™ style that enables the RS6Si to blend in with other landscaping and disappear. All that will be noticed is the great sound not the loudspeaker. - Page 6 A customized electronic dividing network inside the cabinet precisely distributes the music to the woofer and each tweeter, keeping the two channels completely isolated from each other. The three pole two-way design of the RS6Si crossover provides excellent stereo imaging into each channel, low distortion and superior sonic performance.
-
Page 7: Installation Considerations
The RS6Si loudspeaker will cover an area of a circle with a 22- foot diameter, in front of the speaker. - Page 8 Figure 1 Stereo Coverage 4 speakers Two-speaker Stereo Mode In this mode, each loudspeaker will have one amplifier speaker cable connected to both loudspeaker connection cables and it will take two loudspeakers to play in stereo. To obtain the best stereo imaging possible, use stereo outputs from the amplifier and alternate the speakers, in your layout.
- Page 9 Figure 2 Two-speaker Stereo Coverage – with 4 speakers Figure 3 Speaker Stereo Coverage – with 6 speakers Figure 2 shows how this would work for a square area of 35 feet by 28 feet and using stereo signals. Using our spacing rules as shown in Table 1, leads to the need for four speakers.
- Page 10 In order to choose the proper speaker cable, please follow these steps: • Unless you are using a Niles WVC100 or WMVC100 series weatherproof impedance matching volume controls or equivalent, only two halves of an RS6Si loudspeaker can be safely attached to a typical amplifier channel, if that amplifier is rated to drive 4 ohms.
- Page 11 A suggested way to accomplish this is shown in Figures 5 and 5b, 5a is for one-speaker stereo mode and 5b is for two-speaker stereo mode. Niles makes a wide range of outdoor volume controls. We recommend our standard weatherproof volume control, WVC100 series or our weatherproof muting volume control, WMVC series.
- Page 12 “clipping” distortion. A large amplifier will play at the same volume without causing this distortion. If the plan requires connecting two halves of a RS6Si speaker to an amplifier, in the one-speaker stereo mode or using the speaker in the two-speaker stereo mode, an amplifier rated to drive a 4-ohm load of thirty watts to three hundred watts, is recommended.
-
Page 13: Installation
“Selecting the number and location for your speakers” of this manual, to choose the best locations for the speakers. Determine a path for the speaker cable. You may need to run wires in walls, under sidewalks or patios and around obstacles in your yard. Install the wires while conforming to your local building requirements and codes. - Page 14 4. Repeat step 3 with the RS6Si connection cable’s black wire, that is in the same conductor as the wire attached in step 3, and the other stripped amplifier “Right”...
- Page 15 Each loudspeaker you connect must be connected to the amplifier’s speaker wire in the same way. 4. Repeat step 3 with the RS6Si connection cable’s black wires and the other stripped amplifier speaker cable’s conductor. 5. Connect the opposite end of the speaker cable to the amplifier or receiver. Start by performing step 1 and 2 on the speaker cable near the amplifier.
- Page 16 1. Point the speakers at each other, rather than at the area you want to cover 2. Play some music with the amplifier or receiver set to Mono 3. Stand so you are the same distance from each speaker and listen to the richness of the bass and the loudness of the sound 4.
- Page 17 Installing the Security Bracket and Cable 1. With the loudspeaker in the proper location, turn the loudspeaker over so the bottom of the loudspeaker is facing you, as shown in Figure 7. 2. Take the nylon security cable, supplied with the loudspeaker and fold it in half. Using the middle of the cable, feed it through the Security Attachment Eyelet as shown in Figure 8.
- Page 18 1. Prepare a hole that is at least one-foot deep, at a minimum (three-feet if the speaker is being installed in an area that has a frost line). The hole should be at least six inches in diameter. This hole should be under the desired location of the loudspeaker.
-
Page 19: Operation
6. Loop the end of the aircraft cable around the eyebolt and back to the aircraft cable. Secure this end of the cable to the main aircraft cable with the wire rope clamp. 7. Turn the loudspeaker over and feed the other end of the aircraft cable through the eyelet in the bottom of the loudspeaker. - Page 20 However, if you desire to clean the loudspeaker you can clean the RS6Si with a dampened soft cloth or a paper towel. Hosing the loudspeaker off with a garden hose or high pressure cleaner is not recommended, the drivers, especially the tweeter, can be damaged by a high-pressure stream of water.
-
Page 21: Specifications
88 decibels for 2.83 Volts RMS of Pink Noise, measured at 1 Meter on Axis Wiring Requirements 2-conductor direct burial cable at the following sizes depending on longest length of cable required (2 per speaker in one-speaker stereo mode): Wire Gauge Temperature Extremes -50°... - Page 22 NOTES...
- Page 23 NOTES...
- Page 24 NOTES...
Need help?
Do you have a question about the RS6Si and is the answer not in the manual?
Questions and answers