
Related Manuals for CELETTE RAPID SPOT MINI


Summary of Contents for CELETTE RAPID SPOT MINI
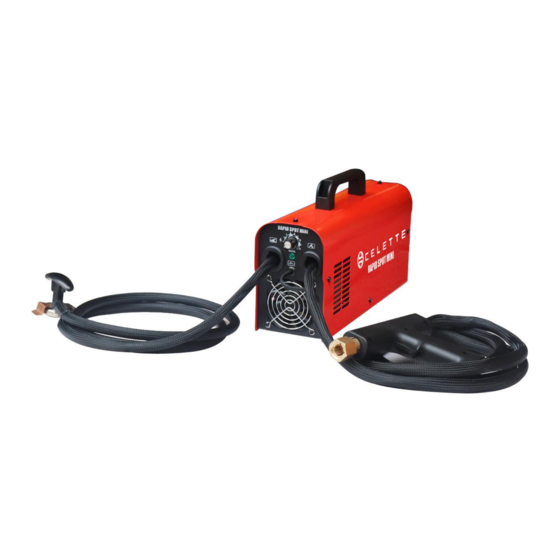
- Page 1 RAPID SPOT MINI ORIGINAL MANUAL PRODUCT REF NO: CEL.11245-C-02 01/2023 - REV. 1.0 WWW.CELETTE.COM...
-
Page 2: Table Of Contents
- 3.4.1 PREPARATION FOR OPERATION ..............Page 9 4. TROUBLE SHOOTING ........................Page 10 5. WIRE DRAWING ..........................Page 11 - 5.1 WIRE DRAWING FOR RAPID SPOT MINI 220V .............Page 11 - 5.2 WIRE DRAWING FOR RAPID SPOT MINI 110V ............Page 12 6. RAPID SPOT MINI 1PH/220V EUROPE/INDIA..............Page 13 7. -
Page 3: Foreword
IMPORTANT: Before starting the equipment, read the contents of this manual, which must be stored in a place familiar to all users for the entire operative life-span of the machine. This equipment must be used solely for welding operations. www.celette.com Page No: 3... -
Page 4: Safety Precautions
Do not spot weld where flying sparks can strike flammable material. Protect yourself and others from flying sparks and hot metal. Be alert that welding sparks can easily go through small cracks and openings to adjacent areas. Watch for fire, and keep a fire extinguisher nearby. www.celette.com Page No: 4... - Page 5 Wear body protection made from durable, flame-resistant material (leather, heavy cotton, wool). Body protection includes oil-free clothing such as leather gloves, heavy shirt, cuffless trousers, high shoes, and a cap. P rotect others in nearby areas by using approved flame-resistant or noncombustible fire curtains or shields. Have all nearby persons wear safety glasses with side shields. www.celette.com Page No: 5...
-
Page 6: Additional Symbols For Installation, Operation, And Maintenance
Secure unit during transport so it cannot tip or fall. READ INSTRUCTIONS: Read and follow all labels and the Owner’s Manual carefully before installing, operating, or servicing unit. Read the safety information at the beginning of the manual and in each section. www.celette.com Page No: 6... -
Page 7: Emf Information
2. GENERAL TECHNICAL DESCRIPTIONS: Model CE ENXXXXXX 1~50/60Hz Input Output max current Duty cycle MODEL: The model of the machine Machine Serial Number which must appear on requests or inquiries concerning the machine CE, EN International standards www.celette.com Page No: 7... -
Page 8: Matters Need Attention
2. T he input cable and control cable connectors have screw. Please lock the screw to fixed the connector. 3. The earth cable must use clamp to fix on the base metal. 4. All cables must be kept straight. If the cables are winded, it will interfere with the stud welding. FOR SPOT WELDING: SPOT WELDING TORCH CONTROL CABLE EARTH CABLES WORK PIECE www.celette.com Page No: 8... -
Page 9: Controls On Generator Front Panel
4. Make sure the diameter of the clamp is correct and the length of the gag lever post is correct. Install the screw clamp and gag lever post in the torch. 5. Make sure all the cables connect to the machine and workpiece. Connect input cable and turn on. www.celette.com Page No: 9... -
Page 10: Trouble Shooting
4. Check transformer, maybe over heat 5. Please contact to the manufacturer 1. Check the power of fan Fan is not working 2. Check the fan, maybe something stuck in the fan 3. Please contact to the manufacturer www.celette.com Page No: 10... -
Page 11: Wire Drawing
5. WIRE DRAWING: 5.1 WIRE DRAWING FOR RAPID SPOT MINI 220V: www.celette.com Page No: 11... -
Page 12: Wire Drawing For Rapid Spot Mini 110V
5.2 WIRE DRAWING FOR RAPID SPOT MINI 110V: www.celette.com Page No: 12... -
Page 13: Rapid Spot Mini 1Ph/220V Europe/India
6. RAPID SPOT MINI 1PH/220V EUROPE/INDIA: Code Description Code Description EY11245-CQ0101B1 Front panel PD072402 Power board EY11245-CH0101B1 Back panel VC100630 Power transformer EY11245-CS0101R16 Top cover PD072501 Main control board EY11245-CX0101B1 Bottom panel SE064000 Cable holder EY11245-CZ0101+ Inside baffle XE071000-2E Power cord... -
Page 14: Rapid Spot Mini 1Ph/110V Usa
7. RAPID SPOT MINI 1PH/110V USA: Code Description Code Description EY11245-CQ0101B1 Front panel PD072402 Power board EY11245-CH0101B1 Back panel VC100630 Power transformer EY11245-CS0101R16 Top cover PD072501 Main control board EY11245-CX0101B1 Bottom panel SE064000 Cable holder EY11245-CZ0101+ Inside baffle XJ082030-2C Power cord UL... - Page 15 THANK YOU!!! FOR PURCHASING OUR PRODUCT CELETTE FRANCE SAS 3, Avenue Marcellin Berthelot 38200 Vienne – France +33 474 575 959 info@celette.com www.celette.com...
Need help?
Do you have a question about the RAPID SPOT MINI and is the answer not in the manual?
Questions and answers