
Related Manuals for NICEDAY 701ML

Summary of Contents for NICEDAY 701ML
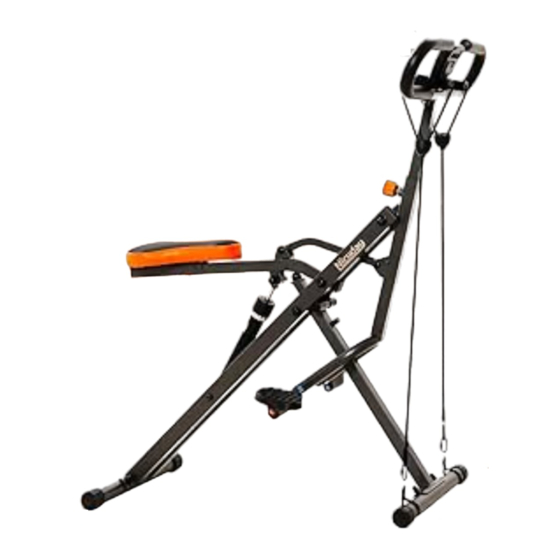
- Page 1 UPRIGHT ROW-N-RIDE EXERCISER 701ML USER MANUAL Please read all the instructions in the manual carefully before installing and using the equipment.
-
Page 2: Table Of Contents
CATALOG Important Safety Information ------------------------------------------------------------- 2 Exploded Diagram ----------------------------------------------------------------------------3 Parts List ---------------------------------------------------------------------------------------- 4 Assembly Instructions ------------------------------------------------------------------- 5-9 Machine Use Adjustment ------------------------------------------------------------ 10-13 Exercise Monitor ---------------------------------------------------------------------------- 14 Warm Up --------------------------------------------------------------------------------------- 15 CUSTOMER SERVICE If you have any needs, please feel free to contact our customer service Email address: NiceDayCycling@outlook.com Contact us via Amazon: Login your Amazon account >... -
Page 3: Important Safety Information
IMPORTANT SAFETY INFORMATION We thank you for choosing our product. To ensure your safety and health, please use this equipment correctly. It is important to read this entire manual before assembling and using the equipment. Safe and effective use can only be achieved if the equipment is assembled, maintained, and used properly. -
Page 4: Exploded Diagram
EXPLODED DIAGRAM... -
Page 5: Parts List
PARTS LIST Parts Description Spec. Qty. Monitor Screw M8*42 Handlebar Washer Handlebar Tube Knob Main Frame Screw M8*40 Pedal(L) Pedal(R) Plug Screw M8*45 Front Stabilizer Rear Stabilizer Pin Ball Resistance Bands Battery Allen Wrench Open-end Wrench 13-15... -
Page 6: Assembly Instructions
ASSEMBLY INSTRUCTIONS STEP 1 First, pull out the Plug (NO.13) fixed on the Main Frame(NO. 8), then open the Main Frame(NO. 8) as shown in the figure, and insert the Plug (NO.13) to fix it. Take out the Screw (NO.9) and Nut (NO.5) from the toolkit, insert the Screw (NO.9) into the main frame hole as shown in the figure, lock the Nut (NO.5), and then use the Open-end Wrench (B) to tighten it. - Page 7 STEP 3 Take out the Screws (NO.14)*2, Nuts (NO.12)*2, Washers (NO.4)*2 from the toolkit. Install the Rear Stabilizer (NO.16) as shown in figure below, and fix it with Open-end Wrench (B) STEP 4 Take out the Handlebar Tube (NO.6), insert it into the hole of the Main Frame(NO. 8) as shown, lock the Knob (NO.7) and tighten it.
- Page 8 STEP 5 Take out the Screws (NO.2)*2, Nuts (NO.5)*2, Washers (NO.4)*2 from the toolkit. Align the holes of the Handlebar (NO.3) and Handlebar Tube (NO.6) as shown in the figure, install them in turn, lock the Nut (NO.5), and then use Allen Wrench (A) and Open-end Wrench (B) to lock the screws and nuts at the same time. STEP 6 Install the Monitor (NO.1) into the monitor tab on the Handlebar (NO.3) tube as shown in the figure.
- Page 9 STEP 7 Attach the Left Pedal (No. 10) to the Pedal Connecting Tube and follow the direction as shown to tighten the Left Pedal (NO.10) clockwise with Open-end Wrench (B). STEP 8 Attach the Right Pedal (NO.11) to the Pedal Connecting Tube and follow the direction as shown, tighten the Right Pedal (NO.11) clockwise with Open-end Wrench (B).
- Page 10 STEP 9 Install the Resistance Bands (NO.19) as shown in the figure, unscrew the Resistance Bands (NO.19) connecting ring button, connect it with the D-type buckle of the webbing on the Front Stabilizer(NO.15), and tighten the button, make sure it is fixed before use. STEP 10 Install the Monitor battery as shown in the figure.
-
Page 11: Machine Use Adjustment
MACHINE USE ADJUSTMENT Adjusting the balance If you notice that the machine is unbalanced during use, you should adjust the End Cap located on the Rear Stabilizer (NO.16) until the machine becomes level with the floor surface. 2: Adjusted the Seat Tube(2 position optional) Lift the front support and connect the upper tube to the use gear as shown in the figure Align the hole and insert the pull Plug (NO.13) - Page 12 3: Resistance adjustment(16 level optional) Rotate the hydraulic cylinder to the desired level. 4: Seat position adjustment(5 position optional) Seat cushion installation, Choose the desired position Lock the knob...
- Page 13 First position state Fifth position state 5: ADJUSTING THE HANDLEBAR(5 position optional) Unscrew and pull the knob Adjust to a suitable height and lock the knob Adjust to the lowest height Adjust to the highest height...
- Page 14 6: Folding instruction Adjust the seat cushion to the first position Adjust handlebar to lowest height, and lock it Remove the pull pin NO.18, pin ball NO.17 Set hydraulic cylinder to 1 and put it down Lift the Seat Connecting Tube, remove the Pin from Fold the mainframe and place it parallel to the ground.
-
Page 15: Exercise Monitor
EXERCISE MONITOR SPECIFICATIONS: TIME ................. 00:00-99:59 MIN/SEC. COUNT ................0-9999 STROKES CALORIES… ................0-9999 KCAL TOTAL CNT ..............….0-9999 STROKES FUNCTIONS: TIME: Displays the workout time while exercising. COUNT(CNT): Accumulate the strokes while exercising. CALORIES(CAL): Displays calories amount burned while exercising. TOTAL CNT(TOT.CNT): Displays the total number of strokes since batteries installed. -
Page 16: Warm Up
WARM UP Before exercise, it is better Warm muscles stretch more easily, so the first of 5 ~ 10 minutes to warm up. Then in accordance with the following methods to stop and do stretching exercises - do five times, each leg every time 10 seconds or more time to do it again after the end of the exercise.
Need help?
Do you have a question about the 701ML and is the answer not in the manual?
Questions and answers