Advertisement
Quick Links
Advertisement

Related Manuals for HE&M A-1 AIR SAW

Summary of Contents for HE&M A-1 AIR SAW
- Page 1 OPERATION A-1 AIR SAW...
-
Page 2: Lock-Out/Tag-Out Procedure
OPERATIONS Lock-Out/Tag-Out Procedure This document outlines the process for Lock-Out/Tag-Out for an Air Saw. While there are some variations from model to model with the high voltage junction box appearance the function will be the same. It is important to follow all safety practices and pay attention to all safety warnings noted in this procedure. - Page 3 2. The High Voltage Junction Box will be located on the side or back of the saw and is equipped with a Main Disconnect that has the ability to accept a padlock for electrical Lock-Out/Tag-Out. 3. De-Energize the saw by pushing the Main Disconnect Handle down to the “OFF”...
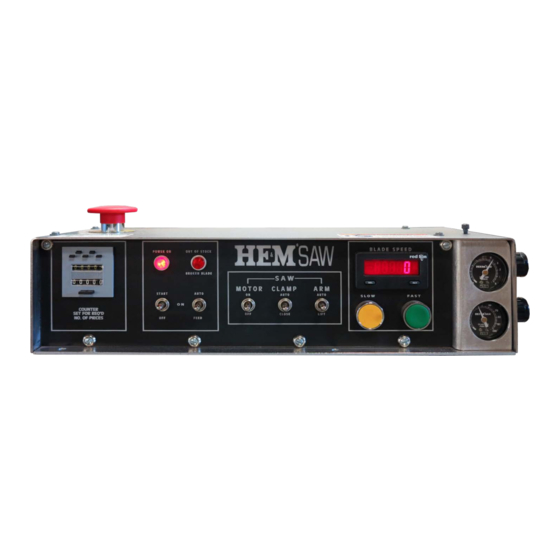
- Page 4 HOW TO ENERGIZE THE SAW 1. Pull the Main Disconnect lever located on the High Voltage Junction Box to the “ON” position to energize the saw. 2. Verify that the “Emergency Stop” button located on the top of the control console is raised up in the off position. (If it is pressed down, turn the button clockwise to raise it.) 3.
- Page 5 MOTOR RESET MOTOR RESET BUTTON If the saw appears to have power but the motor won’t start, it could be the “MOTOR RESET BUTTON” has tripped off. This button acts like a circuit breaker. To reactivate it, tap the blue “MOTOR RESET BUTTON” several times.
-
Page 6: Manual Cut
MANUAL CUT 1. To make a manual cut, lift the arm by moving the “ARM” switch down to the “LIFT” position. 2. Adjust the arm height with the upper arm stop to have it close enough to the material so that the arm does not have too much free-fall before starting the cut. - Page 7 4. For a trim cut, place the end of the material far enough past the blade to trim the material as needed. For a predetermined length part, mark the material at the correct length and place the material so that the mark is aligned with the path of the blade. 5.
- Page 8 7. To initiate the cut, put the “ARM” switch in the center “neutral” position. This will allow the arm to fall at the set Feed Rate and start the cut at the set Cutting Pressure. 8. When the blade completes the cut, move the “ARM” switch down to the “LIFT”...
- Page 9 AUTOMATIC CUTTING SEQUENCE If multiple parts of the same length are required, the saw will be operated with an automatic cutting sequence in automatic mode. Place the material on the saw, with longer length material properly supported, and align it for either a trim cut or flush with the blade if not trim cut is required.
Need help?
Do you have a question about the A-1 AIR SAW and is the answer not in the manual?
Questions and answers