Advertisement
www.costway.com
USER'S MANUAL
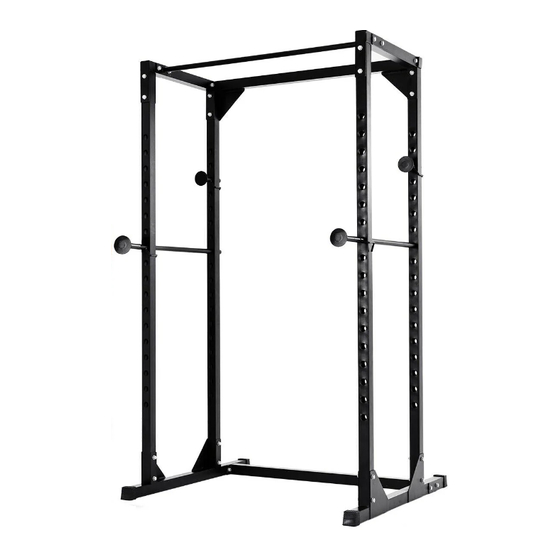
POWER RACK
SP36550
THIS INSTRUCTION BOOKLET CONTAINS IMPORTANT SAFETY INFORMATION. PLEASE READ AND KEEP FOR FUTURE REFERENCE.
Follow Costway
Please give us a chance to make it right and do better!
Visit us: www.costway.com
Contact our friendly customer service department for help first.
Replacements for missing or damaged parts will be shipped ASAP!
Advertisement
Table of Contents

Related Manuals for Costway SP36550


Summary of Contents for Costway SP36550
- Page 1 THIS INSTRUCTION BOOKLET CONTAINS IMPORTANT SAFETY INFORMATION. PLEASE READ AND KEEP FOR FUTURE REFERENCE. Follow Costway Please give us a chance to make it right and do better! Visit us: www.costway.com Contact our friendly customer service department for help first. Replacements for missing or damaged parts will be shipped ASAP!
- Page 2 PARTS LIST Contact Us! Do NOT return this item. Contact our friendly customer service department for help first. E-mail US: cs.us@costway.com UK: cs.uk@costway.com Before You Start Before You Start Please read all instructions carefully. Retain instructions for future reference.
- Page 3 STEP 2 STEP 1 Attach 4PCs x (4)Uprights to the Right Bottom Tube (1) and the Left Attach the Bottom Connection Tube (3) to the Right Bottom Tube(1) and Bottom Tube (2), using 4PCs x (10) Plates (150mmL), 8PCs x (15) Hex...
- Page 4 STEP 3. STEP 4: 1. Attach two Top Tubes (5) to the Upper Rear Connection Tube (6), using 1.Attach the Upper Front Connection Tube (7) to the Top Tube (5), using 2PCs x (16) Hex Bolts (M10 x 65mm), 4PCs x (17) M10 Washers,2PCs x 2PCs x (11) Plates (120mmL), 4PCs x (15) Hex Bolts (M10 x 70mm), (12) M10 Nylon Nuts.
- Page 5 February 24, 2019 Great products so far. Fast delivery, easy setup, and working without any issues. With your inspiring rating, COSTWAY will be more consistent to offer you EASY SHOPPING EXPERIENCE, GOOD PRODUCTS and EFFICIENT SERVICE! US office: Fontana, California...
Need help?
Do you have a question about the SP36550 and is the answer not in the manual?
Questions and answers