Advertisement
Quick Links
Speed Meter
JB101
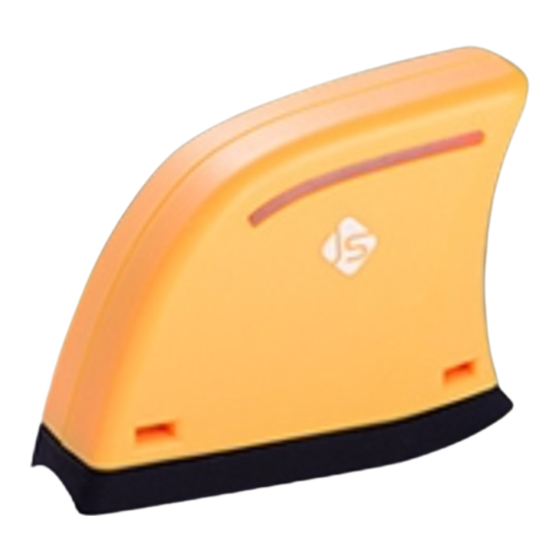
2. Magnet alignment mark
2. Magnet alignment mark
1. LED indicator
1. LED indicator
3.
3.
Cable tie
Cable tie
through hole
through hole
1
2
LED
Magnet
Indicator
alignment
mark
3
4
Cable tie
Rubber stand
Battery
hole
ribbon
User Manual
5. Battery ribbon
5. Battery ribbon
4. Rubber stand
4. Rubber stand
Accessories included with your product
5
CR2450
Battery
Spoke magnet
Cable tie
Advertisement

Related Manuals for JSPORT JB101

Summary of Contents for JSPORT JB101
- Page 1 Speed Meter User Manual JB101 2. Magnet alignment mark 2. Magnet alignment mark 1. LED indicator 1. LED indicator 5. Battery ribbon 5. Battery ribbon 4. Rubber stand 4. Rubber stand Cable tie Cable tie through hole through hole Accessories included with your product...
-
Page 2: Install Battery
Step 5 : push back the battery ribbon Step 3 : battery push into battery holder Step 6 : Covered with Rubber stand Note: The battery Anode mark should face to Logo, same direction as icon on bottom side of JB101... - Page 3 Install JB101 on your Bike Step1 : Place sensor on left chainstay with 2 cable tie Logo side outwards Step3 : Mount the Magnet on the spoke, place the spoke in the groove of the plastic piece Step4 : Move magnet to align triangle mark on JB101 , tight the screw to fix magnet position.
- Page 4 Step5 : Tilt the JB101 sensor top side closer to magnet within 5mm for better sensing performance Blister Blister Note put assemble gauge between magnet and JB101 sensor, the space is around 5mm Assemble Gauge Assemble Gauge...
- Page 5 Step6 : Swing rear wheel ,let the magnet pass through JB101 if LED turn on sequentially. Then tighten 2 cable tie and cut off redundant cable to finish hardware installation place JB101 on chainstay close to Note: the Rim...
- Page 6 Install...
- Page 7 Start With App Device Requirement This product supports mobile phone via Bluetooth wireless technology. Please pair it with your cellular phone when using this product for the first time. Please make sure your device meets the following system requirements before pairing and use.
- Page 8 Pair with Cellular Phone App Step1 : Enable the Cellular Phone GPS & Bluetooth Device Step2 : Enable JSports App APP Start Screen Recording Setup About Track Log...
-
Page 9: Setup Page
Setup page Setup items Setup icon... - Page 10 Paring Device Step 1 : turn to the setup page and click “select JSports Device” Turn the crank counter-clockwise. Step 2 Turn the bike wheel Step 3 Device Paired Device had Pairing with JSports App when Device name appeared...
- Page 11 Basic Date Setup Select Wheel Size by Bike model or wheel model Bike Model Wheel Model...
- Page 12 select male/female select speed unit select Display color Bright Orange Cool Blue...
- Page 13 Far-Away Alarm Setting App will alarm if bike leave a far distance from receiving cellular phone when this feature enable...
- Page 14 Click “Back” Icon Return to main menu...
- Page 15 Recording Riding Path Recording icon...
- Page 16 click Record Icon ” ” To Start recording function Red Dot show recording function is in processing...
- Page 17 again Touch Record” ” Icon enable stop/pause record “pause” for a short time stop recording “stop “to stop this riding path recording...
- Page 18 Check Riding Path Log Track Log...
- Page 19 Check Riding Record Click time mark to check recorded riding information...
- Page 20 Riding Path and Data Map info Riding info Riding info Riding info In line graph In line graph...
- Page 21 Social media to share Riding Data...
- Page 22 Upload Riding Data to Cloud login and upload...
- Page 23 Download Riding Data from Cloud Choose date range Download file...
- Page 24 Cloud records...
Need help?
Do you have a question about the JB101 and is the answer not in the manual?
Questions and answers