Advertisement
Quick Links
CR338 Wireless Charging Sensor Installation Guide
Phone Security
TOOLS & PARTS NEEDED
VP-1751#
VP-1742#
K-1140
or
K-1106
* = Optional | # = Substitute W for White
3
NON-ADHESIVE MOUNTING
Option 1 - Slot Hole Fixtures
*For slot hole fixtures not suitable for
adhesive mounting, use the K-1106
Mounting Ring Kit.
K-1106 Kit Includes:
Mounting Ring
Threaded Rods
Thumb Nuts
Screw the threaded rods
through the mounting ring
and into the pedestal. Mount to the
fixture with the two thumb nuts.
Skip to step 6.
6
Attach the sensor
to the pedestal by
twisting the boot
into the sensor.
Attach the sensor
to the pedestal by
twisting the boot
into the sensor.
1
ALL MOUNTING
IMPORTANT:
switch on the base of the pedestal is
fully depressed when attaching.
KF-1106
AD-239-5
AP-001-200
V-T99
V-39
INCORRECT
4
NON-ADHESIVE MOUNTING
Option 2 - Single Hole Fixtures
*For single hole fixtures not suitable for
adhesive mounting, use the K-1140
Single Hole Adapter.
Adhesive
Tape
Adhesive
Liner
IMPORTANT:
Fully remove both the
adhesive liner and the adhesive tape
from the bottom of the pedestal.
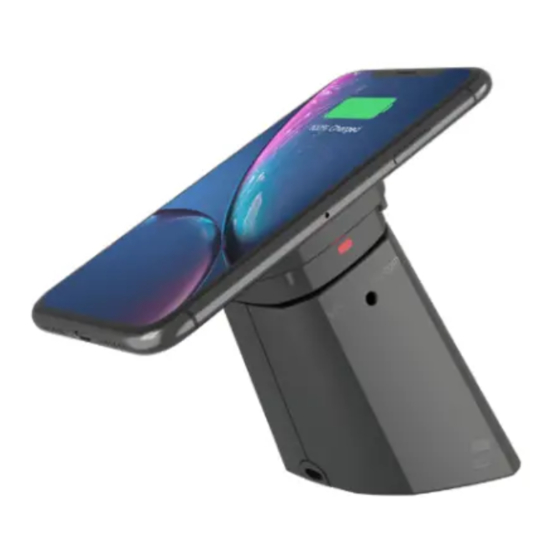
7
Make sure the
text "TOP" and
"BOTTOM" on the
sensor is oriented with
the top and bottom of
the phone.
Before adhering, find the best placement
for the sensor to charge the device.
v a n g ua r d p r o t e x g l o ba l . c o m
©2022 Vanguard Protex Global
Ensure tamper
Tamper Switch
Side View
CORRECT
2
ADHESIVE MOUNTING
Clean fixture surface and wipe
dry. Thread the power cable through
the fixture slot.
Remove the adhesive
liner from the base of the
pedestal and adhere to
the fixture. Skip to step 6.
Hold firmly for 30 seconds
IMPORTANT:
to ensure a strong bond.
5
NON-ADHESIVE MOUNTING
Option 2 - Single Hole Fixtures
A. Thread the pedestal power cord
through the single hole
adapter plate and screw to
the bottom of the pedestal.
K-1140 Kit Includes:
Adapter Plate
Ring Nut
Screws
B. Place connected
pedestal and adapter through the
hole in the fixture and tighten nut.
8
Clean the back of the
device with an alcohol
pad and wipe dry.
Adhere sensor to the
center of the device.
Arm the system with your IR Keyfob.
Point the key near the black receiver
above the LED.
Customer Care | 1-877-477-4874
International | +1-813-855-9639
Advertisement

Related Manuals for VPG CR338


Summary of Contents for VPG CR338
- Page 1 CR338 Wireless Charging Sensor Installation Guide Phone Security ALL MOUNTING ADHESIVE MOUNTING TOOLS & PARTS NEEDED Clean fixture surface and wipe IMPORTANT: Ensure tamper dry. Thread the power cable through switch on the base of the pedestal is the fixture slot.
- Page 2 Additional Funtionality Keyfob video IR Keyfob The IR Keyfob allows for touchless control of the CR338. The security code in the IR Keyfob is programmed to the CR338 the first time the system is armed. How to change the security code: Chisel Tool 1.
- Page 3 Ascending tone followed by 2 confirmation beeps Back Up Battery Device is properly secured and armed. If the CR338 has lost power, the unit will switch to its internal back-up battery (3-5 day battery life); Ascending tone followed by a low toned beep...
Need help?
Do you have a question about the CR338 and is the answer not in the manual?
Questions and answers