Table of Contents
Advertisement
Advertisement
Table of Contents

Related Manuals for Element P100


Summary of Contents for Element P100
- Page 1 Handheld Barcode Scanner P100 User Manual...
- Page 2 Disclaimer Please read all the contents of the manual carefully before using the products described in this manual to ensure the safe and effective use of the products. After reading, please keep a copy of this manual on hand for future reference. Do not disassemble or attempt to repair the scanner on your own, otherwise our company shall not assume the responsibility of warranty or replacement for the scanner.
-
Page 3: Table Of Contents
2019.07.03 Add barcode settings 2020.02.18 Add barcode settings Modify the setting of prefix and suffix 2020.04.14 Add the setting of Bluetooth mode (Bluetooth mode device) 2020.07.22 Modify Page8 CONTENT Chapter 1 Introduction ......................1 Appearance ........................1 Dimension ........................2 Scanner Data Cable Interface Definition ............... - Page 4 Aiming .......................... 22 Illumination ........................22 Read success prompt tone ....................22 Chapter 5 Symbologies ....................... 23 1D Barcode Setting ...................... 23 ENA-8 ........................... 23 Enable/Disable EAN-8 ....................23 Enable/Disable 2/5-bit Add-On code ................23 Convert EAN-8 to EAN-13 .................... 23 ENA-13 ..........................
- Page 5 Transmit check character .................... 31 Interleaved 2 of 5 ......................... 31 Enable/Disable Interleaved 2 of 5 ................31 Check and transmit character ..................31 Convert I 2 of 5 to EAN-13 ................... 32 Matrix 2 of 5......................... 32 Enable/Disable Matrix 2 of 5 ..................32 Check and transmit character ..................
- Page 6 Han Xin ..........................40 Anti-color ........................40 Inverse ......................... 40 Chapter 7 Troubleshooting ....................40 Chapter 8 Scanner Settings ....................41 Serial Port Command Format ....................41 Barcode Setting Format ....................... 41 Version number——HYRS_RE ....................42 General settings (default HID single scan mode) ............42 Host mode (CDC, HID, BT, COM)...
-
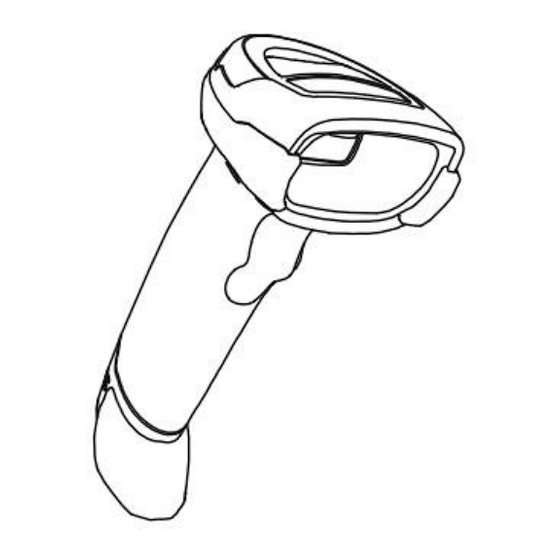
Page 7: Chapter 1 Introduction
2D l image products. P100 can read all kinds of 1D barcodes and standard 2D barcodes (various versions of PDF417, QR code, and Data matrix) can easily scan paper, plastic cards, LCD and other barcode printed media. Its fully integrated design makes it easy to embed in a wide range of product applications. -
Page 8: Dimension
P100 User Manual Illumination Definition Green: decoding successfully Dimension... - Page 9 P100 User Manual...
- Page 10 P100 User Manual ✓ Left View ✓ Front View...
-
Page 11: Scanner Data Cable Interface Definition
P100 User Manual ✓ Top View Scanner Data Cable Interface Definition Define Input / Output Function USB_DP USB Signal USB_DM USB Signal POWER Ground Wire VBUS POWER Power, +5V POWER Ground Wire RS232 Clear to Send RS232 Request to Send... -
Page 12: Usb Cable Connection
P100 User Manual RS-232 Connect P100 to Host USB Cable Connection... -
Page 13: Rs-232 Cable Connection
P100 User Manual Connect the scanner to a Host through a USB cable with RJ45 and USB connectors: 1) Plug the RJ45 connector into the serial port on the scanner. 2) Plug the USB connector into the USB port on the Host. -
Page 14: Power On, Power Off And Restart
P100 User Manual Connect the scanner to a Host through an RS-232 cable with RJ45 and RS-232 connectors and a power jack: 1) Plug the RJ45 connector into the serial port on the scanner. 2) Plug the RS-232 connector into the RS-232 port on the Host. -
Page 15: Maintenance
P100 User Manual Maintenance The reading window must be kept clean. Supplier is exempt from warranty liability for damage caused by improper maintenance. Avoid hard and rough objects to scratch the reading window. Remove the stains from widow with a brush. -
Page 16: Restore Factory Defaults
P100 User Manual Restore Factory Defaults Note: Please use the "Restore Factory Defaults" function carefully, and when you scan this setup barcode, the current parameter settings will be lost and replaced with the factory default values. Restore Factory defaults... -
Page 17: Chapter 2 Communication Interface
Serial Interface Serial interface is a common way to connect the scanner to the host (e.g. PC, POS devices). P100 handheld scanner provides RS-232 electrical level interface, which can directly connect to PC’s serial interface. -
Page 18: Baud Rate
P100 User Manual Even parity Baud Rate The unit of Baud Rate is bps: bits per second, the optional configuration parameter is as below shown: 115200 38400 19200 9600 (Default) 4800 2400 1200 USB Interface HID Virtual Keyboard When using USB interface, the scanner can be simulated as a HID-KBW device. In this mode, the scanner would be a virtual keyboard that output the data to the host. -
Page 19: Usb International Keyboard Setting
P100 User Manual USB International Keyboard Setting USA (Default) Belgian Finnish (Swedish) French German Italian Swiss (German) British Danish Norwegian Spanish Dutch Hebrew Portuguese Latin(America) Czech_DEC... - Page 20 P100 User Manual Brazilian Greek_DEC Canadian (French) Hungarian Polish Slovakian_DEC Swedish Turkish_Q Romanian Russian Turkis_F Japanese(ASCII) Swiss(French) USA(International) Slovenian Croatian Bosnian...
- Page 21 P100 User Manual Macedonian Albanian Serbian(Latin) Serbian(Cyrillic) Czech_QWERTZ Czech_QWERTY Czech(Programmers) Estonian Latvian Latvian_QWERT Lithuania Lithuanian (IBM) Slovakian_QWERTZ Slovakian_QWERTY Hungarian_101_Key Spanish(Variation) Bulgarian(Cyrillic) Bulgarian(Latin)
- Page 22 P100 User Manual Canadian(French_Legacy) Canadian(Multilingual) Italian_142 Polish_214 Polish_Programmers Brazilian_MS Greek_Polytonic Greek_220 Greek_319 Greek_Latin Greek_220_Latin Greek_319_Latin Greek_MS Russia_MS Russian(Typewriter) Thai(Pattachote) Thai(Kedmanee) Irish...
-
Page 23: Usb Virtual Serial Port
P100 User Manual Maltese Icelandic Ukrainian Uzbek(Cyrillic) Kazakh Kyrgyz(Cyrillic) Azeri(Latin) Azeri(Cyrillic) Belarusian Faeroese Gaelic Tatar Mongolian(Cyrillic) USB Virtual Serial Port When the scanner uses a USB communication interface, but the host application uses serial communication to receive data, you can set the scanner to the USB virtual serial port. This function requires that be installed the appropriate driver on the host. -
Page 24: Bluetooth Interface
P100 User Manual Bluetooth Interface In this mode, the scanner outputs data to the host in Bluetooth transmission mode. Bluetooth transmission mode settings Set scanner switch time (Bluetooth mode only) No Shutdown 5 min 10 min 15 min 30 min... -
Page 25: Vid & Pid Table
P100 User Manual VID & PID Table USB uses 2 numbers to identify the device and find the correct device. The first number is VID (Supplier ID), designated by USB Implementers Forum. The second number is PID (Device ID), and each interface type assigns a PID number. -
Page 26: Sensitivity
P100 User Manual When the scanner works in this mode, it can also according to the trigger electrical level to enter the reading state. After the trigger electrical level is canceled or reading times out, it will re-enter the state of monitoring scene change. Before re-entering the monitoring state, the trigger electrical level needs to be canceled, then it will be switched to the sensing mode. -
Page 27: Command Programming
P100 User Manual Continuous Single Reading Time Limit In continuous mode, it indicates the maximum time of scanner continuously collect and identify barcode before reading successfully. If it times out, it will enter the interval of not collecting and reading according to the setting. -
Page 28: Chapter 4 Illumination And Aiming
P100 User Manual Chapter 4 Illumination and Aiming Aiming There is a projecting device on the scanner that is used to project a special image when reading, which characterizes the center of the scene image taken by the scanner. When the scanner is used for shooting, the image is projected on the reading target, and the scanner aims at the reading target, which makes it easier to read the target. -
Page 29: Chapter 5 Symbologies
P100 User Manual Chapter 5 Symbologies Every symbology (barcode type) has its own unique attributes. This chapter provides programming barcodes for configuring the scanner so that it can identify various symbologies. It is recommended to disable those that are rarely used to increase the efficiency of the scanner. -
Page 30: Ena-13
P100 User Manual ENA-13 Enable/Disable EAN-13 Enable (Default) Disable Enable/Disable 2/5-bit Add-On code The 2/5-digit Add-On code refers to the 2/5-digit digital barcode added after the ordinary barcode. Enable (Default) Disable Auto UPC-E Enable/Disable UPC-E Enable (Default) Disable Transmit check character UPC-E barcode data is fixed to 8 characters, and the eighth character is the check bit, which is used to check the correctness of all 8 characters. -
Page 31: Convert Upc-E To Upc-A
P100 User Manual Enable (Default) Disable Auto Convert UPC-E to UPC-A The chip can convert the decoding results of UPC-E type barcodes to UPC-A type barcodes according to standard algorithms. Convert UPC-E to UPC-A Disable (Default) System character transmit Transmit system character (Default) -
Page 32: Enable/Disable 2/5 Add-On Code
P100 User Manual Not transmit preamble Enable/Disable 2/5 Add-On code The 2/5-digit Add-On code refers to the 2/5-digit digital barcode added after the ordinary barcode. Enable (Default) Disable Auto UPC-A Enable/Disable UPC-A Enable (Default) Disable Transmit check character UPC-A bar code data is fixed to 13 characters, and the 13th character is check bit, which is used to check the correctness of all 13 characters. -
Page 33: Transfer System Character
P100 User Manual Enable (Default) Disable Auto Transfer system character Transmit system character (Default) Transmit system character and country cod Disable (“0” only for USA) Code 39 Enable/Disable Code 39 Enable (Default) Disable Check character verification and transmit Code 39 barcode data does not contain a check character. If there is a check character, it is the last character of the data. -
Page 34: Enable/Disable Code 39 Full Ascii
P100 User Manual Not check (Default) Check Transmit check character Transmit check character Disable (Default) Enable/Disable code 39 Full ASCII Code 39 data can include all ASCII characters, but the reader can only read part of ASCII characters by default. Through setting, the function of reading full ASCII characters can be turned on. -
Page 35: Code 11
P100 User Manual Code 11 Enable/Disable code 11 Enable Disable (Default) Check Setting Code 11 barcode data does not contain the check digit. If there is a check digit, it can be the last one or two characters of the data. The check bit is the value calculated from all data to check whether the data is correct. -
Page 36: Code 128
P100 User Manual Code 128 <FNC4> Disable (Default) Enable Codabar Enable/Disable Codabar Enable (Default) Disable Start and stop characters Enable CLSI Disable CLSI (Default) Enable this parameter to remove the start and stop characters, and insert spaces after the first, fifth and tenth characters of the 14-character Codabar barcode. -
Page 37: Check Bit Algorithm
P100 User Manual data is correct. Therefore, if it is set to "Not check", the reader will normally transmit all barcode data. 1-bit check 2-bit check Check bit algorithm 1 MSI MOD10/MOD10 (Default) 2 MSI MOD10/MOD11 Transmit check character Transmit check character... -
Page 38: Convert I 2 Of 5 To Ean-13
P100 User Manual Not check (Default) USS check OPCC check Transmit check character: Transmit check character Disable (Default) Convert I 2 of 5 to EAN-13 Convert I 2 of 5 to EAN-13 Disable (Default) Matrix 2 of 5 Enable/Disable Matrix 2 of 5... -
Page 39: Industrial 2 Of 5
P100 User Manual Transmit check character Disable (Default) Industrial 2 of 5 Enable/Disable Industrial 2 of 5 Enable Disable (Default) Standard 25 Enable/Disable Standard 25 Enable Disable (Default) ISSN Enable Disable (Default) ISBN Enable Disable (Default) -
Page 40: Data Bit Setting
P100 User Manual Data bit setting Use 13 bits (Default) Use 10 bits ISBT 128 Enable/Disable ISBT 128 Enable (Default) Disable GS1 128 Enable/Disable GS1 128 Enable (Default) Disable Gs1-128 emulation mode for UCC/EAN composite code Disable (Default) Enable GS1 DataBar... -
Page 41: Convert Gs1 Databar To Upc/Ena
P100 User Manual Convert GS1 DataBar to UPC/ENA Convert DataBar to UPC/ENA Disable (Default) GS1 DataBar Limited Enable/Disable GS1 DataBar Limited Enable Disable (Default) GS1 DataBar Expanded Enable/Disable GS1 DataBar Expanded Enable Disable (Default) 1D Barcode Inverse Disable(Default) Enable Automatic detection... - Page 42 P100 User Manual...
-
Page 43: 2D Barcode Setting
P100 User Manual 2D Barcode Setting PDF417 Enable/Disable PDF417 Enable (Default) Disable Data Matrix Anti-color Auto (Default) Disable Only read Anti-color color Enable/Disable Data Matrix Enable (Default) Disable Mirror Images Auto (Default) Enable Disable... -
Page 44: Inverse
P100 User Manual Inverse Disable (Default) Enable Auto Enable/Disable QR Enable (Default) Disable Enable/Disable Micro QR code (this setting is only valid when enable QR) Enable (Default) Disable Inverse Disable (Default) Enable Auto... -
Page 45: Anti-Color
P100 User Manual Anti-color Auto (Default) Only read Anti-color color Disable Aztec Inverse Disable (Default) Enable Auto Anti-color Auto (Default) Only read Anti-color color Disable... -
Page 46: Han Xin
P100 User Manual Han Xin Anti-color Auto (Default) Only read Anti-color color Disable Inverse Disable (Default) Enable Auto Chapter 7 Troubleshooting Q: There are some barcodes cannot be scanned. A: Check the barcode type, open the barcode function; if it is verified, try to turn off. -
Page 47: Chapter 8 Scanner Settings
P100 User Manual cable, and the host accepts with serial port tool. Both modes need to ensure that the serial port attribute of the serial port tool on the host is consistent with the serial port attribute of the device. -
Page 48: Version Number--Hyrs_Re
P100 User Manual 5 BYTES 1 BYTE 1BYTE~250BYTE Set barcode Code 128 type Barcode Prefix Fixed prefix: +N+S- Operand The operand is the following command data Data Indicates parameter data carried by this command Version number——HYRS_RE General settings (default HID single scan mode) Host mode (CDC, HID, BT, COM)... -
Page 49: Decoding Timeout(0.1S~9S
P100 User Manual Decoding timeout(0.1s~9s) Operand: 0x44 0.1s 0.2s ..9.7s 9.8s 9.9s Data 0x01 0x02 ..0x61 0x62 0x63(Default) When setting barcode reading, if the barcode is not read, it will stop reading the code time. Data prefix Operand: 0x52... -
Page 50: Aiming Device (On/Off)
P100 User Manual Aiming device (ON/OFF) Operand: 0x46 Data 0x01(Default) 0x00 Illumination light (ON/OFF) Operand: 0x47 Level 1 Level 2 ..Level 9 Level 10 Data 0x00 0x01 0x02 ..0x09 0x0A Data: When the fill light is 0, it is closed. -
Page 51: Multi Code Sensitivity
P100 User Manual Set whether to start scanning multiple barcode modes at the same time and set the number of scanning barcodes simultaneously. Multi code sensitivity Operand: 0x4C Level 1 ..Data 0x00 0x01 0x03 ..0x09 0x0A Note: the higher the level, the stronger the ability to decode the double code, but the corresponding time to decode the single code will be longer. -
Page 52: Sensitivity
P100 User Manual Sensitivity Operand: 0x51 Normal Fast Ultra-Fast Data 0x00(Default) 0x01 0x02 Note: Ultra-fast mode in auto-sensing mode, the sensing distance of the scanning paper barcode will be reduced significantly. Normal (Default) Fast Ultra-fast Center aiming decode setting Operand: 0x53... -
Page 53: Virtual Serial Port Mode Command Settings
P100 User Manual Virtual serial port mode command settings Start scanning Operand: 0xE4 Data: 0x00 This feature only supports serial mode. Stop scanning Operand: 0xE5 Data: 0x00 This feature only supports serial mode. Setting barcode convert mode Operand: 0xEE Data:... -
Page 54: Barcode Function Settings
P100 User Manual 0: OFF Barcode function settings ITF cut the first few bits of data Operand: 0x55 Enable Disable Data 0x01 (Default) 0x02~0x32 Note: 0x02 indicates cutting the first data; 0x32 indicates cutting 49 data from the front. Disable... -
Page 55: Skip The Number Of Characters Before Barcode Data
P100 User Manual Reduce multiple consecutive spaces to one space Skip the number of characters before barcode data Operand: 0x59 data: *0: Do not skip barcode data 1-31: skip the number of characters before barcode data *Not skip barcode data... -
Page 56: Insert Characters Into Barcode Data
P100 User Manual Convert barcode data into lower case Insert characters into barcode data (up to 8 characters) Operand: 0x5C Data: Data0 ~ data1: the position of the inserted data in the barcode data Data2: data inserted in corresponding position (range: 0x01 ~ 0x7F) Note:... -
Page 57: Appendix Ⅰ Barcode Enabling Settings
P100 User Manual Add suffix LF+CR Add suffix TAB Appendix Ⅰ Barcode Enabling Settings Operand: 0x40 Data: 2BYTE data Set the barcode enabling parameter, DATA 0 is the barcode parameter, DATA 1 is the barcode parameter variable. The following is the parameter default value. 0 is OFF, 1 is ON... - Page 58 P100 User Manual Codabar 0x14 Enable 0x15 Disable US Postnet 0x16 Enable US Planet 0x17 Enable UK Postal 0x18 Enable Japan Postal 0x19 Enable Australia Post 0x1A Enable Netherlands KIX Code 0x1B Enable USPS 4CB 0x1C Disable UPU FICS Postal...
-
Page 59: Appendix Ⅱ Data Code Prefix And Suffix
P100 User Manual UCC Coupon Extended Code 0x2F Disable ISBT Concatenation 0x30 Enable Convert Code 39 to Code 0x31 Enable Convert I 2 of 5 to EAN 13 0x32 Disable Convert GS1 DataBar to Disable UPC/EAN 0x33 Disable Code 128 Emulation 0x34 Appendix Ⅱ... - Page 60 P100 User Manual Enable suffix 1 Clear suffix 1 Enable suffix 2 Clear suffix 2 Clear all suffix data...
- Page 61 P100 User Manual...
- Page 62 P100 User Manual...
- Page 63 P100 User Manual...
- Page 64 P100 User Manual...
- Page 65 P100 User Manual...
-
Page 66: Appendix Ⅲ Ascii Code Table
P100 User Manual Appendix Ⅲ ASCII Code Table Hexadecimal Decimal Character NUL (Null char.)... - Page 67 P100 User Manual SOH (Start of Header) STX (Start of Text) ETX (End of Text) EOT (End of Transmission) ENQ (Enquiry) ACK (Acknowledgment) BEL (Bell) BS (Backspace) HT (Horizontal Tab) LF (Line Feed) VT (Vertical Tab) FF (Form Feed) CR (Carriage Return)...
- Page 68 P100 User Manual ! (Exclamation Mark) " (Double Quote) # (Number Sign) $ (Dollar Sign) % (Percent) & (Ampersand) ` (Single Quote) ( (Right / Closing Parenthesis) ) (Right / Closing Parenthesis) * (Asterisk) + (Plus) , (Comma) - (Minus / Dash)...
- Page 69 P100 User Manual [ (Left / Opening Bracket) \ (Back Slash) ] (Right / Closing Bracket) ^ (Caret / Circumflex) _ (Underscore) ' (Grave Accent)...
- Page 70 P100 User Manual { (Left/ Opening Brace) | (Vertical Bar) } (Right/Closing Brace) ~ (Tilde) DEL (Delete)...
Need help?
Do you have a question about the P100 and is the answer not in the manual?
Questions and answers