Table of Contents
Advertisement
Quick Links
Advertisement
Table of Contents

Summary of Contents for Nextar N10W-402
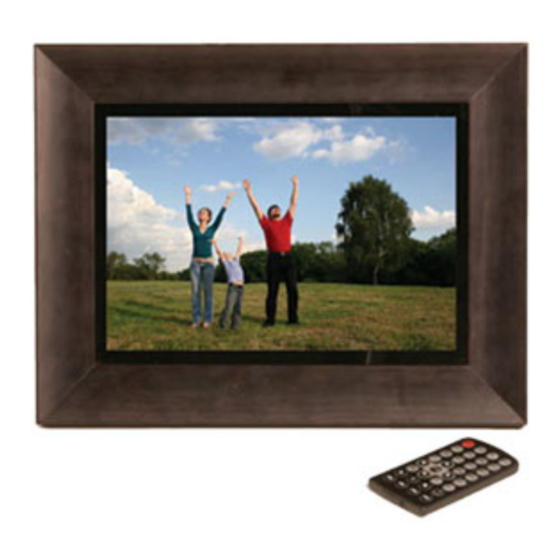
- Page 1 N10W-402 10.4 Inch Digital Photo Frame...
- Page 2 To reduce the risk of fire or electric shock, do not expose this device to rain or moisture To prevent overheating, do not block the vents on the back of the digital photo frame Keep your Digital Photo Frame out of direct sunlight...
-
Page 3: Table Of Contents
Overview ... 3 Features ... 4 Getting Started ... 4 Connecting the frame to the Power Supply Connecting the frame to a computer Remote Control…………………………………………………… 7 Menu Screen ……………………………………………………… 8 Photo Music Combo Movie Text Edit Setup Table of Contents... -
Page 4: Overview
The Digital Photo Frame supports SD/MMC/MS/CF memory cards as well as most of the popular file formats The Digital Photo Frame is a digital photo album that lets you display hundreds of pictures anywhere in your home or office You can play Music in MP3 format using the Digital Photo Frame... -
Page 5: Features
The frame allows users to delete, rotate and/or pan pictures, play music (MP3 format), play movie clips, create slide shows, and move pictures between the memory cards. Getting Started Package Contents The box should include: • Digital photo frame • AC Power Adapter • USB Extended Cable •... -
Page 6: Connecting The Frame To The Power Supply
Connecting Your Frame o Plug one end of the AC Adapter into the digital photo frame and the other end into a standard 110-240 volt 50-60 Hz AC electrical outlet. o Insert a memory card into the appropriate card slot. - Page 7 Connecting to USB flash drive The frame has a USB port to connect to other devices such as a USB flash drive, USB card reader, or a camera.
- Page 9 Main Menu The Main Menu contains icons for the major functions. Use the navigation buttons on the remote control to highlight the desired function. Press Enter to select. A second screen is presented for media control. A third screen may be presented to view and select the media content.
-
Page 10: Menu Screen
Function Description Photo Play photos in slideshow Music Play MP3 audio Combo Play slideshow with audio Movie Play movies Text Play text data on the display Edit Copy/Delete Setup Set System Menu Menu Screen Navigation Use the arrows to navigate to the desired function. The selected function is highlighted and the characters of the function changes color. -
Page 11: Photo
Photo This function is used to play a slideshow. Select Photo from the Main Menu and click Enter. This will take you to the screen where you can choose your media. Only memory cards that are inserted in the frame can be selected. -
Page 12: Music
Music and press Enter. Select the media from the screen that appears. Press Enter to access the media. The next screen displays the names of the MP3 files available in the selected media. Press Enter to Play. The MP3 file will begin to play. -
Page 13: Combo
Combo This function is used to play an audio slideshow. There must be an MP3 file on the media with the images. In this mode MP3 audio will be played in the background while a slideshow is playing. Operation steps: 1. -
Page 14: Movie
Movie This function is used to play a movie clip. and press Enter. Then, select the media. The next screen shows the name of the clips to Play. The clip will begin to play. Press Pause to pause the end movie and return to the Main Menu. On Screen Controls While Playing a Movie ♦... -
Page 15: Text
Text This function is used to display text files. Use the arrows on the remote control to scroll up and down. -
Page 16: Edit
Edit The Edit menu is used to copy and delete files. The Copy/Delete function is used to copy or delete files from you to copy the files on the external memory to be copied to another memory the same way. Operation steps: 1. -
Page 17: Setup
Setup The Setup menu allows you to make the following types of adjustments to the way the frame functions: Language Set This menu allows you to select the language that is displayed on the menu, highlight the language you want, then press Enter again. Press the left arrow to exit. Picture Set Press Enter to access the settings. -
Page 18: Startup Set
StartUp Set The StartUp Set menu determines which screen appears when the unit is first turned on. Press Enter to access the menu, then use the up or down arrow buttons to highlight your choice. Press Enter to move the asterisk, and then press the left arrow button to exit the menu. - Page 19 Nextar may find it necessary to modify, amend or otherwise change or update this manual. We may reserve the right to do this at any time, without any prior notice. All specifications and features are subject to change without notice.


Need help?
Do you have a question about the N10W-402 and is the answer not in the manual?
Questions and answers