Advertisement
Quick Links
Advertisement

Subscribe to Our Youtube Channel
Related Manuals for MSA 4X4 DROP SLIDE

Summary of Contents for MSA 4X4 DROP SLIDE
- Page 1 LIDE NSTALLATION NSTRUCTIONS When only the best will do...
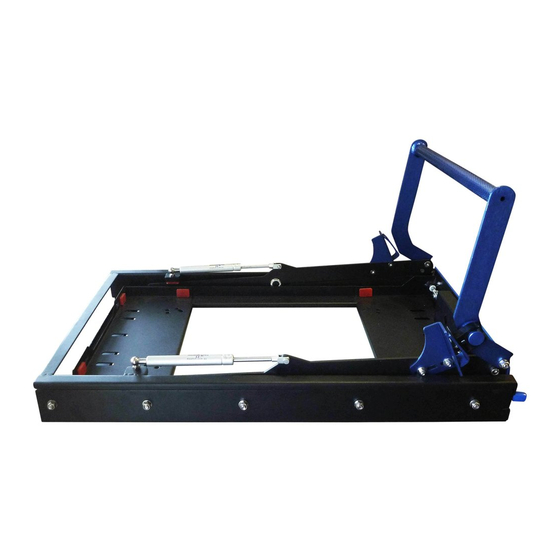
- Page 2 LIDE Congratulations on your purchase of a quality MSA 4x4 Dropslide. Please follow these instructions to ensure that your new Dropslide is installed correctly. WARNING • Do not use your slide until all installation instructions have been completed and full operation is understood •...
- Page 3 LIDE 2. Place one side of handle with 8mm bolt in mount hole on end of lever arm and then, pushing lever arms together, place other side over 8mm bolt. ** PLEASE NOTE: you will notice that the handle arms have a curve. Install the handle so that when the handle is lowered, the curve goes down as in (fig 7.) Install steel washer and 8mm Nyloc nut and holding the 8mm bolt with the Allen key on one side, tighten the Nyloc nut (fig 6.).
- Page 4 LIDE DROPSLIDE INSTALLATION 1. Place slide in position on top of shelving unit no more than 110mm back from the front edge of mounting surface. This is a basic measurement guide and will depend on your particular application. 2. Unlock slide by key lock on front face of fridge tray and press the Blue Lock Release Button and slide open approx 150mm. 3.
- Page 5 LIDE FRIDGE INSTALLATION – DO NOT USE TURN BUCKLES TO TIE DOWN FRIDGES. 25mm TIE DOWN STRAPS ARE RECOMMENDED (supplied) 1. Slide platform out and push down - this will take some downward pressure as gas struts are designed for weight to be loaded FOR ENGEL FRIDGES 1.
- Page 6 LIDE FOR WAECO FRIDGES: 1. Holes have been provided in the platform to mount WAECO universal fixing kit. 25mm tie down straps are still required. There are 4 x 6mm counter sunk head bolts / Nyloc Nuts and washers supplied – please install these bolts in the top surface of the tray with the Nyloc Nut and washer on the underside.
- Page 7 HANDLE BRACKET INSTALLATION: Included in the kit is a left and right handle bracket (HB1), that mount to the Drop Slide arms just behind the mount point for the Drop Slide handle. As in (fig 10.) below this is the right hand HB1 and is held in place by two bolts with spring washers, steel washers and nyloc nuts.
- Page 8 LIDE FITTING TIE DOWN STRAPS: DO NOT USE TURN BUCKLES TO TIE DOWN FRIDGES. 25mm CAM BUCKLE TIE DOWN STRAPS ARE RECOMMENDED Front Straps are fitted by either using the loops in the tie down bracket fitted as illustrated below or alternately using the holes in the front face of the Dropslide fridge tray, (Depending on fridge or device mounted into the Dropslide).
-
Page 9: Operation
LIDE POWER CORDS Ensure power cords are tied out of way of all mechanisms. Cable ties are supplied in the Dropslide kit. Run the power cables up the back of the fridge and cable tie to the fridge handles and then, on fridges with rear power points, loop over to the mount point of the gas strut allowing enough slack for when the fridge tray drops. - Page 10 LIDE 4. Using your thumb, press this button down (fig 13) and Place slight downward pressure on handle while pulling slide cradle out towards yourself (DO NOT RELEASE DOWNWARD PRESSURE). Once moving, you can release the Blue Lock Release button. fig 13.
- Page 11 LIDE 10. Ensure when raising the fridge tray that the LOCK IS IN THE UNLOCKED POSITION (If lock is in horizontal closed position when platform is pushed back, damage to lock WILL occur to the locking tongue. When slide stops and locking runner has engaged correctly, twist key lock clockwise to lock position (lock with key if needed).
-
Page 12: Maintenance
DISCLAIMER MSA 4x4 Accessories Pty Ltd is not liable to the buyer in contract or in tort arising out of, or in connection with, or relating to; (a) the performance of this product or any breach of these conditions: or (b) any fact, matter of thing relating to this product; or any error (whether negligent or in breach of contract or not) in information supplied to the buyer or a user before or after the date of the purchaser’s or user’s use of this product. - Page 13 LIDE When only the best will do...
- Page 14 LIDE When only the best will do...
- Page 15 LIDE MSA 4x4 Accessories Pty Ltd 3/24 Kohl Street Upper Coomera Gold Coast, QLD 4209 Ph: 07 5665 7555 Fax: 07 5665 7511 Web: msa4x4.com.au When only the best will do...
- Page 16 LIDE MSA 4x4 Accessories Pty Ltd 3/24 Kohl Street Upper Coomera Gold Coast, QLD 4209 Ph: 07 5665 7555 Fax: 07 5665 7511 Web: msa4x4.com.au When only the best will do...
Need help?
Do you have a question about the DROP SLIDE and is the answer not in the manual?
Questions and answers