Table of Contents
Advertisement
Available languages
Available languages
Quick Links
Advertisement
Table of Contents

Related Manuals for PcCom Discovery GO2480


Summary of Contents for PcCom Discovery GO2480
- Page 3 Interface, and the HDMI Logo are trademarks or registered trademark of HDMI Licensing Administrator, Inc. in the United States and other countries.
- Page 4 We apologize if your product is not working as expected. In this case, PCCOM will arrange for repair, replacement, refund or provide spare parts under the terms of the warranty. Warranty period starts on the day of purchase of the product from an authorized dealer or vie online and will ends after 24 MONTHS.
- Page 5 GARANTÍA Estimado cliente: tad para instalar o utilizar el producto, le recomendamos que consulte primero las instrucciones de funcionamiento antes de ponerse en contacto con el servicio técnico. Le pedimos disculpas si su producto es defectuoso o tiene algún problema de fabricación. En ese caso, por favor, póngase en contacto con PC Componentes para tramitar la reparación, sustitución o reembolso según las condiciones de la garantía.
-
Page 6: Table Of Contents
Contents Product Description..................... Product Overview....................Installation....................Wall Mounting...................... Basic Operation....................Monitor Ports...................... OSD Menu......................OSD Menu Function.................... - Page 7 ÍNDICE Descripción del producto..................USO BÁSICO...................... Instalación......................Instalación en pared.................... Uso básico......................Puertos del monitor....................Menú OSD (dispuesto en pantalla)..............Funciones del menú en pantalla (OSD)...............
- Page 8 IMPORTANT SAFETY PRECAUTIONS Operation Keep the monitor out of direct sunlight and away from stoves or any other heat source. Keep the monitor out of water source. Remove any object that could fall into ventilation holes or prevent proper cooling of the monitor's electronics. Do not block the ventilation holes.
-
Page 9: Product Description
1. Product Description Packing list Please check the following items in the packing case before installation: lf any of above items is missing, please contact with the dealer. Monitor×1 Stand stem×1 Stand base×1 Harness seat×1 Foot pad×1 Screws×3 Wall mount screws×4 DP cable×1 Power Adaptor×1 User Manual×1... -
Page 10: Installation
3. Installation 3.1 Installation of Base Open the package, take out the stand and base, insert 2 screws into the base to lock the stand and attach the rubber feet. Screw Rubber foot Take the monitor out from the package, keep the monitor at and face up, clip the stand into the monitor, push them quickly, and release the button to complete stand assembly. -
Page 11: Wall Mounting
4. Wall Mounting The iron stud found from the accessory bag can be locked in the M4 threaded hole of the screwdriver. Wall stud lock position Wall mount screws × 4 Do not pinch the screen directly Wall Wall with your hands during the process of hanging the product to prevent the screen from being broken. -
Page 12: Monitor Ports
6. Monitor Ports HDMI2 HDMI1 AUDIO Power Adapter HDMI Interface Please connect the power Use the HDMI cable to connect the adapter to the power HDMI IN interface of the product to adapter interface of a PC, the HDMI OUT interface of a PC. and plug the other end of the power cable into the power socket. -
Page 13: Osd Menu
7. OSD Menu The screen display (OSD) menu can be used to adjust settings of the monitor and is shown on the screen after the monitor is powered on and the button is pressed. ll automatically adjust to the optimal values depending on the connected device (PC / console). -
Page 14: Osd Menu Function
7.1 OSD Menu Functions Main Menu Submenu Choices Description Standard Mode Off / On Turn the Standard Mode function on/off RTS/RPG Mode Off / On Turn the RTS/RPG Mode function on/off FPS Arena Mode Off / On Turn the FPS Arena Mode function on/off MOBA Arena Mode Off / On Turn the MOBA Arena Mode function on/off... - Page 15 Main Menu Submenu Choices Description , English, 简体中文 ىبرع 한국어, Portugues Brazil, Deutsch, Nederland, Suomi, Français, , Indonesia, Ελληνικά Set OSD language Language Italiano, 日本語, Malaysia, Polskie, Português, Pусский Español,ไทย, Українська Ti ng Vi t , Türkçe 繁体中文 Set how long the OSD remains open OSD Time Out 5-100 a er non-use...
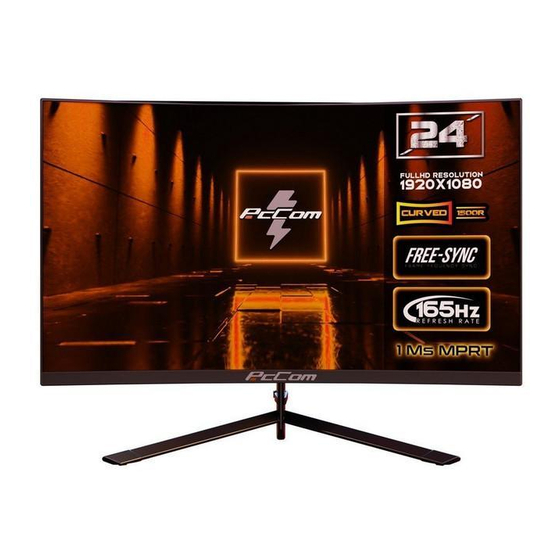
- Page 16 Model PCC-24165VA-CV Screen Size 23.6" Aspect Rstio 16:9 Backlight ELED Brightness 250nits(typ) , 200 nits (min) Panel DP1.2: 1920 x 1080p @ 165Hz Resolution HDMI2.0: 1920 x 1080p @ 120Hz Refresh Rate 165Hz Response Time 1Ms MPRT Viewing Angle 178°(H)/178°(V) Contrast Ratio 3000:1 Colours...
- Page 17 Audio Speakers Audio Out Accessories DisplayPort Cable Power Adaptor HDMI Cable DP Cable Additional Functions Low Blue Light Physical Dimensions Dimensions (w/ Stand) 537.9 * 410.9 * 161.0 mm Dimensions (w/o Stand) 537.9 * 320.3 * 72.1 mm Net Weight 3.25 Kg Gross Weight 4.64 Kg...
- Page 18 CONSEJOS DE SEGURIDAD Mantenga el monitor alejado de la luz solar directa y de estufas o cualquier otra fuente de calor Mantenga el monitor alejado de fuentes de agua componentes electrónicos del monitor No toque ni deje caer el monitor durante el funcionamiento o el transporte. CONSEJOS DE MANTENIMIENTO PRECAUCIÓN No coloque el monitor en la lluvia, ni en un ambiente húmedo, ni abra la carcasa del monitor para evitar cualquier riesgo...
-
Page 19: Descripción Del Producto
1. Descripción del producto Contenido de la caja Revise que el contenido esté completo antes de usarlo, en caso de faltar algún componente por favor contacte con su vendedor. Monitor×1 Brazo del Base del soporte×1 Anclaje para Pie de goma×1 soporte×1 cableado×1 Tornillos No.1 x3... -
Page 20: Instalación
3. Instalación 3.1 Instalación del soporte Abre la caja, saca el producto conjunto con el embalaje y colóc mesa. Inserta la base al brazo y atornillalos usando 2 tornillos No.1. Tornillos Pie de goma Con cuidado, Colóquelo sobre un escritorio o una mesa y proteja la pantalla. Coloque el conjunto de la base ensamblada en el hueco correspondiente de la carcasa trasera y asegurarlo hasta que se escuche el clic del sistema de seguridad. -
Page 21: Instalación En Pared
4. Instalación en pared Abre la caja, saca el producto conjunto con el embalaje y colócalo en una una mesa. Anclaje sistema VESA Tornillos × 4 pared Instala el monitor en la pared, junto pared con el soporte VESA o el soporte instalado para su sujeción a la pared (no incluido) según las instrucciones del fabricante. -
Page 22: Puertos Del Monitor
6. Puertos del monitor HDMI2 HDMI1 AUDIO Puerto de alimentación Interfaz HDMI Conecta el cable de Conecta un cable HDMI a alimentación al monitor y cualquier dispositivo compatible este a la corriente. con salida HDMI. Salida Audio Interfaz DisplayPort (DP) Conecta un cable Conecta cualquier dispositivo de DisplayPort a cualquier... -
Page 23: Menú Osd (Dispuesto En Pantalla)
7. Menú OSD (dispuesto en pantalla) El menú en pantalla (OSD) se usa para ajustar las preferencias inferior derecha una vez lo activemos. stará de manera automática a los valores óptimos en función del dispositivo conectado (PC/consola). Presiona ( ) cualquier de los botones para activar el menú.. Presiona para acceder al inicio del menú. -
Page 24: Funciones Del Menú En Pantalla (Osd)
7.1 Funciones del menú en pantalla (OSD) Menú principal Sub-menú Opciones Descripcion Modo Estándar Cerrar/Activado Modo RTS/RPG Cerrar/Activado Activa el modo de juego prestablecido seleccionado Modo Estadio FPS Cerrar/Activado Modo Estadio MOBA Cerrar/Activado Activa/desactiva la función de sincronización Adaptyve-Sync Cerrar/Activado vertical Bal. - Page 25 Menú principal Sub-menú Opciones Descripcion , English, 简体中文 ىبرع 한국어, Idioma Selecciona el idioma del menú Portugues Brazil, Deutsch, Nederland, Suomi, Français, , Indonesia, Ελληνικά Italiano, 日本語, Malaysia, Polskie, Português, Pусский Español,ไทย, Українська Ti ng Vi t , Türkçe 繁体中文 Ajusta el tiempo de espera para salir Tpo espera OSD 5-100...
- Page 26 Modelo PCC-24165VA-CV Diagonal de la pantalla 23,6 pulgadas Ratio de aspecto 16:9 Retroiluminación Edge-LED Brillo 250nits(typ) , 200 nits (min) Panel DP1.2: 1920 x 1080p @ 165Hz Resolución HDMI2.0: 1920 x 1080p @ 120Hz Tasa de refresco 165Hz Tiempo de respuesta 1Ms MPRT Angulo de visión 178°(H)/178°(V)
- Page 27 Audio Altavoces Salida de audio Accesorios Cable de alimentación Adaptador de corriente Cable HDMI Cable DP Funciones adicionales Filtro de luz azul Dimensiones Dimensions (con Stand) 537.9 * 410.9 * 161.0 mm Dimensions (sin Stand) 537.9 * 320.3 * 72.1 mm Peso neto 3.25 Kg Peso bruto...
- Page 28 According to Waste of Electrical and Electronic Equipment (WEEE) directive, WEEE should be separately collected and treated. lf at any time in future you need to dispose of this product please do NOT dispose of this product with household waste . Please send this product to WEEE collecting points where available. Según la Directiva sobre residuos de aparatos eléctricos y electrónicos (WEEE) por sus siglas en inglés, los residuos de aparatos eléctricos y electrónicos se deben recoger y tratar por separado.
Need help?
Do you have a question about the Discovery GO2480 and is the answer not in the manual?
Questions and answers