Table of Contents
Advertisement
Quick Links
INSTALLATION OPERATION AND SERVICE
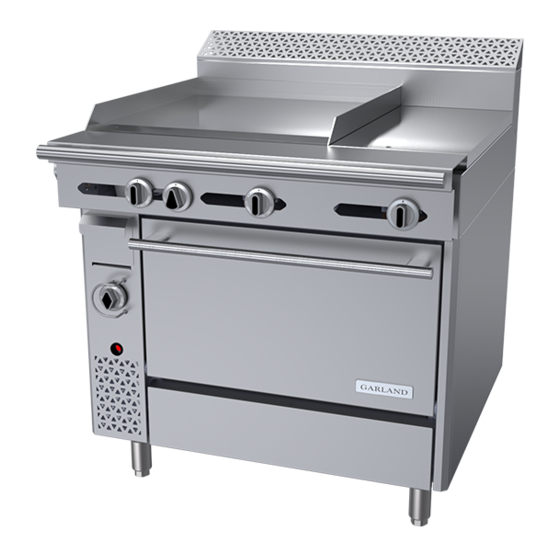
CUISINE C SERIES COMMERCIAL RANGES,
ADD-A-UNITS, MODULAR RANGES, AND CHAR BROILERS
FOR YOUR SAFETY:
DO NOT STORE OR USE GASOLINE
OR OTHER FLAMMABLE VAPORS OR
LIQUIDS IN THE VICINITY OF
THIS OR ANY OTHER
WARNING:
IMPROPER INSTALLATION, ADJUSTMENT,
ALTERATION, SERVICE OR MAINTENANCE
CAN CAUSE PROPERTY DAMAGE, INJURY,
OR DEATH. READ THE INSTALLATION,
OPERATING AND MAINTENANCE
INSTRUCTIONS THOROUGHLY
BEFORE INSTALLING OR
SERVICING THIS EQUIPMENT
Users are cautioned that maintenance and repairs must be performed by a Garland authorized service agent
using genuine Garland replacement parts. Garland will have no obligation with respect to any product that has been
improperly installed, adjusted, operated or not maintained in accordance with national and local codes or installation
instructions provided with the product, or any product that has its serial number defaced, obliterated or removed,
or which has been modified or repaired using unauthorized parts or by unauthorized service agents.
For a list of authorized service agents, please refer to the Garland web site at http://www.garland-group.com.
The information contained herein, (including design and parts specifications), may be superseded and is subject
to change without notice.
Original Document
Document # G_GHD_OM_CUISINE_4605671 9/20
MANUAL
APPLIANCE
Bring Your Passion to the Surface
PLEASE READ ALL SECTIONS OF THIS MANUAL
AND RETAIN FOR FUTURE REFERENCE.
THIS PRODUCT HAS BEEN CERTIFIED AS
COMMERCIAL COOKING EQUIPMENT AND
MUST BE INSTALLED BY PROFESSIONAL
PERSONNEL AS SPECIFIED.
IN THE COMMONWEALTH OF MASSACHUSETTS
THIS PRODUCT MUST BE INSTALLED BY A
LICENSED PLUMBER OR GAS FITTER. APPROVAL
NUMBER: G-1-07-05-28
For Your Safety:
Post in a prominent location, instructions to be
followed in the event the user smells gas. This
information shall be obtained by consulting
your local gas supplier.
Advertisement
Table of Contents

Related Manuals for Welbilt GARLAND CUISINE C Series

Summary of Contents for Welbilt GARLAND CUISINE C Series
- Page 1 Bring Your Passion to the Surface INSTALLATION OPERATION AND SERVICE MANUAL CUISINE C SERIES COMMERCIAL RANGES, ADD-A-UNITS, MODULAR RANGES, AND CHAR BROILERS PLEASE READ ALL SECTIONS OF THIS MANUAL FOR YOUR SAFETY: AND RETAIN FOR FUTURE REFERENCE. DO NOT STORE OR USE GASOLINE OR OTHER FLAMMABLE VAPORS OR THIS PRODUCT HAS BEEN CERTIFIED AS LIQUIDS IN THE VICINITY OF...
-
Page 2: Important Information
IMPORTANT INFORMATION WARNING: This product contains chemicals known to the state of California to cause cancer and/or birth defects or other reproductive harm. Installation and servicing of this product could expose you to airborne particles of glass wool/ceramic fibers. Inhalation of airborne particles of glass wool/ceramic fibers is known to the state of California to cause cancer. -
Page 3: Table Of Contents
TABLE OF CONTENTS IMPORTANT INFORMATION . . . . . . . . . . . . . . . . . . . . . . . . 2 Seasoning . -
Page 4: Specifications
SPECIFICATIONS Table A: Gas Pressures SUPPLY GAS PRESSURE RANGE Type Minimum Maximum Natural 7” W.C.( 17.5 mbar) 14” W.C. (35 mbar) Propane 11” W.C. (27.5 mbar) 14” W.C. (35 mbar) MANIFOLD OPERATING PRESSURE Type Natural Propane Ranges, Broilers 6”W.C. (15 mbar) 10”... - Page 5 SPECIFICATIONS Continued MODELS DESCRIPTION Convection Oven Base C36-1C 36” Griddle C36-1-1C 36” Thermostatic Griddle C36-2C 24” Griddle, (2) Open Burners (12” Top Grate) C36-2-1C 24” Therm. Griddle, (2) Open Burners (12” Top Grate) C36-3-C 24” Griddle, 12” Hot Top C36-3-1C 24”...
- Page 6 SPECIFICATIONS Continued MODELS DESCRIPTION Storage Base (Open Cabinet) Continued C36-10S (2) 18” Front fired Hot Tops C36-11S 18” Hot Top (Left), 18”Front Fired Hot Top (Right) or 18” Front Fired Hot Top (Left), 18” Hot Top (Right) (2) Open Burners, 12” Top Grate (Left, Centre or Right), 12” Hot Top (Left or Centre), 12” Hot Top C36-12S (Right or Centre) C36-13S...
- Page 7 SPECIFICATIONS Continued MODELS DESCRIPTION Char-Broilers on Standard Oven Base C36-ABR Lava Rock W/Adjustable Grates – 36” Wide C36-ARR Cast Iron Radiants W/Adjustable Grates – 36” Wide C36-NRR Cast Iron Radiants W/Non-Adjustable Grates – 36” Wide Char-Broilers on Convection Oven Base C36-ABC Lava Rock W/Adjustable Grates –...
- Page 8 SPECIFICATIONS Continued MODELS DESCRIPTION Additional Griddle Models 48” Wide Units C48-1R 36” Std. Oven Base + 12” Storage Base + 48” Manual Griddle Top C48-1-1R 36” Std. Oven Base + 12” Storage Base + 48” Therm. Griddle Top C48-1C 36” RC Oven Base + 12” Storage Base + 48” Manual Griddle Top C48-1-1C 36”...
- Page 9 SPECIFICATIONS Continued Table C: Input Rating GAS TYPE Model Number Natural (@ 6”W.C.) Propane (@ 10”W.C.) BTU/HR BTU/HR Open Burner for Models: C36-2,-2-1,-6,-6SU,-12,-13,-15(Front) 35,000 33,000 Open Burner for Models: C36-4,-4-1,-7,-14,-17 40,000 38,000 C36-15 Rear hot-top burner 15,000 15,000 C36-10,-11,-17 Front fired hot top burner 12,500 12,500 C36-3,-3-1,-8,-12,-13,-12”...
-
Page 10: Introduction
INTRODUCTION Uncrating Rating Plate 1. Check crate for possible damage sustained during transit. Every cooking unit has a rating plate. Information on this Carefully remove unit from crate and again check for plate includes model and serial numbers. Knowing the damage. -
Page 11: Siting
INSTALLATION Continued 3. Place the appliance in the required position and level by adjusted to overcome an uneven floor. means of the adjustable feet, or shims if the appliance is not equipped with legs. Installation Instructions for Cuisine Stub Backguard 4. -
Page 12: Installation Instructions For Cuisine Back Risers
INSTALLATION Continued Installation Instructions for Single Deck Risers: Cuisine Back Risers. Follow instructions above for double-deck backriser but as there are no shoulder bolts involved in the single deck Double Deck Risers assembly, the installation and removal of the front panel only comprises assembly and disassembly of the four #10 x 1 1/4”... -
Page 13: Installation Instructions For Cuisine Salamander Or Cheese Melter
INSTALLATION Continued Installation Instructions For Cuisine Modular 7. Reattach the front panel by first aligning clearance holes with studs in uprights and then re-installing sheet metal Units on Delfield Refrigeration Bases screws (Item 5) previously removed. Polar Cuisine refrigeration bases from Delfield have a 8. -
Page 14: Gas Supply Notes
INSTALLATION Continued Where it is not practical to do this, an automatic isolation pressure testing of that system at pressures in excess of valve system shall be fitted which can be operated from a 1/2 PSIG (3.45 kPa). readily accessible position near to the exit. The appliance must be isolated from the gas supply piping At locations where the manual isolation valve is fitted or system by closing its individual manual shut-off (not... -
Page 15: Assembly Of Battery
INSTALLATION Continued Ventilation And Air Supply POWER FAILURE NOTE: In the event of a power failure, no attempt should be made to operate this oven. This oven is The range(s) must be installed so that the flow of combustion gas operated but has electrical features, motor and door and ventilation air is unobstructed. -
Page 16: Commissioning
COMMISSIONING Pressure Regulators. 3. Leak test all valves and fittings as described in the procedure above. Correct any leaks as required and 1. Must have a maximum regulation capacity for the total recheck. connected load. 4. Light oven pilot. 2. The pressure regulator(s) installed must be listed by a 5. -
Page 17: Thermostat Bypass Adjustment - Oven
COMMISSIONING Continued Thermostat Bypass Adjustment – Oven Figure 5 Calibration Calibration Lock Screw Plate By-Pass Flame Adjuster Indicator Mark Dial Stop With reference to Figure 5, the Robertshaw FDO snap- throttle thermostat requires a bypass adjustment. To adjust the bypass, follow this procedure. 1. -
Page 18: Pilot Burner Adjustments
COMMISSIONING Continued Pilot Burner Adjustments Solid Hot Plate/Griddle General 1. Light the pilot in accordance with the Operation Instructions. 1. Light the pilot light in accordance with the Operation Instructions in Operation Section. 2. Check the length of the flame. Adjust pilot flame for desired characteristics. -
Page 19: Thermostatically Controlled Griddles
OPERATION Continued Oven (Standard) Shutdown 1. Turn all valves to the off position. If the unit is to be shut down for an extended time, close the in-line gas valve. Oven Thermostatically Controlled Griddles Thermostat 1. Light the pilots at the front right side of the burner via a long match or tape through the opening in the valve Reset panel. -
Page 20: Rc" Convection Ovens
OPERATION Continued “RC” Convection Ovens 4. If the pilot does not stay lit after you release the reset button, wait 5 minutes and repeat Step 3 & 4. For 115 V usage, a cord and plug is provided but connection Start Up to the electrical service must comply with local codes;... -
Page 21: Unit Broilers
OPERATION Continued Unit Broilers 2. If the unit is to be shut down for an extended time, close the in-line gas valve. 1. Light the pilots via a long match or taper through the Fryers opening(s) in the valve panel. 2. -
Page 22: Stainless Steel Exterior And Standard Oven
MAINTENANCE AND CLEANING Continued Oven Interior Establish a regular cleaning schedule. Any spill should be wiped off immediately. (Optional Porcelain Enamel Finish) The oven should be permitted to cool down before cleaning NOTE: Disconnect line cord (if applicable) from power exterior surfaces. -
Page 23: Griddle Cleaning
MAINTENANCE AND CLEANING Continued Note that griddle, open top grates and burners, hot tops Allow the cast iron burner to dry thoroughly before installing and broiler components should be cool to the touch prior into the range. If the burner ports are blocked or plugged to performing any clenaing procedure . -
Page 24: Broiler Cleaning
MAINTENANCE AND CLEANING Continued Broiler Cleaning C36-ARR/C36-ARC Models C36-NRR/C36-NRC Models Daily Daily 1. Remove the broiler grates. Wire brush them clean of any encrusted materials and wash in hot, soapy water. 1. Remove the broiler grates. Wire brush them clean of A common cleaning practice is to turn grates upside- any encrusted materials and wash in hot, soapy water. -
Page 25: Automatic Pilot Valve
MAINTENANCE AND CLEANING Continued Automatic Pilot Valve a. Open Burner 1/2” stable, sharp inner blue cones. b. Hot tops, griddles and broilers 1/4” to 5/16” stable, sharp The automatic pilot valve is a protective device which allows inner blue cones. gas to flow to the oven burner only when the pilot burner is burning. -
Page 26: Problem/Solutions Convection Oven
CONVECTION OVEN PRODUCT APPLICATION Continued • Do not use a deep pan for shallow cakes, cookies, etc. as • When rethermalizing frozen products, preheat the oven circulation across the surface is essential for even cooking 50° higher than cooking temperature to compensate for and browning. -
Page 27: Servicing
SERVICING Regular maintenance and servicing by competent and 7. Repeat the temperature reading and check when the qualified personnel is recommended for the continued safe control cuts down to bypass to make sure the correct and efficient operation of cooking equipment. adjustment has been made. -
Page 28: Standard Oven Burners
SERVICING Continued Broiler 3. Clean the burners in hot soapy water with a stiff scrubbing brush. 1 Remove the top grates. 4. Rinse the burners and shake them well to remove the 2 Remove the briquettes or radiants. water. 3. Lift the rear of the burner and slide it to the rear and off 5 Make sure the ports are free of debris. -
Page 29: Replacement Of Parts
SERVICING Continued 4. For RC convection oven models: Follow procedures 6. Clean the pilot burner by blowing through it or washing specified for burner cleaning, then disconnect pilot it in water. tubing from the base of the pilot burner and remove two CAUTION: Do not use wire to clear the pilot burner . -
Page 30: Power Switch
REPLACEMENT OF PARTS Continued 8. Remove the two thermostat mounting screws and pull 5. Remove the oven bottom assembly plate. (For RC models, the thermostat forward. refer to the previous section under burner cleaning.) 9. Release the thermostat sensor retaining clips from the 6. -
Page 31: Troubleshooting Guide
TROUBLESHOOTING GUIDE Oven (Standard & Convection) PROBLEM POSSIBLE CAUSE SOLUTION Oven too hot or not hot enough Thermostat out of calibration Check Calibration Burner flame too large Incorrect setting pressure or injector Check setting pressure and injector Burner flame soft-yellow tip Insufficient primary air Check aeration shutter setting Flame lifts off burner ports... - Page 32 TROUBLESHOOTING GUIDE Continued Oven (Convection Only) Problem Possible Cause Solution Cook/Cool Down switch set to “Cook” No power to oven Check power supply position Light off Motor working Defective Cook/Cool down Switch Replace Switch Faulty wiring Check condition of wires and all connections Cook/Cool Down switch set to “Cook”...
- Page 33 Notes Document # G_GHD_OM_CUISINE_4605671 9/20 Page 33...
- Page 34 Notes Page 34 Document # G_GHD_OM_CUISINE_4605671 9/20...
- Page 35 THIS PAGE INTENTIONALLY LEFT BLANK Document # G_GHD_OM_CUISINE_4605671 9/20 Page 35...
- Page 36 1177 KAMATO ROAD, MISSISSAUGA, ONTARIO, CANADA L4W 1X4 888-442-7526 WWW.GARLAND-GROUP.COM Welbilt offers fully-integrated kitchen systems and our products are backed by KitchenCare® aftermarket parts and service. Welbilt’s portfolio of award-winning brands includes Cleveland™, Convotherm®, Crem®, Delfield®, fitkitchen®, Frymaster®, Garland®, Kolpak®, Lincoln®, Manitowoc®, Merco®, Merrychef® and Multiplex® .
Need help?
Do you have a question about the GARLAND CUISINE C Series and is the answer not in the manual?
Questions and answers