Advertisement
Available languages
Available languages
Quick Links
Advertisement
Chapters
Troubleshooting

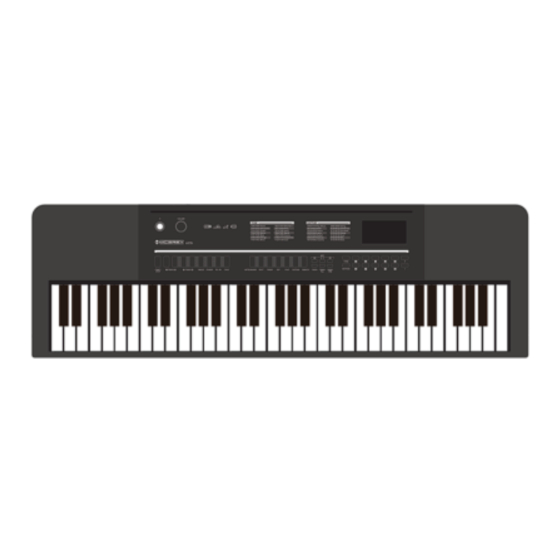
Related Manuals for McGrey 6170


Summary of Contents for McGrey 6170
- Page 1 6170 Keyboard Bedienungsanleitung / User manual Version: 08/2022...
- Page 2 Vielen Dank, dass Sie sich für dieses Produkt entschieden haben. Um sicherzustellen, dass Sie mit diesem Produkt voll und ganz zufrieden sind, lesen Sie sorgfältig und verstehen Sie diese Bedienungsanleitung, bevor Sie dieses Instrument verwenden. Bewahren Sie diese Bedienungsanleitung an einem sicheren Ort auf. Die Bedienungsanleitung muss an alle nachfolgenden Anwender weitergegeben werden.
- Page 3 Vorsicht Bitte beachten Sie folgende grundlegenden Hinweise, um sich oder andere nicht zu gefährden und Schäden an externen Geräten zu vermeiden. Warnhinweise Bauen Sie das Instrument nicht auseinander und nehmen Sie keine Modifikationen daran vor. Dies könnte Verletzungen durch Stromschlag zur Folge haben. Betrauen Sie eine Fachwerkstatt mit eventuell nötigen Service- und Wartungsarbeiten oder wenden Sie sich an Ihren Händler.
-
Page 4: Table Of Contents
Inhaltsverzeichnis Vorbereitung ......................5 Bedienelemente ..................... 5 POWER ......................5 VOLUME ......................5 TONE ....................... 5 RHYTHM ......................5 START / STOP....................6 TEMPO ......................6 TRANS ......................6 CHORD (SINGLE / FINGER) ................6 FILL IN ......................6 SYNC ....................... -
Page 5: Vorbereitung
Vorbereitung Bitte laden Sie das Instrument vor der ersten Nutzung komplett auf. Der Power-Knopf leuchtet im Ladezustand als Ladekontrollanzeige rot. Bei vollständig geladenem Akku erlischt die Ladekontrollanzeige. Bedienelemente POWER Mit dem POWER-Knopf nehmen Sie Ihr Instrument in Betrieb. Bitte schalten Sie Ihr Instrument bei Nichtbenutzung aus, um Energie zu sparen. -
Page 6: Start / Stop
START / STOP. Starten, bzw. stoppen Sie die Rhythmus-Begleitung mit START/STOP TEMPO Durch Drücken der Taste TEMPO + bzw. TEMPO - können Sie das Tempo der Demo- Songs, des Metronoms und der Rhythmusbegleitung ändern. TRANS Durch Drücken der Taste TRANS + bzw. TRANS – können Sie die Stimmung des Instruments in Halbtonschritten nach oben oder unten verändern. -
Page 7: Metronome
METRONOME Durch Drücken der METRONOME-Taste starten, bzw. stoppen Sie das Metronom. Durch mehrmaliges Drücken der METRONOME-Taste ändern Sie die Taktart der Metronom- Funktion. SPLIT Wählen Sie wie unter „TONE“ beschrieben eine Klangfarbe aus. Drücken Sie SPLIT, um die Klaviatur des Instruments in zwei gleichberechtigte Hälften aufzuteilen. Nun können Sie mit den Zifferntasten oder + - die Klangfarbe der rechten Klaviaturhälfte verändern. -
Page 8: Demo
DEMO Drücken Sie eine der DEMO Tasten, um die Demo-Wiedergabe zu starten. Drücken Sie die jeweilige Demo-Taste erneut, um die Demo Wiedergabe zu beenden. Wählen Sie DEMO-ALL, um alle Demos hintereinander abzuspielen. Durch mehrmaliges Drücken der Taste DEMO ONE blättern Sie durch die einzelnen Demo-Songs. OKON Durch Drücken der Taste OKON, gelangen Sie in den Übemodus zu den jeweiligen Demo- Songs. -
Page 9: Rückseitiges Anschlusspanel
Rückseitiges Anschlusspanel ① Netzteilbuchse Verwenden Sie das Instrument ausschließlich mit dem mitgelieferten Netzteil. Verbinden Sie zuerst den Micro-USB des Ladekabels mit der Netzteilbuchse am Instrument. Verbinden Sie dann das Netzteil zur Steckdose. ② Phones Beim Anschluss eines Kopfhörers an dieser 3,5mm Buchse werden die Lautsprecher des Instruments deaktiviert. -
Page 10: Trouble Shooting
Trouble Shooting Sollte eine Funktionsstörung auftreten, prüfen Sie bitte folgende Fehlerquellen. Fehler Ursache Lösung Das Piano lässt sich nicht 1.Der Akku ist vollständig 1.Laden Sie den Akku auf einschalten entleert 2.Stellen Sie die Stromversorgung über das externe Netzteil her Das Piano gibt keinen Ton 1.Die Lautstärke ist auf den 1. -
Page 11: Produktspezifikationen
Produktspezifikationen Keyboard 61 Tasten Sounds Rhythmen Demo Akku 3,7V 1200mAh, Li-Ion Kopfhörer (3,5mm Klinke), Mikrofon Anschlüsse (3,5mm Klinke), USB 2.0 Port für MP3 Wiedergabe, Micro-USB Ladebuchse Abmessungen (BxTxH in mm) 950x300x90 Netzteil DC 5V, min. 1000mA... - Page 12 WEEE-Erklärung (Waste of Electrical and Electronic Equipment) Ihr Produkt wurde unter Verwendung hochwertiger Materialien und Komponenten entwickelt und hergestellt, die recycelbar und wiederverwendbar sind. Dieses Symbol bedeutet, dass elektrische und elektronische Geräte am Ende ihrer Lebensdauer vom Hausmüll getrennt entsorgt werden müssen. Bitte entsorgen Sie dieses Gerät bei Ihrer örtlichen kommunalen Sammelstelle oder im Recycling-Center.
- Page 13 6170 Keyboard User manual Version: 08/2022...
- Page 14 Thank you for choosing this product. To ensure that you are fully satisfied with this product, carefully read and understand this manual before using this instrument. Keep this manual in a safe place. The operating instructions must be passed on to all subsequent users. Observe operating instructions! The WARNING signal word identifies hazards that, without precautions, could result in serious injury.
- Page 15 Caution Please observe the following basic information in order not to endanger yourself or others and to avoid damage to external devices. Warning Do not disassemble the instrument and do not modify it. This could result in electric shock. Entrust a specialist workshop with any necessary service and maintenance or contact your dealer.
- Page 16 Table of Contents Preparation ......................5 Operating elements ....................5 POWER ......................5 VOLUME ......................5 TONE ....................... 5 RHYTHM ......................5 START / STOP....................6 TEMPO ......................6 TRANS ......................6 CHORD (SINGLE / FINGER) ................6 FILL IN ......................6 SYNC .......................
-
Page 17: Preparation
Preparation Please charge the instrument completely before using it for the first time. The power button lights up red as a charge control indicator when the battery is charged. When the battery is fully charged, the charge indicator goes out. Operating elements POWER Press the POWER button to turn on the instrument. -
Page 18: Start / Stop
START / STOP. Press START/STOP to start or stop the rhythm accompaniment. TEMPO Pressing the TEMPO + or TEMPO - button changes the tempo of the demo songs, metronome, and rhythm accompaniment. TRANS Press the TRANS + or TRANS - button to change the tuning of the instrument up or down in semitone steps. -
Page 19: Metronome
METRONOME Press the METRONOME button to start/stop the metronome. Press the METRONOME button repeatedly to change the time signature of the metronome function. SPLIT Select a tone as described under "TONE". Press SPLIT to split the instrument's keyboard into two equal halves. Now you can use the number buttons or + - to change the tone of the right half of the keyboard. -
Page 20: Demo
DEMO Press one of the DEMO buttons to start demo playback. Press the respective DEMO button again to stop demo playback. Select DEMO-ALL to play all demos in sequence. Press the DEMO ONE button repeatedly to scroll through each demo song. OKON Press the OKON button to enter the practice mode for each demo song. -
Page 21: Rear Connection Panel
Rear connection panel ① AC adapter jack Use the instrument only with the supplied AC adapter. First, connect the micro USB of the charging cable to the power supply socket on the instrument. Then connect the power adapter to the power outlet. ②... -
Page 22: Trouble Shooting
Trouble shooting If a malfunction occurs, please check the following sources of error. Error Cause Solution The piano will not turn on 1.The battery is completely 1.Charge the battery discharged 2. Establish the power supply via the external power supply unit. The piano does not emit 1.The volume is set to the 1. -
Page 23: Product Specifications
Product specifications Keyboard 61 keys Sounds Rhythms Demo Battery 3.7V 1200mAh, Li-Ion Headphones (3.5mm jack), Microphone Connections (3.5mm jack), USB 2.0 port for MP3 playback, Micro-USB charging port Dimensions (WxDxH in mm) 950x300x90 Power supply unit DC 5V, min. 1000mA... - Page 24 WEEE Declaration (Waste of Electrical and Electronic Equipment) Your product has been designed and manufactured using high quality materials and components that are recyclable and reusable. This symbol means that electrical and electronic equipment must be disposed of separately from household waste at the end of their service life.
Need help?
Do you have a question about the 6170 and is the answer not in the manual?
Questions and answers