VESDA LaserCOMPACT VLC-500 Installation Manual
Hide thumbs
Also See for LaserCOMPACT VLC-500:
- Product manual (27 pages) ,
- Installation instructions (2 pages)

Subscribe to Our Youtube Channel
Related Manuals for VESDA LaserCOMPACT VLC-500


Summary of Contents for VESDA LaserCOMPACT VLC-500
- Page 1 A LaserCOMPACT ™ INSTALLATION MANUAL VLC-500 (Relays Only) Model VLC-505 (VESDAnet) Model April 2004 Version 3.4...
- Page 2 Security in connection with the VESDA System. ® You expressly agree that you assume the entire risk as to the results and performance of the VESDA ® System resulting from the configuration of the VESDA System. Vision Fire & Security does not warrant, guarantee or make any representations, either expressly or implied, regarding the current or ®...
- Page 3 Disclaimer The manufacturer reserves the right to change designs or specifications without obligation and without further notice. VESDA, LaserTEKNIC, LaserPLUS, LaserSCANNER, LaserCOMPACT, LaserFOCUS, VESDAnet, VESDAlink, ASPIRE, AutoLearn, VSM, VConfig, InfoWORKS, PROACTIV, PRECISION and VSC are trademarks used under licence by the distributor.
-
Page 5: Table Of Contents
Contents Contents ............................1 Introduction .......................... 2 Cabling Requirements ......................3 Power Cables ........................3 Data Cables........................3 Product Specifications ......................4 Product Dimensions ......................5 Battery Backup Calculations ....................7 Installation ..........................8 Check Procedure Before Installation.................. 8 Removal of Front Cover ..................... 9 Removal of Plastic Plugs for Cable Entry................ -
Page 6: Introduction
This manual is intended for installation technicians to be able to install, perform basic power and preliminary device checks for the LaserCOMPACT detector. It does not cover information for commissioning. All VESDA equipment is to be commissioned by personnel who have attended a VESDA accreditation course. -
Page 7: Cabling Requirements
VESDA ® LaserCOMPACT Installation Manual Cabling Requirements The terminals on the termination card in the LaserCOMPACT will accept wire sizes up to 2.5sq mm (12 AWG). 2.1 Power Cables Use the power ratings for the detector to determine the required wire sizes. -
Page 8: Product Specifications
VESDA ® LaserCOMPACT Installation Manual Product Specifications Supply Voltage 18 to 30VDC Power Consumption 5.4W quiescent, 5.9W with alarm Current Consumption 225mA at 24VDC quiescent, 245mA with alarm Fuse Rating 1.6A Dimensions (WHD) 225mm x 225mm x 85mm (8 7/8in x 8 7/8in x 3 3/8in) Weight 1.9kg (4.2lbs) -
Page 9: Product Dimensions
VESDA ® LaserCOMPACT Installation Manual Product Dimensions (8.07) Mounting Bracket (8.86) 112.5 (4.43) (3.74) 112.5 (4.43) (8.86) Figure 1 Dimensions in mm (inches) of LaserCOMPACT with mounting Bracket (Rear View) E=Cable Entry Point on Rear of Enclosure Version 3.4... - Page 10 VESDA ® LaserCOMPACT Installation Manual 70.5 Air Inlet Port (2.78) 26 (1.02) Cable Entry (8.86) (3.35) 31 (1.22) 45 (1.77) (8.86) (1.10) Right Hand Side View Air Exhaust Port 60 (2.36) Bottom View (1.30) 17.8 E= Cable Entry Point (0.68) Figure 2 Dimensions in mm (inches) for the LaserCOMPACT Version 3.3...
-
Page 11: Battery Backup Calculations
VESDA ® LaserCOMPACT Installation Manual Battery Backup Calculations The nominal battery voltage is 24 VDC. Use Table 1 to calculate and to determine the battery backup requirements for your fire detection system. NORMAL LOAD @ 24 V DC FULL ALARM LOAD @ 24 VDC... -
Page 12: Installation
VESDA ® LaserCOMPACT Installation Manual Installation 6.1 Check Procedure Before Installation (a) Do not install your LaserCOMPACT if there are any signs of shipping damage to the product. Inform your distributor if there is any damage. (b) Check the model of the LaserCOMPACT is correct as per the design specifications for the site. -
Page 13: Removal Of
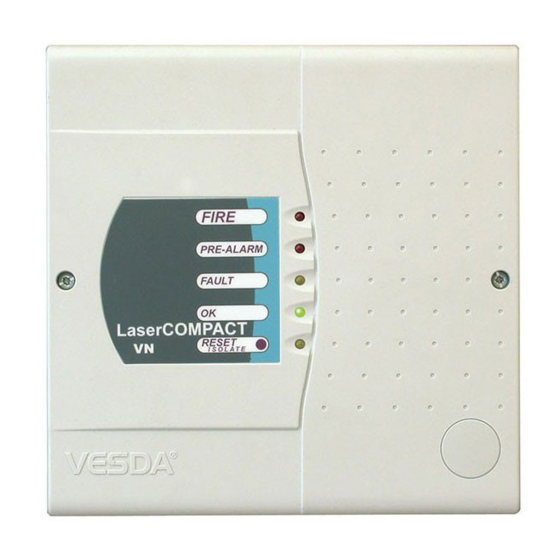
VESDA ® LaserCOMPACT Installation Manual 6.2 Removal of Front Cover (a) Unscrew the two Philips head screws located on the left and right hand sides of the front cover. (b) Remove the cover. The front cover is held to the main enclosure with a plastic tie. There is a cable loom labelled LED CARD that connects the termination card in the enclosure to the LED card located behind the front cover. -
Page 14: Securing The Mounting Bracket
VESDA ® LaserCOMPACT Installation Manual 6.4 Securing the Mounting Bracket Warning Make sure that there are no electrical wires or plumbing behind the mounting position before drilling. Ensure the mounting position is flat. (a) Place the mounting bracket onto the surface and mark out the two mounting screw holes. -
Page 15: Attaching The Detector Onto The Bracket
VESDA ® LaserCOMPACT Installation Manual 6.5 Attaching the Detector onto the Bracket (a) Determine the required orientation for the LaserCOMPACT. (b) Mount the detector onto the bracket by placing the four rectangular slots located on the rear of the detector onto the four bracket tabs. Refer to Figure 6. -
Page 16: Connecting The Air Sampling Pipe
VESDA ® LaserCOMPACT Installation Manual Air Inlet Port Cable Entry Ports Cable Terminal Strips Programming Socket 15 pin for VN model 9 pin for RO model Termination Card Anti Tamper Screw Fuse 1.6A VESDAnet Number Aspirator Air Filter Cartridge Air Exhaust Port... -
Page 17: Cabling Using Glands And Conduits
VESDA ® LaserCOMPACT Installation Manual 6.7 Cabling Using Glands and Conduits 6.7.1 Using Glands (a) If using cable glands, use the correct gland size to fit the 25mm∅ cable entry hole. (b) Run the wires through the glands and into the LaserCOMPACT enclosure. Use your local codes and electrical standards for cabling. -
Page 18: Procedure To Terminate Wires To The Termination Card
VESDA ® LaserCOMPACT Installation Manual 6.8 Procedure to Terminate Wires to the Termination Card Use the appropriate wiring standards for your country or use the following suggested procedure listed below. (a) Strip off 5 to 10mm of outer insulation from each wire. -
Page 19: Connecting The Vesdanet Wires To The Termination Card (Vn Model Only)
VESDA ® LaserCOMPACT Installation Manual 6.10 Connecting the VESDAnet Wires to the Termination Card (VN model only) a) Refer to Figure 8 for the network terminals location on the termination card. b) Connect the VESDAnet wires as shown in Figure 11. This diagram is only an example for five detectors. -
Page 20: Terminating The Relay Wires To The Termination Card
VESDA ® LaserCOMPACT Installation Manual 6.11 Terminating the Relay Wires to the Termination Card a) Refer to Figure 8 or 9 for the relay terminals location on the termination card. b) Connect the relay wires to the terminals as per Figure 13 and your site requirements. -
Page 21: Terminating The Auxiliary Wires To The Termination Card
VESDA ® LaserCOMPACT Installation Manual 6.12 Terminating the Auxiliary Wires to the Termination Card a) Refer to Figure 8 or 9 for the Reset, LED and Bias terminals on the termination card for the RO or VN model. b) The function for these outputs are as follows:-... -
Page 22: Power Up
® LaserCOMPACT Installation Manual Power Up Caution Powering up the system must be done by VESDA accredited personnel. 7.1 Power Up the System (a) Remove the 1.6A fuse on the termination card. (b) Turn on the power to the detector. -
Page 23: Preliminary System Checks
VESDA ® LaserCOMPACT Installation Manual Preliminary System Checks Perform the following preliminary system checks before commissioning. (a) Logging onto the system with a PC or a LCD Programmer. See section 8.1. (b) Normalise the airflow. See section 8.2 (c) VESDAnet communication checks for VN models only. See section 8.3 (d) Basic pass/fail smoke test. -
Page 24: Normalise The Air Flow And Clearing Air Flow Faults
VESDA ® LaserCOMPACT Installation Manual 8.2 Normalise the Air Flow and Clearing Air Flow Faults a) List all the VESDAnet number for all detectors to be normalised. b) Go to section 8.2.1 for LCD programming or section 8.2.2 for PC programming. -
Page 25: Using Lcd Programmer
(d) Wait for one of the red LEDs on the front panel to light up. (e) If the LED does not light up contact a fully trained accredited VESDA engineer. (f) Reset the detector by pressing the Reset switch once when the smoke test passes. -
Page 26: Installation Checklist
VESDA ® LaserCOMPACT Installation Manual Installation Checklist Site Name: ……………………………………………………………………… Zone: …………………………………………………………………………….. Detector Serial Number/s: …………………………………………………… Perform the following checks listed below to ensure that all the necessary items are completed before handing over to a commissioning engineer. INSTALLATION CHECKS 1. -
Page 27: Maintenance And Parts Replacement
The frequency of maintenance checks could vary depending upon local codes and standards and the environment of the installation. WARNING: While a VESDA Zone has been isolated, no fire warnings will be issued by the VESDA LaserCOMPACT and any fire will go undetected. Prior to any maintenance or testing: 1. -
Page 28: Exploded View Of Lasercompact Components
VESDA ® LaserCOMPACT Installation Manual 10.1 Exploded view of LaserCOMPACT components A) Air Filter Cartridge B) Termination Card Screws (4) C) Termination Card D) Main Enclosure E) Aspirator F) Sample Air Hose G) Front Cover H) Aspirator Cable Loom J) Manifold Outlet Flange... -
Page 29: Opening The Detector
VESDA ® LaserCOMPACT Installation Manual 10.2 Opening the Detector 1. Undo two Philips head screws on front cover (A). 2. Open front cover (B) and allow cover to hang by the attached plastic strap. 10.3 Closing the Detector 1. Replace the front cover over detector... -
Page 30: Replacing The Aspirator
VESDA ® LaserCOMPACT Installation Manual 10.5 Replacing the Aspirator Interface Card Connector (C) Disassembly 1. Remove the four screws (A) securing the termination card. 2. Disconnect the aspirator cable loom from the connector on the aspirator. 3. Gently pull out termination card (B) from interface card (connected behind). - Page 31 Vision Fire & Security does not warrant, guarantee or make any representations, either expressly ® or implied, regarding the current or future use, or the results of the use, of the VESDA System, with respect to its correctness, accuracy, reliability, completeness, interworking, functionality, ®...
- Page 32 Australia and Asia The Americas Europe and the Middle East Vision Fire & Security Vision Fire & Security Vision Fire & Security Private Bag 215 700 Longwater Drive Vision House, Focus 31 Mark Road 495 Blackburn Road Norwell, MA 02061, USA...
Need help?
Do you have a question about the LaserCOMPACT VLC-500 and is the answer not in the manual?
Questions and answers