Table of Contents
Advertisement
Advertisement
Table of Contents

Related Manuals for FERREX GAS20


Summary of Contents for FERREX GAS20
- Page 1 User Manual ASH AND DIRT VACUUM CLEANER Original User Manual...
- Page 3 11 12...
-
Page 4: Package Contents/Device Components
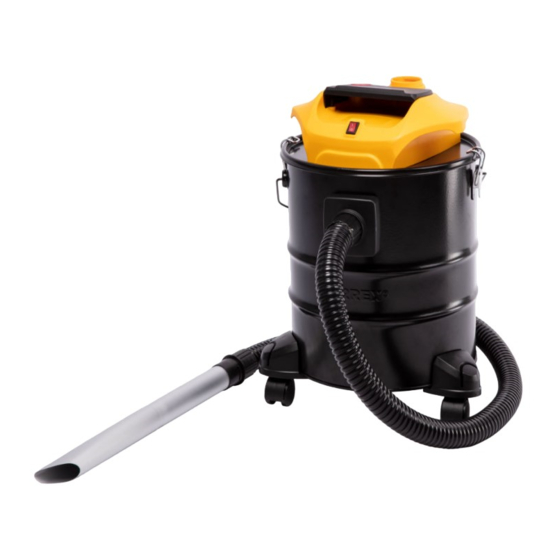
Package contents/device components Package contents/device components Motor head Filter cleaning button Container Blow connection Vacuum hose Mount for accessories Filter Filter mount Filter screen Safety switch Vacuum nozzle Vacuum connection Vacuum tube Handle Rollers (x 3) Snap lock (2x) ON/OFF switch Power cable Carry handle Cable- and hose winder... -
Page 5: Table Of Contents
Table of content Table of content Overview........................2 Package contents/device components..............4 General information....................6 Reading and storing the user manual................6 Proper use...........................6 Foreseeable misuse......................6 Explanation of symbols................... 7 Safety........................7 General safety instructions....................8 Safety notes........................8 Safety notes for dry vacuums..................11 Before first use....................... -
Page 6: General Information
General information General information Reading and storing the user manual This user manual is part of the ash and dirt vacuum cleaner (hereinafter also called "device"). It contains important information on how to set up and use the device. Before using the device, read the operating manual carefully, in particular the safety instructions. -
Page 7: Explanation Of Symbols
Explanation of symbols Explanation of symbols The following symbols and signal words are used in this user manual, on the device or on the packaging. This symbol provides you with useful additional information on handling and use. Declaration of conformity (see chapter “Declaration of conformity”): Products marked with this symbol meet all the applicable Community regulations of the European Economic Area. -
Page 8: General Safety Instructions
Safety This signal symbol/word denotes a WARNING! hazard with an average risk level that could lead to death or severe injury if it is not avoided. This signal symbol/word denotes a CAUTION! hazard with a low risk level that could lead to mild or moderate injury if it is not avoided. - Page 9 Safety - Do not use the device if there is visible damage or if the power cable is defective. - Do not open the device. Leave repairs to a qualified service technician. Contact the service address indicated on the warranty card. Liability and warranty claims are excluded if you carry out repairs yourself, improperly connect the device to the power supply or operate it incorrectly.
- Page 10 Safety - Do not operate the device with an external timer or a separate remote control system. - Do not use the device during a thunderstorm. Switch it off and pull the power cable out of the socket. - While the device is not in use or is being cleaned, or if a malfunction occurs, always turn the device off and disconnect it from the power supply.
-
Page 11: Safety Notes For Dry Vacuums
Safety Safety notes for dry vacuums - Do not vacuum persons or animals with the device. - Never point the vacuum hose and nozzles at your own body or at other persons during operation, especially not at eyes and ears. - When working, make sure that the nozzles and the vacuum tube are not at head level. -
Page 12: Before First Use
Before first use Before first use Check the device and scope of delivery WARNING! Danger of suffocation! Children may become tangled up in the packaging film when playing with it and suffocate. - Do not let children play with the packaging film. NOTE! Risk of damage! If opening the packaging with a sharp knife or other pointed... -
Page 13: Mounting The Motor Head
Assembly instruction Mounting the motor head 1. Place the motor head on the container 2. Hook the two clamps of the snap locks into the side of the motor head. 3. Push down both bottom parts of the snap locks. The motor head is mounted. -
Page 14: Disassembly
Disassembly Disassembly Removing the motor head 1. Pull up both bottom parts of the snap locks 2. Slide the two clamps of the snap locks outward from the edge of the motor head 3. Lift the motor head off the container The motor head is removed. -
Page 15: Inserting/Removing The Filter
Inserting/removing the filter Inserting/removing the filter Inserting the filter 1. Remove the motor head (see section "Removing the motor head"). 2. Turn the motor head bottom up. 3. Place the filter screen on the filter. 4. Place the filter on the filter mount like this. -
Page 16: Operation
Operation Operation WARNING! Risk of fire and explosion! When mixing with the vacuumed air, certain substances can form explosive mixtures or vapours. - Do not vacuum up any flammable, combustible, explosive or caustic gasses, vapours, liquids and dust. - Do not vacuum up any flammable materials (such as wood) - Do not vacuum up smouldering materials (such as cigarette butts or ashes). -
Page 17: Blowing
Operation 3. Pick up the vacuum hose 4. Vacuum the area to be cleaned. 5. Switch off the device (see section "Switching off the device"). Blowing 1. Push the vacuum hose with one of its connecting pieces into the blow connection Attach the vacuum tube and/or the vacuum nozzle... -
Page 18: Cleaning
Cleaning and storage NOTE! Risk of damage! Improper handling can damage the device. - Do not use any aggressive cleaners, sharp or metallic cleaning utensils such as knives, hard scrapers or similar items. These could damage the surfaces. Cleaning We recommend that cleaning be carried out outdoors in a place sheltered from the wind. -
Page 19: Transport
Cleaning and storage 5. Wind the power cable around the cable- and hose winder 6. Store the device in a clean, dry, frost-protected place out of the reach of children. Transport - Exclusively transport the device in normal position; prevent tilting while transporting. -
Page 20: Technical Data
Filter clogged (see section "Filter cleaning function") If the problem persists, contact the customer service listed on the last page. Technical data Model GAS20 Mains connection: 230-240 V ~; 50 Hz Motor output 1300 W Container volume approx. 20 l Hose length approx. -
Page 21: Declaration Of Conformity
EC Declaration of Conformity MEROTEC GmbH Otto-Brenner-Str. 8, 47877 Willich, Germany herewith declare under our own, sole responsibility that our product Ash cleaner Model No. GAS20 is in conformity with the following directives: 2014/35/EU LVD directive 2014/30/EU EMC directive 2011/65/EU RoHS amended by (EU) 2015/863 2009/125/EC Ecodesign directive, incl. -
Page 22: Disposal
Disposal Disposal Disposing of packaging Dispose of packaging according to type. Sort the paperboard and cardboard as waste paper and the film as recyclable material. Dispose of old electrical device Applicable in the European Union and other European countries with systems for separate collections of recyclable waste. - Page 23 PRODUCED IN CHINA FOR: ALDI STORES LTD. PO BOX 26, ATHERSTONE WARWICKSHIRE, CV9 2SH ALDI STORES (IRELAND) LTD. PO BOX 726, NAAS, CO. KILDARE Visit us at www.aldi.com AFTER SALES SUPPORT 820212 +44(0) 1904727501 +353(0) 19022605 support@coreservice.co.uk YEAR MODEL: WARRANTY GAS20 10/2022...
Need help?
Do you have a question about the GAS20 and is the answer not in the manual?
Questions and answers