Table of Contents
Advertisement
Advertisement
Table of Contents

Related Manuals for JINMA HHJM 30 Series


Summary of Contents for JINMA HHJM 30 Series
- Page 2 Executive Product Standard:Q/320901YT 010-2004/009-2005 Preface Thank you for your trust on our HHJM 30-40 series wheel tractors (hereinafter HHJM -300B, HHJM -304B, HHJM-350, HHJM-354, HHJM-400A, and HHJM-404). This series is reasonable in structure, excellent in materials and completed in performance. In order to help customers operate, adjust , repair and maintain the products in a better way, and for better performance of this series, we compile this operation manual.
-
Page 3: Table Of Contents
Contents Preface Chapter One Precautions for Safe Operations--------------------------------------------------1 Chapter Two General Description------------------------------------------------------------------5 Chapter Three Some key Technical Specifications of the Tractor 3.1 Parameter of the Whole Unit-------------------------------------------------------------6 3.2 Engine Parameter--------------------------------------------------------------------------8 3.3 Transmission system---------------------------------------------------------------------10 3.4 Traveling, steering, and braking-------------------------------------------------------11 3.5 Working Device -------------------------------------------------------------------------12 3.6 Electric System --------------------------------------------------------------------------13 3.7 Perfusion Capacities --------------------------------------------------------------------14 3.8 Air-braking Unit -------------------------------------------------------------------------14... - Page 4 6.1 Tramsmission-----------------------------------------------------------------------------39 6.1.1 Clutch-----------------------------------------------------------------------------------39 6.1.2 Shaft Coupling-------------------------------------------------------------------------42 6.1.3 Gear Box Assembly ------------------------------------------------------------------43 6.1.4 Differential Gear and Differential Lock--------------------------------------------45 6.1.5 Final Transmission--------------------------------------------------------------------48 6.2 T ravel & Steering System-------------------------------------------------------------49 6.2.1 Steering Gear --------------------------------------------------------------------------49 6.2.2 Brake------------------------------------------------------------------------------------53 6.2.3 Two-wheel Front Driving Axle-----------------------------------------------------55 6.2.4 Front Driving Axle--------------------------------------------------------------------57 6.2.5 Wheels----------------------------------------------------------------------------------62 6.3 Working Unit----------------------------------------------------------------------------64 6.3.1 Suspending System--------------------------------------------------------------------64...
- Page 5 7.4 Abnormal Air Exhaust Color----------------------------------------------------------91 7.5 Over- high temperature of Exhausted Water----------------------------------------92 7.6 Speed of Diesel Raises Suddenly (Flying Diesel)----------------------------------92 7.7 Abnormal Sound during Engine Running------------------------------------------ 92 7.8 Too low pressure or Zero Pressure of Diesel Oil-----------------------------------93 7.9 Brake--------------------------------------------------------------------------------------93 7.10 Clutch-----------------------------------------------------------------------------------93 7.11 Hydraulic Suspending System--------------------------------------------------------94 7.12 Electric System-------------------------------------------------------------------------95 7.12.1Starter ----------------------------------------------------------------------------------95...
-
Page 6: Chapter One Precautions For Safe Operations
Chapter One Precautions for Safe Operations 1.1 Only after reading the manual carefully, can the driver who has got special training and driving license with a full survey record operate the tractor. Tractor cannot be operated without licenses. 1.2 This machine only can be operated, maintained and repaired by the persons who are familiar to its features and know related safe operation rules. - Page 7 Warning Warning For physical safety: To avoid casualty caused by ----Read and comprehend the operation overturn or bump, the left and the manual before operating tractor; right braking pedals should be ----When starting the tractor, put into jointly locked up. neutral gear and release the clutch.
- Page 8 1.6 Before operation, a new tractor should have a running- High temperature! in following the related regulations. And then normal Keep away to avoid loaded work can be done. scald. 1.7 Before the tractor moves, on its path should be no any barrier, and no people between the tractor and the rear Fig.
- Page 9 1.19 Tractor cannot be used with over load to avoid damage to organs. Load limit of the trailer is 3 tons. 1.20 Dirt should be eliminated from radiating water tank to guarantee its heat radiating performance. When the water tank is too hot, you can't water the engine or water tank with cold water to avoid breaking the tank.
-
Page 10: Chapter Two General Description
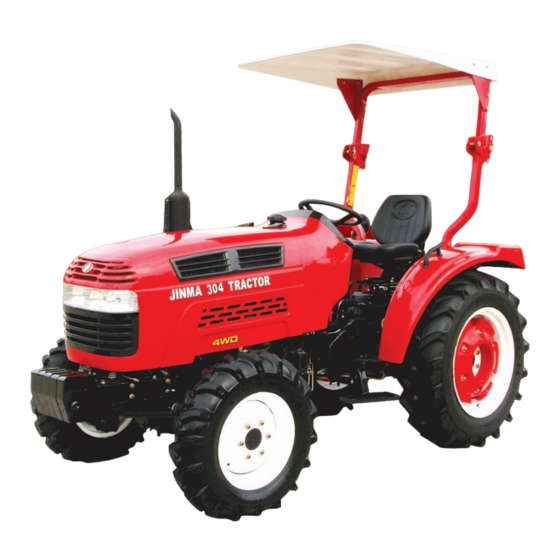
Chapter Two General Description HHJM30~40 series wheel tractors (HHJM-300B, HHJM-304B, HHJM-350, HHJM-354, HHJM-400A and HHJM-404A) are the newly developed wheel tractors accoording to demands from our international markets. HHJM30-40 series wheel tractors are newly developed with kinds of new technologies, new techniques, and new structures and on the years' production experiences of 18-30 series. -
Page 11: Chapter Three Some Key Technical Specifications Of The Tractor
Chapter Three Key Technical Specifications of the Tractor 3.1 Parameters of the whole unit Tractor Model HHJM-350 HHJM-354 HHJM -300B HHJM-304B HHJM-400A HHJM-404A Data Name × ( ) × ( ) Model 2 2-wheel driving 4 4-wheel driving external 2930 3090 3070 3230... - Page 12 Theoretical Velocity km/h 1. Type 300B, 304B, 350 and 354 tractors with real driving wheels: 11.2-24, starting rev is 2300r/min, finally transfer to quick gears Type 400A tractor with real driving wheels: 11.2-28, starting rev is 2300r/min, finally transfer to quick gears 404A tractor with real driving wheel tires: 11.2-28, starting rev is 2300r/min, finally transfer to slow gears...
-
Page 13: Engine Parameter
3.2Engine parameter Type HHJM-300B/304B HHJM-350/354 400A/ Engine Data 404A SL210 SL310 Engine type ZN390 Y480 LL480 TY395 Y485 LL485 ZN490 Engine model four-stroke, water-cooling and vertical type × × × × × × × × × Cylinder Bore × Travel mm Rated Output and 22.1/ 22.1/... - Page 14 Tractor Model HHJM- HHJM-300B/304B HHJM-350/354 400A/404A Engine Parameter SL21 Engine Type ZN390 Y480 LL480 SL3100 TY395 Y485 LL485 ZN490 Starting Point of Inlet Valve ahead from TDC Closing Point of Inlet Valve ℃ ℃ ℃ ℃ ℃ ℃ ℃ ℃ ℃...
-
Page 15: Transmission System
3.3 Transmission system Type HHJM-300B/350/400A HHJM-304B/354/404A Part single-acting, dry and constantly-engaged friction type Clutch gual-acting, dry and constantly-engaged friction type ( )× Gearbox two-axial, direct teeth 2 combination type Central Drive spiral taper gear Differential two planetary gear teeth, bevel gear type (with differential lock) Final Drive external gearing direct teeth type ——... -
Page 16: Traveling, Steering, And Braking
3.4Traveling, steering, and braking HHJM- HHJM- Type 300B/350 400A 304B/354 404A Part Parameter Frame Type No Frame Type of Fore Shaft(Fore tri-sentor separable axisle shousing Inverted-U Pipe Epuilibrium Drive Axle) of conic reducer ± ° ± ° Fore Axle Tilt Angle Toe-in of Front Wheel 4~11 3~11... -
Page 17: Working Device
3.5 Working unit Tractor Model HHJM-300B/304B/350/354/400A/404A Parts and Parameter Type of Lifter Semi-divided positioned Type Model of Gear Pump CBN-E310(turn flat port to right for connection) Model of Constant Flow Pump CBT1-E306HL062L or HLCB-06/06 Model of Dispenser Outlaid Unload Control (... -
Page 18: Electric System
3.6 Electrical System Type HHJM-300B/304B/350/354/400A/404A Parts Electric One-wire System,Minus Earth 12V System TY395 SL2105 ZN390 Y480 LL480 Engine oil TY3100 SL3100 ZN490 Y485 LL485 JT11or Starting JF131 JF11A 2JF200 JFWBC1 Motor 2JF200 QD1525 or QDj1309-ky QD138 QD100C3 QD1538 or Generator QD1315D QDj1401 QD139... -
Page 19: Perfusion Capacities
3.7 Perfusion capacity Tractor Model 300B 350/400A 304B 354/404A Part Parameter Capacity of Fuel Tank Final Drive Capacities of Gear-bos,Rear 18.5 18.5 20.2 20.2 Axle and Transfer Case l —— —— Capacity of Fore Drive Axle ( Capacity of Redirector worm-and )... -
Page 20: Chapter Four Operation Of The Tractor
Chapter Four Operation of the Tractor 4.1 Fuel and lubricating oil See Fig. 4-1 for the fuel and lubricating oil of the tractor. Fig. 4-1 The fuel and lubricating oil of the tractor Season and Envirenmental Site Oil Specification Temperature (... -
Page 21: Water
overflowed diesel oil at once. 4. Wash fuel tank regularly, discharge precipitated oil, and wash diesel oil filter. ’ 5. Don t use open oil drum to transport fuel. 6. Put all cloth with oil into containers with covers. No dog-end can touch it. ’... -
Page 22: Running
4.3 Running-in To put into use, new tractors or heavily repaired tractors must run in first, because newly manufactured parts have more or less tool marks on the surfaces. If you use the tractor with a heavy load without running-in, abrasion on the parts will be more severe and the parts can even be stuck and damaged to shorten the tractor life. - Page 23 VI-gear 30min. Reverse I-gear 10min. During the travel of free running-in, do steering operations and use the brake suitably. Pay attention to the following items: 1) Watch and listen carefully to the operations of its engine, transmission system and travel & steering.
-
Page 24: Steering Mechanism And Meters
5. Check and adjust the free travels of the clutch pedal and brake pedal, and the operating of the brake. 6. Check and tighten the bolts and nuts at every key connecting site. 7. Check oil nozzle and valve clearance. Adjust them if necessary. 8. -
Page 25: Control And Drive
( ) 2 Hand Throttle Push ahead, and the oil supply will be increased; pull back, it will be reduced. ( ) 3 decompression handle Turning clockwise means decompression (exhaust valve is released) ( ) Shut-down Lever Pull the lever backward and the engine will be shut down. Then the lever will be rush into the original position for next starting. - Page 26 symbols and understand them correctly. 3. It is forbidden to drive tractors after being drunk, tired or taking some antipsychotic. ’ ’ 4. Don t leave driver s seat to start or control the tractor. Before starting the tractor, every gear shift lever should be placed in the “...
- Page 27 10. For emergency parking, you should step down the clutch pedal ’ and brake pedal at the same time. Don t only step down the brake pedal , or the brake will be damaged 11. Driving on road, you should follow the local traffic rules. Attention: exhaust the air in the system.(This step can be omitted generally.
- Page 28 roads. Only low gears are allowed. When going down the slope, it is forbidden to step down the clutch and slide with neutral gear. ’ 8. To avoid the pollution caused by the exhaust gas don t start the diesel in a room that is closed without fine ventilated conditions.
- Page 29 Fig. 4-3control device and indicators 1 battery 2 engine oil filter 3 fuel supply pump 4 high-pressure oil pump assembly 5 dip stick of engine 6 filter for engine oil 7 sediment bowl 8 switch of oil tank Fig 4-4 1 fueling tap of lifter 2 PTO shaft handle 3 force-control coupling siteof top link 4 position-control coupling site of top link 5 top link 6 hitch iron 7 towing pin8 anchoring chain9 lower link 10 PTO shaft housing 11 gear oil pump 12 length-controling handle of anchoring chain 13 drain line of lifter 14 force-control handle 15 position-control handle...
- Page 30 rest for 10 seconds and then have another try to start. ℃ 3. When it is hard to start due to a temperature of below 5 , usually you need a engine oil preheater ℃ that will be energized for 15 minutes, fill some 20~30 water , and the engine can be started.
- Page 31 means no over load, while if it slows down, it means over load. 2). When V-gear is used for working and engine sounds heavy with black smoke, it means overload. Change to IV-gear. Every time you shift gears, clutch pedal should be stepped down fully first to avoid breaking gears.
-
Page 32: Operation And Use Of The Working Units Of The Tractor
Fig.4-3 ● Important: 1. When working in fields or muddy area, you'd better remove the dirt from your shoes and keep the pedals clean. Catch the armrest careful when getting on or off the tractor. 2. Watch the values on every meter. The value of engine oil indicator should be in the range of 196 一... - Page 33 implement match that of PTO shaft; 3. Stop the engine to couple farm implements. ’ 4. Coupling with the PTO shaft, gimbal joint can t have a too big deviation angle; 5. To couple with gimbal joint, the clutch should be released thoroughly first.
- Page 34 ( ) Operation of the control handle of hydraulic suspending system The operation of hydraulic suspending system is done through control handle. During plowing, when the soil resistivity is changeable, use the integrated force & position control. Plow depth depends on the different positions of the control handle. In the range of the integrated control, the lower the control handle is, the bigger the plow depth is;...
- Page 35 Adjust the control hand wheel (2) to change the dropping speed (See Fig 4-5).A proper dropping speed can keep the farm implements from severely impinging against land due to high speed dropping. The control hand wheel(2) for dropping speed directly controls the lowering speed valve(3) on the end of cylinder(1).
- Page 36 1 right lifting lever 2 top link 3 left lifting lever lower link Fig. 4-6 suspending gear Through adjusting lifter helix, the lower hanging point of the plow connects to the coupling site of the lower link. The top suspending-point coupling pin connects to the top suspending point of the plow by ’...
- Page 37 Attention: 1. Keep people far away from the lifting area of the lifter when operating hydraulic lifters 2. 3-point suspending unit is only for the farm tools especially designed for 3-point suspending devices. 3. High speed is not allowed when operating or transferring to other field with hung farm implements.
- Page 38 2. If one of the rear wheels has wheelspin, speed down the engine before stepping down the differential lock to avoid impact on the transmission box. 3. When the differential lock is engaged, release the control lever of the differential lever immediately to let it reset.
-
Page 39: Chapter Five Technical Maintenance For The Tractor
Chapter Five Technical Maintenance of the Tractor For continuous normal work and a longer life of the tractor, technical maintenance rules should be strictly followed and technical maintenance should be often done to see the technical situation of the tractor. Technical maintenance is done regularly and is classified into the following grades according to their cycle period : ’... -
Page 40: I- Gradetechnical Maintenance
d. driving axle 10. Check and see if the tools along with the tractor are all here. 11. Start the engine and watch is the pressure of engine oil and cooling water is normal. 12. When the tractor travels toward a working site or gets near to farm tools, you should have try to push the control handle of the suspending lifter or the handle of PTO shaft, watching their performances and listen to the working gears. -
Page 41: Iii-Grade Techincal Maintenance
7. Check the sealing between the valve and its base. Turn crankshaft, listen carefully and make sure there is no air leakage. Do grinding if necessary and eliminate carbon deposit from its air flue. 8. Check the clearance of free turning angle of the steering wheel, do adjustment if necessary. 9. -
Page 42: Techinical Maintenance For Winter
every gear. 14. Knock the body of the muffler to eliminate dusts from it. 15. When tractor operation is over, store it in a dry and ventilated place. 16. For maintenance, only the parts that meet product standard can be used to replace malfunctioned parts. - Page 43 Attention: 1. Only the persons who are familiar to the features of the machine and have related safe- operation skills can maintain and repair the machine. 2. Read the parts book relative to this manual and the manual for diesel before maintenance.
-
Page 44: Chapter Six Structure Of The Tractor And Its Maintenance
Chapter Six Structure and Maintenance of the Tractor 6.1 Transmission System 6.1.1 Clutch 图 离合器总成图 Fig. 6-1 Cluch Assembly 飞轮 离合器盖 离合器压盘 销 分离杠杆 分离杠杆弹簧 离合器轴 离合器压力弹簧 从动盘总成 1. flywheel 2. clutch case 3. clutch pressure plate 4. pin 5 releasing lever 6. spring of releasing 紧固螺钉... - Page 45 claws of the pressure plate are put in the holes on clutch case, and between the pressure plate and the clutch case 6 pressure springs are installed to press the plate towards flywheel end. Its driven part is a driven plate assembly. The whole driven assembly is installed between flywheel and clutch pressure plate and pressed by the pressure plate.
- Page 46 the same time. The revolution angles must be the same and use the control test of the releasing clutch to test its reliability. After finishing the adjustment, tighten the nuts 25. ③ When the clutch skids: One possible situation is that the free travel disappears, or the three releasing levers are even compressed, you just need to adjust the free travel to the rated value;...
-
Page 47: Shaft Coupling
driven sector, and control sector. The driving sector runs together with the engine fly wheel, while only when the clutch is engaged, will the driven sector run along with the engine. During the dual clutch operating, the continuous abrasion of parts will cause the clutch skid and inexhaustive separating, which will stop the tractor from working normally. -
Page 48: Gear Box Assembly
6.1.3 Gear box assembly ( ) 1 Constructure of the gear box (see fig. 6-3 and fig. 6-4) Fig. 6-3 single-acting gear box assembly 1 gear shifter 2 shift shaft 3 shifting block 4 elastic cylindrical pin 5 III-IV gear shifting block 6 III-IV gear shift shaft 7 II-reverse gear shift shaft 8 II-reverse gear shifter 9 I-gear shift shaft 10 I-gear gear shifter 11III-IV gear shifter 12 bearing NUP2308 13 gear sliding gear14 bi-axis spline housing15 III-gear driven gear 16 II-gear driven gear 17 I-gear driven gear 18 housing of transmission case 19 bi-axis front bearing housing20 washer 21 round nut 22... - Page 49 Fig.6-4 dual gear box assembly 1I-gear driven gear 2 bi-axis spline housing 3 rolling bearing 31305 4 coupling annular gear 主离合器联轴节从动套 rolling bearing6208 6 I-shaft 7 joint driven bush of main clutch 8 power 副离合器联轴节从动套 take off drive shaft 9 joint driven bush of assistant clutch 副离合器联轴节联接套...
-
Page 50: Differential Gear And Differential Lock
( )× 2 gear shifting of the gear box is done through controling the key and assistant gear shifters. The key gear shifter can get four forwarding gears and a reverse gear, while the assistant gear shifter can get a high-speed gear and a low-speed gear. Gear distributions are some diffirent between the single-acting gear box and the bi-acting gear box, so you should first see clearly the gear distributions on the key or the assistant gear shifters. - Page 51 Fig. 6-5 control device of differential lock 1 bearing bush 2 washer10 3 nut M10 4 retainer bolt 5 big taper gear 6 pullback spring of diffirencial lock 7 fork of diffirential lock 8 fork shaft of diffirencial lock 9 pedal of diffirential lock 10 adjusting nut if diffitencial lock 11 bearing support 12 bearing 30212 13 diffirencial lock assembly 14 diiffirencial housing 15 right axle shaft gear 16 epicyclic gear 17 planet gear shaft...
- Page 52 conners by curving the lock slice. The adjustment of the screw wimble gear should be done after the wheel box has run for 1~2 minutes without oil. The side gap of the taper gear should be between 0.15~0.25mm and the ideal touching trace are shown as Picture 6-6.
-
Page 53: Final Transmission
can be joined as follows to make the tractor move out the lubricious area: Step the clutch pedal, and switch the main and assistant gearlever to low gear. Put the accelerograph control to the maximum. Use your right foot to step the differential lock footplate. Loosen the clutch pedal slowly to make the tractor move out of the lubricious area slowly. -
Page 54: Travel& Steering System
at the same time. Base plate (7) is used for stopping oil and as dismantling tool when connection between bearings NU311 external ring and case is too tight. The block bearing on the small-end driving shaft of the end transmission case shall be often oiled with lime grease. 6.2 Travel&... - Page 55 Steering shaft makes an angle of 600 with tractor longitudinal axis, as Fig. 6-9. Assembly of steering shaft with steering worm (11) is installed in steering gear case, and set on 977097K and 9077097(12) bearings on the steering gear case. Steering lever assembly (5) is set in the steering gear case assembly (4) with sleeve, its left end is set on the sleeve (3) and right end on NUP205 bearing of side steering cover assembly on steering gear case(7), so the rolling wheel (bearing 776701) on steering lever axis assembly is engaged with the worm, steering lever (1) is connected to its shaft...
- Page 56 and steering lever assembly. ⑩ Loose 4 bolts on the lower cover of steering gear, remove lower cover of steering gear, take off bearing 977907K, steering shaft worm assembly and bearing 977907 respectively. (4) Installation of steering gear: ① Before installation, clean all parts and oil each inter faces with lubricating oil, paper spacer surface with butter.
- Page 57 body to control flow direction; an engaged pair of cycloidal pin gear is formed by rotator and stator as a measuring motor to guarantee that oil-intake volume to oil cylinder is proportional to rotational angles of steering wheel. During manual steering, it is used as hand oil pump, and coupling shaft is used as rotational torsion moment.
-
Page 58: Brake
6.2.2 Brake (1) Structure and work principle of brake: The tractor is equipped with sealing disc brakes, they are set on the left side and the right side of the final transmission (small) gear shaft respectively, the right brake or the left brake may be applied in single side, its structure is as Fig. - Page 59 Two pressing plates (12) are pulled by each other with 3 springs (14)with 3 steel balls (15) between 2 pressing plates. The pressing plates may rotate around the steel balls, and two pressing plates are connected with a pull plate (1) and a fork pull plate (2), another end of pull plates is connected to adjustment rod (3), and put an adjustment rod in the sway arm (4).
-
Page 60: Two-Wheel Front Driving Axle
Free travel of the left brake pedal of tractor must be identical with that of the right one; otherwise tractor will deviate from its course and lead to accident in case of emergency brake. 6.2.3 Two-wheel Front Driving Axle ( ) Structure (See Fig. - Page 61 – Front axle of 2 wheel tractor is pipe axle with an adjustable wheel base, setting in front of engine, stand (3) is connected to engine with 6 bolts, sway arm (2) bears against front end and back end of stand and is put in welded sleeve assembly (26), there are 3 bolts (24) in both sides respectively used for fixing left and right sleeve assembly pair (7).
-
Page 62: Front Driving Axle
③ Dismantle connectors of longitudinal and transverse pull rods and all steering pull rods. ④ Remove the auxiliary sleeve assembly with front wheel rim. ⑤ Remove 6 screws connecting stand with engine. ⑥ Remove 2 screw (1) of sway shaft assembly respectively, take out sway shaft (2), and separate sleeve assembly (26) from stand (3). - Page 63 the tractor goes along a sticky, wet and sandy path, or works in half- dry paddy fields, its back wheels skid easily, the front driving system shall be given power to raise its traction force. (2) Structure and adjustment of front driving system. ①...
- Page 64 are as the following: loose discharge screw plug (4) at lower end ofthe final transmission case (28) to exhaust lubricating oil.
- Page 66 23. (1) Upper end of main pin : remove sway arm (23) and axle seat of main pin (24). According to meshing clearance of gears, people may abrade the support sleeve (25) at the lower end of bevel gears (2), (27), and at the same time, take out washer (26) to make meshing clearance get less. Just draw out adjustment washer (26) if it is caused by bearing (22) abrasion, then reassemble the dismantled parts.
-
Page 67: Wheels
assembly (Fig. 6-16), put its two shaft necks into internal ring of bearing (6) and adjustment nut (17) respectively, inspect meshing of driven wheel (18) and driving wheel (16), and adjust it if necessary then twist bolt(4) and single ear washer (3) in driven wheel (18) and differential mechanism cover (2), and lock hexagon head of bolt (5) by bending single-ear washer(3). - Page 68 ● : Important (1) When tractor is equipped with tires with convex patterns for paddy fields work, it shall “ ” not be used for transportation, and for normal fields work, its speed shall not exceed 15km/h. (2)Adjustment of wheel base Front wheel base and back wheel base shall be adjusted for different kinds of fields operations.
-
Page 69: Working Unit
③ Prize the outer tubes into the wheel rims with a tommy bar. ④ Aerify the tires till normal air pressure and check to see if there is leakage. : Warning 1. The size of your tires cannot be larger than what is stiplulated in the manual. 2.Only skilled workers with proper tolls can do the dissembling and replacing the tires or adjusting the wheel bases. - Page 70 Fig.6-21 Adjustment of the distributor 1 Control handle 2 rocker 3 key control valve 4 steel ball 5 dropping valve 6 adjusting swasher 7 pin 8 key valve spring 2. Installed the wholelly adjusted distributor assembly onto the lifter. Ⅱ Adjustment of the hydraulic lifter 1.
- Page 71 Fig. 6-22 Force-position integrated control 1 rocker 2 stand 3 adjusting bolt 4 force-control spring 5 locking nut 6 link 7 outer lifting arm 8 welded right pressing plate 9 middle arm 10 response lever between the mark on the outer lifting arm and the one on the housing is not over 3mm (Here the inner lifting arm and the lifting housing have a gap of about 5mm).
- Page 72 Fig. 6-23 cylinder piston 1 cylinder case 2 piston 3 piston support 4 check ring 5 O-ring 6 O-ring7 O-ring Fig. 6-24 force-control spring assembly 1 spring seat 2 force-control spring 3 spring beam 4 spring clamp 5 nut 6 dust guard 7 pin 8 connector of the top link ’...
- Page 73 to intaking & outleting oil pipes through oil pump gasket. Fig. 6-25 Oil pup & oil pipe assembly 1 low-pressure connector 2 gear oil pump 3 O-ring 4 paper gasket of oil pump 6 plate gasket of oil pump 7 cruciform joint 8 sucker pipe assembly 9 filter element assembly 10 copper washer11 screws of sucker pipes 12 screws of outletting pipes 13 copper washer 14 connector of outletting pipes 15 O-ring 16 high-pressure connector 1.
- Page 74 force-adjusting spring (2), spring pressing board (4) onto spring beam(3) Set dust guard (6) and nut (5) onto the connector of the top link(8). And then screw the spring lever into the hole of the connector of the rocker Adjust it till the spring is out of pressure.Except the a hole blocked with a rubber choke.
-
Page 75: Structure And Use Of Pto Shaft
are engaged gradually and the working space capacity is reduced relatedly. So the oil in the teeth bends is pressed out and transferred to oil outlet pipes. Because there are always a pair of teeth in engaged situation, oil pressing chamber is always separated from the oil suction by the engaged points. So the oil cannot return back. -
Page 76: Electric Installation
+ + running speed of PTO shaft can be 540r/min 720r/min, or 540r/min 1000r/min. When the PTO shaft is out of the operation, its handle should be set in the central position, just like Fig. 6-29. (clash gear stays at the neutral postion). -
Page 77: Engine
Fig. 6-29 Control position of PTO shaft Fig. 6-30 Releasing hadle of driving PTO shaft 1 handle of PTO shaft 2 high gear 3 neutral gear 4 low gear earth. See Chapter 8.1 for electric wires. lectric installation. All the electric See Item 3.6 of Chapter 3 for the types and specifications of e devices are not the same due to engines of different models, suppliers and special requirenments of some clients. - Page 78 1. Structure and principle: Type 2JF200 silicon rectification generator is formed by stator, rotor, silicon rectifying cells, front and back housings, belt pulley and such other parts. Generator stator is formed by pressed silicon steel sheets in layers. Threephase winding is embeded on the stator.
- Page 79 2. Usual troubles and causes Trouble Position Causes Connection has short circuit, open circuit, connection inefficient connecction or wrong connection. Jaw is extremly loose and rotor coil has open circuit. No electric power generator Rectifier cell is damaged. coming from the Brush has malfunction.
- Page 80 ( ) 3 3. Maintenance and repair 1) Check the tautness of the generator's cone belt. You can press at the middle site when the cone belt strains on the three wheels. Generally, it is proper to get a sag of 10-12mm (See Fig.6-31). Check to see if there is open circuit or short circuit at the connecting-wire contactors.
- Page 81 brush and the slip ring should have a cambered touch to prolong the life of the slip ring.The brush designation is DS-4. If the brush has too much abrasion, you should replace them. n the circuit. If the4) Check the silicon rectifying cell. Use a series circuit formed with a battery and a 12V and 1.5W bulb to test the components (See Fig.
-
Page 82: Voltageadjuster
220V 220V Fig. 6-34 insulation test with a field coil Fig. 6-35 insulation test with a stator coil and bright, it means the insulation has breakages and they need to be dismounted and repaired. 6) Test the stator. Stator and core inductances also can be tested with 220V alternating current (See fig. -
Page 83: Battery
a temperature compensating device. When the generater rev i s 3500r/m and outside load is half, the adjusting voltage of the adjuster is 13.5~14.5V. Now the gap between anchor core of the adjuster and the iron core should be 1.4~1.5mm. Adjuster is a fine electric instrument, so don't adjust it ad arbitrium. - Page 84 clean water. The time between pouring electrolyte into batteries and the first electric charging should not be over 18 hours. Polarity of the outgoing line of the charging device must be consistent and connected well with that of the binding post of the batteries. Positive and negative points must be in their right sites.
- Page 85 ( ) Troubles and ways out Troubles Causes Ways out When the generator doesn't work, electrical equipments Check and repair the generator. (head lamps) use too much electric power. No charging or the chargong Check the generator or the adjustor. is not enough.
-
Page 86: Starter
: Warning 1) During engine operation, the battery housing musten't be dismountd. don't let electrolyte toutch eyes, hands or clothese. If it spilles onto your body, wash thoroughly with clear water. 2) Only after the earth cable is cut from the batteries ,can the repair be done. 3) The gas discharged from the batteries is easy to explode. - Page 87 Troubles Causes 1. The battery lacks electricity, contactors of conducting wire are loose or pile heads are too dirty. These cause malfunctional contacting. 2. Brush has too much abrasion or inefficient spring, which causes Inefficient operation of malfunctional contact or too dirty commutator. starter 3.
-
Page 88: Preheating Plug
3) Check with a short circuit testerto and see if rotor has short circuits between coils . Watch the weld of rotor coil and collector, the abrasion of journal spline and the singeing on the surface of collector. If the rotor coil falls off, it need be welded; if rotor has short circuits between coils, it should be sent to a repair factory. -
Page 89: Fuse Box
the heater plug stops.on the right caused by valve lever's holding. When the diesel engine starts, the switch turns on and the I grade preheating plug gets power, the cover on the extension bush will II grade become longer because of heat to make the vavle lever move left, thus III grade opening the vavle. -
Page 90: Intake & Exhaust System
Situations suggested by the current meter: “ ” (1) when the finger points at 0 , it generally means the accumulator has been fully charged and ’ the dynamotor don t charge it any longer. When something is wrong either with the dynamotor adjustor or the connection line, the accumulator can't be charged any more. - Page 91 ’ of the filtrate element. After several times swerve, blocking and inflation, the noise is greatly reduced. After being used for about 1000 hours, the dust need to be removed by knocking at the ourside ’ of the muffler in order not to block up or affect the engine s function. 1317A filter element dust bag Fig.
-
Page 92: Use And Adjustment Of Air-Braking Device Of The Trailer
6.6 Use and adjustment of the air-braking device of the trailer To ensure the safety of the trailer and the immediate stop, the tractor is equipped with air-braking device. It consists of aie compressor 1, air tank5, braking valve4, air pressure watch 2 and pipelines. (Fig. - Page 93 bevel gear assembly (4) are supported on the box case(6) and box housing (1) respectively. Driven bevel gear axis(5) is supported on the box with ball bearing (6305) and is engaged with the driving × × ( ) bevel gear assembly. The box housing and bearing cover(10) both have oil seals 50 ×...
- Page 94 Attention:Adjustment not following the stipulations will cause accidents. 6.11 Strucure, dismounting&reassembling and adjustment of the belt pulley subassembly Belt pulley subassembly (Fig.6-42) is driven by a couple of bevel gears.Both ends of the driving ed to the driven bevel gear axis with a dowel(15) and is locked up with nut (12). Raising speed ratio of the belt pulley is 1.647.
-
Page 95: Chapter Seven Main Troubles And The Solutions
Chapter Seven Main Troubles and The Solutions 7.1 Hard or Failto Start Diesel Causes Ways Out I. Malfunction of fuel system 1. Check the store of diesel oil and refill diesel oil; 1.Diesel oil is used out or the switch of oil tank turn on the oil tank. -
Page 96: Inefficient Power Of Diesel
7.3 Inefficient power of diesel Causes Ways out 1. Inefficient pressure 1. Do as the ways out of " Diesel is Hard to Start 2. compression ratio is not the rated value. or Can't Be Started " 3. Injection value is not enough. (due to 2. -
Page 97: Over- High Temperature Of Exhausted Water
7.5 Too high temperature of exhuasted water Causes Ways out 1. Water in the water tank is not enough. 1. Gradualy reduce the temperature and top up the 2. Drive belt of the water pump is too loose. water tank. 3. -
Page 98: Too Low Pressure Or Zero Pressure Of Diesel Oil
7.8 Too-low pressure or zero pressure of engine oil Causes Ways out 1. Engin oil in the oil pan is not enough. 1. Top up engine oil. 2. engine oil is too thin. 2. Replace with qualified engine oil. 3. engine oil pipes has oil leake or blocks. 3. -
Page 99: Hydraulic Suspending System
7.11 Hydraulic suspending system Trouble Causes Ways out 1. 1) Fill oil to the rated level. 1. The oil pump can't absorber oil 2)Wash or replace the filter. normally. 3) Replace the damaged seal 1) Transmission box (or oil tank) has a ring. -
Page 100: Electric System
Troubles Causes Ways out 5. Farm tools can be 1. Regulating stem is shortened (or 1. Adjust the lever length ( lifted normally but can't becomes longer) (position control lver position control lever, force lift to the top position.( and force control lever) control lever) Or over top) 1. -
Page 101: Batteries
7.12.2 Batteries Troubles Causes Ways out 、 Electric store is not 1. Generator or regulator has 1. Repair the generator or the enough in batteries. malfunction ,no charging current. regulator. 2. Connection in charging circuit is 2. Check and see if the post loosen or rusted, and itincreases chuck and connection bolts are resistance. -
Page 102: Lights
7.12.4 Lights Troubles Causes Ways out 1. The headlight has no 1. Circuit is opn or the fuse is broken. 1. Repair and connect it. dipped beam or high beam. 2. Light switch has ill contacts or is 2. Repair or replace it. 2. -
Page 103: Chapter Eight Appendix
Chapter Eight Appendix 8.1 Electric Wiring Map... -
Page 104: Sizes Of The Suspending System
Indications of electric wiring map 、 、 、 、 、 indicator 2 headlight 3 alternator 4 series-wound cable of storage battery 5 storage 、 、 、 、 battery 6 cable from storage battery to starter7 starter 8 flasher 9 brake indicator switch 、... -
Page 105: Spare Parts Along With The Machine
distance between front linkage points of tow link, 487mm distance between real suspending points of lower link , 718mm length of lower link, 816mm 451.5mm / length of brace bar 8.3 Driver Spare Parts Code Name Quantity compond washer18 compond washer ×... -
Page 106: Tools Along With The Machine
8.4 Driver Tools Name Specification Quantity grease gun × double-head spacer × double-head spacer × double-head spacer × double-head spacer box wrench S=27 , hexagon ring spanner S=6 S=8 1 for each slip joint pliers ″ ″ circlip clamp for holes circlip clamp for shaft ×...
Need help?
Do you have a question about the HHJM 30 Series and is the answer not in the manual?
Questions and answers