
Subscribe to Our Youtube Channel
Related Manuals for GEL MATIC GIOTTO 11 GR

Summary of Contents for GEL MATIC GIOTTO 11 GR
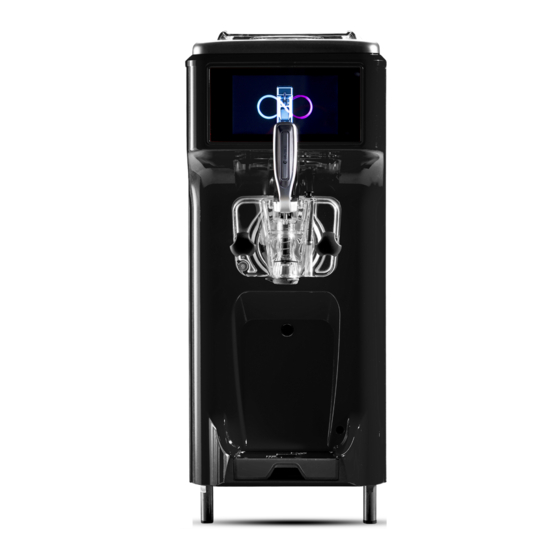
- Page 1 INSTALLATION, USE AND MAINTENANCE ORIGINAL INSTRUCTIONS GIOTTO 11 GR Rev.04 - 08.2021 211555.04...
-
Page 2: Acknowledgements
We are confident that the product you purchased will fully meet your expectations, just like all the other machines designed by Gel Matic Italia. The product that you are about to use is the outcome of in-depth research and tests to guarantee utmost levels of functionality, safety and satisfaction, both in terms of design and efficiency. -
Page 3: Table Of Contents
SUMMARY Acknowledgements ............................................. 1 Documentation notes ............................................1.1 Use ................................................ 1.2 Graphic conventions ......................................... 1.2.1 Symbols ........................................1.2.2 Text representation .................................... 2 Safety rules and directions ......................................... 2.1 Danger levels ..........................................2.2 Structure of safety directions ..................................... 2.3 Essential safety directions ....................................2.3.1 Qualification and role of personnel ............................ - Page 4 8.1.1 Assembly of the beater ..................................8.1.2 Assembly of the dispensing door .............................. 8.1.3 Assembly of the feed tube ................................8.1.4 Assembly of the hopper agitator ..............................8.1.5 Assembly of the drip-tray ................................8.1.6 Sanitizing ......................................... 8.2 Priming ............................................8.3 Daily closing procedures ....................................... 8.4 Daily opening procedures ....................................
- Page 5 9.4.6.1 Maintencance levels ..............................9.4.6.2 How to record maintenance operations ......................9.4.6.3 Notifications ................................... 9.4.7 vCard .......................................... 9.4.8 GCARE Notifications ..................................9.4.8.1 How to set up notifications ............................. 9.4.9 GLEARN Tutorial ....................................Giot to 11 GR...
-
Page 6: Documentation Notes
1. DOCUMENTATION NOTES This document contains essential information about installation for Technical Personnel and necessary directions for daily use and maintenance for the Operator and the Store Manager. IMPORTANT Keep the instructions for use in a safe and handy place. IMPORTANT In case of transfer, attach the present instructions for use and maintenance to the machine. -
Page 7: Safety Rules And Directions
2. SAFETY RULES AND DIRECTIONS Do not attempt to operate the soft serve machine until you read and understand all safety messages and the instructions in this manual. DANGER LEVELS The danger level is part of the safety direction and it is characterized by a keyword. The possible consequences differ according to the chosen keyword. -
Page 8: Safety Rules On Installation And Maintenance
All extraordinary operations of installation, assembly and maintenance must be carried out solely and exclusively by qualified personnel authorized by Gel Matic, according to the standards in force in the country of use and complying with the rules on systems and workplace safety. -
Page 9: Description Of The Machine
REFRIGERANT As for protection of the environment, Gel Matic is proud to use only environmentally friendly HFC refrigerants. The HFC refrigerant used in this machine is generally considered non toxic and non flammable. Nevertheless, all gases are potential hazards and must be handled with care. -
Page 10: Working Limits
Check the consignment for completeness. Make sure the goods delivered by the forwarder correspond to the content of the delivery note and to the order placed. In case of missing items, promptly inform the forwarder and Gel Matic or its local representative. -
Page 11: Transportation To The Installation Area
Check the power cord integrity and make sure it has not been damaged during transportation. In case of missing or damaged parts, make a written complaint immediately against Gel Matic or its local representative. Enclose a picture of damaged items to your complaint. -
Page 12: First Start-Up
Do not use adapters or taps as they could cause overheating, burns or power the machine incorrectly thus leading to its breakage. WARNING In case of damage to the power cord, replacement shall be carried out by an authorized Gel Matic Service Centre or by a qualified technician. This aims at avoiding any risk. WARNING Some components are live even when the power switch is off (OFF position). -
Page 13: User Interface Quickstart
6. USER INTERFACE QUICKSTART The advanced In.Co.Di.S. system (Interactive Control & Diagnosis System) allows you to easily communicate with the machine at any operating step. IMPORTANT The In.Co.Di.S. system is equipped with touch screen technology. It is necessary to follow the instructions below for its proper use. -
Page 14: Selecting The Operation Mode
SELECTING THE OPERATION MODE ● Several operation modes are available. Swipe down and select the desired one: PRODUCTION: Select this mode at the beginning of your work shift during which ice cream will be dispensed. The machine automatically prepares the product and allows delivery. STAND-BY: Select this mode at the end of your work shift, when ice cream dispensing is no longer required. -
Page 15: Part Names And Functions
7. PART NAMES AND FUNCTIONS MACHINE LAYOUT Name Function Cylinder Produces the product to be dispensed and keep some ready. Hopper Stores the liquid mix at 2/4°C. Beater Rotates in the freezing cylinder, blending air and mix and ejecting product. Dispensing door Closes the cylinder and provides product dispensing. -
Page 16: Dispensing Door
DISPENSING DOOR Name Function Dispensing door Closes the cylinder and provides product dispensing. Dispensing door seal Prevents the product from leaking out of the dispensing door Dispensing handle It starts and stops the product dispensing. Piston Opens and closes the product opening, thus letting the product flow. Spring Closes the piston automatically when the user releases the handle. -
Page 17: Beater
BEATER Name Function Beater body Rotates in the freezing cylinder, blending air and mix and ejecting product. Beater scraper blade Scrapes the frozen product from the freezing cylinder wall. Beater seal Prevents the product from leaking out of the bottom of the cylinder. Must be lubricated carefully and replaced regularly. -
Page 18: Cleaning Tools
CLEANING TOOLS CLEANER & SANITIZER Name Function Hopper and cylinder cleaning & Brush for cleaning and sanitizing the hopper and the cylinder. sanitizing brush Dispensing door and feed tube cleaning Brush for cleaning and sanitizing the dispensing door and the feed tube. &... -
Page 19: Operating Procedures
8. OPERATING PROCEDURES CAUTION The user is responsible for complying with current national or federal health regulations. INTRODUCTION The following instructions refer to a situation where the various components are removed and dry, after cleaning. The following procedures show how to assemble the machine components, do the sanitization, prime the machine with fresh mixture and dispense the first ice cream serving. -
Page 20: Assembly Of The Dispensing Door
Mount the scraper on the beater body. 10 mm Insert the assembled beater in the freezing cylinder. 8.1.2 ASSEMBLY OF THE DISPENSING DOOR Insert the piston with the spring into the lubricated housing of the dispensing door, attach the handle, fit the shaped nozzle and the prime tube. -
Page 21: Assembly Of The Feed Tube
Insert the seal in place, fit the dispensing door and secure the fastening knobs. 8.1.3 ASSEMBLY OF THE FEED TUBE Insert the assembled feed tube into the mix inlet hole on the hopper bottom and turn it to the desired setting. In case of first start- up, adjust the feed tube at 3. -
Page 22: Sanitizing
8.1.6 SANITIZING CAUTION To prevent bacteria growth, sanitize with suitable 100 PPM solutions, prepared according to the manufacturer’s directions (e.g. Kay-5® o Stera-Sheen®). The cleaning/sanitizing solution cannot stay in contact with metal and plastic parts for more than 15 minutes. Otherwise, the surfaces may corrode. CAUTION Do not put brushes into the mix inlet hole while the beater is running. -
Page 23: Daily Closing Procedures
Select “PRODUCTION” mode. • Prepare the mix or use a ready-to-use mix. Raise the prime tube When the ice cream • Pour the mixture into the storage hopper: to release the excess mix starts leaking from minimum 3 litres and e maximum 6.5 litres, of air from the cylinder. - Page 24 ● Prepare a cleaning & sanitizing solution and fill two buckets, one for cleaning and one for sanitizing. ● Select STOP mode. Cleaning & sanitizing solution ● Remove the extruder, the drip-tray, the feed tube, the hopper agitator impeller and the hopper cover. ●...
- Page 25 ● Put all components on a clean, dry and sterilized surface and let them air dry. AIR DRYING ● Soak the brush in the sanitizing solution and rub the dispensing door at the ice cream exit point. Repeat several times for at least 60 seconds.
-
Page 26: Daily Opening Procedures
DAILY OPENING PROCEDURES CAUTION To prevent bacteria growth, sanitize with suitable 100 PPM solutions, prepared according to the manufacturer’s directions (e.g. Kay-5® o Stera-Sheen®). The cleaning/sanitizing solution cannot stay in contact with metal and plastic parts for more than 15 minutes. Otherwise, the surfaces may corrode. Before starting the opening procedures, check the screen for error messages. -
Page 27: Rinse
● To facilitate the ice cream melting and release, activate the “DEFROST” function and wait for this process to end. Start Wait Completed ● Place a bucket under the dispensing door, activate the beater rotation and release the melted ice cream. ●... -
Page 28: Hopper Cleaning
● Brush the hopper walls, the level sensor, the hopper agitator body and the mix inlet hole on the bottom of the hopper to remove ice cream leftovers. ● Place a bucket under the dispensing door, activate the beater rotation and release the rinse water. ●... -
Page 29: Disassembly Of Components
● Brush the hopper walls, the hopper agitator body and the mix inlet hole on the bottom of the hopper. ● Place a bucket under the dispensing door, activate the beater rotation and release the sanitizing solution. ● Once finished, close the handle and select “STOP” mode. 8.5.4 DISASSEMBLY COMPONENTS ●... -
Page 30: Cleaning And Sanitization Of Components
● Extract the beater from the cylinder and disassemble every part. ● Remove and disassemble the drip-tray. 8.5.5 CLEANING AND SANITIZATION OF COMPONENTS ● Prepare a cleaning & sanitizing solution and fill two buckets, one for cleaning and one for sanitizing. ●... - Page 31 ● Sanitize the components, leaving them to soak in the sanitizing solution for at least 5 minutes. SANITIZATION ● Place all the cleaned and sanitized components on a clean, dry and sterilized surface and let them air dry until the next use. AIR DRYING ●...
-
Page 32: Product Settings
ADJUSTING THE ICE CREAM VISCOSITY AND SELECTING THE PRODUCT TYPE The structure of the dispensed product depends on the mixture composition and the machine settings. Giotto 11 GR can be set up for the production of 4 different types of product, which differ in terms of viscosity and dispensing temperature. Viscosity can be adjusted according to each product type. -
Page 33: Machine Menu
IMPORTANT Wait at least 15 minutes and deliver at least 10 servings before evaluating the new set overrun. 9. MACHINE MENU The machine menu allows you to manage additional functions, specific settings and complementary services. Within these sections you can view and change some basic data without the use of passwords. More detailed information and settings, falling under the Store Manager’s and the Technician’s responsibility, are password-protected. -
Page 34: Presentation Of The Main Screen
IMPORTANT The Store Manager is responsible for checking the HT cycle effectiveness with the mix used, by contacting the semi-finished product or mixture manufacturer. IMPORTANT The Store Manager is responsible for complying with current national or federal health regulations and shall make sure the HT cycle is allowed. IMPORTANT HT cycle function is not to be used in lieu of proper cleaning and sanitizing procedures. -
Page 35: Ht Cycle Manual Start-Up
9.2.1.2 HT cycle manual start-up and stop ● Press PLAY to start the HT function manually. ● Press STOP to stop the HT function manually. 9.2.1.3 How to schedule the HT cycle auto-start ● Press icon to enter the HT cycle schedule, ●... -
Page 36: Pop-Up Messages
9.2.1.5 Pop-up messages During the HT cycle, some pop-up messages may be displayed on the screen. 9.2.1.6 Notifications The machine can send notifications about HT cycle anomalies to remote users. Events reported by GCARE Notifications service are: ● HT cycle failed ●... -
Page 37: How To Activate Self-Service Mode
9.2.3.2 How to activate Self-Service mode ● Select “Activate Self-Service mode”. 9.2.3.3 How to quit Self-Service mode ● Swipe down. ● If the screen lock is active, insert code 4444. 9.2.3.4 How to select and upload multimedia files Enter GCARE Connect app or GCARE Galileo web portal to upload customized multimedia files (pictures or videos). ●... -
Page 38: Viscosity And Selection Of The Product Type
9.3.1 VISCOSITY AND SELECTION OF THE PRODUCT TYPE See paragraph 8.7.1 Adjusting the ice cream viscosity. 9.3.2 AUTOSWITCH The autoswitch function allows you to set the automatic change of mode from Production to Stand-by and from Stand-by to Production at a specific time without the operator’s intervention. 9.3.2.1 Presentation of the main menu FROM PRODUCTION FROM STAND-BY... -
Page 39: How To Save A Set Of Parameters
PARAMETER UTILITIES BACK TO THE DESCRIPTION HOME PAGE RESTRICTED AREA ENTER ADVANCED SETTINGS CODE 9.3.4.2 How to save a set of parameters You can save a set of adjustments for future retrieve. ● Press ● Press Save parameters. 9.3.4.3 How to retrieve a set of parameters You can restore the previously saved values. -
Page 40: Mix Temperature Calibration
9.3.5 MIX TEMPERATURE CALIBRATION Mix temperature calibration To ensure proper mixture storage temperature in Carry out the calibration every 12 months to ensure adequate mixture storage temperature and proper HT cycle execution. the machine, it is important to make sure the real temperature corresponds to the one detected by the Hopper mix temperature calibration... -
Page 41: Gtech Healthy
9.4.2 GTECH HEALTHY Enable GTECH Healthy to ensure quality and safety to the ice cream dispensed, in compliance with the American NSF hygiene requirements in force. An alert reports failure of proper storage process, inviting you to follow the recovery procedures for a safe production activity. -
Page 42: How To Reset The Counter
BACK TO THE RESET COUNTER HOME PAGE Serving counter RESTRICTED AREA Today SERVINGS DELIVERED TODAY Since 20 March 2019 10:32 SERVINGS DELIVERED SINCE THE LAST RESET 9.4.3.1 How to reset the counter Daily counter (Today) is automatically reset every day at midnight. ●... -
Page 43: How To Connect To The Machine Remotely
Keep the machine connected to ensure automatic software updates which improve performance, reliability and energy saving. In case of assistance, a Technician can assist you remotely in a quick and effective way. Furthermore, you will help Gel Matic to improve its technology. BACK TO THE... -
Page 44: Gcare Maintencance
9.4.6 GCARE MAINTENANCE GCARE Maintenance is a set of services conceived to guide you through proper machine use, both with ordinary and extraordinary activities. The objective is to extend the machine life span and reduce technical service and the associated costs, thus avoiding downtimes thanks to a programmed maintenance activity. -
Page 45: Notifications
9.4.7 VCARD Touch the machine screen to view the Technician’s contact details for scheduled maintenance or problem fixing. ● vCard data can only be modified by a service centre authorized by Gel Matic. BACK TO THE HOME PAGE vCard SERVICE CENTRE DATA 9.4.8... -
Page 46: How To Set Up Notifications
● HT cycle not started or failed ● Machine downtime due to GTECH Healthy intervention. GCARE Maintenance ● Requests for parts replacement ● Requests for maintenance ● Confirmations of maintenance execution. 9.4.8.1 How to set up notifications ● Enter your Account section from GCARE Connect app or GCARE Galileo web portal. 9.4.9 GLEARN TUTORIAL GLEARN Tutorial is a tool conceived to guide you through some of the operating procedures. - Page 47 GO TO THE GO TO THE PHASE TITLE PREVIOUS PHASE NEXT PHASE Cleaning CLOSE PHASE NO. SHOW MACHINE COMMANDS MACHINE COMMANDS FOR PHASE EXECUTION Activate the beater rotation and release the melted ice cream. PLAY TUTORIAL VIDEO DESCRIPTION OF THE OPERATION TO BE PERFORMED Giot to 11 GR...
- Page 48 Head Office Showroom Production Site Via Zanica, 6C I - 24050 Grassobbio (BG) Legal Head Office Production Site Via G. Galilei, 10 I - 24050 Orio al Serio (BG) Tel. +39 035 525138 - info@gelmatic.com - www.gelmatic.com...
Need help?
Do you have a question about the GIOTTO 11 GR and is the answer not in the manual?
Questions and answers