Advertisement
Quick Links
Advertisement

Related Manuals for Loft D3 Series


Summary of Contents for Loft D3 Series
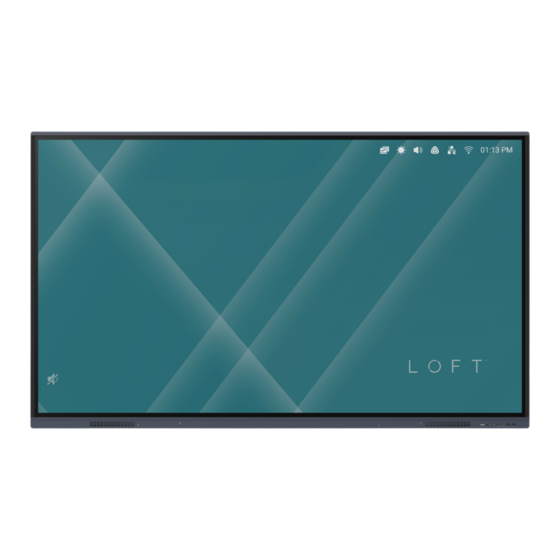
- Page 1 D3-Series Interactive Display User Manual...
-
Page 2: Table Of Contents
Contents Safety Warnings......................3 FCC Statement....................... 6 Control Panel ........................7 Remote Control......................13 Connections and Settings.................. 18 Troubleshooting ......................22... -
Page 3: Safety Warnings
Safety Warnings Before operating, please read this manual thoroughly, and keep it for future reference. Image shown in this manual is indicative only. There may be differences between the pictures and the actual product. Placement • Do not put heavy objects on top of the unit. •... - Page 4 LED Screen • Unplug the power cable before cleaning. Clean the screen with a soft, dustless and dry cloth. • For deep cleaning, please contact an authorized service center. • Never use water or the spray type detergent to clean the unit. •...
- Page 5 Earphones • Before using earphone, please turn down the volume in advance. Listening at a high volume for long periods of time may affect hearing. Battery • Please ensure the remote batteries are properly disposed of or recycled after using. •...
-
Page 6: Fcc Statement
FCC Statement This equipment has been tested and found to comply with the limits for a Class B digital device, pursuant to part 15 of the FCC Rules. These limits are designed to provide reasonable protection against harmful interference in a residential installation. This equipment generates, uses and can radiate radio frequency energy and, if not installed and used in accordance with the instructions, may cause harmful interference to radio communications. -
Page 7: Control Panel
Control Panel Number Items Function description Loudspeaker Amplify audio. Magnetic Area for placing the absorptive zone magnetic pen. - Page 8 Tap to enter energy-saving, press for at least 2 seconds to enter standby mode. Remote control signal Receive the remote signal. receiver Identify the brightness of Light Sensor ambient light. Support charging, data transmission, extension for audio and video output interface, etc. Note:The maximum rated power of the USB Type- C port of this USB-C 3.1...
- Page 9 High- definition multimedia interface signal input, connect to devices with HDMI output HDMI 3 interface (personal computer with HDMI output, set- top box, or another video device). Touch signal output to the TOUCH 2 external computer. Connect USB devices such as USB 3.0 mobile hard disk, USB keyboard and mouse, USB drives, etc.
- Page 10 Number Items Function description Serial interface, used for mutual RS232 transfer of data between devices. Connect RJ45 terminals. Connect USB devices such as mobile hard disk, U disk, USB keyboard and mouse, USB drives, etc. Touch signal output to the external TOUCH 1 computer.
-
Page 11: Remote Control
Remote Control Remote Control Button Instruction... - Page 12 Function Power on/off Enter or exit mute mode Start PC's Windows key Space PC's Space key Alt+Tab PC's Alt+Tab key Alt+F4 PC's Alt+F4 key Numeric Keys Numeric input keys Display Display channel information Input Pop up TouchMenu-General Setting Home Return to android system main screen key Menu Pop up TouchMenu-Audio Enable or disable Front keyboard and Touch...
- Page 13 Remote Control Instructions Install Batteries Open back cover of battery component on the back of remote control. 2. Install AAA type battery according to the corresponding electrode, make sure battery positive and negative pole are correct ("+ "to"+ ", "- " to "- "), please do not mix using old and new batteries.
-
Page 14: Connections And Settings
Connections and Settings For the safety of you and the machine, please do not connect any power plug before connection. 1 . External Computer and Touch Connection You can connect a PC to the display by: • Using a USB Type C cable to connect the computer •... - Page 15 After cable connection, plug in power cord, and switch power on. Start external computer. Press the key, and the equipment will power on Switch the input source to the USB Type C/V GA/HDMI channel in the main menu. (Supports Resolutions: 800×600, 1024×768, 1920×1080, 3840× 2160) NOTE: With an external computer input, the equipment's maximum...
- Page 16 2. Audio and Video Equipment • Use HDMI cable to connect audio and video equipmentwith HDMI output. • After cable connection, plug in power cord, and switchpower • Press to turn equipment on. • Switch the input source to the HDMI channel in the main menu. 3.
- Page 17 4. RS232 Connection 5. LAN Connection 6. USB Connection AUDIO OUT Connection...
-
Page 18: Troubleshooting
Troubleshooting Machine Fails to Work Normally Check whether there are other objects between remote control and equipment control receiving window, thus leading to failure of remote control. Remote control failure Check whether the battery electrode in the remote control is correct. Check whether remote control needs new batteries. - Page 19 PC Mode Check whether display is set correctly. Signal out of Check whether resolution is the best range resolution. Adjust line and field synchronization in menu. Select automatic correction in menu. Background has vertical lines or Adjust clock and phase position in streaks menu.
- Page 20 Video Function is Not Working Normally Check whether the machine is started state. Check whether signal wire is properly connected, whether INPUT is No picture and corresponding to it. no sound If the display is set to output the OPS- PC, check whether the OPS-PC is powered on.
- Page 21 Audio Function Can't W ork Normally Check whether mute button is pressed for mute. With image but Press VOL + /- to adjust volume. without sound Check whether audio line is connected correctly. Adjust sound balance in menu. Check whether computer sound Only one speaker control panel only sets up one sound has sound...
- Page 22 Maintenance Proper maintenance can avoid many early faults and regular careful cleaning can make machine brand new. Please unplug power plug before cleaning and maintenance, to prevent electric shock. Cleaning the Screen Please mix and stir even a little fabric softener or tableware detergent with alcohol.
Need help?
Do you have a question about the D3 Series and is the answer not in the manual?
Questions and answers