Table of Contents
Advertisement
Quick Links
Advertisement
Table of Contents

Related Manuals for Sunde H4

Summary of Contents for Sunde H4
- Page 1 SUNDE User’s Manual H4 and earlier models...
- Page 2 2012 Huiyuan Co., Ltd. All rights reserved. THANK YOU FOR PURCHASING SUNDE NETWORK TERMINAL. PLEASE READ THIS MANUAL CAREFULLY BEFORE USE. NOTE: All the information contained herein is the property of HUIYUAN. No part of this publication (whether in hardcopy or electronic form) may be reproduced or transmitted, in any form or by any means, electronic, mechanical, photocopying, recording, or otherwise, without the prior written consent of HUIYUAN.
-
Page 3: Table Of Contents
Contents Chapter 1. Introduction ..................3 1.1 Components ................... 3 1.2 Recommended Server Configuration ............4 1.3 Connecting .................... 4 Chapter 2. Installing Program ................7 2.1 Installing NetPoint Software ..............8 2.2 Setting up user accounts ..............13 2.3 Changing user account types ............... 16 2.4 Enabling Remote Desktop .............. -
Page 4: Chapter 1. Introduction
Its main job is to convey input and output between the user and the remote server. By using SUNDE Network Terminal devices, a great deal hardware cost can be saved, much less software support is required, much less power is consumed, little desk space is occupied and much less e-waste is generated. -
Page 5: Recommended Server Configuration
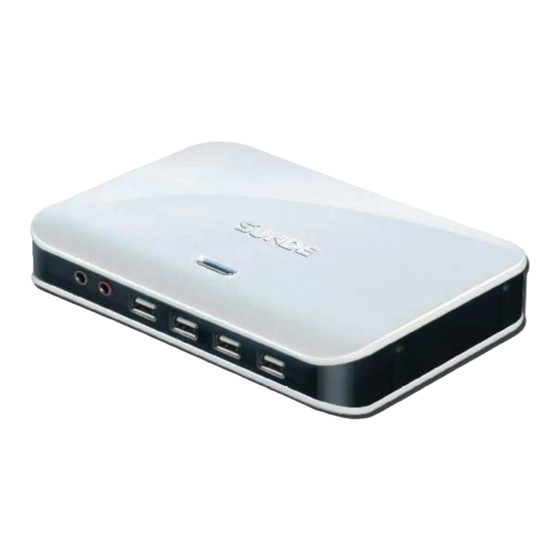
Additional Ethernet cables will be required in this case. 1.2 Recommended Server Configuration Given below is the recommended minimum Host PC/Server configuration for connecting up the corresponding number of SUNDE Network Terminal terminals. 1.3 Connecting Diana Front Diana Back... - Page 6 H4 Front H4 Back H4 NANO H 4 NANO LM1U Front LM1U Back 5 5 5 5...
- Page 7 800LS 800LS Back 1. Connect your Keyboard/Mouse/Monitor/Speaker or Headphone as shown in the picture: 2. Connect the Terminal to Host PC/Switch/Router using the Ethernet cable with RJ45 pins as shown below. CAUTION USE ONLY THE ORIGINAL POWER SUPPLY ADAPTER 3. Connect the power adapter. 6 6 6 6...
-
Page 8: Chapter 2. Installing Program
For the latest version of NetPoint, please visit http://www.sundenc.com/support/download.html Turn on SUNDE Terminal and wait till all lights are on. 1. On the Host PC, open a browser (e.g. IE), input the IP address of the terminal, the NetPoint Terminal Setup page will appear. - Page 9 3. Before installation, please follow below steps to set your system: 1) right click “My computer” 2) select “Properties” 3) choose “Hardware” tab 4) click “Driver Signing” 5) choose “Ignore—Install the software anyway and don’t ask for my approval.” 4. Find the location where you put “NetPoint Installation Package”. In the example picture, it is put on the desktop of the host OS.
- Page 10 If the following window pops up (this will happen if the OS is Windows 7), choose “Yes” to continue Click on “Next” to continue: 9 9 9 9...
- Page 11 Choose “I accept the terms of the license agreement”: NetPoint will automatically detect the OS version. If it is 32bit version Windows, like Windows XP pro, Windows 2003, the following installing components will be available:...
- Page 12 Choose “Remote Sound” will install NetPoint virtual audio device into the OS, enabling SUNDE terminal to have audio output and MIC input function. Choose “USB Printer” if you want to plug USB printers to the terminal and print locally. If the OS is 64bit version, like Windows 7 64bit, Windows 2003 64bit, or Windows 2008R2, only “NetPoint Core”...
-
Page 13: Setting Up User Accounts
The installation process will start. When the installation is finished, click on “Finish” to restart the system: 2.2 Setting up User Accounts When the OS is restarted first time since the installation of NetPoint, the following window will pop up, reminding you to set up user accounts which will be assigned for terminals:... - Page 14 Click on “Ok” if you want to set up new account now, or you can simply click on “No” if want to do this job later. Here are the steps of how to set up new accounts: Go to “Control Panel” ->”All Control Panel Items” ->User Accounts. See picture above. Click on “Manage another account”.
- Page 15 Type in the new account name and then choose the user type. It could be a standard user or an administrator. An administrator will automatically have the right to log on the system remotely, while a standard user could not log on the system by default. Some changes need to be made to the attributes of a standard user before it has the right to log on system remotely.
-
Page 16: Changing User Account Types
2.3 Changing User Account types Now, we will add this new account “1” to the user group of “Remote Desktop User” which has the right to log on the OS remotely. Go to Control Panel ->All Control Panel Items -> Administrative Tools, then click on “Computer Management”. - Page 17 Double click on “1”, or right click on it then choose “Properties”: Click on “Member of”, then “Add”...
- Page 18 In the new window, click “Advanced” In the new window, click on “Find Now”...
- Page 19 A list of user groups will show up. Choose “Remote Desktop Users”, then click on “OK” to save: Now we will be back to the previous window. You can see “HYTEST-PC\Remote Desktop Users” is chosen. Click on “OK” to take effect.
- Page 20 Now you can see the user with name “1” is a member of “Remote Desktop Users” Group. Click on “OK” to close the window.
-
Page 21: Enabling Remote Desktop
2.4 Enabling Remote Desktop We need to set the system to allow Remote Desktop so that SUNDE terminal can log on the system remotely. Take Windows 7 as the example: Go to “Computer”, then “System properties”. In the new window, click on Remote, then choose “Allow connections from computers... -
Page 22: Uninstalling Netpoint Software
2.5 Uninstall NetPoint Software Click on the “NetPoint Installation Package”: Choose “Remove” and then click on “Next” to continue:... - Page 23 In the pop up window, choose “OK” to confirm uninstall: When uninstall process is finished, click on “Finish” to restart the system:...
-
Page 24: Chapter 3. Ip Address Setting
3. IP Address Setting There are two IP addresses need to be set. One is terminal’s Local IP, the other one is Server’s IP. 3.1 Setting Terminal’s IP Address There are two ways to setup the Terminal’s IP address. IP A DHCP S YNAMIC DDRESS FROM... - Page 25 Click “Find” and the Terminal would detect the DHCP server and obtain the IP address and the User Interface will appear for Connect. IP A TATIC DDRESS FOR THE ERMINAL This would be an option exercised by users not employing a network server environment, though windows XP and Vista are capable of being used as DHCP servers.
-
Page 26: Setting Server's Ip Address
3.2 Setting Server’s IP Address There are two ways to setup the server’s IP address. EARCH SERVERS IN If the server is in the same LAN with the terminal, the terminal can search the LAN and find the server itself by set the server IP as “Search servers in LAN”. - Page 27 After setup terminal’s Local IP, just click “find”, it will find all the servers in the LAN. Click “Find” and after the Host is detected, Click “Connect”. TATIC FOR SERVER You can setup the server using static IP address so that the terminal can logon the server directly after power on.
-
Page 28: Chapter 4. Terminal Configuation
After save, the terminal will restart, and windows Log will appear on screen. 4. Terminal Configuration 4.1 Setting Screen Resolution The terminals will auto select the screen resolution for hardware attached to it, which would be the default resolution. Users can change this default to one of their choice. To change screen resolution: Click “Setup”, select “General”... -
Page 29: Peripheral Device Setting
“Yes” to keep these settings. Otherwise, just wait for a minutes, it will go back to the previous configuration. 4.2 Peripheral device setting Click “Setup”, select “General” tab. On the USB tab you can select Printer or Disk (SUNDE 880L\SUNDE M-HX1U\ SUNDE M-HM1U has this function), Local Sound. When done, click “Save”. -
Page 30: Setup Protect Setting
When you choose Printer option, you can use printer easily. Note: When logon to host PC, you can plug in a USB Printer at anytime, after plug in, The following message will be displayed when the connection is correct. This means the system has detected the USB device. -
Page 31: Setting Up Default Region
When you switch ON the Network Terminal and click “Setup”, it will prompt for the Password. 4.4 Setting up Default Region This will effect after logon to a Windows System. Click “Setup”, select “Language tab”, and choose the language you need. When done, click “Save”. -
Page 32: Setting Up Terminal Through Web Broswer
5. Terminal Management 5.1 Running NetPoint Manager Console Using NetPoint Manager Console, you can control the SUNDE terminal. To run NetPoint Manager Console, double click on the NetPoint Manager Console icon on the taskbar: The NetPoint Manager Console window will show up. -
Page 33: Functions Of Netpoint Manager Console
5.2 Functions of NetPoint Manager Console Status You can see the status of all the SUNDE terminals connected to the Host PC. Name For management purposes, you can setup different names for the terminals. By default, the name of terminal is the serial number of each device. - Page 34 Send Message The Host PC can send message to any terminal which is connected to it. Right click on the user to whom you are going to send message:...
- Page 35 Click on “SendMsg”, or choose “SendMsg All” if you want to send the same message to all available terminals. Type your message in the new window, and then click “Send”. View user’s desktop In the NetPoint Manager Console, when you move mouse on the “Desktop” column of the user, the user’s desktop will show.
-
Page 36: Chapter 6. Local Printer Setting Up
Information It shows the status of the user, its IP address, Device ID (serial number), User Name, etc. See picture below: 6. Configuration Local Printer 1. The first step is to install the driver of the printer in the Host PC with Netpoint software installed. -
Page 37: Chapter 7. Audio Redirection
SUNDE terminal logging in. For 64bit version of Windows Operation Systems, no NetPoint Virtual Audio devices will be installed to the host. Instead, SUNDE will use Windows RDP audio redirection to achieve audio playback and MIC input. -
Page 38: Windows 7 64Bit
7.1 Windows 7 64bit Audio Redirection Setting Up Click on “Start”, then type in “gpedit.msc”. A new window titled “Local Group Policy Editor” will pop up:... - Page 39 Click on “Computer Configuration”, then “Administrative Templates”, “Windows Components”: In the “Windows Components” tree, click on “Remote Desktop Services”, then “Remote Desktop Session Host”, “Device and Resource Redirection”. In the list shown in the right of the window, the first two shows “Not configured”. See picture below:...
- Page 40 Click on “Allow audio and video playback redirection”. In the popping up new window, choose “Enabled”, then click on “OK” to save:...
- Page 41 Then click on “Allow audio recording redirection”. In the popping up new windows, do the same thing as we just have done just now. See picture below: Now you can see the first two are enabled:...
-
Page 42: Windows 2008R2 64Bit
7.2 Windows 2008R2 64bit Audio Redirection Setting Up In the “Initial Configuration Tasks” window, click on “Add roles”: Click on “Next” to continue:... - Page 43 Click on “Server Roles”, choose “Remote Desktop Services”, then “Next”: Click on “Role Services”, choose “Remote Desktop Session Host”, then “Next”:...
- Page 44 Click on “Client Experience”, choose “Audio and video playback” and “Audio recording redirection”, then “Next”: Confirmation: click on “Install”, the system will then install the functions you have chosen:...
-
Page 45: Windows 2003 64Bit & 32Bit
7.3 Windows 2003 64bit and 32bit Audio Setting Up Click on “Start”, then “Administrative Tools”, “Terminal Services Configuration”: In the new window, click on “Connections”, then double click “RDP-Tcp” to open it:... - Page 46 Click on “Client Settings”: Uncheck “Audio mapping”:...
- Page 47 Click “Apply”, then “OK” to save: NOTE: this setting up process is also needed in Windows 2003 32bit version if audio function is needed at the terminal side.
-
Page 48: Chapter 8. Configuration With Linux Os
8. Configuration with Linux OS 8.1 Ubuntu Installation of RDP server in Ubuntu A. Configure apt Follow these steps to configure apt: 1.. sudo apt-get update 2. sudo apt-get upgrade Complete the system update. Restart the computer. 3. sudo apt-get install build-essential... - Page 49 4. sudo apt-get install libpam0g-dev 5. sudo apt-get install libssl-dev...
- Page 50 6. sudo apt-get install tightvncserver B. install xrdp-0.4.1 Follow these steps to install xrdp-0.4.1: 1. tar xvzf xrdp-0.4.1.tar.gz...
- Page 51 2. cd xrdp-0.4.1 3. make 4. sudo make install...
- Page 52 C. Configuration file Follow these steps: 1. gconf-editor 2. apps / gnome-setting-deamon / plugins / keyboard / To set "active" to Disable NOTE: The configuration of each user must be changed to disable.
- Page 53 D. Start XRDP Sudo /usr/local/xrdp/xrdp_control.sh start Logon Please select "Auto logon" in the "Server" bookmark in Setup of Terminal. Input the Server IP address and save. Turn the power off and on.
- Page 54 xrdp autostart setting NOTE: The host can auto-run xrdp only when logon under root user A. Boot system with super user (root) 1. modify “/etc/gdm/gdm.conf” file with the command as following: Sudo gedit /etc/gdm/gdm.conf 2. Modify 237 Line “AllowRoot=false” to “AllowRoot=true”...
- Page 55 3. choose “save” and exit 4. set the password for “root”...
- Page 56 5. reboot the system, logon with “root” user B. xrdp autostart setting 1. gnome-session-properties 2. choose “Add”...
- Page 57 3. Add Startup Program Name: xrdp Command: /usr/local/xrdp/xrdp_control.sh start Comment: start xrdp Chick “Add” to save 4. reboot the system, logon with “root” user...
-
Page 58: Redhat
8.2 Installation of RDP Server in REDHAT 6 Open “Terminal”: 1. Type in “suroot” in the new window and then code. This will change to root user account. 2. Type in following command to install “gcc、make、pam-devel、openssl-devel”: yum install gcc make pam-devel openssl-devel 3. - Page 59 Start XRDP first, then use “netstat” to check if XRDP has been successfully installed /usr/local/xrdp/xrdp_control.sh start Starting:xdrp and sesman … netstat -tlnp tcp 0 0 127.0.0.1:3350 0.0.0.0:* LISTEN 8545/sesman tcp 0 0 0.0.0.0:3389 0.0.0.0:* LISTEN 8543/xrdp If the installation has been successful, the above 2 lines in red will show up. This means the port 3350 of sesman and port 3389 of XRDP has been enabled.
- Page 60 10. Enable remote log in...
- Page 61 11. Try logging in remotely...
-
Page 62: Centos
7.3 Installation of RDP Server in CENTOS 6 1. Install CENTOS 6 2. Open “Terminal” 3. Type in “suroot” in the new window and then code. This will change to root user account. Type in following command to install “gcc、make、pam-devel、openssl-devel”: yum install gcc make pam-devel openssl-devel 5. - Page 63 tar zxf xrdp-0.4.1.tar.gz Install XRDP cd xrdp-0.4.1 make make install 8. Start XRDP first, then use “netstat” to check if XRDP has been successfully installed /usr/local/xrdp/xrdp_control.sh start Starting:xdrp and sesman … netstat -tlnp tcp 0 0 127.0.0.1:3350 0.0.0.0:* LISTEN 8545/sesman tcp 0 0 0.0.0.0:3389 0.0.0.0:* LISTEN 8543/xrdp...
- Page 64 12. Enable remote log in...
- Page 65 13. Try log on the system remotely...
-
Page 66: Chapter 9. Faq
8. FAQ 1.Q: How to set user account and password A: 1). Open Control Panel, then choose User Accounts 2). Choose “Create a new account” 3). Type a name for the new account, then choose Next 4). Pick an account type, then choose Create Account NOTE: The user account type must be an administrator account or a Remote Desktop user. - Page 67 8.Q: I am not connected and the screen displays “DHCP server not found” A: NT is set to get the IP address dynamically. If you enter the setup screen of the terminal by pressing “Setup”, you can check in the “Local” tab and make sure that the “Get from DHCP Server”...
Need help?
Do you have a question about the H4 and is the answer not in the manual?
Questions and answers