Table of Contents
Advertisement
Advertisement
Table of Contents

Related Manuals for Sunde H4S

Summary of Contents for Sunde H4S
- Page 1 SUNDE User’s Manual NetPoint2.2 & H4S USER MANUAL FOR NETPOINT2.2 AND H4S 4...
- Page 2 ©2015 Bigpond Technology. All rights reserved. www.sunde.net.pk THANK YOU FOR PURCHASING SUNDE NETWORK TERMINAL. PLEASE READ THIS MANUAL CAREFULLY BEFORE USE. NOTE: All the information contained herein is the property of BIGPOND TECHNOLOGY. No part of this publication (whether in hardcopy or electronic form) may be reproduced or transmitted, in any form or by any means, electronic, mechanical, photocopying, recording, or otherwise, without the prior written consent of BIGPOND TECHNOLOGY.
-
Page 3: Table Of Contents
..........................29 4.4 User Accounts ..........................30 4.5 One-Key Broadcasting ........................33 5. H4S Connecting to Windows or Linux Without NetPoint2.2 ..............34 5.1 How to Mount USB flash drive in Linux ..................35 USER MANUAL FOR NETPOINT2.2 AND H4S 4... -
Page 4: Introduction
Its main job is to convey input and output between the user and the remote server. By using SUNDE H4S Network Terminal devices, a great deal hardware cost can be saved, much less software support is required, much less power is consumed, little desk space is occupied, and much less e-waste is generated. -
Page 5: Components
Additional Ethernet cables will be required in this case. 1.2 Recommended Server Configuration You can find a detailed Server Configuration chart in H4S datasheet. Remember, the size chart is reference only. Since the workload may vary greatly in different environments, a test running is suggested if you need a more accurate server configuration data. -
Page 6: Connecting
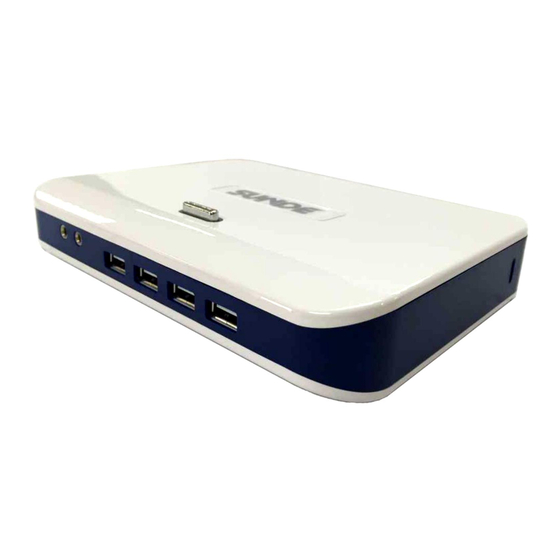
1. Connect your Keyboard/Mouse/Monitor/Speaker or Headphone as shown in the picture: 2. Connect the Terminal to Host PC/Switch/Router using the Ethernet cable with RJ45 pins as shown below. CAUTION USE ONLY THE ORIGINAL POWER SUPPLY ADAPTER 3. Connect the power adapter. USER MANUAL FOR NETPOINT2.2 AND H4S 4... -
Page 7: Software Installing
NetPoint2.2. They can be enabled or reinstalled after the installation of NetPoint2.2. Please visit http://www.sunde.net.pk/ for the latest version of NetPoint2.2. Find the location where you put “NetPoint Installation Package2”. In the example picture, it is put on the desktop of the host OS. - Page 8 If below message pops up, choose “Yes” to continue: Click on “Next” to continue: Choose “I accept the terms of the license agreement”: USER MANUAL FOR NETPOINT2.2 AND H4S 4...
- Page 9 Choose the installation location. Use the default destination folder. Click on “Next” to continue: USER MANUAL FOR NETPOINT2.2 AND H4S 4...
- Page 10 Keep the default. Then “Next”: Now the software is installing: USER MANUAL FOR NETPOINT2.2 AND H4S 4...
- Page 11 When this warning shows up, choose “Install this driver software anyway”: Installing virtual audio device: USER MANUAL FOR NETPOINT2.2 AND H4S 4...
- Page 12 Installation is complete. Click “Finish” to restart the system: USER MANUAL FOR NETPOINT2.2 AND H4S 4...
-
Page 13: Enabling Remote Desktop
2.2 Enabling Remote Desktop We need to set the system to allow Remote Desktop so that SUNDE terminal can log on the system remotely. Take Windows 7 as the example: Go to “Computer”, then “System properties”. In the new window, click on Remote, then choose “Allow connections from computers running any version of Remote Desktop”. -
Page 14: Uninstalling Netpoint2.2 Software
2.3 Uninstall NetPoint2.2 Software Click on the “NetPoint Installation Package2”: Choose "Remove” and then click on “Next” to continue: USER MANUAL FOR NETPOINT2.2 AND H4S 4... - Page 15 When this pop up, choose “OK” to confirm uninstall: When uninstall process is finished, click on “Finish” to restart the system: USER MANUAL FOR NETPOINT2.2 AND H4S 4...
-
Page 16: Setting Up H4S
DHCP would automatically distribute them to the clients. When the network terminal is connected to a Network having a DHCP server, the settings for the Terminals would be as follows. Click “Setup”, select “Local” tab, and choose “Use Dynamic IP Address”. Click “Save” to exit: USER MANUAL FOR NETPOINT2.2 AND H4S 4... - Page 17 1. IP Address: Give H4S an IP address of its own here. The easy way to do is to give it an IP address after adding 1 to the last number of IP address you gave to the Host PC. Then you can continue adding 2, 3...
- Page 18 3. Gateway: Most often, this is the IP address of your Router. USER MANUAL FOR NETPOINT2.2 AND H4S 4...
-
Page 19: Setting Server Ip Address
If the server is in the same subnet with the terminal, the terminal can search the network and find the server itself by set the server IP as “Search servers in LAN”. After save the settings, H4S will go back to “Host List” page, and then display all available servers (with NetPoint2.2) installed in the LAN. - Page 20 You can setup the server using static IP address so that the terminal can logon the server directly after power on. For those Host servers that are not in the same subnet as H4S, you have to setup the IP address for the server in this way.
-
Page 21: Setting Screen Resolution
After save, the terminal will go to Host List page. After 5s counting down, H4S will try to connect to the designated Host server. 3.3 Setting Screen Resolution H4S supports 13 monitor resolutions. Please choose the correct resolution which matches best with the monitor. - Page 22 On this “Monitor” tab, you can also set the monitor to “Turn off after 15 minutes” or “Keep monitor always on”: USER MANUAL FOR NETPOINT2.2 AND H4S 4...
-
Page 23: Auto Logon
3.4 Auto Logon H4S can be set to log on the host directly when power on. That means you do not need to type in user name and password each time. To set up H4S working in this way, the first step is to set H4S Server IP address as shown in the picture below. - Page 24 (Domain) environment, type in the Domain Name. Otherwise, just leave it open. Save the settings, and the H4S will go back to Host List page, start counting down and then log on the Host automatically using the specified username and password.
-
Page 25: Advanced Settings
3.5 Advanced Settings To access “Advanced Settings” of H4S, click “Setup”, select “Advanced” tab. Here we can set up for H4S “Password Protection”, “Firmware Update”, “USB ports”, “Sound Ports” and “Language”. USB Ports Here you can choose to enable or disable USB ports for USB devices like USB flash drive, USB printer, etc. - Page 26 The final part of "Advanced" setting page shown the firmware information of H4S. Here you can also update firmware of H4S. There are two ways to apply the update: by TFTP server or by USB flash drive. We have a manual on how to update firmware for SUNDE terminals by TFTP server, please refer to this manual if you want to update firmware by TFTP server.
-
Page 27: Terminal Information
In the NetPoint 2.2 Console, click on “Terminal”, and the console will list all H4S terminals. When click to select one H4S terminal, the desktop of this H4S will be shown in the middle. Down to the bottom, two options are available. “Information” displays H4S serial No., IP address, status, server IP and user account name. -
Page 28: Send Message
“Administrator” and have logged in remotely. 4.3 Send Message In the terminal page, click on “Dialog” and you can see the txt space for typing in message. Type in your message, and then click “Send”. USER MANUAL FOR NETPOINT2.2 AND H4S 4... - Page 29 4.4 Account We can use the “Account” function of NetPont Console to set up user accounts for H4S users. Creating New Accounts: Creating one Creating multiple USER MANUAL FOR NETPOINT2.2 AND H4S 31 USER MANUAL FOR NETPOINT2.2 AND H4S 4...
- Page 30 There two types of accounts can be created: Remote User (RDP) and Administrator. Now, we can go to the “Local Users and Groups” to check if the creation of Windows user accounts is successful. USER MANUAL FOR NETPOINT2.2 AND H4S 4...
- Page 31 List of Accounts: We can also make amendments to accounts or delete accounts: We can also make amendments to accounts or delete accounts: USER MANUAL FOR NETPOINT2.2 AND H4S 4...
-
Page 32: One-Key Broadcasting
Steps to set H4S working without NetPoint2.2: Step1, make sure that the Host RDP (Widows) or XRDP (Linux) is enabled. Step2, go to Settings of H4S. In the server page, type in Server IP plus RDP port number. For example, 192.168.1.99:3389. -
Page 33: How To Mount Usb Flash Drive In Linux
5.1 How to Mount USB Flash Drive in Linux When H4S is connected to a Linux host, its user can plug in USB flash drive to the H4S and use it in the Linux system by typing some commands.
Need help?
Do you have a question about the H4S and is the answer not in the manual?
Questions and answers