Table of Contents
Advertisement
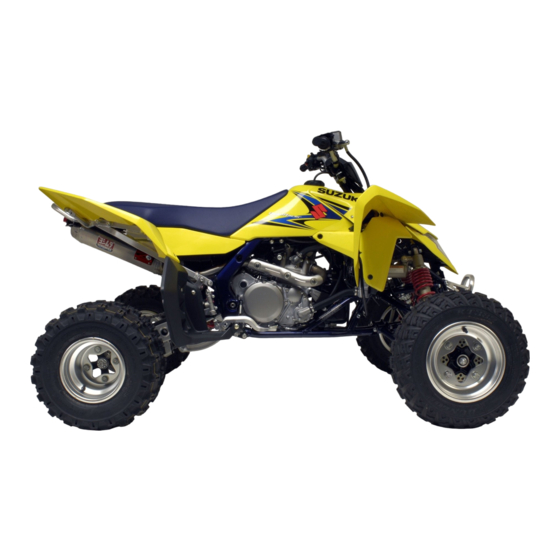
LT-R450
MANUEL DU PROPRIETAIRE
This owner's manual contains
important safety information.
Please read it carefully.
Never allow anyone under 16
years old to ride this ATV.
OWNER'S MANUAL
HANDLEIDING
Ce 'Manuel du propriétaire contient
des informations importantes
concernant la sécurité.
Le lire soigneusement.
Ne jamais autoriser les enfants
âgés de moins de 16 ans à
piloter ce V.T.T.
Deze handleiding bevat belangrijke
veiligheidsinformatie.
Lees de handleiding zorgvuldig door.
Laat nooit iemand onder 16 jaar
op deze ATV rijden.
Part No. 99011-45G51-01L
June, 2006
EN, FR, DU
TK
Advertisement
Chapters
Table of Contents

Related Manuals for Suzuki LT-R450 2006


Summary of Contents for Suzuki LT-R450 2006
- Page 1 LT-R450 OWNER’S MANUAL MANUEL DU PROPRIETAIRE HANDLEIDING This owner’s manual contains Ce ’Manuel du propriétaire contient Deze handleiding bevat belangrijke important safety information. des informations importantes veiligheidsinformatie. Please read it carefully. concernant la sécurité. Lees de handleiding zorgvuldig door. Le lire soigneusement. Never allow anyone under 16 Laat nooit iemand onder 16 jaar years old to ride this ATV.
- Page 2 ENGLISH LT-R450 OWNER’S MANUAL This manual should be considered a permanent part of the vehi- cle and should remain with the vehicle when resold or otherwise transferred to a new owner or operator. The manual contains important safety information and instructions which should be read carefully before operating the vehicle.
- Page 3 CAUTION Indicates a potential hazard that could result in vehicle damage. NOTE: Indicates special information to make maintenance easier or instructions clearer. © COPYRIGHT SUZUKI MOTOR CORPORATION 2006...
- Page 4 NOTICE TO OWNER’S • Never operate an ATV without wearing an approved motorcycle helmet that fits properly. You AN ATV IS NOT A TOY AND CAN should also wear eye protection BE HAZARDOUS TO OPERATE. An (goggles or face shield), gloves, ATV handles differently from other boots, long-sleeved shirt or jacket, vehicles including motorcycles and...
- Page 5 • Never operate the ATV on hills too • Always use proper procedures if steep for the ATV or for your abili- you stall or roll backwards when ties. Practice on smaller hills climbing a hill. To avoid stalling, before attempting larger hills. use the proper gear and maintain •...
- Page 6 • Always use the size and type tires specified in this manual. Always maintain proper tire pressure as described in this manual. • Never modify an ATV through improper installation or use of accessories. • Never exceed the stated load capacity for an ATV.
-
Page 8: Table Of Contents
TABLE OF CONTENTS FUEL, ENGINE OIL AND COOLANT RECOMMENDATIONS CONTROLS, EQUIPMENT AND ADJUSTMENTS RIDING YOUR ATV ACCESSORY USE AND VEHICLE LOADING INSPECTION AND MAINTENANCE TROUBLESHOOTING PREPARATION FOR WINTER RIDING TRANSPORTING CLEANING PROCEDURE CONSUMER INFORMATION SPECIFICATIONS INDEX... -
Page 10: Fuel, Engine Oil And Coolant Recommendations
FUEL, ENGINE OIL AND COOLANT RECOMMENDATIONS FUEL ........................1-2 ENGINE OIL ......................1-3 ENGINE COOLANT SOLUTION ................. 1-5... - Page 11 Oxygenated fuels which meet the are not the responsibility of Suzuki minimum octane requirement and the and may not be covered under the requirements described below may New Vehicle Limited Warranty or the be used in your motorcycle without Emission Control System Warranty.
- Page 12 NOTE: ENGINE OIL • To help clean the air, Suzuki rec- Oil quality is a major contributor to ommends that you use oxygen- your engine’s performance and life. ated fuels. Always select good quality engine oil. • Be sure that any oxygenated fuel...
- Page 13 JASO T903 Energy Conserving The JASO T903 standard is an index Suzuki does not recommend the use to select engine oils for 4-stroke of “ENERGY CONSERVING” oils. motorcycle and ATV engines. Motor- Some engine oils which have an API cycle and ATV engines lubricate...
- Page 14 ENGINE COOLANT SOLUTION CAUTION Use engine coolant that is compatible with an aluminum radiator, mixed with Spilled engine coolant can harm distilled water at a 50:50 mixture ratio your ATV. for engine coolant solution. An engine coolant mixture other than 50:50 can Engine coolant damage...
-
Page 16: Controls, Equipment And Adjustments
CONTROLS, EQUIPMENT AND ADJUSTMENTS LOCATION OF PARTS ..................2-2 KEY ........................2-5 IGNITION SWITCH ....................2-6 INDICATOR LIGHTS ................... 2-7 GEARSHIFT LEVER ..................2-10 LEFT HANDLEBAR ................... 2-10 CHOKE LEVER ....................2-12 RIGHT HANDLEBAR ..................2-12 THROTTLE LIMITER ..................2-13 REAR BRAKE PEDAL .................. -
Page 17: Location Of Parts
CONTROLS, EQUIPMENT AND ADJUSTMENTS LOCATION OF PARTS 1 Clutch lever 2 Left handlebar switches 3 Choke lever 4 Parking brake lock 5 Ignition switch 6 Indicator lights 7 Front brake fluid reservoir 8 Front brake lever 9 Fuel tank cap 0 Throttle lever... - Page 18 A Gearshift lever B Footrests...
- Page 19 C Seat lock D Rear brake pedal...
-
Page 20: Key
WARNING Indicates a potential hazard that could result in injury or death. Two keys come with this vehicle. Keep the spare key in a safe place. An iden- tifying number is stamped on the keys. Use this number when making a replacement key. -
Page 21: Ignition Switch
IGNITION SWITCH CAUTION Leaving the ignition switch in the “ ” position without the engine running for a long time can dam- age the ATV’s battery. The battery will run down if the lights are no for a long time when the engine is not running. -
Page 22: Indicator Lights
Neutral Indicator 2 INDICATOR LIGHTS A green light will come on when the transmission is in neutral. The light will go out when you shift into any gear other than neutral. Fuel indicator 1 When the fuel in the fuel tank drops below approximately 2.5 L (0.7/0.6 US/lmp. - Page 23 FI system failure Bring your vehicle to an autho- A. The red indicator light 3 comes rized Suzuki dealer as soon as on and remains lit when the FI possible. If the engine stalls, try system has a failure.
- Page 24 NOTE: CAUTION • High engine speed, low vehicle speed, or heavy load can increase Operating the ATV while the FI/ engine coolant temperature. engine coolant temperature indi- Decrease engine speed, reduce cator is blinking two times a sec- load and select an appropriate ond can damage your ATV.
-
Page 25: Gearshift Lever
GEARSHIFT LEVER LEFT HANDLEBAR Clutch Lever 1 The clutch lever is used for disengag- This vehicle has a 5-speed transmis- ing the drive to the rear wheels when sion which operates as shown in the starting the engine or shifting trans- illustration. - Page 26 Dimmer Switch 3 CAUTION Use the dimmer switch to select the high or low headlight beam when the Engaging the starter motor for ignition switch is in the “” position. longer than five seconds at a time When you move the dimmer switch to can damage the ATV.
-
Page 27: Choke Lever
CHOKE LEVER RIGHT HANDLEBAR Front Brake Lever 1 This ATV has a choke system to pro- vide easy starting when the engine is Apply the front brake by squeezing cold. When starting a cold engine, the front brake lever towards the grip. turn the choke lever all the way Throttle Lever 2 toward you. -
Page 28: Throttle Limiter
THROTTLE LIMITER REAR BRAKE PEDAL Use the throttle limiter to restrict max- Pressing the rear brake pedal will imum engine power by limiting throttle apply the rear brake. lever travel. Adjust this limiter accord- ing to the rider’s skill and experience. To adjust the throttle limiter: 1. -
Page 29: Fuel Tank Cap
FUEL TANK CAP WARNING Overfilling the fuel tank can be hazardous. If you overfill the fuel tank, fuel may overflow when it expands. Fuel expands due to engine heat or heating by the sun. Fuel that overflows can catch fire. Stop adding fuel when the fuel level reaches the bottom of the To open the fuel tank cap, remove the... -
Page 30: Seat Lock
SEAT LOCK WARNING Improperly installing the seat can be hazardous. Failure to install the seat properly could allow the seat to move and cause loss of rider control. Make sure to properly position and securely attach the seat when you install it. -
Page 31: Flag Bracket
ATV. This adjustment can be performed by changing the adjuster ring position. However, Suzuki recommends that this adjustment be done by your authorized Suzuki dealer, since a special tool is needed for this job. 2-16... - Page 32 Damping Force Adjustment The rebound and compression damp- ing force can be individually adjusted by turning the respective adjusters. The rebound damping force adjuster 1 is located at the bottom of the front suspension. The compression damp- ing force adjuster 2 is located at the top of the front suspension.
-
Page 33: Rear Suspension
This adjustment can be performed by changing the adjuster ring position. However, Suzuki recommends that this adjustment be done by your authorized Suzuki dealer, since a special tool is needed for this job. To set the rebound damping force, turn the adjuster clockwise until it stops and then turn it counterclock- wise. - Page 34 Turn the adjuster clockwise from the standard position to stiffen the damp- ing force. Turn the adjuster counter- clockwise to soften the damping force. The damping force should be adjusted gradually, 1/8 turn at a time, to fine-tune the suspension. High speed damping force adjuster To adjust the damping force, turn the adjuster in fully and then turn it out.
-
Page 36: Riding Your Atv
RIDING YOUR ATV WHAT YOU SHOULD KNOW BEFORE RIDING ..........3-2 INSPECTION BEFORE RIDING ................3-3 WHAT TO WEAR ....................3-6 BREAK-IN ......................3-7 STARTING THE ENGINE ..................3-8 STARTING OFF AND SHIFTING ................ 3-9 BRAKING ......................3-13 PARKING ......................3-14 TURNING ...................... -
Page 37: What You Should Know Before Riding
WHAT YOU SHOULD KNOW RIDING YOUR ATV BEFORE RIDING Before you ride, you should read all of WARNING the following information carefully. If you are properly prepared, you will Indicates a potential hazard that have a safer and more enjoyable ride. could result in injury or death. -
Page 38: Inspection Before Riding
Before you begin riding, you should INSPECTION BEFORE RIDING find a good place to practice the skills WARNING you need to ride safely. Find a flat, open area with enough space to prac- tice new skills. Failure to inspect the ATV before operating it can be hazardous. - Page 39 WARNING WARNING Operating this ATV with improper Checking maintenance items modifications can be hazardous. when the engine is running can be hazardous. Improper installation of accesso- ries or modification of this vehicle You could be severely injured if may cause changes in handling.
- Page 40 WHAT TO General 1. Bolts and nuts are tight CHECK FOR CHECK condition 2. No rattle from any parts of the machine with the Steering 1. Smoothness engine running 2. No restriction of 3. No visible evidence of movement damage 3.
-
Page 41: What To Wear
WHAT TO WEAR A helmet is the most important piece of gear you should wear. A helmet WARNING can help prevent a serious head injury. Choose a helmet that fits snugly. Ask your dealer for help in Operating this ATV without wear- ing an approved motorcycle hel- selecting a good quality helmet that fits properly. -
Page 42: Break-In
BREAK-IN Observe Your Initial and Most Critical Service The first month is the most important The initial service (break-in mainte- in the life of your vehicle. Proper oper- nance) is the most important service ation during this break-in period will your vehicle will receive. -
Page 43: Starting The Engine
STARTING THE ENGINE CAUTION Before attempting to start the engine, make sure to follow these steps. Engaging the starter motor for 1. Turn the key to the “ON” position. more than five seconds at a time 2. Set the engine stop switch to the can damage the ATV. -
Page 44: Starting Off And Shifting
STARTING OFF AND SHIFTING WARNING WARNING Operating this ATV on paved sur- faces, including sidewalks, paths, Carrying a passenger on this ATV parking lots, driveways, can be hazardous. streets can be hazardous. Carrying a passenger can greatly ATV tires are designed for off-road reduce your ability to balance and use. - Page 45 WARNING WARNING Operating this ATV on public Attempting stunts can be hazard- streets, roads or highways can be ous. hazardous. Stunt riding increases the chance You can collide with another vehi- of an accident, including an over- cle if you ride on public roads. turn.
- Page 46 WARNING WARNING Removing your hands from the Failure to use extra care when handlebars or feet from the foot- operating on excessively rough, rests during operation can be haz- slippery, or loose terrain can be ardous. hazardous. If you remove even one hand or Failure to use extra care can foot from the ATV, you can reduce cause loss of traction or vehicle...
- Page 47 WARNING Failure to use extra care when operating this ATV on unfamiliar terrain can be hazardous. You can come upon hidden rocks, bumps, or holes, without enough time to react. This could cause the ATV to overturn or go out of con- trol.
-
Page 48: Braking
BRAKING WARNING To stop the ATV, first release the throt- tle lever. Next, apply the front and rear Opening the throttle suddenly can brakes evenly and at the same time. be hazardous. As vehicle speed decreases, shift down through the gears. The front wheels can lift off the ground and cause loss of control ... -
Page 49: Parking
PARKING TURNING After stopping the ATV according to WARNING the “BRAKING” section, shift to neu- tral. Neutral position can be confirmed Turning the ATV improperly can be by observing the neutral indicator hazardous. light. Park the ATV on a flat surface and set the parking brake lock. -
Page 50: Skidding Or Sliding
To turn the ATV, use the following SKIDDING OR SLIDING technique: WARNING • Turn the handlebars in the direc- tion of the turn. • Shift body weight slightly forward Skidding or sliding improperly can and support your weight on the be hazardous. -
Page 51: Operation On Hills
OPERATION ON HILLS Climbing a Hill WARNING WARNING Climbing hills improperly can be Operating this ATV on excessively hazardous. steep hills can be hazardous. Climbing hills improperly can The ATV can overturn more easily cause loss of control or cause the on extremely steep hills than on ATV to overturn. - Page 52 To climb a hill with the ATV, follow the WARNING directions below. 1. Speed up and maintain a steady Stalling, rolling backwards or speed before reaching the bottom improperly dismounting the ATV of the hill. Shift down to increase while climbing a hill can be haz- approach speed, if necessary.
- Page 53 You may start to climb a hill and may a. If you are able to, drag the rear be unable to make it to the top. If this end of the ATV around until the happens, use the correct procedure vehicle points downhill.
- Page 54 Descending a Hill 6. Avoid going down a hill at an angle that would cause the vehicle WARNING to lean sharply to one side. Go straight down the hill where possi- Going down a hill improperly can ble. be hazardous. Going down a hill improperly can cause loss of control or cause the ATV to overturn.
-
Page 55: Riding Over Obstacles
Traversing a Slope RIDING OVER OBSTACLES WARNING WARNING Crossing hills or turning on hills Improperly operating this ATV improperly can be hazardous. over obstacles can be hazardous. Crossing hills or turning on hills Improperly crossing obstacles can improperly can cause loss of con- cause loss of control or a colli- trol or cause the ATV to overturn. -
Page 56: Riding Through Water
After repeated operation of the loss of traction and loss of con- ATV in these condition, bring it to trol. This could lead to an acci- your Suzuki dealer to have the dent. brakes inspected and cleaned. • Never operate this ATV in fast flowing water or in water deeper than described in this section. -
Page 57: Riding In Cold Weather
If brakes do not regain full stopping the tires are frozen to the ground, power, have your local Suzuki dealer pour warm water around them to melt check them before you continue riding the ice. - Page 58 Dressing for Cold Weather Riding WARNING WARNING Operating the ATV without a prop- erly functioning brake system can Operating your ATV in cold be hazardous. weather without proper clothing can be hazardous. Wet or frozen brakes will increase stopping distance.
- Page 59 We strongly recommend that if you do Riding your ATV on Snow and Ice any cold-weather riding, you familiar- WARNING ize yourself with the symptoms, treat- ment, and prevention of hypothermia. Riding on snow-covered terrain Information is available at libraries without care can be hazardous.
- Page 60 Your eyes may be sensitive to sunlight WARNING when you ride over snow or ice on a bright, sunny day. Snow or ice reflects Failure to use extra care when more light into your eyes than dirt or operating on slippery surfaces grass does.
-
Page 62: Accessory Use And Vehicle Loading
ACCESSORY USE AND VEHICLE LOADING ACCESSORY USE AND VEHICLE LOADING ........... 4-2... - Page 63 Use caution when choosing and which interfere with controls or installing accessories for your Suzuki. other equipment. Your Suzuki dealer may be able to 5. Do not carry heavy or bulky cargo. help you choose accessories and 6. Distribute cargo weight evenly install them correctly.
-
Page 64: Inspection And Maintenance
INSPECTION AND MAINTENANCE MAINTENANCE SCHEDULE ................5-2 TOOL ........................5-5 BATTERY ......................5-5 SPARK PLUG ...................... 5-6 IDLE SPEED ADJUSTMENT ................5-9 THROTTLE CABLE ADJUSTMENT ..............5-10 CHOKE CABLE ADJUSTMENT ............... 5-10 FUEL HOSE ....................... 5-11 ENGINE OIL ....................... 5-11 AIR CLEANER .................... -
Page 65: Maintenance Schedule
INSPECTION AND MAINTENANCE WARNING Indicates a potential hazard that could result in injury or death. MAINTENANCE SCHEDULE Perform maintenance according to time interval. Interval Every 3 Every 6 Initial 1 month Item months months Air cleaner element – * Exhaust pipe nuts and muffler bolts * Valve clearance –... - Page 66 Interval Every 3 Every 6 Initial 1 month Item months months Front and rear wheel set nuts Tighten each time the vehicle is ridden * Rear axle nut and locknut * Chassis bolts and nuts * General lubrication NOTE: I= Inspect and clean, adjust, lubricate or replace, if necessary, C= Clean, T= Tighten, R= Replace, L= Lubricate...
- Page 67 If you have any questions regarding Keep your ATV in good condition. maintenance intervals, consult Ask your Suzuki dealer or a quali- your Suzuki dealer. fied mechanic to do the mainte- nance items marked with an asterisk (*).
-
Page 68: Tool
TOOL BATTERY A tool kit is provided with your ATV. It The battery is located on the left side is located under the seat. of the engine. This battery is a sealed type battery and requires no mainte- nance. Have your dealer check the battery’s state of charge periodically. -
Page 69: Spark Plug
A white or dark insulator indicates the battery. that the engine may need adjustment, or another plug type may be needed. Never exceed the maximum charg- Consult your Suzuki dealer if your ing rate. plug insulator is not a light brown color. CAUTION... - Page 70 To install a spark plug, turn it in as far SPARK PLUG REMOVAL as possible with your fingers, then 1. Remove the seat by referring to tighten it with a wrench. the SEAT LOCK section. CAUTION Improper installation of the spark plug can damage your ATV.
- Page 71 6. Remove the bolts 8. Disconnect 4. Remove the cap from the fuel the couplers 9. Remove the fuel valve screw. Turn the fuel valve screw 4 clockwise to close the tank. fuel valve. Remove the fuel hose. Put the rubber cap on the fuel NOTE: Place the removed fuel tank valve outlet to avoid fuel leak.
-
Page 72: Idle Speed Adjustment
SPARK PLUG CLEANING IDLE SPEED ADJUSTMENT Adjust the engine idle speed periodi- cally with the engine at normal oper- ating temperature. To adjust the idle speed: 1. Start the engine and warm it up. 0.7 – 0.8 mm To maintain a hot, strong spark, keep the plug free from carbon. -
Page 73: Throttle Cable Adjustment
THROTTLE CABLE ADJUSTMENT CHOKE CABLE ADJUSTMENT 0.5 – 1.0 mm 3.0 – 5.0 mm Measure the throttle cable play by To adjust the choke cable play: 1. Loosen the lock nut 1. pressing the throttle lever. The throttle 2. Turn the adjuster 2 in or out to lever should have 3.0 –... -
Page 74: Fuel Hose
FUEL HOSE ENGINE OIL Long engine life depends much on the selection of a quality oil and the periodic changing of the oil. Daily oil level checks and periodic changes are two of the most important mainte- nance items to be performed. ENGINE OIL LEVEL CHECK The oil is pumped up to the oil tank while the engine is running. - Page 75 CAUTION Operating the vehicle with an incorrect amount of oil can dam- age your ATV. Too little or too much oil can dam- age your engine. Place the ATV on level ground. Check the oil level with the engine oil dipstick before each use of the vehicle.
- Page 76 WARNING New and used oil can be hazard- ous. Children and pets may be harmed by swallowing new or used oil. Repeated, prolonged contact with used engine oil may cause skin cancer. Brief contact with used oil may irritate skin. Keep new and used oil and used oil filters away from children and pets.
- Page 77 10. Reinstall the drain plugs and Engine damage may occur if you tighten them securely. use oil filter with the wrong design or thread specifications. Be sure to use a genuine SUZUKI oil filter or an equivalent one designed for your ATV. 5-14...
- Page 78 CAUTION Failure to use the correct oil can damage your ATV. Engine damage may occur if you use oil that does not meet Suzuki’s specifications. Be sure to use the oil specified in the FUEL, OIL AND ENGINE COOLANT RECOMMENDATION 11.
-
Page 79: Air Cleaner
AIR CLEANER CAUTION The air cleaner element must be kept clean to provide good engine power Failure to inspect the air cleaner and gas mileage. If you use your vehi- element frequently if the vehicle is cle under normal, low-stress condi- used in dusty, wet, or muddy con- tions, you should service the air ditions can damage your ATV. - Page 80 Removing the Element Washing the Element 1. Remove the seat. Wash the element as follows: 2. Unhook the hooks and take off the 1. Fill a wash pan larger than the ele- air cleaner case cover 1. ment with a non-flammable clean- ing solvent A.
- Page 81 6. Clean any dirt or debris from CAUTION inside the air cleaner case. Be sure no dirt enters the carburetor. Failure to position the air cleaner element properly can damage your ATV. CORRECT INCORRECT Air can bypass the air cleaner ele- ment if the element is not posi- tioned properly.
-
Page 82: Air Cleaner Drain Tube
AIR CLEANER DRAIN TUBE CLUTCH ADJUSTMENT Clutch cable play should be 10 – 15 mm (0.4 – 0.6 in) measured at the clutch lever end. Adjust clutch cable play according to the following proce- dure: Periodically check the drain tube shown by the arrow to see if any gas- oline or oil has accumulated. -
Page 83: Drive Chain
DRIVE CHAIN If you find any of these problems with your sprocket, consult your Suzuki The condition and adjustment of the dealer. drive chain should be checked each day before you ride. Always follow the NOTE: The two sprockets should be... - Page 84 2. After thoroughly washing sprocket. chain and allowing it to dry, oil the links with Suzuki chain lube or an WARNING equivalent chain lubricant. Failure to inspect the drive chain CAUTION slack before each use of the vehi- cle could be hazardous.
- Page 85 • Torque bolts and nuts to the proper specifications. If you are not sure of the proper proce- dure, have your authorized SUZUKI dealer or a qualified mechanic do this. Rear axle housing nuts 1: 28 N·m (2.8 kgf-m, 20.0 lb-ft)
-
Page 86: Engine Coolant
ENGINE COOLANT The engine coolant in the radiator will overflow to the engine coolant reser- voir tank when the engine overheats. Overflowed engine coolant goes back to the radiator when the engine cools. If engine coolant remains in the engine coolant reservoir tank, replen- ish the radiator with specified engine coolant. -
Page 87: Tires
TIRES Tire Tread Condition This vehicle is equipped with low pressure tubeless tires of the size and type listed below. Front Rear 4.0 mm Size AT20 × 7R10 AT18 × 10R8 DUNLOP DUNLOP Type KT381 KT385 WARNING ... - Page 88 Have this work done by ments can result. your Suzuki dealer or a qualified tire repair station. TIRE PRESSURE LOAD When breaking the tire bead loose...
-
Page 89: Brakes
BRAKES WARNING Failure to properly inspect and maintain your ATV’s brake sys- tems can be hazardous. Improper maintenance of the brakes increases your chances of Make sure that the “SIDE FACING having an accident. OUTWARDS” B on the rear tire side wall faces outwards. - Page 90 If there is frequent loss voirs. Inspect for brake pad wear and of fluid, take your vehicle to a leaks. SUZUKI dealer for inspection. WARNING CAUTION Brake fluid can be hazardous to Spilled brake fluid can damage humans and pets.
- Page 91 Riding with unevenly worn brake pads will increase your chances of having an accident. If you need to replace brake pads, have your Suzuki dealer do this Front work. Inspect and maintain the brake pads as recommended. WARNING...
- Page 92 Rear Brake Pedal Adjustment Rear Brake Light Switch The rear brake pedal position must be properly adjusted at all times or the disk brake pads will rub against the disk causing damage to the pads and to the disk surface. Adjust the brake pedal position in the following man- ner: To adjust the brake light switch, hold...
-
Page 93: Parking Brake Adjustment
PARKING BRAKE ADJUSTMENT WARNING Failure to properly adjust the park- ing brake can be hazardous. If the brake grabs or fails to lock the wheels when engaged, you may have an accident. After adjusting the parking brake, lift the rear wheels off the ground and make sure they spin freely with the brake released. -
Page 94: Front And Rear Wheel Removal
If you do not have a torque wrench or do not know how to use one, ask your authorized Suzuki dealer to 1. Park the vehicle on level ground check the nuts. and set the parking brake. -
Page 95: Rear Axle Nut And Lock Nut
Rear axle nut tightening torque: 240 N·m (24 kgf-m, 173.5 lb-ft) NOTE: Ask your Suzuki dealer or a qualified mechanic to retighten the axle nut because this job requires special tool. 1. Disconnect the coupler. - Page 96 2. Remove the nuts 1 and taillight. 5. Remove the 2 bolts. 3. Remove the screws 2 and fitting bracket. 6. Pull out the spark arrester 3. 7. Use a brush to remove carbon 4. Remove the 3 bolts. deposits from the spark arrester screen.
-
Page 97: Light Bulb Replacement
LIGHT BULB REPLACEMENT The wattage rating of each bulb is shown in the following chart. When replacing a burned-out bulb, always use the same wattage rating. Headlight 12V 40/40W CAUTION Failure to use a light bulb with the 2. Remove the socket cover. correct wattage rating can dam- age your ATV. -
Page 98: Fuse
Always replace a blown fuse with a fuse of the same type and rating. If the new fuse blows in a short time, consult your Suzuki dealer immediately. The cooling fan fuse is located on the right side of the cooling fan. One 10A spare fuse is located in the fuse box. -
Page 99: General Lubrication
Shorten intervals when you use your ATV in severe conditions. Your authorized Suzuki dealer should do general lubri- cation as shown in the MAINTE- NANCE CHART. He/she will lubricate things such as wheel bearings, rear... -
Page 100: Troubleshooting
TROUBLESHOOTING FUEL SUPPLY CHECK ..................6-2 IGNITION SYSTEM CHECK ................6-3... - Page 101 This troubleshooting guide is provided system, take your machine to an to help you find the cause of some authorized Suzuki dealer. Refer to the common complaints. “INDICATOR LIGHT” section for an explanation or the FI indicator. If the...
- Page 102 If there is no spark, take your machine to your authorized Suzuki dealer. WARNING Performing the spark test improp- erly can be hazardous. You could get a high voltage elec- trical shock if you are not familiar with this procedure.
-
Page 104: Preparation For Winter Riding
PREPARATION FOR WINTER RIDING ENGINE OIL CHANGE ..................7-2... - Page 105 PREPARATION FOR WINTER RIDING Use of some engine oils in cold weather may make the engine hard to start. It may also cause clutch drag stiff transmission operation. Select the right oil for cold weather according to the chart in the FUEL, ENGINE OIL AND COOLANT REC- OMMENDATIONS section.
-
Page 106: Transporting
TRANSPORTING TRANSPORTING ....................8-2... - Page 107 TRANSPORTING CAUTION TRANSPORTING Failure to properly secure the ATV It is best to transport the ATV in the when transporting it can be haz- normal position. It may also be trans- ardous. ported on its back wheels, but this is not as stable as the normal position.
-
Page 108: Cleaning Procedure
CLEANING PROCEDURE PREPARATION FOR CLEANING ............... 9-2 WASHING YOUR ATV ..................9-3 INSPECTION AFTER CLEANING ............... 9-3 STORAGE PROCEDURE ..................9-4 MAINTENANCE DURING STORAGE ..............9-4 PROCEDURE FOR RETURNING TO SERVICE ..........9-5... -
Page 109: Preparation For Cleaning
PREPARATION FOR CLEANING CLEANING PROCEDURE Wash the ATV before any mud dries on the ATV. A thorough cleaning of your ATV is a necessary part of maintenance and Block or seal the end or the exhaust will help keep your ATV looking and pipe (muffler) using a piece of plastic performing its best. -
Page 110: Washing Your Atv
WASHING YOUR ATV INSPECTION AFTER CLEANING With some care, your ATV can be Remove the rags or wrapping from washed in a similar manner to wash- the exhaust pipe. Check the drain ing an automobile. tubes on the bottom of the air filter box and drain any water that has col- NOTE: Avoid spraying or allowing lected in them. -
Page 111: Storage Procedure
For this reason, spread the oil in the cylinder. Suzuki recommends that you trust this maintenance work to your dealer. BATTERY If you wish to service the machine for •... -
Page 112: Procedure For Returning To Service
PROCEDURE FOR RETURNING TO SERVICE • Clean the entire vehicle. • Drain all the engine oil. Install a new oil filter and fill the engine with fresh oil as outlined in this manual. • Remove the spark plug. Turn the engine a few times by pulling the recoil starter. -
Page 114: Consumer Information
CONSUMER INFORMATION SERIAL NUMBER LOCATION ................10-2 LOCATION OF LABELS ................... 10-3 10-1... - Page 115 Write down the serial numbers here CONSUMER for your future reference. INFORMATION Frame No.: SERIAL NUMBER LOCATION Engine No.: You need to know the frame and engine serial numbers to get title doc- uments for your ATV. You also need these numbers to help your dealer when you order parts.
- Page 116 ATV. Make sure you understand all of the labels. Keep the labels on the ATV. Do not remove them for any reason. If a label comes off or becomes difficult to read, you can get a replacement by contacting your Suzuki dealer. 10-3...
- Page 117 WARNING NEVER ride as a passenger Passengers can cause a loss of control. resulting in SEVERE INJURY or DEATH WARNING Improper tire pressure or overloading can cause loss of control. Loss of control can result in severe injury or death. ALWAYS maintain proper tire pressure as shown below.
-
Page 119: Specifications
SPECIFICATIONS DIMENSIONS AND DRY MASS Overall length ..........1845 mm (72.6 in) Overall width............1245 mm (49.0 in) Overall height ..........1085 mm (42.7 in) Wheelbase ............1285 mm (50.6 in) Front track ............1045 mm (41.1 in) Rear track ............985 mm (38.8 in) Ground clearance.......... - Page 120 ELECTRICAL Ignition type .............Electronic ignition (CDI) Spark plug ............NGK CR8EB Battery.............12V 21.6 kC (6 Ah)/10 HR Generator ............Three-phase A.C. generator Main fuse............20A Cooling fan fuse ..........10/10A Headlight ............12V 40/40W Brake light/Taillight...........LED Neutral indicator light........12V 3.4W Fuel level indicator light ........12V 3.4W FI/Coolant temperature warning light ....12V 3.4W CAPACITIES Fuel tank, including reserve ......
- Page 121 INDEX ACCESSORY USE AND VEHICLE GEARSHIFT LEVER ..... 2-10 LOADING......... 4-2 GENERAL LUBRICATION .... 5-36 AIR CLEANER....... 5-16 AIR CLEANER DRAIN TUBE ..5-19 IDLE SPEED ADJUSTMENT ..5-9 IGNITION SWITCH......2-6 BATTERY ........5-5 IGNITION SYSTEM CHECK ... 6-3 BRAKES ........
- Page 122 REAR AXLE NUT AND LOCK NUT........5-32 REAR BRAKE PEDAL....2-13 REAR SUSPENSION ....2-18 RIDING IN COLD WEATHER..3-22 RIDING OVER OBSTACLES ..3-20 RIDING THROUGH WATER ..3-21 RIGHT HANDLEBAR..... 2-12 SEAT LOCK........2-15 SERIAL NUMBER LOCATION ..10-2 SKIDDING OR SLIDING....
Need help?
Do you have a question about the LT-R450 2006 and is the answer not in the manual?
Questions and answers