
Related Manuals for OPTOKON OERN-13

Summary of Contents for OPTOKON OERN-13
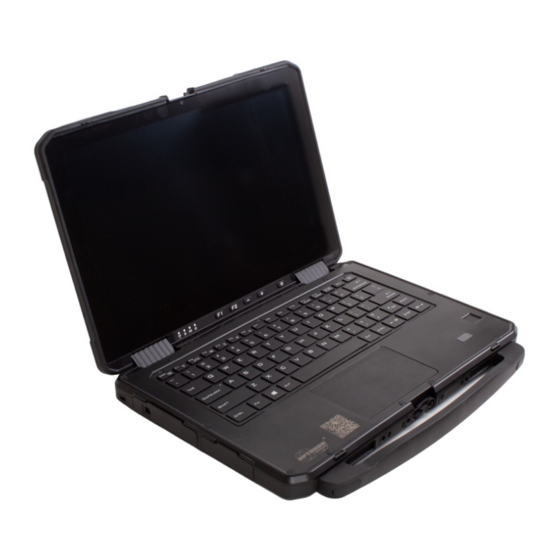
- Page 1 Rugged Notebook OERN-13 / OERN-14 User Manual Please read these instructions carefully before using this product, and save this manual for future use.
-
Page 2: Table Of Contents
Contents Preface ............................. 5 Chapter 1: Getting Started ......................9 1.1 Overview ..............................9 1.2 Package Content ............................9 1.3 Product Overview ........................... 10 1.4 Mechanical Dimension ........................... 15 1.5 Hardware Installation ..........................15 1.5.1 Replacing the Keyboard ........................ 15 1.5.2 Side Expansion Area ........................ - Page 3 2.2.3 Changing the Cursor Speed of Touchpad ..................37 2.2.4 Handling the Touchpad ......................... 37 2.3 Using the Touchscreen .......................... 38 2.3.1 Changing Touchscreen Modes ...................... 38 2.3.2 Touch Gestures ..........................39 2.4 Using Physical Button ..........................40 2.5 Turn On/Off LED Indicator ........................40 2.6 Using Smart Card Reader ........................
- Page 4 3.8.3 Customizing the Power Setting ..................... 60 Chapter 4: Network and Wireless Connections ................. 62 4.1 Connecting LAN ............................. 62 4.2 Disabling/Enabling Wireless Communication ..................62 4.2.1 Using Airplane Mode ........................63 4.2.2 Turning Wireless Communication On/Off Quickly ................. 63 4.2.3 Turning On/Off the Airplane Mode ....................
- Page 5 6.4.3 Other Security Measure ......................... 84 Chapter 7: Basic Troubleshooting ....................86 Appendix ............................88 Appendix A: Using Recovery Wizard to Restore Computer ................88 Appendix B: Declaration of Conformity (DoC) ....................90 Appendix C: RoHS Statement ........................92 Appendix D: Upgrade and Warranty ......................92...
-
Page 6: Preface
Preface Advisory Conventions Four types of advisories are used throughout the user manual to provide helpful information or to alert you to the potential for hardware damage or personal injury. These are Notes, Important, Cautions, and Warnings. The following is an example of each type of advisory. Note: A note is used to emphasize helpful information Important:... - Page 9 Brand and product names are trademarks or registered trademarks of their respective owners. Disclaimer OPTOKON Elektronik Ltd. reserve the right to make changes, without notice, to any product, including circuits and/or software described or contained in this manual in order to improve design and/or performance.
-
Page 10: Chapter 1: Getting Started
Chapter 1: Getting Started 1.1 Overview Congratulations on purchasing OERN Series Rugged Notebook OPTOKON Elektronik Rugged Notebook features with • Fanless cooling system. • Flip design for quick switching between Notebook and tablet modes. • Easy-replaceable design for keyboard. • Removeable hard handle for easy carrying •... -
Page 11: Product Overview
1.3 Product Overview This section contains mechanical drawing of the OERN Series Rugged Notebook. Notice that this is a simplified drawing and some components are not marked in detail. Front Components Item Description Top cover latch Locks the top cover. Detachable carrying handle Provides a convenient way to carry the computer. - Page 12 Right-side Components Item Description Audio Jack Connects a set of headphones or headset. (Mic is only supported with 3.5mm 4-pin headset). HDMI Connects a HDMI monitor or TV set. USB Type-C High speed USB port connects to USB devices, such as USB flash drive, mouse, keyboard, printer, etc.
- Page 13 feature. Or for solid-state drive, which is the mass storage device of the computer. Or USB 3.0 x 1 or PCI-E x 4 or Power 5V/1A. RS232 Interface that enables the connection of a serial device to a computer. USB Type-A USB 3.0 port connects to USB devices, such as USB flash drive, mouse, keyboard, printer, etc.
- Page 14 Qwerty Keyboard with Serves as the data input device. backlight Touch Pad Serves as the pointing device of the computer. Docking Connector (Optional) Port to docking solutions such as vehicle docking. Antenna Passthrough To enhance wireless connections GPS, WLAN, WWAN (Optional) via powerful high-gain antennas.
- Page 15 Item Description Battery Latch To eject the battery, for replacing battery. Battery Lock To securely enable the battery. Service Window To allow user to swap the module easily. Choices are: WWAN/ WLAN/ RAM. Battery 1 Supplies power to computer when external power is not connected Battery 2 Supplies power to computer when external power...
-
Page 16: Mechanical Dimension
1.4 Mechanical Dimension 1.5 Hardware Installation 1.5.1 Replacing the Keyboard For keyboard replacement, please contact the OPTOKON Elektronik Sales Team for more information. Important: • Be sure to turn off the computer before attaching or detaching the keyboard. • The removed keyboard is cannot be reused. - Page 18 4. Pull it to the screen side. Notice the mylar on back side of the keyboard. Remove the mylar. 5. Lift the cable connector. Pull out the cable and replace the keyboard plate. 6. Connect the cable and pull down the connector. 7.
-
Page 19: Side Expansion Area
1.5.2 Side Expansion Area You can add the following option: Smart Card Reader + Removable 2nd SSD Inserting an option to the expansion area: Important: We recommend user to turn off the computer completely by following: 1. Click Start à Settings à Update & Security à Recovery. 2. -
Page 20: Swapping Service Window
3. Pull out the option from the expansion area. 4. Close the expansion slot door and lock the latch. 1.5.3 Swapping Service Window <Only for model with WWAN Module> 1. Turn off the computer and disconnect the AC adaptor. 2. Turn the computer over. Make sure no foreign objects are under the computer. 3. - Page 21 4. Insert module card to its slot and connect two cables (black and red cable for main antenna, gray and green cable for AUX).
-
Page 22: Installing A Micro Sd Card
5. Put back the thermal pads and cover. Beware not to put the cover upside-down. 6. Tighten the screws firmly. Recommended tightening torque 0.45 N·m ± 0.05 N·m (4.5 kgf·cm ± 0.5 kgf·cm). 1.5.4 Installing a Micro SD Card Your Notebook supports up to 2TB additional storage with an optional microSD card slot. - Page 23 • Note that OPTOKON Elektronik assumes absolutely no liability for any loss of data recorded by the user, or any other damages, direct or indirect.
-
Page 24: Battery
1.6 Battery 1.6.1 Installing and Removing the Batteries Important: • The battery pack is not charged when you first purchase it. Be sure to charge it before using for the first time. Charging starts automatically when the AC adaptor is connected to the computer. •... -
Page 25: Battery Indicator
Important: • When hot-swapping the battery, replace it quickly according to the level of batteries in use. • Make sure the latches are securely locked, otherwise the battery pack may fall when you carry the computer. • Do not remove the battery pack forcibly when the latches are locked. Doing so may damage the battery pack. -
Page 26: Connecting To Ac Power
<5% Critical Computer enters Connect the AC adaptor or replace the battery to Battery Level hibernation start-up the computer: • Connect the AC adaptor and charge the battery. • If you have a fully charged spare battery, hot-swap one battery and turn the computer on again. When the computer enter hibernation with the battery down and you resume the operation without charging the battery, the Windows Resume Loader starts up. - Page 27 1.6.5 Important Battery Tips 1.6.5.1 How to Use Battery with Minimal Deterioration The battery performance is normally deteriorated over time. But the deterioration can be accelerated due to the battery is used, charged, or stored in a place with high temperature or repeatedly charged. To reduce the deterioration and ensure longer battery life, you must reduce the number of charges and ensure that the temperature inside the battery does not become too high.
-
Page 28: Turning On The Computer
• When the network communication is not working, turn off the wireless LAN. 1.6.5.3 When the Computer Is Inactive for a Long Period of Time To maintain the battery performance, when not used for a long period (several months or more), remove the battery with a remaining charge of 30% to 40% from the computer and store in a cool and dark place, within the range of 10 °C to 30 °C (50 °F to 86 °F). -
Page 29: Sleep/Hibernation Functions
2. Press the power button in the keyboard or physical buttons. The Windows operating system should start. 1.7.2 Sleep/Hibernation Functions The sleep or hibernation functions can be used to shut off the computer without closing programs and documents and quickly using them. 1.7.2.1 Setting Sleep/Hibernation Sleep 1. - Page 30 Important: • Connect the AC adaptor if the computer will be in sleep for a long period of time. Or use hibernation instead. • Using sleep or hibernation repeatedly may cause malfunction of the computer. To stabilize computer operation, restart Windows regularly (about once a week), •...
- Page 31 Important: • While computer is entering sleep, do not: o Touch the keyboard, touchpad, touchscreen, or power switch. o Use an external mouse or other peripheral devices. o Connect or disconnect the AC adaptor. o Close or open the display o Insert and remove the MicroSD Card or SIM Card.
-
Page 32: Turning Off The Rugged Notebook
1.7.3 Turning Off the Rugged Notebook Important: • Do not perform the following operations o Touch the keyboard, touchpad, touchscreen, or external mouse. o Pressing power switch. o Connect or disconnect the AC adaptor. o Close the display You can shut down your notebook by Click Start à... -
Page 33: Chapter 2: Operating Your Rugged Notebook
Chapter 2: Operating Your Rugged Notebook 2.1 Using the Keyboard Your keyboard has all the standard functions of a full-sized computer keyboard plus a Fn button added for specific functions. The standard functions of the keyboard can be further divided into four major categories: •... -
Page 34: Cursor-Control Keys
2.1.2 Cursor-Control Keys Cursor-control keys are generally used for moving and editing purposes. 2.1.3 Numeric Keypad Numeric keys facilitate entering of numbers and calculations. 2.1.4 Function Keys Function keys are multi-purpose keys that perform functions defined by individual programs. Located on the top row of the keys are the function keys: F1 to F12. 2.1.5 Fn Key The Fn key, at the lower left corner of the keyboard, is used with another key to perform the alternative function of a key. -
Page 35: Windows Keys
Description Turn on/off BT function. Change keyboard backlight brightness (off, low, medium, maximum) Increases the LCD brightness. Decreases the LCD brightness. Decreases the sound volume. Increases the sound volume. 2.1.7 Windows Keys The keyboard has a Windows Logo key to perform Windows-specific functions. Windows Logo key opens the Start menu and performs software- specific functions when used in combination with other keys. -
Page 36: Keyboard Backlight Settings
2.1.8 Keyboard Backlight Settings Hottab Utility Keyboard LED Settings can be used to choose color of the keyboard backlight. 1. Click Hottab Utility à Setting à Keyboard LED. 2. Select the color of the backlit keyboard and brightness level. Note: •... -
Page 37: Using The Touchpad
2.2 Using the Touchpad The touchpad is a pointing device use to control the location of the pointer on the screen and making selection with the buttons. The touchpad consists of a rectangular pad (work surface) that acts like a miniature duplicate of the display. -
Page 38: Touch Gestures
2.2.1 Touch Gestures The touchpad supports touch gesture such as two-finger scrolling, pinch zoom, rotating, and others. To configure the touchpad to suit the user’s needs, go to Start àSettings à Devices à Touchpad. 2.2.2 Disabling/Enabling the Touchpad You can check the status of the touchpad on the HotTab Utility application. -
Page 39: Using The Touchscreen
leave marks (e.g., pencils and ball point pens). Try to avoid having any harmful substances, such as oil, come in touchpad. The cursor may not work properly in such cases. When the touchpad become dirty: wipe to remove dirt by using a dry soft cloth such as gauze or a thoroughly wrung soft cloth with diluted detergent and water. -
Page 40: Touch Gestures
Important: Do not touch the screen while switching the operation mode. It will cause operation failure. 2.3.2 Touch Gestures Hand gestures on touch screen panel allow you to launch programs and access the settings to operate the Rugged Notebook. Some of the touchscreen gestures: Double tap To select an item. -
Page 41: Using Physical Button
Slide to the right or left To go backward or forward through the web browsing history. 2.4 Using Physical Button Physical Button Description User-programmable function key. Increase brightness level Decrease brightness level User-programmable function key Default setting: none Press once to turn on. Power Quick press to quit the operating system. -
Page 42: Using Smart Card Reader
1. Launch the HotTab Utility application. 2. Tap on the Devices ON/ OFF button. 3. Check the status color of the indicator icon: Item Status Color Description Orange Indicator is enabled. White Indicator is disabled. Indicators 4. If the indicator feature is disabled (white), tap on indicator icon to enable it (orange). 2.6 Using Smart Card Reader The Smart Card Reader is an optional feature of OERN Series Rugged Notebok and is designed to allow ICC (Chip) card transactions from your computer. -
Page 43: Convert The Oern Series
Important: Do not: • Hit, bend, or drop the card. • Touch the contact part with finger or metal object. • Place the card in very hot location for a long time. • Remove the card immediately after inserting it. 2.7 Convert the OERN Series OERN Series Rugged Notebook display panel is adjustable up to 360 degrees. -
Page 44: Chapter 3: Configuring The Rugged Notebook
Chapter 3: Configuring the Rugged Notebook BIOS Utility The BIOS utility is a hardware configuration program built into your computer's BIOS. Your computer is already properly configured and optimized, and you do not normally need to run this utility. However, if you encounter configuration problems, you may need to run it. To activate the BIOS utility, press DEL while the computer logo is being displayed. - Page 45 Follow the steps below to complete the Windows 10 IoT Enterprise setup process. 1. Press the power button to turn on the computer. 2. First, select your country/region, your preferred app language, your preferred keyboard layout, and your time zone, then tap Next. 3.
- Page 46 4. Windows will then try to connect to network. Tap Skip this step to continue without a wireless connection as you can then set up the network later. 5. On the Get going fast screen, click Use Express settings for the fastest setup. If you would like more information, tap Learn more, or if you would like to select your own options, click Customize settings.
- Page 47 7. The initial setup screens are complete, and the desktop is displayed. 8. Read any introductory screens describing features of your computer, and tap Next upon completing each. You are now done with the initial setup process.
-
Page 48: Hottab Introduction
3.3 Hottab Introduction Hottab provides quick access to the Notebook functions and features, such as setting up shortcuts, using camera, powering on/off built-in devices, programming function key, etc. As Windows starts up, Hottab starts and runs in the background. To display the Hottab control utility, launch the Hottab Utility application by clicking the Hottab Utility Icon: The main user interface is located on the right side of the screen. -
Page 49: Hottab Utility Setting
Device ON/OFF features the enables and disables functions of camera, touch, touchpad, indicators, keyboard backlight, fingerprint scanner , HF RFID , WLAN, WWAN, GPS, BT, and external antennas Setting is use to set up function key, touch mode, keyboard LED color, panel brightness, and volume. -
Page 50: Check For Update
3.4.1. Check for Update Click to check for update 3.4.2. Function Keys Hottab Shortcuts Menu provides a user-friendly interface to configure function keys short cuts and allow users to quickly access programs with a press. The Function menu offers 4 empty slots to store user’s desired quick access. -
Page 51: Keyboard Led
3.4.4 Keyboard LED The computer supports seven colors for keyboard LED color: red, green, and blue. Keyboard LED brightness can be set either: auto/ maximum/ medium/ low/ off. The auto setting will synchronize keyboard LED with panel brightness. Pressing Fn + F6 will change the keyboard backlit brightness: off/ low/ medium/ maximum. - Page 52 2. The default camera is the front camera. To change into the optional rear camera, click on the Switch Camera button. No Item Description Switch between front camera or rear camera. Switch Camera Opens Camera settings page. Available Settings: • Picture Save: modify/inspect saved location for pictures. Settings •...
-
Page 53: Using Fingerprint Scanner
Review Review Shutter Camera Camera Shutter Button. Tap to take picture. Video Record Tap to Start, and press again to stop recording. Flash Control Enables/ Disables LED Flash when taking picture. 3.6 Using Fingerprint Scanner <Only for model with fingerprint scanner> 3.6.1 Precaution For security when using fingerprint authentication: •... -
Page 54: Using Fingerprint Scanner With Hottab Utility
o If your fingerprint grooves have become too shallow due to wear. o If you touch the fingerprint reader while sliding your finger. o If you touch the fingerprint reader with a finger at an angle o If the pressing force to touch the fingerprint reader is weak. o If your finger is swollen, such as from bathing. -
Page 55: Fingerprint Authentication Function
3.6.3 Fingerprint Authentication Function Use fingerprint authentication to improve security and convenience by replacing the conventional password entry required to sign in to Windows. To enroll a fingerprint: Click Start à Settings à Accounts à Sign-in options. On the right side under Fingerprint, click Set up. Enter fingerprints by repeatedly touching and releasing your finger on the fingerprint reader. -
Page 56: Rfid Trigger Setting
Tap on the ON button. Check the status color of the ON icon is green, and the status color of the RFID icon on the Hottab menu is orange at the same time. Item Status Color Description Orange HF RFID Reader is enabled. White HF RFID Reader is disabled. - Page 57 Single User can also define the RFID Reader scanning as Single Scan. Under this setting, Scan the RFID Reader will be triggered only when user click on “Send”.
-
Page 58: Settings
3.7.2 Settings Item Description Sound The Sound check box defines whether a beep sound will come with the data scanning. Output to This setting defines the output type of the scanned data. Two options are available: Keyboard Wedge Under this setting, the data scanned is sent like keyboard data. The scanned data can be output directly to the demo area below this window, or user can also open other utility, such as Office Word or Notepad files, for data input. - Page 59 User can also tap on the Settings button for further details settings. Item Description Prefix User can type in this field to define the characters BEFORE the data scanned. Suffix User can type in this field to define the characters AFTER the data scanned.
-
Page 60: Rfid Output Setting
Replace User can define specific characters to be replaced with preferred characters automatically. When the characters defined in Regex Substitution is scanned, the data will be replaced with the one filled in Replace with. Reset to User can remove all the set up and back to default mode. default For users following SDK for software porting, the scanned data can also be output with the format needed. -
Page 61: Power Saving
3.8 Power Saving 3.8.1 Reducing Power Consumption Use methods below to reduce power consumption: • Reduce LCD brightness: Press Fn + ↓ • Change the Power mode: 1. Click on the task tray. 2. Move the Power mode slider to the left to set Best battery life. •... - Page 62 3.8.3.3 Delete the Power Plan 1. Right-click on the task tray and click Power Options. 2. Click Change plan settings of the power plan you wish to delete. 3. Click Delete this plan and click OK on the confirmation screen.
-
Page 63: Chapter 4: Network And Wireless Connections
Chapter 4: Network and Wireless Connections Connecting LAN Important: Do not connect the telephone cable to the LAN port. 1. Turn off the computer. Do not use sleep or hibernation. 2. Open the IO cover. 3. Connect the LAN port and network system (server, HUB, etc.) using a LAN cable. 4. -
Page 64: Using Airplane Mode
4.2.1 Using Airplane Mode 1. Click Start à Settings à Network & Internet à Airplane mode. 2. To disable wireless communications, set Airplane mode to On. 3. To enable wireless communications, set Airplane mode to Off, and then: • Set Cellular to On (for wireless WAN). •... -
Page 65: Connecting Wireless Lan
Connecting Wireless LAN Only for model with wireless LAN (WLAN)/ 2 WLAN. Important: • Do not use WLAN on airplanes, in hospitals, or in other locations where WLAN signals may affect devices. Follow the instructions of airline companies and hospital, or disable the WLAN function in these locations. •... -
Page 66: Using The Wlan By Hottab Utility
Note: • The settings depend on the network environment. For further information, ask the system administrator or the person in charge of the network. • If you use the stealth type WLAN access point which restricts automatic detection of the WLAN, take the following procedure to access: 1. -
Page 67: Wireless Wan (4G/Lte)
Note: In some countries, communication using IEEE802.11a (5GHz wireless LAN) standard is restricted by law. If IEEE802.11a is enabled or disabled while the computer is connected to an IEEE802.11b/g access point, the connection will be temporarily interrupted. Wireless WAN (4G/LTE) <Only for model with Wireless WAN (WWAN) The computer supports data connection with 4G/LTE modules and fits a Nano-SIM card. - Page 68 ❸ Put the SIM card on the tray and insert SIM- ❹ Put the battery back and lock the battery. card all the way in. Chip/contact is facing down. Important: Do not insert the nanoSIM card upside down.
-
Page 69: Connect/Disconnect To A Network
4.4.2 Connect/Disconnect to A Network To connect to the network using wireless WAN: 1. Click à Settings à Network & Internet à Cellular. 2. Click Advance options. 3. Click Add an APN. 4. Input detailed information such as APN, and then click Save. 5. -
Page 70: Bt Module
5. You can check the wireless WAN connection status through the wireless network connection status icon in the Windows notification area. The more bars encompassed, the better the signal is. BT Module <Only for model with BT> Communication is established through the BT antenna on the upper side of the display. Do not block with your body or hand. -
Page 71: Check Bt Communication Status
4.5.3 Check BT Communication Status Click Start à Settings à Devices à Bluotooth & other devices. Or, Click on the task tray, and then click Bluetooth Devices à Show Bluetooth Devices to check the communication status. Communication is established through the GPS antenna on the upper side of the display. Do not block with your body or hand. -
Page 72: Chapter 5: Connectors
Chapter 5: Connectors External Display You can switch the output destination to an external display using the HDMI port or USB port. To switch the display mode: 1. Click Start à Settings à System à Display. 2. Select the item under Multiple Displays. Note: •... -
Page 73: Usb Devices
Important: • Before disconnecting the external display, switch to the internal LCD by pressing key + P. Otherwise the displayed image quality may become different after disconnection. In this case, press pressing key + P to reset the image quality or reset the computer. -
Page 74: Com Port Definition
Note: These steps are not necessary when: • Removing the device after turning off the computer. • The device does not appear after step no.2. • is not displayed. 3. Remove the USB device. COM Port Definition OERN Series Rugged Notebook uses Hottab utility for built-in peripherals control. All the COM port numbers have been defined in the OS image coming with the package. - Page 75 Tap on Port Setting tab and click on Advanced button. Tap on the dropdown list and choose the correct COM Port Number (refer to the COM Port Definition Table), and click OK.
-
Page 76: Chapter 6: Handing And Maintenance
Double check Device Manager to make sure the COM Port number has been re-defined successfully, and then restart the system. Chapter 6: Handing and Maintenance Operation environment • Place the computer on a flat stable surface not subject to shock, vibration and danger of dropping. -
Page 77: Handling The Screen
o Remove all external devices, cables, and other protruding objects. o Do not drop or hit the computer against solid objects. o Do not leave the display open. o Do not grip the display part. • Do not put anything between the display and keyboard. •... -
Page 78: When Battery Indicator Does Not Light On
6.2.3 When Battery Indicator Does Not Light On The battery indicator may not light on even if the AC adaptor and the battery pack are correctly connected to the computer. This may due to the AC adaptor’s protection function. In this case, unplug the AC cord and wait more than 1 minute before reconnect the AC cord. -
Page 79: Internet And Online Security
1. Click Start à Settings à Accounts à Sign-in options. 2. Click Add under Password. Set the key entry to English “ENG” and enter characters. The keyboard layout can be added and changed: 1. Click Start à Settings à Time & Language à Language. 2. - Page 80 DSL (Digital Subscriber Line) is an ‘always-on’ connection that runs over the phone line. As DSL and phone do not use the same frequencies, you can use your telephone at the same time you are connected to the internet (this requires a ‘micro-filter’ on each telephone socket to avoid interference).
- Page 81 Wireless networks A wireless LAN or WLAN is a wireless local area network, which may link two or more computers without using wires. Setting up a wireless network is easy and allows you to share files, peripheral devices and an internet connection. Components of a wireless LAN To set up your Wireless network at home you need to have the following: •...
- Page 82 6.4.2.5 Internet Security Software Staying ahead of cybercriminals Stay ahead of hackers and cybercriminals by understanding the tactics they use to access your private data. Ensure your software is up to date Cybercriminals rely heavily upon software or platform vulnerabilities, as they are the easiest way to sneak malware into a user's device unnoticed, sometimes with little action on the user's part.
- Page 83 A form of malware that will encrypt personal data files on your computer and attached devices. Encryption converts files into another format, that can only be opened with a specific decryption key. Once the ransomware installs itself, it will display a warning message that the computer is now locked.
- Page 84 Public WLAN is available just about everywhere, from the local coffee shop to the hotels and airports you visit while traveling. While public WLAN has made our lives a little easier, it also poses security risks to the personal information available on our Notebook. A virtual private network (VPN) gives you online privacy and anonymity by creating a private network from a public internet connection.
-
Page 85: Other Security Measure
If the Action Center reports an alert, or if your computer behaves erratically, crashes unexpectedly or if some of your programs do not work correctly, your computer may be infected by malicious software. However, do not blame every computer problem on a virus! If you suspect your computer is infected, the first thing to do is update, if you have not already done so, and run your antivirus and anti-spyware software. - Page 86 The computer comes with a computer security slot for a security lock. Wrap a computer security lock cable around an immovable object such as a table or handle of a locked drawer. Insert the lock into the notch and turn the key to secure the lock. Some keyless models are also available. Windows Hello This function is used to sign in to Widows quickly, or perform individual authentication.
-
Page 87: Chapter 7: Basic Troubleshooting
Chapter 7: Basic Troubleshooting Problem Solution • The computer does not start or boot up after Check if power is being supplied to the computer (if your computer has a power indicator, it will be off). pressing the power button •... - Page 88 Problem Solution • Restart the computer • Make sure the IP address or subnet mask setting is correct. The keyboard does not respond. • Try attaching an external keyboard to a USB port on the computer. If it works, contact your dealer or an authorized service center as the internal keyboard cable may be loose.
-
Page 89: Appendix
Appendix Appendix A: Using Recovery Wizard to Restore Computer OERN Series Rugged Notebook has a dedicate recovery partition stored on the hard drive of the Notebook to enable quick one-key recovery process. This partition occupies about 11GB of the storage space, and comes built-in to each OERN Series Rugged Notebook. Warning! Before starting the recovery process, be sure to backup all user data, as all data will be lost after the recovery process. - Page 90 5. Wait till the recovery process to complete. During the recovery process, a command prompt will show up to indicate the percent of recovery process. 6. After recovery is completed, please press any key to continue, and the computer will shut down automatically.
-
Page 91: Appendix B: Declaration Of Conformity (Doc)
Appendix B: Declaration of Conformity (DoC) FCC-B Radio Frequency Interference Statement This equipment has been tested and found to comply with the limits for a Class B digital device, pursuant to part 15 of the FCC rules. These limits are designed to provide reasonable protection against harmful interference in a residential installation. - Page 92 • EN61000-3-2:2014 • EN61000-3-3:2013 Low Voltage Directive (2014/35/EU) • EN 62368-1:2014 Battery Regulations European Union: Batteries, battery packs, and accumulators should not be disposed of as unsorted household waste. Please use the public collection system to return, recycle, or treat them in compliance with the local regulations. California, USA: The button cell battery may contain perchlorate material and requires special handling when recycled or disposed of in California.
-
Page 93: Appendix C: Rohs Statement
Appendix C: RoHS Statement Japan JIS C 0950 Material Declaration A Japanese regulatory requirement, defined by specification JIS C 0950, mandates that manufacturers provide material declarations for certain categories of electronic products offered for sale after July 1, 2006. India RoHS This product complies with the "India E-waste (Management and Handling) Rule 2011"... - Page 94 Notes...
- Page 95 OPTOKON Elektronik Ltd. Peksimet Mah. 5555 Sk. No: 8/1 Bodrum, Muğla / Turkey Copyright © 2022 OPTOKON Elektronik Ltd. All rights reserved.
Need help?
Do you have a question about the OERN-13 and is the answer not in the manual?
Questions and answers