
Related Manuals for Vitrolife EmbryoScope


Summary of Contents for Vitrolife EmbryoScope
- Page 1 EmbryoScope™ time-lapse incubator User manual EmbryoScope time-lapse incubator, ES-D2, software version 7.7 User manual, first issue 2020.04.24, revised 2022.06.01/EU/EGS/English...
-
Page 2: Table Of Contents
Table of contents Introduction .......................... 5 Warnings, restrictions and limited warranty ..............6 Important notes ......................10 Intended use – EmbryoScope time-lapse incubator ..........12 Intended use – EmbryoSlide culture dish ..............12 Intended users ......................12 Clinical benefits ......................12 Overview of the EmbryoScope time-lapse incubator ............ - Page 3 EmbryoScope time-lapse incubator 6.3.2 Creating a new patient on the EmbryoScope time-lapse incubator ..... 38 Playing a time-lapse video ..................39 Refocusing embryos ....................40 Ending an EmbryoSlide culture dish ................. 40 Routine checks of the EmbryoScope time-lapse incubator..........42 Starting validation checks ..................
- Page 4 Connection labels ..................... 80 Disposal of waste....................... 81 Contact information ......................82 CohortView, CulturePro, EmbryoScope, EmbryoSlide, EmbryoViewer, Guided Annotation, iDAScore and KIDScore are trademarks or registered trademarks belonging to the Vitrolife Group. ©2022 Vitrolife A/S. All rights reserved. - 4 -...
-
Page 5: Introduction
The EmbryoScope time-lapse incubator is a medical device that must be operated by trained personnel according to the instructions contained in this user manual. Users must be qualified to operate the device and qualified to perform procedures associated with device use in accordance with local qualification standards. -
Page 6: Warnings, Restrictions And Limited Warranty
EmbryoScope time-lapse incubator. • The EmbryoScope time-lapse incubator may not be used in a wet environment. No fluids other than culture medium and oil and the cleaning agents specified in this user manual may be used in or near the incubator. - Page 7 The EmbryoScope time-lapse incubator includes moving parts with safety stops. Do not try to block safety sensors by inserting a finger or a hand into the EmbryoScope time- lapse incubator while it is turned on. This is dangerous and may cause injury.
- Page 8 INCUBATOR • While the EmbryoScope time-lapse incubator is still in the shipping boxes, it must only be moved by using a lift truck or a pallet lifter. Do NOT open the shipping boxes without the presence of a person certified by Vitrolife.
- Page 9 ELECTROMAGNETIC COMPABILITY • The EmbryoScope time-lapse incubator has been tested and found to comply with the limits for medical devices set out in the IEC 60601-1-2 Edition 4.0 for electromagnetic compatibility. These limits are designed to provide reasonable protection against harmful interference in a typical medical installation.
-
Page 10: Important Notes
Ensure that personnel are properly trained in cyber security awareness o Prevent physical access to the equipment by unauthorised users. • Users must inform Vitrolife A/S without any undue delay upon becoming aware of a cyber security vulnerability incident or any suspected security events. 1.2 Important notes NOTE –... - Page 11 Live mode. The time period until the image acquisition is automatically resumed will be 30 minutes, even if you have set up the EmbryoScope time-lapse incubator to produce images every 10 minutes. You may, however, manually restart the image acquisition without any delay by returning the EmbryoScope time-lapse incubator to the embryo overview screen.
-
Page 12: Intended Use - Embryoscope Time-Lapse Incubator
ALL of the data are stored either on the PC running the EmbryoViewer software or on the ES server from which they will not be deleted. 1.3 Intended use – EmbryoScope time-lapse incubator The intended use of the EmbryoScope incubator is to provide an environment with controlled temperature and gas concentrations (CO and optionally O ) for the culture of gametes and/or embryos and to acquire images of these during incubation. -
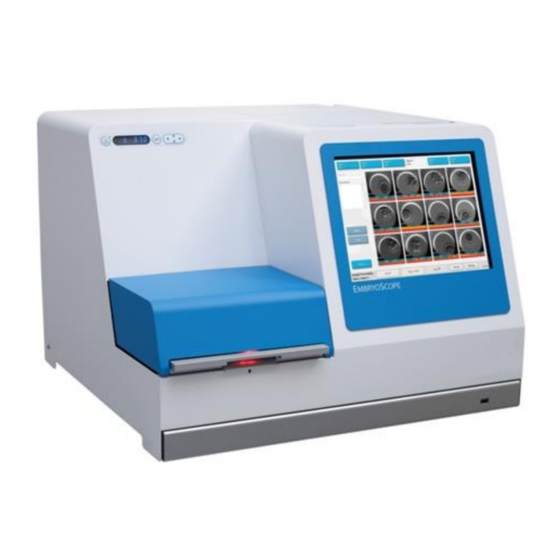
Page 13: Overview Of The Embryoscope Time-Lapse Incubator
EmbryoScope time-lapse incubator 2 Overview of the EmbryoScope time- lapse incubator Backplate. Contains main switch, connectors and Service lid. Access to gas sample sockets pipe and filters. A copy of the emergency procedures is also found under the service lid... -
Page 14: Installation And Required Conditions
• Sturdy table with approximately 1.0 x 0.6 m of bench space. • A minimum distance of 150 mm between the back wall of the EmbryoScope time-lapse incubator and any solid object. • Optional: uninterruptible power supply (UPS), min. 300 W, with proper grounding. -
Page 15: Starting Up The Embryoscope Time-Lapse Incubator
EmbryoScope time-lapse incubator 2.2 Starting up the EmbryoScope time-lapse incubator The EmbryoScope time-lapse incubator should be turned on at least three hours before use to ensure temperature equilibration throughout the time-lapse incubator. Please ensure that the EmbryoScope time-lapse incubator is grounded through the power connector, that the gas connections are not leaking, and that the gas reservoir is full. -
Page 16: Restarting The Integrated Pc
EmbryoScope time-lapse incubator 3 Restarting the integrated PC In some cases, it will be necessary to restart the PC that is integrated in the EmbryoScope time- lapse incubator, e.g. if an error condition occurs. To restart the PC: 1. Pull out the keyboard at the bottom of the EmbryoScope time-lapse incubator. -
Page 17: Connections To Supporting Systems
EmbryoScope time-lapse incubator 4 Connections to supporting systems All connectors and sockets are found at the back of the EmbryoScope time-lapse incubator. Connectors and sockets should only be used by a person certified by Vitrolife during installation. Operators should never use or attach any tubing/wiring to the panel. -
Page 18: The Incubator
EmbryoScope time-lapse incubator 5 The incubator 5.1 The incubator control panel The incubator control panel is located in the upper left corner of the EmbryoScope time-lapse incubator: The control panel is used for: • Pausing audible warning alarms issued by the EmbryoScope time-lapse incubator (using the pause audio button) •... -
Page 19: Locking Or Unlocking The Incubator Control Panel
EmbryoScope time-lapse incubator To navigate from the set point menu to the calibration menu, press the down arrow for about three seconds. To navigate back from the calibration menu to the set point menu, press the up arrow for ... -
Page 20: Temporarily Pausing Audible Warning Alarms
5.4.2 Validating the temperature The EmbryoScope time-lapse incubator must have been turned on for at least three hours before the temperature is validated. The room temperature must be equivalent to normal laboratory temperature. The temperature validation is performed by measuring the temperature in the culture dish holder using a temperature probe connected to a high-precision thermometer. - Page 21 EmbryoScope time-lapse incubator Follow this procedure to validate the temperature: 1. Press Check on the touch screen of the EmbryoScope time-lapse incubator. The culture dish holder will move to a position that enables you to perform an external temperature measurement.
-
Page 22: Calibrating The Temperature
37.50 37.30 5.4.3 Calibrating the temperature he EmbryoScope time-lapse incubator must have been turned on for at least three hours to achieve full equilibrium before the temperature is calibrated. The room temperature must be equivalent to normal laboratory temperature. If the external temperature measured by using the high-precision thermometer deviates from the currently displayed temperature, you can calibrate the temperature from the control panel. - Page 23 7. Wait at least ten minutes until the temperature is stable. Then validate the temperature after calibration. You can track the temperature by pressing the Temperature button on the touch screen of the EmbryoScope time-lapse incubator. - 23 -...
-
Page 24: Incubator Co 2 Concentration
EmbryoScope time-lapse incubator NOTE • Always validate the incubator temperature after calibration. • It is not possible to calibrate the temperature in excess of +/- 3.0°C. If you attempt to calibrate the temperature more than this as compared with your starting point, the control ... -
Page 25: Validating The Co Concentration
Gas sample pipe 4. Open the valve by turning the lever towards you until the lever is in upright position. 5. Press Check on the touch screen of the EmbryoScope time-lapse incubator. 6. Measure the CO concentration two or three times or until the measurement is stable. -
Page 26: Calibrating The Co
Attaching a CO calibration device with a strong internal pump may interfere with the internal gas control system inside the EmbryoScope time-lapse incubator. Therefore, do not use a calibration device that absorbs more than 0.5 l/min. 1. In the set point menu, navigate to the CO menu item by pressing either the right or the left ... -
Page 27: Incubator O 2 Concentration
EmbryoScope time-lapse incubator NOTE • Always validate the CO concentration after calibration by performing several measurements. • It is not possible to calibrate the CO concentration in excess of +/- 2%. If you attempt to calibrate the concentration more than this as compared with your starting point, the control ... -
Page 28: Calibrating The O
Attaching a O calibration device with a strong internal pump may interfere with the internal gas control system inside the EmbryoScope time-lapse incubator. Therefore, do not use a calibration device that absorbs more than 0.5 l/min. 1. In the set point menu, press the right or the left arrow... -
Page 29: Operating The Embryoscope Time-Lapse Incubator
6.1 Start-up procedure 1. Turn on the EmbryoScope time-lapse incubator on the main switch (green switch at the back of the time-lapse incubator, upper left corner). 2. From the incubator control panel, check that the temperature and gas set points etc. are at the desired levels (see sections 5.4.1, 5.5.1 and 5.6.1). - Page 30 During initial start-up and after an incubator shutdown, always validate the gas and temperature levels using calibrated external validation devices as detailed in the EmbryoScope user manual. Do NOT rely solely on values displayed on the incubator control panel. - 30 -...
-
Page 31: Resetting And Calibrating The Camera
EmbryoScope time-lapse incubator 6.2 Resetting and calibrating the camera To ensure that the two motors in the EmbryoScope time-lapse incubator move the culture dish holder correctly and in alignment with the camera, a camera reset and calibration is required in the following cases: •... - Page 32 EmbryoScope time-lapse incubator 8. When the image of well no. 1 is displayed, press the centre of the well on the touch screen. Well no. 1 of the culture dish in position no. 1 NOTE • Camera calibration should always start with an image of well no. 1 in the EmbryoSlide culture dish.
- Page 33 EmbryoScope time-lapse incubator 9. Adjust the well until it is placed in the middle of the picture. Either use the adjustment arrows on the screen or drag the well to the centre from the touch screen. Adjust the focal plane so that the bottom of the well is in focus, and press the In Focus button on the screen.
- Page 34 EmbryoScope time-lapse incubator 10. The image of EmbryoSlide culture dish no. 1, well no. 4 is displayed. Adjust the well until it is placed in the middle of the picture. Use either the adjustment arrows on the screen or the touch screen to drag the well to the centre.
- Page 35 13. Follow the instructions given on the screen, and finish the reset procedure. Press Yes to save the new parameters. The EmbryoScope time-lapse incubator has now been recalibrated and is ready to start. Proceed to section 6.3 to start an EmbryoSlide culture dish.
-
Page 36: Starting An Embryoslide Culture Dish
NOTE • EmbryoScope time-lapse incubators with a serial number lower than 100 do not have a lock indicator light in the load door cover. 2. Open the load door and place the EmbryoSlide culture dish in the accessible position of the holder. -
Page 37: Associating An Existing Patient With A New Embryoslide Culture Dish
EmbryoScope time-lapse incubator 6.3.1 Associating an existing patient with a new EmbryoSlide culture dish Enter the relevant patient ID, and press the Find button. Please be careful to select the correct patient ID. The patient name is retrieved from the database, and a list of available treatments... -
Page 38: Creating A New Patient On The Embryoscope Time-Lapse Incubator
EmbryoScope time-lapse incubator 6.3.2 Creating a new patient on the EmbryoScope time-lapse incubator Enter a patient ID in the Patient ID field and press Find. If the patient ID you have entered could not be retrieved from the database, this dialogue box is displayed: 2. -
Page 39: Playing A Time-Lapse Video
EmbryoScope time-lapse incubator 6.4 Playing a time-lapse video From the home screen -> Slide tab -> Video tab, you can play an embryo time-lapse video by pressing the right arrow button in the video playback controls area (see the illustration below). -
Page 40: Refocusing Embryos
6. Press Yes to return to the embryo overview screen and restart the image acquisition. 6.6 Ending an EmbryoSlide culture dish Follow this procedure to permanently remove an EmbryoSlide culture dish from the EmbryoScope time-lapse incubator: 1. On the home screen, press the EmbryoSlide culture dish you want to remove. The embryo overview screen opens. - Page 41 EmbryoScope time-lapse incubator 4. Press OK. NOTE • A specific EmbryoSlide culture dish can also be permanently removed from the Program Paused screen (go to the screen for the relevant culture dish and press Pause). - 41 -...
-
Page 42: Routine Checks Of The Embryoscope Time-Lapse Incubator
EmbryoScope time-lapse incubator 7 Routine checks of the EmbryoScope time-lapse incubator It is recommended to perform scheduled validation checks at least every two weeks to validate the temperature, gas concentrations and cleanliness of the culture dish holder. 7.1 Starting validation checks Press Check…... - Page 43 EmbryoScope time-lapse incubator Press Next when the validation of the gas concentration is complete. - 43 -...
-
Page 44: Temperature Check
EmbryoScope time-lapse incubator 7.3 Temperature check To perform a temperature validation check, start by opening the load door of the EmbryoScope time-lapse incubator. The temperature is validated by inserting a calibrated temperature sensor into the culture dish holder. Any certified temperature sensor with proper sensor dimensions may be used in accordance with the manufacturer’s guidelines. -
Page 45: Cleaning Check
EmbryoScope time-lapse incubator 7.4 Cleaning check To perform a cleaning check, start by opening the load door of EmbryoScope time-lapse incubator. The culture dish holder and embryo chamber must be visually inspected to ensure that no particles or liquid residuals are visible. If the culture dish holder or the embryo chamber need to be cleaned, follow the instructions provided in section 8. -
Page 46: Cleaning The Embryoscope Time-Lapse Incubator
Wearing gloves and using good handling techniques are important to successful cleaning. Follow this procedure to clean the EmbryoScope time-lapse incubator: 1. Moisten a sterile wipe and clean all internal and external surfaces of the EmbryoScope time-lapse incubator. It is recommended that the unit is cleaned with aqueous 70% isopropyl alcohol. -
Page 47: Disinfection Of The Embryoscope Time-Lapse Incubator
2. Check on the home screen that all culture dishes have been ended. 3. Close the PC by pressing Shutdown on the home screen. 4. Turn off the EmbryoScope time-lapse incubator by pressing the green main switch found at the rear panel. - Page 48 10. Clean all internal surfaces plus the cover plate and culture dish holder (which has been unmounted from the EmbryoScope time-lapse incubator). Apply EcaFlo Anolyte to sterile wipes and wipe all internal surfaces and the culture dish holder using at least three wipes.
- Page 49 17. Gently replace the cover plate that normally covers the inaccessible positions of the culture dish holder and close the load door. 18. Turn on the EmbryoScope time-lapse incubator by pressing the main switch found at the rear panel. 19. Allow the EmbryoScope time-lapse incubator three hours to equilibrate gas and temperature levels.
-
Page 50: Alarm And Information Signal System
(such as closing the load door). o Malfunction information signals: Most malfunction information signals indicate that there is a technical problem with the software or hardware of the EmbryoScope time-lapse incubator. Malfunction information signals indicate technical errors that are less important than a malfunction alarm or a technical alarm. -
Page 51: Warning Alarms
EmbryoScope time-lapse incubator 9.1 Warning alarms Warning alarms are activated when the temperature or the gas concentration in the incubator deviate from their set points or when the internal gas pressure is too low. All warning alarms will be recorded and logged in the data files of all EmbryoSlide culture dishes. - Page 52 Running area will return to its normal grey colour. When you press View Running, you will see which EmbryoScope time-lapse incubator is in error (in case more incubators are connected). External alarm Activated warning alarms will be No response.
-
Page 53: Overview Of Warning Alarms
EmbryoScope time-lapse incubator 9.1.2 Overview of warning alarms The following warning alarms may occur: Temperature is either too high or too low: Temperature reading is missing: concentration is too high: concentration is too low: inlet pressure is too low: inlet pressure is too low:... -
Page 54: Multiple Warning Alarms
As the individual problems are solved, they will no longer be shown in the display. 9.2 Incubator malfunction alarms An incubator malfunction alarm will be activated if there is a malfunction or power failure of the unit that controls the running conditions of the EmbryoScope time-lapse incubator. - 54 -... -
Page 55: Control Unit Responses To An Incubator Malfunction Alarm
External alarm The event will be No response. communicated to the external alarm system after two minutes if the EmbryoScope time-lapse incubator cannot be returned to normal operating conditions within this time delay (see section 9.5.1) Connected EmbryoViewer 10 minutes after the external No response. -
Page 56: Operator Response To An Incubator Malfunction Alarm
10. 9.3 Technical alarms A technical alarm will be activated if the power supply to the EmbryoScope time-lapse incubator is completely cut off. 9.3.1 Control unit responses to technical alarms... -
Page 57: Information Signals
EmbryoScope time-lapse incubator 9.4 Information signals In a number of pre-defined cases, the EmbryoScope time-lapse incubator will display an information signal (a blue LED lamp on the control panel, see also section 5.1). Two types of information signals may be issued: warning information signals and malfunction information signals (see sections 9.4.1 and 9.4.2 for an in-depth description of each type of information signal). -
Page 58: Control Unit Responses To Malfunction Information Signals
EmbryoScope time-lapse incubator 9.4.1.1 Control unit responses to malfunction information signals When a warning information signal is activated, the control units will respond as follows: Control unit Response when a Response when the problem malfunction information is solved signal is activated... -
Page 59: Warning Information Signals
• The EmbryoScope time-lapse incubator has been paused for more than one hour without reinsertion of an EmbryoSlide culture dish. • The EmbryoScope time-lapse incubator has been left in Check mode for more than half an hour. - 59 -... -
Page 60: Control Unit Responses To Warning Information Signals
In case the connection between EmbryoScope time- signal will be saved in the database the incubator and the integrated lapse incubator of the EmbryoScope time-lapse PC has been interrupted, the incubator. touch keys that display the current temperature, CO In case the connection between the... -
Page 61: External Alarm System
There is an incubator malfunction or power failure of the unit that controls the running conditions of the EmbryoScope time-lapse incubator. Technical alarm: • The power to the entire EmbryoScope time-lapse incubator is completely cut off. Malfunction information signals: • Motor errors, e.g. if the motors are incorrectly positioned •... -
Page 62: Delay Of External Alarms And Malfunction Information Signals
9.5.1 Delay of external alarms and malfunction information signals Prior to being sent out externally, the alarms will appear on the control panel of the EmbryoScope time-lapse incubator itself. This will take place two minutes before the external alarm is also activated. -
Page 63: Connecting The External Alarm
The information contained in this section is primarily intended for technical staff members who are tasked with setting up the EmbryoScope time-lapse incubator with an external alarm. The four-pin alarm plug is labelled Alarm and is placed on the rear panel of the EmbryoScope time- lapse incubator: 1 –... -
Page 64: Normally Open And Normally Closed Circuits
Normally open circuits are completed when they are not in their “normal” state, i.e. when an error condition has occurred in the EmbryoScope time-lapse incubator. This means that the alarm will be activated when an error condition occurs and the circuit is closed. -
Page 65: Emergency Procedure
10.1 Removing EmbryoSlide culture dishes after a power failure 1. Turn on the EmbryoScope time-lapse incubator using the main switch (the green switch at the back, upper left corner). 2. When everything has been initialised and the welcome screen appears, press Remove Slides. - Page 66 EmbryoSlide culture dishes can be removed. 7. To resume using the EmbryoScope time-lapse incubator, reinsert the cover plate, close the load door, turn on the time-lapse incubator and follow the instructions for recalibration and adding EmbryoSlide culture dishes found in sections 5 and 6.3.
-
Page 67: Technical Specifications
EmbryoScope time-lapse incubator 11 Technical specifications Additional information on the specifications is found under the respective sections in this manual. Incubator: • Capacity: 6 EmbryoSlide culture dishes containing 12 embryos each, i.e. 72 embryos in total. • Temperature range: 7°C above ambient temperature (although never lower than 30°C), maximum 45°C. - Page 68 The load door to the embryo chamber has been left open for more than 30 seconds. o The EmbryoScope time-lapse incubator has been paused for more than one hour without reinsertion of an EmbryoSlide culture dish. o The EmbryoScope time-lapse incubator has been left in Check mode for more than half an hour. Air flow: •...
- Page 69 Isolation of poles: • Isolation on all poles simultaneously is achieved by either turning off the EmbryoScope time-lapse incubator using the mains switch at the back of the time-lapse incubator or by unplugging the power supply cord from the power supply socket.
- Page 70 In case the boxes are damaged, please contact Vitrolife immediately for further instructions. Do NOT open the boxes. Leave the EmbryoScope time-lapse incubator in the shipping boxes in a dry and safe place until it can be handled by a person certified by Vitrolife.
-
Page 71: Emc And Hf Technical Review
• The EmbryoScope time-lapse incubator should not be used adjacent to or stacked with other equipment. If adjacent or stacked use is necessary, the incubator should be observed to verify normal operation in the configuration in which it will be used. -
Page 72: Electromagnetic Immunity
12.2 Electromagnetic immunity Guidance and manufacturer’s declaration – electromagnetic immunity The EmbryoScope time-lapse incubator is intended for use in the home healthcare environment specified below. The customer or the user of the EmbryoScope time-lapse incubator should assure that it is used in such an environment. - Page 73 Guidance and manufacturer’s declaration – electromagnetic immunity The EmbryoScope time-lapse incubator is intended for use in the home healthcare environment specified below. The customer or the user of the EmbryoScope time-lapse incubator should assure that it is used in such an environment.
- Page 74 To assess the electromagnetic environment due to fixed transmitters, an electromagnetic site survey should be considered. If the measured field strength in the location in which the EmbryoScope time-lapse incubator is used exceeds the applicable RF compliance level above, the EmbryoScope time-lapse incubator should be observed to verify normal operation.
- Page 75 Recommended separation distances between portable and mobile RF communications equipment and the EmbryoScope time-lapse incubator The EmbryoScope time-lapse incubator is intended for use in a home healthcare environment in which radiated RF disturbances are controlled. The customer or the user of the EmbryoScope...
-
Page 76: Accessories And Materials
EmbryoScope time-lapse incubator 13 Accessories and materials The following equipment and materials are needed to run the EmbryoScope time-lapse incubator: • EmbryoSlide culture dishes (refer to the user manual for the EmbryoSlide culture dishes) • EmbryoViewer software • Motor lock (see section 8.2) •... -
Page 77: Planned Service And Maintenance
EmbryoScope time-lapse incubator 14 Planned service and maintenance A person certified by Vitrolife will inspect and replace all of the following items in accordance with the intervals specified in the below table. Replaceable item Description Service interval Replaced by (years) -
Page 78: Symbols And Labels
EmbryoScope time-lapse incubator 15 Symbols and labels 15.1 Product information labels Label Description Note Manufacturer Placed at the Vitrolife A/S information upper end of the panel. Jens Juuls Vej 20, 8260 Viby J See section 17. Denmark +45 7221 7900... -
Page 79: Warning Labels
EmbryoScope time-lapse incubator Label Description Note Manufacturer name and See section 17. logo Year and month of YYYY-MM production Country of origin Serial number Model-version- production number Caution when See section 16. discarded Humidity limitation Atmospheric pressure limitation 15.2 Warning labels... -
Page 80: Connection Labels
EmbryoScope time-lapse incubator 15.3 Connection labels Label Description Note Direction of flow through Found under the service lid the HEPA filter at the top of the EmbryoScope time-lapse incubator. See section 2. External alarm output See section 4. Alarm socket label... -
Page 81: Disposal Of Waste
EmbryoScope time-lapse incubator 16 Disposal of waste In order to minimise the waste of electrical and electronic equipment, waste must be disposed in accordance with the Directive 2012/19/EU on waste electrical and electronic equipment (WEEE) as amended by Directive (EU) 2018/849. This includes: PCBs (lead-free HASL), switches, PC batteries, printed circuit boards and external electrical cables. -
Page 82: Contact Information
EmbryoScope time-lapse incubator 17 Contact information Urgently need help? Call our service hotline for support: +45 7023 0500 (available 24 hours a day, 7 days a week) E-mail support: support.embryoscope@vitrolife.com (response within two working days) Vitrolife A/S Jens Juuls Vej 20...
Need help?
Do you have a question about the EmbryoScope and is the answer not in the manual?
Questions and answers